


 本文介绍如何将Arduino IDE外观和字体修改为类似Sublime Text的风格,包括修改preference.txt设置行号、编辑theme.txt调整颜色样式,并提供修改default.xml的提示,以实现更好的编程体验。
声明:本文内容部分基于gitee项目上转载的开源项目:DarkArduinoTheme: 一款Arduino IDE的暗黑主题,fork自 https://github.com/jeffThompson/DarkArduinoTheme 欢迎加群讨论 1026416808 https://gitee.com/drswith/DarkArduinoTheme.git
目录
2.1获得修改theme的权限(同理可操作default.xml)
2.6# GUI - PLOTTING(串口绘图器的颜色设置,此处自行探索)
注意:
所有修改需要先备份好文件以防丢失,修改配置文件需要保存,并且重启Arduino IDE
先看一下修改后的内容:
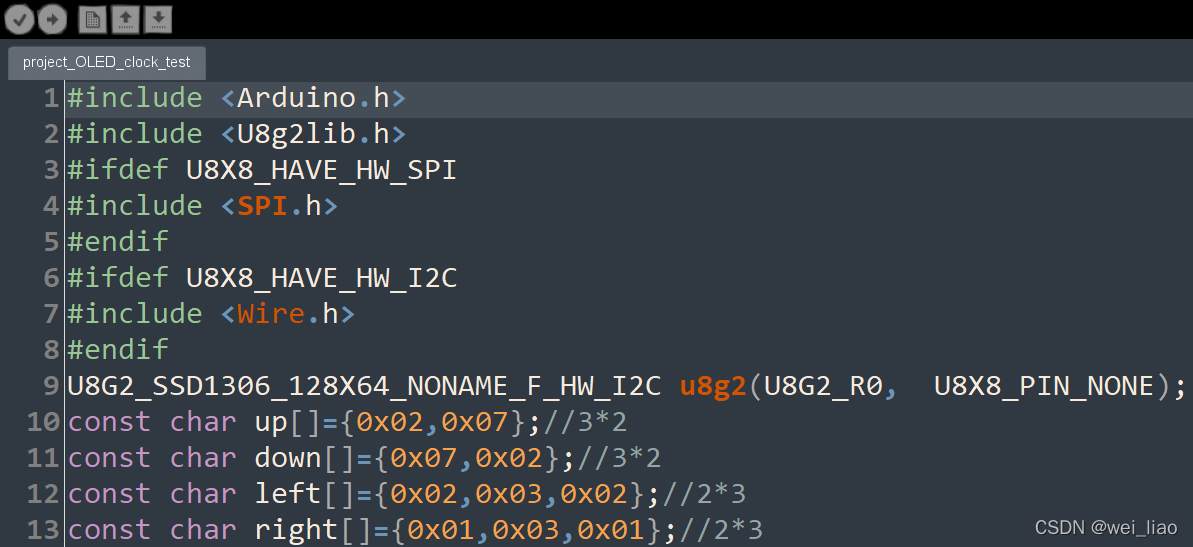
下面是相同代码在SublineText3中的外观(C++)

废话不多说,我们进入正题:
想要修改主题,就要了解主题的配置文件,一共有三个文本文件可供修改,桌面win+E打开文件管理器:
1.改preference(先改字体)
用记事本打开C:\users\(你的用户名)\AppData\Local\Arduino15\preference.txt
可以看到以下内容,在这里既有系统自动写入的内容,也有可以自己修改的设置
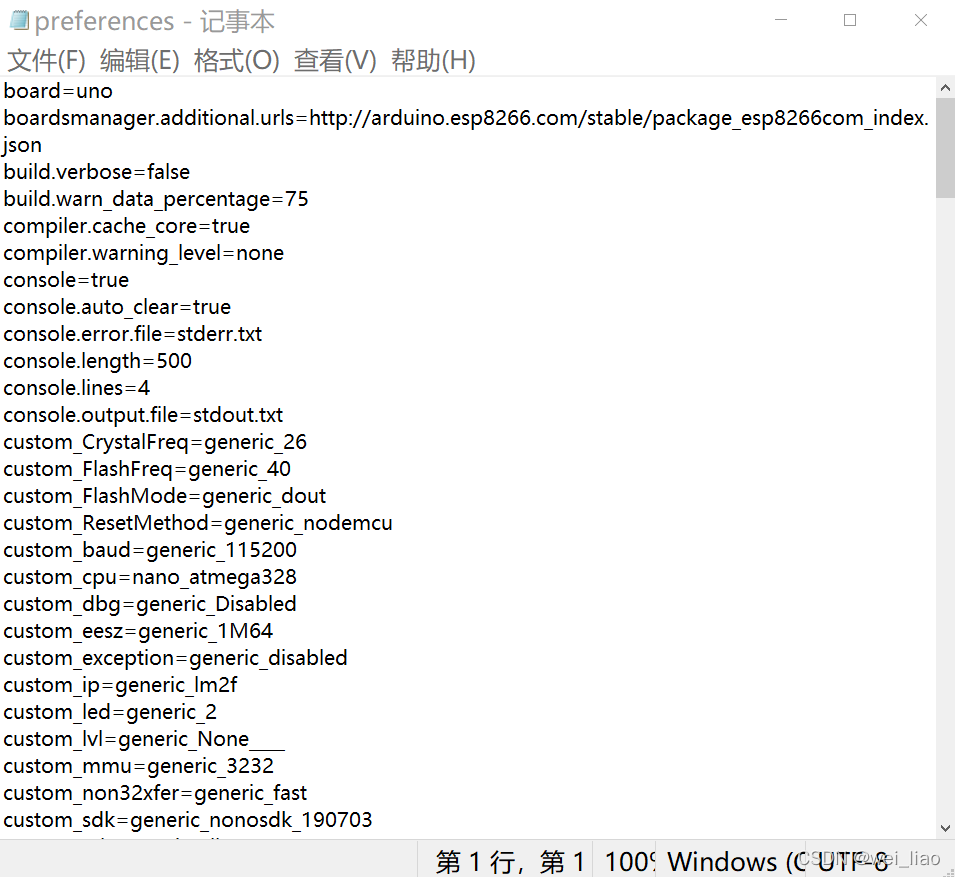
ArduinoIDE把下方显示编译运行等信息的控制台称为“console”操作台,你可以修改以下值来改变控制台是否打开;是否自动清空;错误日志;高度,显示行数等,,,
console=true
console.auto_clear=true
console.error.file=stderr.txt
console.length=50
console.lines=1
console.output.file=stdout.txt
Arduimo把代码正文(中间区域)的所有元素称为“editor”编辑区 ,以下值控制了光标,字体,快捷键,窗口大小等(部分可改)
editor.antialias=true
editor.auto_close_braces=true
editor.caret.blink=true
editor.code_folding=false
editor.divider.size=2
editor.external=false
editor.font=Consolas,bold,19
editor.indent=true
editor.invalid=false
editor.keys.alternative_cut_copy_paste=true
editor.keys.home_and_end_beginning_end_of_doc=false
editor.keys.shift_backspace_is_delete=true
editor.languages.current=
editor.linenumbers=true
editor.save_on_verify=true
editor.tabs.expand=true
editor.tabs.size=2
editor.update_extension=true
editor.window.height.default=600
editor.window.height.min=290
editor.window.width.default=500
editor.window.width.min=400
export.applet.separate_jar_files=false
export.application.fullscreen=false
export.application.platform=true
export.application.stop=true
export.delete_target_folder=true
例如修改 :
editor.caret.blink= 可以设置光标是否闪动
editor.font=字体名(使用Consolas与SublineText一致),字格式(bold加粗,plain不加粗),字高
1.1设置行号
Arduino页面-文件-首选项-显示行号
2.改theme(改字体颜色样式,外观)
打开C:\ Program Files(x86) \ Aduino \ lib \ theme \ theme.txt
可以看到:许多数字“#000000”,代表了不同的RDB色的16进制数(不懂的朋友可以百度一下)
#FUNCTIONS COLOR 			#D35400 - ORANGE			KEYWORD1
#FUNCTIONS COLOR			#D35400 - ORANGE			KEYWORD2
#STRUCTURE COLORS 			#728E00 - GREEN			KEYWORD3
#CONSTANTS COLOR 				#00979C - BLUE				LITERAL1
#VARIABLES COLOR 				#00979C - BLUE				LITERAL2

#ERROR COLOR					#A61717 - RED
#COMMENTS // COLOR			#95A5A6 - LIGHT GREY
#COMMENTS /**/ COLOR		#434F54	- DARK GREY

# GUI - STATUS
status.notice.fgcolor = #002325
status.notice.bgcolor = #17A1A5
status.error.fgcolor = #FFFFFF
status.error.bgcolor = #E34C00
status.edit.fgcolor = #000000
status.edit.bgcolor = #F1B500
status.font = SansSerif,plain,12

# GUI - TABS
# (tab images are stored in the lib/theme folder)
header.bgcolor = #17A1A5
header.text.selected.color = #005B5B
header.text.unselected.color = #007e82
header.text.font = SansSerif,plain,12

# GUI - CONSOLE
console.font = Monospaced,plain,11
console.font.macosx = Monaco,plain,10
console.color = #000000
console.output.color = #eeeeee
console.error.color = #E34C00

# GUI - BUTTONS
buttons.bgcolor = #006468
buttons.status.font = SansSerif,plain,12
buttons.status.color = #ffffff

# GUI - PLOTTING
plotting.bgcolor = #ffffff
plotting.color = #ffffff
plotting.gridcolor = #f0f0f0
plotting.boundscolor = #000000
plotting.graphcolor.size = 8
plotting.graphcolor.00 = #0000FF
plotting.graphcolor.01 = #FF0000
plotting.graphcolor.02 = #009900
plotting.graphcolor.03 = #FF9900
plotting.graphcolor.04 = #CC00CC
plotting.graphcolor.05 = #666666
plotting.graphcolor.06 = #00CCFF
plotting.graphcolor.07 = #000000

# GUI - LINESTATUS
linestatus.color = #ffffff
linestatus.bgcolor = #006468

# EDITOR - DETAILS

# foreground and background colors
editor.fgcolor = #000000
editor.bgcolor = #ffffff

# highlight for the current line
editor.linehighlight.color=#e2e2e2
# highlight for the current line
editor.linehighlight=false

# caret blinking and caret color
editor.caret.color = #333300

# color to be used for background when 'external editor' enabled
editor.external.bgcolor = #c8d2dc

# selection color
editor.selection.color = #ffcc00

# area that's not in use by the text (replaced with tildes)
editor.invalid.style = #7e7e7e,bold

# little pooties at the end of lines that show where they finish
editor.eolmarkers = false
editor.eolmarkers.color = #999999

# bracket/brace highlighting
editor.brackethighlight = true
editor.brackethighlight.color = #006699


# TEXT - KEYWORDS

# FUNCTIONS
editor.keyword1.style = #d35400,bold
editor.data_type.style = #d35400,bold

# METHODS
editor.keyword2.style = #D35400,plain
editor.function.style = #d35400,plain

# STRUCTURES
editor.keyword3.style = #5E6D03,plain
editor.reserved_word.style = #5E6D03,plain


# TEXT - LITERALS
editor.literal1.style = #00979C,plain
editor.literal2.style = #00979C,plain
editor.variable.style = #00979C,plain
editor.reserved_word_2.style = #00979C,plain
editor.literal_boolean.style = #00979C,plain
editor.literal_char.style = #00979C,plain
editor.literal_string_double_quote.style = #005C5F,plain
editor.preprocessor.style = #5E6D03,plain

# http://www.arduino.cc/
editor.url.style = #0000ff,underlined

# e.g. + - = /
editor.operator.style = #434f54,plain


# ?? maybe this is for words followed by a colon
# like in case statements or goto
editor.label.style = #7e7e7e,bold


# TEXT - COMMENTS
editor.comment1.style = #434F54,plain
editor.comment2.style = #95a5a6,plain


# LINE STATUS - editor line number status bar at the bottom of the screen
linestatus.font	   = SansSerif,plain,10
linestatus.height  = 20
2.1获得修改theme的权限(同理可操作default.xml)
右键-属性

选择“安全”
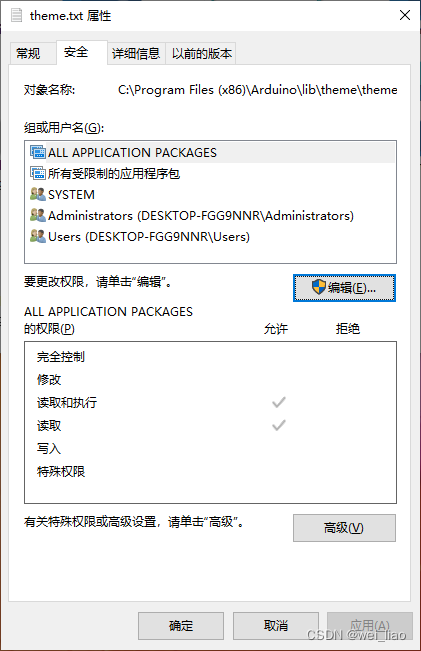
点击-编辑
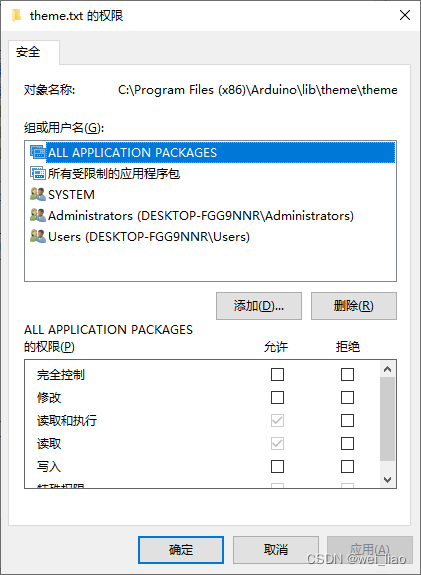
点击添加
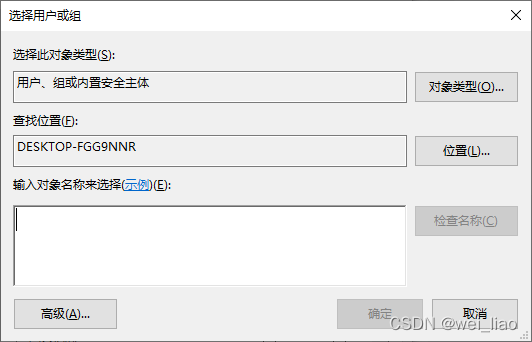
点击高级-立刻查找-选中自己的用户名-点击确定-确定

完全控制下:允许✔-点击确定

点击确定退出即可获得编辑权限
2.2# GUI - STATUS
# GUI - STATUS
status.notice.fgcolor = #00ff00
status.notice.bgcolor = #00ff00
status.error.fgcolor = #00ff00
status.error.bgcolor = #00ff00
status.edit.fgcolor = #00ff00
status.edit.bgcolor = #00ff00
status.font = SansSerif,plain,12 

status.notice.fgcolor = #00ff00--------------------上图绿色色块(运行前)内文字的颜色
status.notice.bgcolor = #ffffff-----------------------上图绿字运行前的背景
status.error.fgcolor = #00ff00------------------------运行后的绿字
status.error.bgcolor = #000000----------------------运行后绿字的黑色背景
status.edit.fgcolor = #00ff00---------------------------不详
status.edit.bgcolor = #000000-------------------------不详
status.font = SansSerif,plain,12------------------------字样式
2.3# GUI - TABS
# GUI - TABS
# (tab images are stored in the lib/theme folder)
header.bgcolor = #17A1A5
header.text.selected.color = #005B5B
header.text.unselected.color = #007e82
header.text.font = SansSerif,plain,12 
上图打×的区域为TAB区
header.bgcolor = #17A1A5----------------------------TAB区的颜色
header.text.selected.color = #005B5B--------------------图上“ArduinoISP”的颜色
header.text.unselected.color = #007e82------------------另一块未选中的文件名的颜色
header.text.font = SansSerif,plain,12--------------------设置字体
2.4# GUI - CONSOLE

console.color = #000000-------------黑色背景
console.output.color = #eeeeee------白字输出
console.error.color = #E34C00 -------红字警告
2.5# GUI - BUTTONS
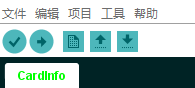
buttons.bgcolor = #ffffff--------------------------------图中按钮周围的底色
buttons.status.font = SansSerif,plain,12 ---------点击按钮后一边显示的文字
buttons.status.color = #ffffff---------------------------该文字的颜色
2.6# GUI - PLOTTING(串口绘图器的颜色设置,此处自行探索)
2.7# GUI - LINESTATUS

linestatus.color = #ffffff----------------------------屏幕最底下小条的字颜色
linestatus.bgcolor = #006468----------------------小条的颜色
linestatus.font = SansSerif,plain,10----------字的类型
linestatus.height = 20----------------------------------字的大小(在theme最底下)
2.8# EDITOR - DETAILS
editor.fgcolor = #00ff00-----------------------------以下图中的绿色,“.h”
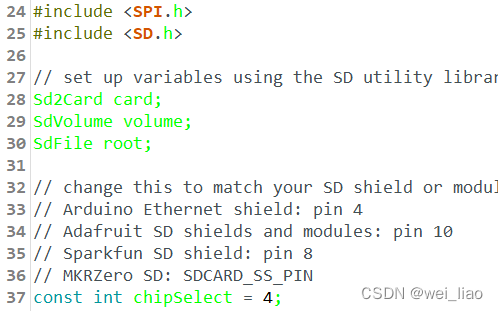
editor.bgcolor = #ffffff---------------------------------文本背景颜色
editor.linehighlight.color=#e2e2e2---------------改为true后,选中行的底色
editor.linehighlight=true
editor.caret.color = #333300---------------------闪烁光标的颜色
editor.selection.color = #ffcc00--------------------选中内容高亮
editor.eolmarkers = false-------------------------------这个打开后如下图,每行结尾自动加入一个符号
editor.eolmarkers.color = #999999------------------符号颜色

editor.brackethighlight = true---------------------------暂时不详
editor.brackethighlight.color = #ff0000
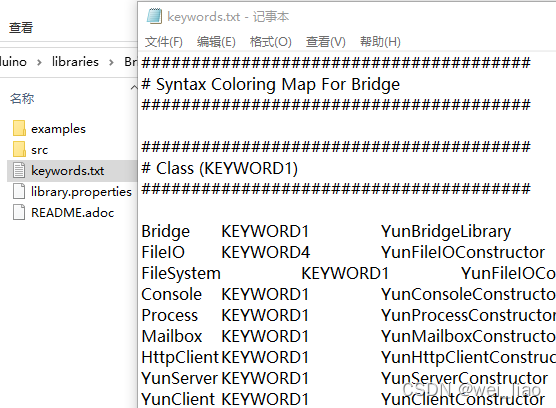
2.9# TEXT - KEYWORDS
editor.keyword1.style = #d35400,bold--------------关键词1,库里面有相关说明
editor.data_type.style = #d35400,bold--------------Serial,SPI,U8G2LIB,等
editor.keyword2.style = #D35400,plain-----------------关键词2,库里面有相关说明
editor.function.style = #d35400,plain------------------库内的函数
editor.keyword3.style = #5E6D03,plain------------------关键词3,库内有相关说明
editor.reserved_word.style = #5E6D03,plain-----------if,else,case,switch,setup、,loop等
2.10# TEXT - LITERALS
editor.literal1.style = #00979C,plain
editor.literal2.style = #00979C,plain
editor.variable.style = #00979C,plain
editor.reserved_word_2.style = #00979C,plain-------------int float 等的颜色
editor.literal_boolean.style = #00979C,plain------------------布尔变量颜色
editor.literal_char.style = #00979C,plain------------------------char颜色
editor.literal_string_double_quote.style = #005C5F,plain-------冒号后双引号的内容
editor.preprocessor.style = #5E6D03,plain-----------------“#include”后的内容
editor.operator.style = #434f54,plain---------------------------运算符号的颜色
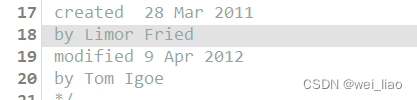
2.11# TEXT - COMMENTS
editor.comment1.style = #434F54,plain---------------单行注释颜色/................./
editor.comment2.style = #95a5a6,plain----------------整块注释的颜色/*..........*/
3.改default.xml
打开C:\ Program Files(x86) \ Aduino \ lib \ theme \ syntax \default.xml
用记事本打开,修改也需要权限,获取权限参考2.1
鉴于题主目前完全不会XML语言,学会后再展示


 被折叠的 条评论
为什么被折叠?
被折叠的 条评论
为什么被折叠?
 到【灌水乐园】发言


