


 本文档详细介绍了自定义项目模板的开发过程,包括在hzw-cli-dev-template模块下创建hzw-cli-dev-template-custom-vue3模板,修改package.json,添加main字段及index.js文件。同时,展示了installCustomTemplate函数的实现,用于查询并执行自定义模板。此外,还展示了hzw-cli-dev-template-custom-vue3的index.js内容,该文件包含了ejs模板渲染和安装逻辑。作者表示在第一阶段完成了脚手架创建项目功能,并计划在后续阶段补充更多功能。
自定义项目模板开发
在 hzw-cli-dev-template 这个模块下,新建模板 hzw-cli-dev-template-custom-vue3。
修改 package.json , 添加 main 字段
"main": "index.js"
添加 index.js
function install(options) {
  console.log(options);
}

module.exports = install
发布到 npm
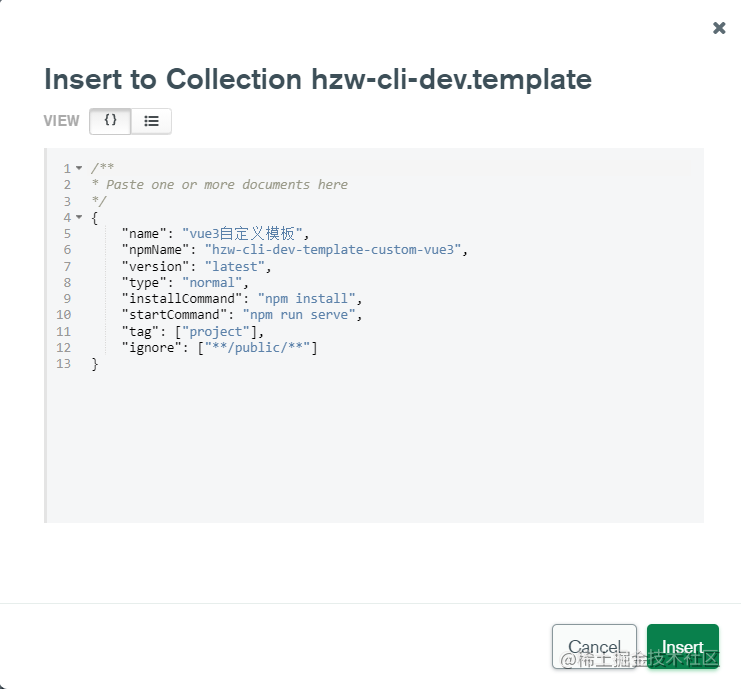
数据库添加一条新的数据
自定义模板安装逻辑开发
commands\init\lib\index.jsinstallCustomTemplate
 /**
   * @description: 安装自定义模板
   * @param {*}
   * @return {*}
   */
  async installCustomTemplate() {
    // 查询自定义模板的入口文件
    if (await this.templateNpm.exists()) {
      const rootFile = this.templateNpm.getRootFilePath();
      if (fs.existsSync(rootFile)) {
        //开始执行自定义模板
        const templatePath = path.resolve(this.templateNpm.cacheFilePath, 'template')
        const options = {
          templateInfo: this.templateInfo,
          projectInfo: this.projectInfo,
          targetPath: process.cwd(),
          sourcePath: templatePath
        }
        const code = `require("${rootFile}")(${JSON.stringify(options)})`
        await execAsync('node', ['-e', code], { stdio: 'inherit', cwd: process.cwd() })
        // 自定义模板安装成功
      }
    }
  }
hzw-cli-dev-template-custom-vue3\index.js
const fse = require("fse")
const inquirer = require('inquirer')
const glob = require('glob')
const ejs = require('ejs')

/**
 * @description: ejs 模板渲染
 * @param {*}
 * @return {*}
 */
async function ejsRender(options) {
  return new Promise((resolve, reject) => {
    // 遍历文件列表
    glob("**", {
      cwd: options.targetPath,
      nodir: true,
      ignore: options.ignore || []
    }, (err, files) => {
      if (err) {
        reject(err)
      }
      // 对文件列表使用 ejs 进行渲染
      Promise.all(files.map((file) => {
        const filePath = path.join(process.cwd(), file)
        return new Promise((resolve1, reject1) => {
          ejs.renderFile(filePath, options, {}, (err, res) => {
            if (err) {
              reject1(err)
            }
            // 将源文件替换成 ejs 渲染后的文件
            fse.writeFileSync(filePath, res)
            resolve1(res)
          })
        })
      }))
        .then(() => resolve(files))
        .catch((err) => reject(err))
    })
  })
}

async function install(options) {
  const promptArr = []
  const descriptPrompt = {
    type: 'input',
    message: '请输入组件描述',
    name: 'description',
    validate: (a) => {
      if (a) {
        return true;
      }
      return '组件描述不可以为空';
    },
  }
  promptArr.push(descriptPrompt)
  const answer = await inquirer.prompt(promptArr);
  options.description = answer.description
  // 获取模板缓存路径
  // 获取模板所在目录 获取当前目录
  const { sourcePath, targetPath } = options
  try {
    // 确保目录存在 不存在会创建
    fse.ensureDirSync(sourcePath);
    fse.ensureDirSync(targetPath);
    // 拷贝模板到当前目录
    fse.copySync(templatePath, targetPath)
    // ejs 模板渲染
    options.ignore = ['node_modules/**', ...options.templateInfo.ignore]
    // const ops = { ignore }
    await ejsRender(options)
    // const { installCommand, startCommand } = this.templateInfo
    // 依赖安装
    // await this.execCommand(installCommand, '依赖安装成功')
    // 启动命令
    // await this.execCommand(startCommand, '项目启动成功')
  } catch (error) {
    log.error(error.message)
  } finally {
    spinner.stop(true)
    log.warn('模板安装成功')
  }
}

module.exports = install
第一阶段总结
本课程的第一阶段任务到此就结束了。主要内容就是开发脚手架的创建项目功能,脚手架还有其它功能,会在后面的课程中继续补充。
由于自身能力问题,第一阶段的课程加餐,也就是 nodejs 相关的源码分析,都没有完完整整的看一遍,所以这个地方后面有机会或者有能力之后,需要再补充一下。
- 第二周的第四章
- 第四周的第五章和第七章
- 第五周的第七章
- 第六周的第七章和第八章
在这个阶段中一共产生了三个代码仓库
hzw-cli-dev:脚手架核心代码hzw-cli-dev-server:脚手架服务端hzw-cli-dev-template:存放项目模板的仓库
本阶段一共产出笔记二十遍(含本篇) 👉👉 我要当架构师
这里显示 17 因为有三篇还没有发布。 
说实话看到后面有点看不下去了,但还是坚持看完了,一边看视频,一边敲代码,一边写笔记,进度有点慢。
接下来就到了 B 端开发了,接触一些新的技术栈,希望可以提高兴趣,并且提升速度。
还是那句话:祝自己早日成长为一个合格的架构师 ~


 902
902

 被折叠的 条评论
为什么被折叠?
被折叠的 条评论
为什么被折叠?
 到【灌水乐园】发言


