


 本文详细介绍了如何在MacOS环境下通过Xcode新建工程并配置参数来创建iOS Bundle资源包,包括设置BaseSDK、BuildActiveArchitectureOnly、InstallationDirectory等关键步骤,以及如何将图片资源拖入工程和编译生成bundle,最后提供了两种使用生成的bundle资源的方法。
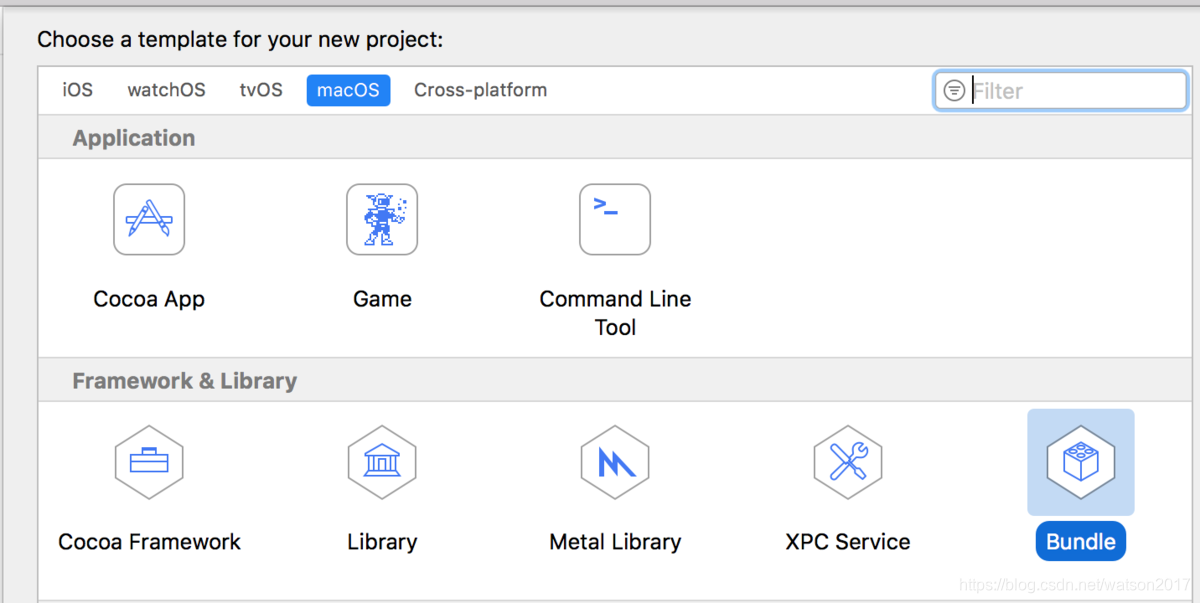
1,新建工程,选择macOS->Bundle
2,选择Build Settings,修改以下配置:
"Base SDK" 设置为 "iOS "
"Build Active Architecture Only" 设置为 "YES" (Debug,Release均为YES)(仅编译当前环境,如果每个环境都编译一遍会使包变大)
Installation Directiotory 删除掉后面的路径 (不安装相关配置,也不需要安装路径)
Code Signing Identity 选择 "-"
"iOS Deployment Target" 设置为 iOS 9.0
"Skip Install" 设置为 "NO" (不需要安装相关配置)
"Strip Debug Symbols During Copy" 中"Release"模式设置为 "YES"
"COMBINE_HIDPI_IMAGES" 设置为 "NO" (不然图片会是tiff格式)
3,将图片资源拖入到工程中,或者在Build Phases-Copy Bundle Resources中添加
4,编译生成bundle。
5,使用方式:
第一种:
UIImage *image = [UIImage imageNamed:@“animate.bundle/001.png"];
第二种:
NSString *bundlePath = [[NSBundle mainBundle] pathForResource:@"animate.bundle" ofType:nil];
NSBundle *imageBundle = [NSBundle bundleWithPath:bundlePath];
UIImage *image = [UIImage imageNamed:@"001" inBundle:imageBundle compatibleWithTraitCollection:nil];
或者
NSString *path = [imageBundle pathForResource:@"001" ofType:@"png"];
UIImage *image = [UIImage imageWithContentsOfFile:path];


 788
788

 被折叠的 条评论
为什么被折叠?
被折叠的 条评论
为什么被折叠?
 到【灌水乐园】发言


