


 本文讲述了在大数据平台Ambari中管理服务器防火墙的重要性,指出直接关闭防火墙可能带来的安全隐患,特别是在云环境中。作者通过netstat命令检查端口使用情况,识别出需要开放的端口如22、5000和6800,并使用nmap工具进行端口扫描验证。同时,讨论了Yarn和Spark在Hadoop Yarn集群中的通信端口安全问题,强调了防火墙配置的必要性和正确性。
网上搜索链接基本都是ambari将服务器的防火墙关闭,这样最为简单。我也这么做了,却被其他人嘲笑,我本来也不是专业的运维,但是我看他们也经常这么做啊,或许他在网络安全方面做了足够好,但是如果服务器是在云上呢?那好吧,只得老老实实的开启防火墙,设置相关的端口。
大数据平台ambari中是直接将防火墙关闭的,但因为我们的ambari中大数据环境已经在运行,直接开启端口,恐怕不行。
于是先找个系统来演练一下,不能硬刚。
1 爬虫演练
先查看端口的使用情况,可以看到Local Address有几种类型,防火墙既然开放端口,那么应该是别人访问,那么127.0.0.1的端口就不需要添加,而0.0.0.0开头的端口22、5000、6800这三个应该添加到防火墙中
[root@sp2 ~]# netstat -ntlp
Active Internet connections (only servers)
Proto Recv-Q Send-Q Local Address           Foreign Address         State       PID/Program name
tcp        0      0 127.0.0.1:6037          0.0.0.0:*               LISTEN      13197/python3.8
tcp        0      0 127.0.0.1:6038          0.0.0.0:*               LISTEN      13896/python3.8
tcp        0      0 0.0.0.0:22              0.0.0.0:*               LISTEN      1415/sshd
tcp        0      0 127.0.0.1:6039          0.0.0.0:*               LISTEN      14557/python3.8
tcp        0      0 127.0.0.1:6040          0.0.0.0:*               LISTEN      15262/python3.8
tcp        0      0 127.0.0.1:6041          0.0.0.0:*               LISTEN      16159/python3.8
tcp        0      0 127.0.0.1:25            0.0.0.0:*               LISTEN      1030/master
tcp        0      0 127.0.0.1:6023          0.0.0.0:*               LISTEN      14611/python3.8
tcp        0      0 127.0.0.1:6024          0.0.0.0:*               LISTEN      5360/python3.8
tcp        0      0 0.0.0.0:5000            0.0.0.0:*               LISTEN      9857/python3.8
tcp        0      0 127.0.0.1:6025          0.0.0.0:*               LISTEN      26532/python3.8
tcp        0      0 127.0.0.1:6026          0.0.0.0:*               LISTEN      28520/python3.8
tcp        0      0 127.0.0.1:6027          0.0.0.0:*               LISTEN      2743/python3.8
tcp        0      0 127.0.0.1:6028          0.0.0.0:*               LISTEN      3423/python3.8
tcp        0      0 127.0.0.1:6029          0.0.0.0:*               LISTEN      4979/python3.8
tcp        0      0 127.0.0.1:6030          0.0.0.0:*               LISTEN      6809/python3.8
tcp        0      0 127.0.0.1:6031          0.0.0.0:*               LISTEN      7463/python3.8
tcp        0      0 127.0.0.1:6032          0.0.0.0:*               LISTEN      8420/python3.8
tcp        0      0 0.0.0.0:6800            0.0.0.0:*               LISTEN      26316/python3.8
tcp        0      0 127.0.0.1:6033          0.0.0.0:*               LISTEN      9109/python3.8
tcp        0      0 127.0.0.1:6034          0.0.0.0:*               LISTEN      10927/python3.8
tcp        0      0 127.0.0.1:6035          0.0.0.0:*               LISTEN      11573/python3.8
tcp        0      0 127.0.0.1:6036          0.0.0.0:*               LISTEN      12232/python3.8
tcp6       0      0 :::22                   :::*                    LISTEN      1415/sshd
tcp6       0      0 ::1:25                  :::*                    LISTEN      1030/master
[root@sp1 ~]# netstat -tlunp
Active Internet connections (only servers)
Proto Recv-Q Send-Q Local Address           Foreign Address         State       PID/Program name
tcp        0      0 127.0.0.1:6028          0.0.0.0:*               LISTEN      23110/python3.8
tcp        0      0 127.0.0.1:6029          0.0.0.0:*               LISTEN      27898/python3.8
tcp        0      0 127.0.0.1:6030          0.0.0.0:*               LISTEN      25903/python3.8
tcp        0      0 127.0.0.1:6031          0.0.0.0:*               LISTEN      23859/python3.8
tcp        0      0 127.0.0.1:6032          0.0.0.0:*               LISTEN      26693/python3.8
tcp        0      0 0.0.0.0:6800            0.0.0.0:*               LISTEN      30924/python3.8
tcp        0      0 127.0.0.1:6034          0.0.0.0:*               LISTEN      29614/python3.8
tcp        0      0 0.0.0.0:22              0.0.0.0:*               LISTEN      1435/sshd
tcp        0      0 127.0.0.1:25            0.0.0.0:*               LISTEN      1029/master
tcp        0      0 0.0.0.0:8000            0.0.0.0:*               LISTEN      24997/python3.8
tcp        0      0 127.0.0.1:6023          0.0.0.0:*               LISTEN      7501/python3.8
tcp        0      0 127.0.0.1:6024          0.0.0.0:*               LISTEN      19693/python3.8
tcp        0      0 0.0.0.0:7081            0.0.0.0:*               LISTEN      12231/python3.8
tcp        0      0 127.0.0.1:6025          0.0.0.0:*               LISTEN      6071/python3.8
tcp        0      0 127.0.0.1:6026          0.0.0.0:*               LISTEN      14071/python3.8
tcp        0      0 127.0.0.1:6027          0.0.0.0:*               LISTEN      21357/python3.8
tcp6       0      0 :::8080                 :::*                    LISTEN      22509/java
tcp6       0      0 :::22                   :::*                    LISTEN      1435/sshd
tcp6       0      0 ::1:25                  :::*                    LISTEN      1029/master
tcp6       0      0 127.0.0.1:8005          :::*                    LISTEN      22509/java
tcp6       0      0 :::8009                 :::*                    LISTEN      22509/java
udp        0      0 0.0.0.0:68              0.0.0.0:*                           789/dhclient
udp        0      0 127.0.0.1:323           0.0.0.0:*                           618/chronyd
udp6       0      0 ::1:323                 :::*                                618/chronyd
看一下一台罗
根据上面的分析,执行准备命令
# 22为ssh的端口
firewall-cmd --zone=public --add-port=22/tcp --permanent
# 5000是scrapyweb端口
firewall-cmd --zone=public --add-port=5000/tcp --permanent
# 6800是scrapyd的端口
firewall-cmd --zone=public --add-port=6800/tcp --permanent
# 7081是pypi-server的端口
firewall-cmd --zone=public --add-port=7081/tcp --permanent
这个时候,我仍然不敢在没有充分了解状态的时候,因为有两行我并不明白
tcp6       0      0 :::22                   :::*                    LISTEN      1415/sshd
tcp6       0      0 ::1:25                  :::*                    LISTEN      1030/master
CentOS安装nmap端口查看工具,安装yum install -y nmap, 现在扫一下本地,扫描后发现了3个open的端口
[root@sp4 ~]# nmap localhost

Starting Nmap 6.40 ( http://nmap.org ) at 2021-01-16 16:15 CST
Nmap scan report for localhost (127.0.0.1)
Host is up (0.0000020s latency).
Other addresses for localhost (not scanned): 127.0.0.1
Not shown: 997 closed ports
PORT     STATE SERVICE
22/tcp   open  ssh
25/tcp   open  smtp
6025/tcp open  x11

Nmap done: 1 IP address (1 host up) scanned in 1.60 seconds
接着在另外一台机器扫描它,为什么这里只看到了一个22端口呢?难道我的防火墙只需要开放22端口就可以了吗?
[root@sp5 ~]# nmap 10.128.1.68

Starting Nmap 6.40 ( http://nmap.org ) at 2021-01-16 16:17 CST
Nmap scan report for sp4.test.com (10.128.1.68)
Host is up (0.00025s latency).
Not shown: 999 closed ports
PORT   STATE SERVICE
22/tcp open  ssh
MAC Address: xx:xx:xx:xx:xx:xx (Unknown)

Nmap done: 1 IP address (1 host up) scanned in 1.62 seconds
参考centos 6.5下安装nmap工具及简单用法,继续分析下去看看有什么发现。
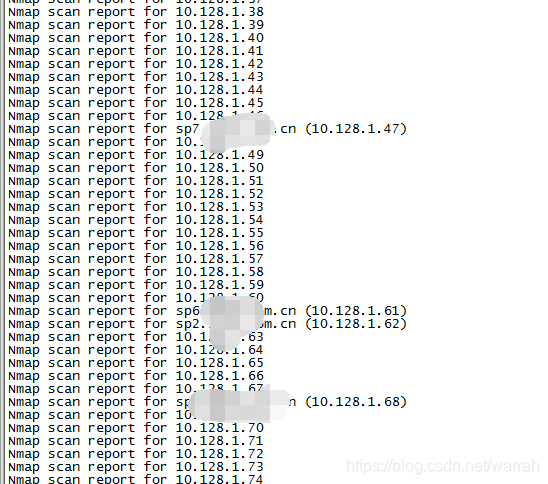
执行命令nmap -sL 10.128.1.0/24,可以看到确实可以把子网内的所有机器都扫描出来了
扫描特定端口nmap -p U:53,T:80,21,22,S:9 10.128.1.166,其中T代表TCP协议、U代表UDP协议、S代表SCTP协议
21/tcp closed ftp
22/tcp open   ssh
80/tcp closed http
2 ambari
下面可以看出别人的确是给大数据增加了防火墙
yarn-cluster模式spark应用客户端与集群的通信端口
Hadoop Yarn 未授权访问导致被攻击
待完善。。。


 346
346

 被折叠的 条评论
为什么被折叠?
被折叠的 条评论
为什么被折叠?
 到【灌水乐园】发言


