


 本文深入解析SpringCloud中@RefreshScope注解的实现原理,详细阐述其在类实例化过程中的作用及生命周期,包括ClassPathBeanDefinitionScanner的doScan、AnnotationConfigUtils的applyScopedProxyMode及ScopedProxyUtils的createScopedProxy等关键步骤。
Spring Cloud 2.2.2 源码之三十五@RefreshScope详解一
RefreshScope注解类实例化基本流程

@RefreshScope作用
主要声明一个类的对象的作用域和刷新相关,既不是单例也不是原型,而且是会进行动态代理的。@Scope("refresh")表示他是跟refresh的作用域相关。
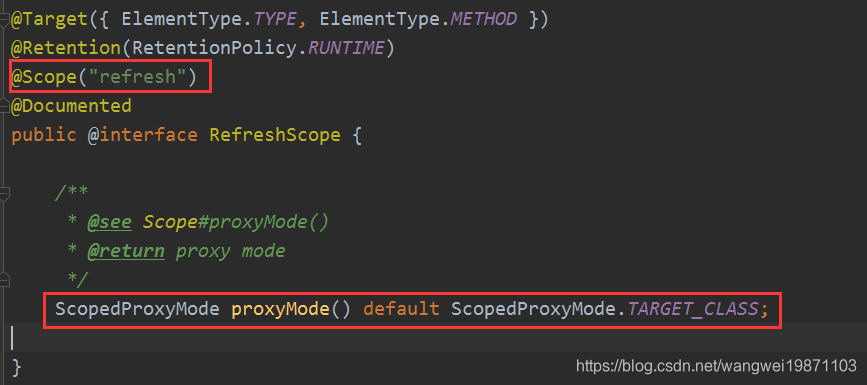
生命周期跟RefreshScope相关。

@Scope回顾这个的作用
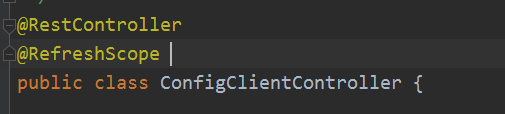
如果我们这样写,这个类会被扫描进容器,我们来看看扫描的时候是怎么做的。
ClassPathBeanDefinitionScanner的doScan
扫描的时候会进行scope的解析和设置,然后进行代理的设置。
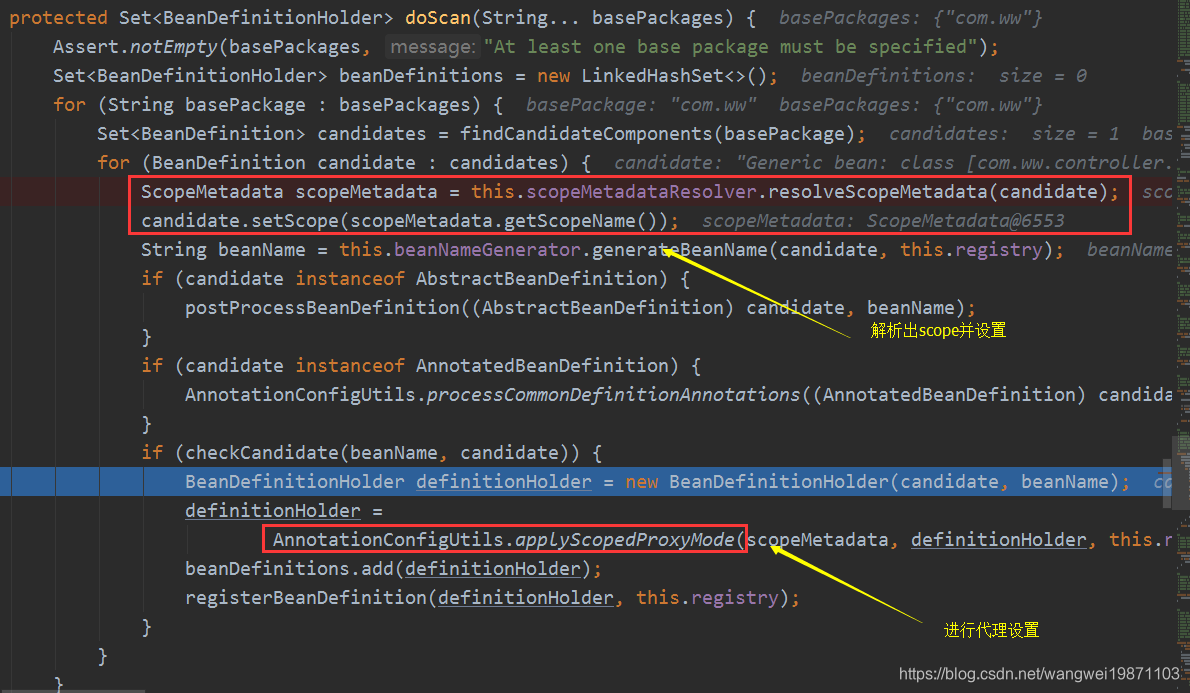
AnnotationConfigUtils的applyScopedProxyMode
因为前面RefreshScope注解设置了代理目标这个属性,所以这里会进行Scoped代理设置。
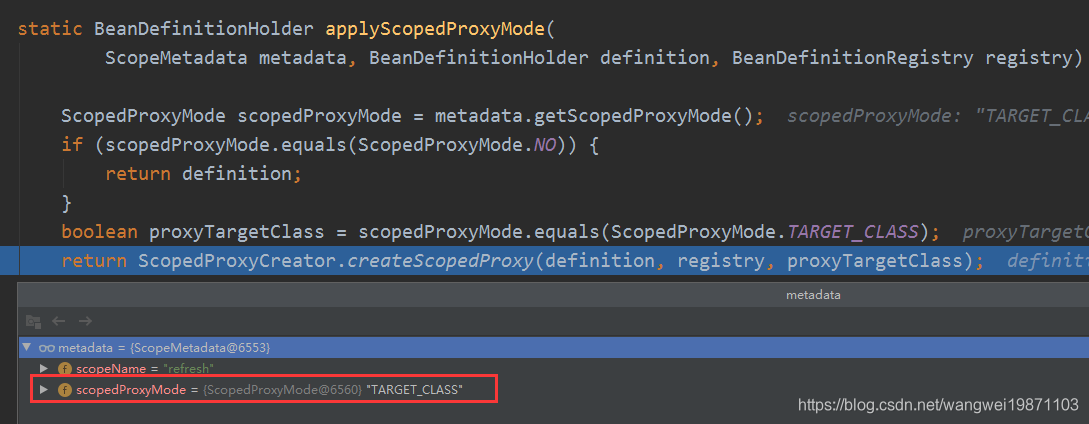
ScopedProxyUtils的createScopedProxy
创建一个代理bean定义来包装,并且设置好属性,然后注册到容器里,这里注意被代理对象的beanName被改成scopedTarget.xxx了,而代理对象的名字才是被代理对象原来的名字。
public static BeanDefinitionHolder createScopedProxy(BeanDefinitionHolder definition,
			BeanDefinitionRegistry registry, boolean proxyTargetClass) {
		//原bean名字
		String originalBeanName = definition.getBeanName();
		//原bean定义
		BeanDefinition targetDefinition = definition.getBeanDefinition();
		//代理bean名字,加了scopedTarget.前缀
		String targetBeanName = getTargetBeanName(originalBeanName);

		//创建代理bean定义,类型是ScopedProxyFactoryBean
		RootBeanDefinition proxyDefinition = new RootBeanDefinition(ScopedProxyFactoryBean.class);
		//设置装饰的bean定义,把原bean定义放进去
		proxyDefinition.setDecoratedDefinition(new BeanDefinitionHolder(targetDefinition, targetBeanName));
		//设置原bean定义
		proxyDefinition.setOriginatingBeanDefinition(targetDefinition);
		proxyDefinition.setSource(definition.getSource());
		proxyDefinition.setRole(targetDefinition.getRole());
		//添加属性
		proxyDefinition.getPropertyValues().add("targetBeanName", targetBeanName);
		if (proxyTargetClass) {
			targetDefinition.setAttribute(AutoProxyUtils.PRESERVE_TARGET_CLASS_ATTRIBUTE, Boolean.TRUE);
			// ScopedProxyFactoryBean's "proxyTargetClass" default is TRUE, so we don't need to set it explicitly here.
		}
		else {
			proxyDefinition.getPropertyValues().add("proxyTargetClass", Boolean.FALSE);
		}

		// Copy autowire settings from original bean definition.
		proxyDefinition.setAutowireCandidate(targetDefinition.isAutowireCandidate());
		proxyDefinition.setPrimary(targetDefinition.isPrimary());
		if (targetDefinition instanceof AbstractBeanDefinition) {
			proxyDefinition.copyQualifiersFrom((AbstractBeanDefinition) targetDefinition);
		}

		// The target bean should be ignored in favor of the scoped proxy.
		targetDefinition.setAutowireCandidate(false);
		targetDefinition.setPrimary(false);

		// 注册原bean定义,名字是scopedTarget.XXX
		registry.registerBeanDefinition(targetBeanName, targetDefinition);

		// Return the scoped proxy definition as primary bean definition
		// (potentially an inner bean).
		return new BeanDefinitionHolder(proxyDefinition, originalBeanName, definition.getAliases());
	}
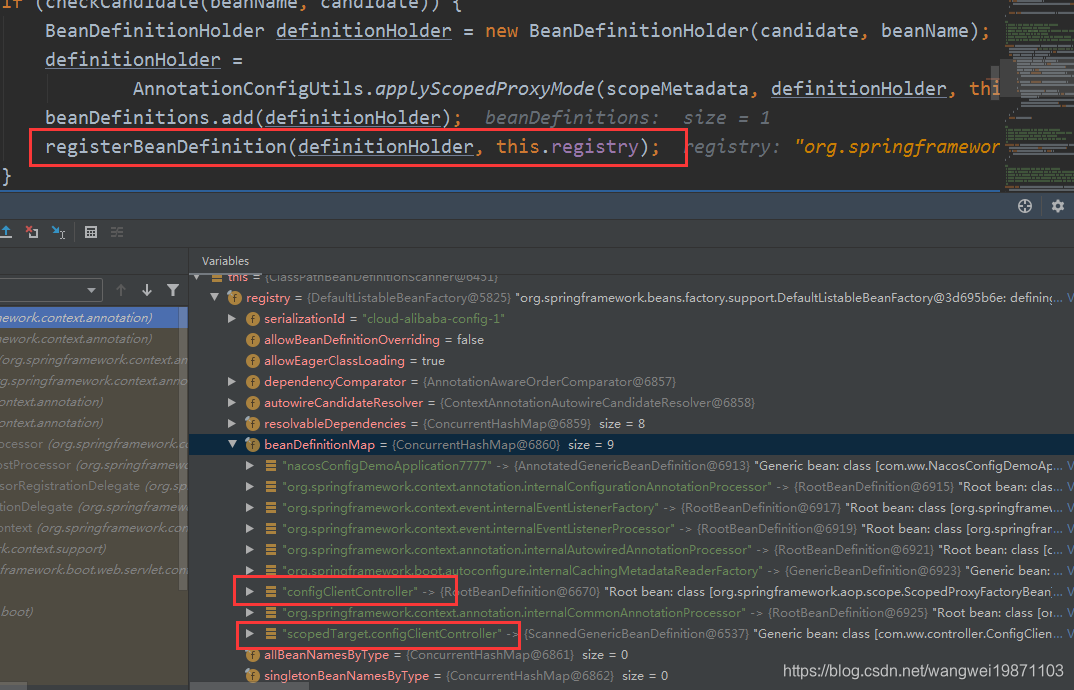
注册被代理对象bean定义:
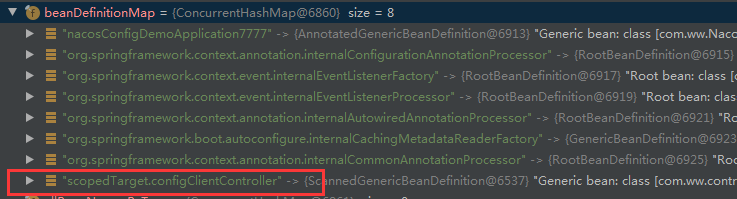
但是外面最后还有一次注册,是注册代理对象的bean定义,名字没变,其实就是多了一个代理的,configClientXXX是代理对象,scopedTarget.configClientXXX是被代理对象:
下篇继续说后面怎么实例化。
好了,今天就到这里了,希望对学习理解有帮助,大神看见勿喷,仅为自己的学习理解,能力有限,请多包涵


 6718
6718

 被折叠的 条评论
为什么被折叠?
被折叠的 条评论
为什么被折叠?
 到【灌水乐园】发言


