


 本文详细介绍了如何使用RabbitMQ作为消息中间件与Flask框架结合,实现消息队列的创建、配置及消息消费过程。通过实例代码展示了如何在RabbitMQ中添加exchange和queue,并将两者绑定,以及如何使用Python的pika库消费队列中的消息。
之前用flask写了一个接口,调用的方法不是直接调用,而是用MQ来消费,这里选用了RabbitMQ
RabbitMQ的下载与安装这里我就不介绍了,不懂得可以参考下这篇文章:https://blog.youkuaiyun.com/u011709128/article/details/81082331
安装好后
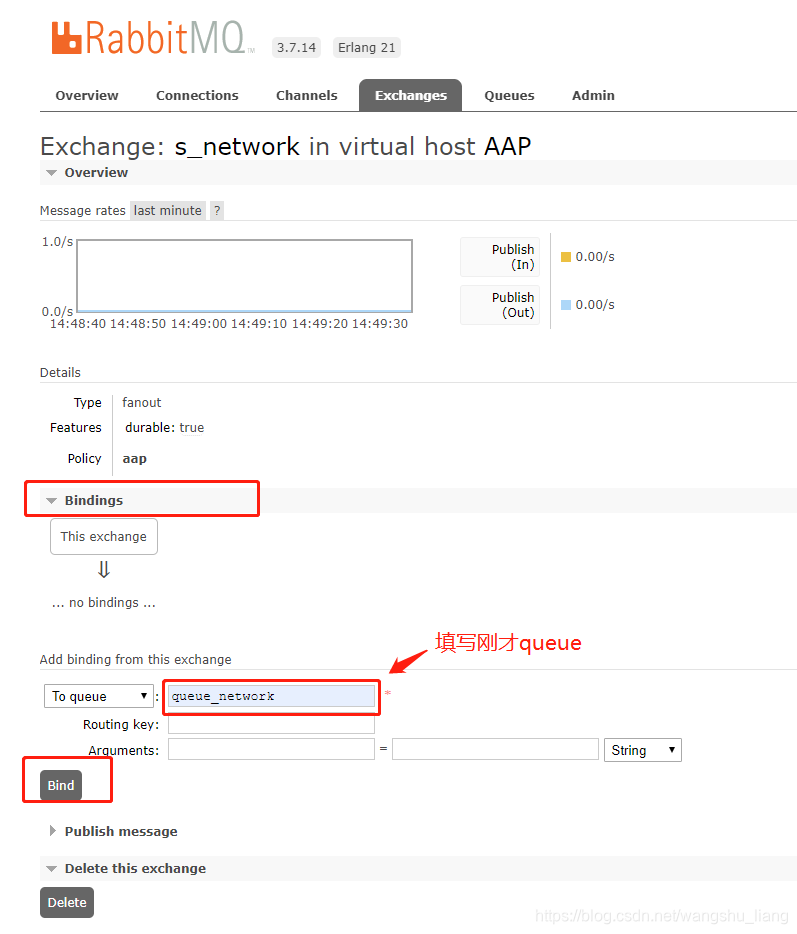
登陆后添加一个新的exchange
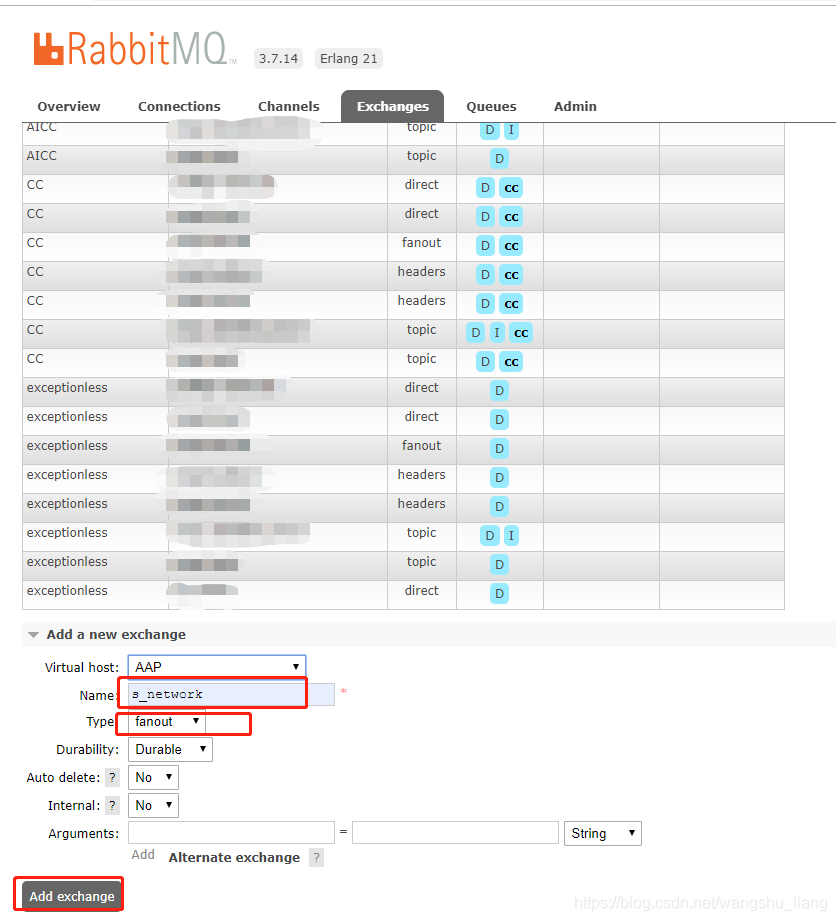
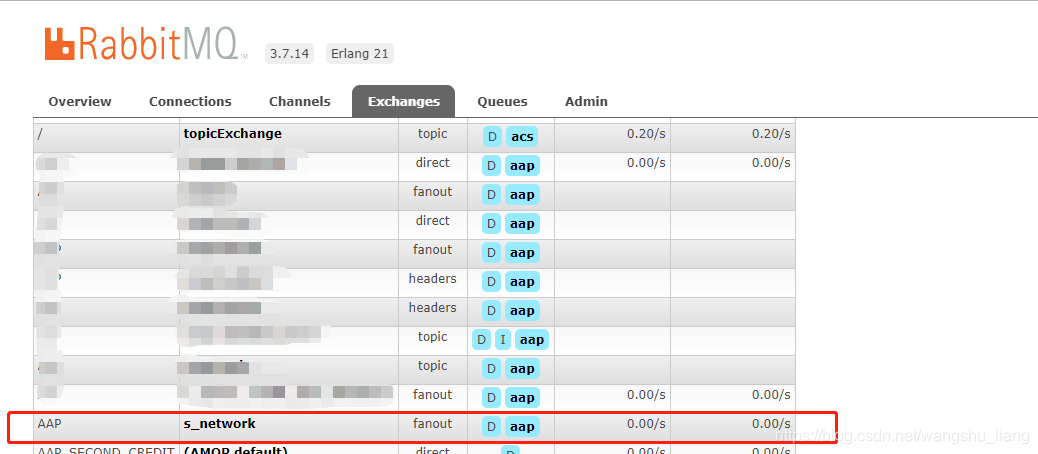
创建完
然后添加queue
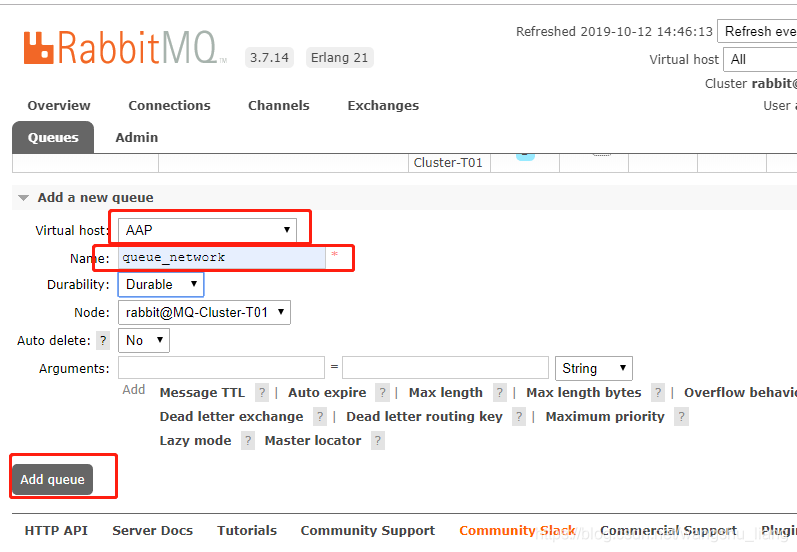
创建完

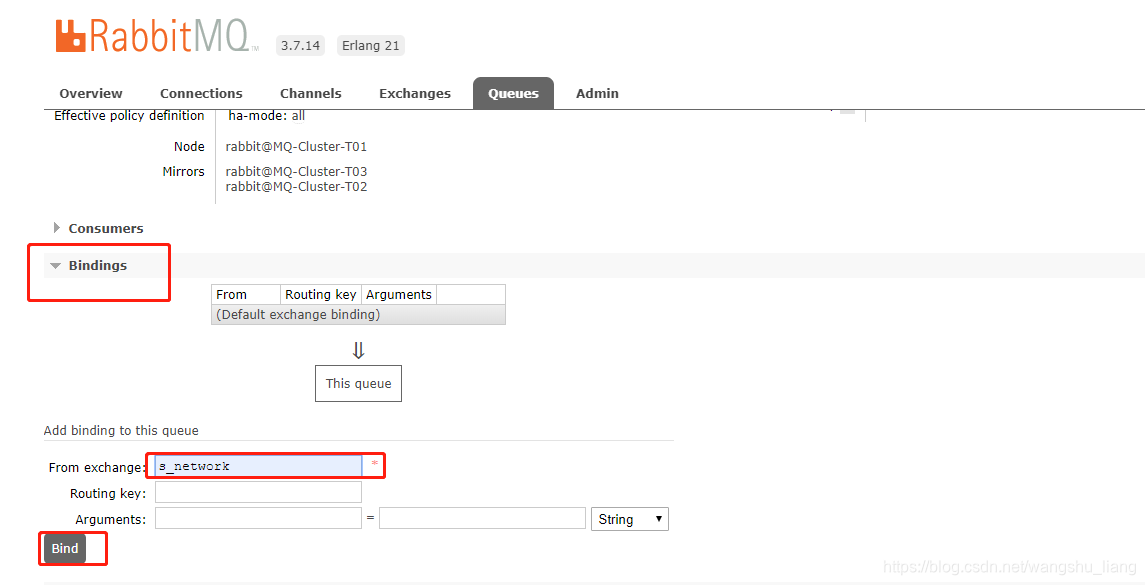
下一步:把exchange和queue相互绑定一下
现往队列中推了十条数据
![]()
以下为消费消息代码
import pika
import requests
import json
from config import config


class Mq_Consumer:

    def __init__(self):
        self.mq_ip = config.mq_ip
        self.mq_port = config.mq_port
        self.mq_virtual_host = config.mq_virtual_host
        self.mq_username = config.mq_username
        self.mq_pwd = config.mq_pwd

    def mq_con(self, ):
        user_pwd = pika.PlainCredentials(self.mq_username, self.mq_pwd)
        params = pika.ConnectionParameters(host=self.mq_ip, virtual_host=self.mq_virtual_host,
                                           credentials=user_pwd)  # 创建连接

        s_conn = pika.BlockingConnection(parameters=params)
        chan = s_conn.channel()

        # chan.basic_qos(prefetch_count=1)
        c1 = chan.basic_consume(callback,'queue_network')
        # c2 = chan.basic_consume(callback, queue='queue_network', no_ack=False)

        print('[消费者] waiting for msg .')

        chan.start_consuming()  # 开始循环取消息


def callback(channel, method, properties, body):  # 定义一个回调函数,用来接收生产者发送的消息
    try:
        req_body = body.decode('utf-8')
        req = json.loads(req_body)

        url = 'http://{}/socialnetwork/social?appno={}'.format(config.network_url, req["applyNo"])
        res = requests.get(url)
        print("[消费者] recv %s" % body)
    except Exception as e:
        print(e)
    finally:
        channel.basic_ack(delivery_tag=method.delivery_tag)


if __name__ == '__main__':
    mq_consumer = Mq_Consumer()
    mq_consumer.mq_con()
消费完队列就空了
![]()


 396
396

 被折叠的 条评论
为什么被折叠?
被折叠的 条评论
为什么被折叠?
 到【灌水乐园】发言


