


 本文解析了Netty中AdaptiveRecvByteBufAllocator的工作原理及其如何实现数据接收过程中的自适应缓冲区分配。通过源码分析,介绍了从建立连接到读取数据的整个流程,并详细解释了读取数据过程中涉及的关键方法。
前言
上一次讲到了建立连接,那么建立完连接之后自然就要开始接收数据了,这一讲我们就来看看接收数据的流程
开始
在开始阅读源码之前我们先来了解一个类:AdaptiveRecvByteBufAllocator,这个类是用来做什么的呢,这个类可以看成是一个自适应的数据大小的分配器,主要是在接收数据的时候分配缓存用的,这个缓冲区的大小有三种分别是默认,最小值和最大值
static final int DEFAULT_MINIMUM = 64;
static final int DEFAULT_INITIAL = 1024;
static final int DEFAULT_MAXIMUM = 65536;
而每一次读取数据时,分配器根据之前Channel接收到的数据报文大小进行计算,来获得这一次需要分配的缓存大小,但是传过来的数据可能很长,所以Netty会去循环读取一直读取到结束,但是每次读取最多不能超过maxMessagesPerRead的值
了解了这个自适应适配器之后,我们来开始接收数据的流程,首先我们之前说过,读取数据和建立连接的事件,都是OP_READ,那么这时候多路复用器Selector会收到OP_READ事件,然后开始处理,根据之前经验,我们直接把断点打到NioEventLoop里的unsafe.read()方法上
//处理建立/断开连接请求或读取数据请求
            if ((readyOps & (SelectionKey.OP_READ | SelectionKey.OP_ACCEPT)) != 0 || readyOps == 0) {
                unsafe.read();
            }
然后我们先启动EchoServer,然后启动EchoClient,来到了断点,然后进入断点
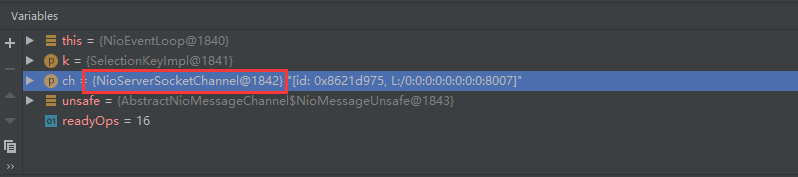
由于先要建立连接,所以第一次进入断点看到的channel是NioServerSocketChannel,这里就不看了,直接跳到第二次进入断点,进入断点,此时的Channel就是NioSocketChannel了,而NioSocketChannel在这里的作用就是接收数据。
这时候进入断点,来到了io.netty.channel.nio.AbstractNioByteChannel.NioByteUnsafe#read方法,继续往下看
@Override
        public final void read() {
            final ChannelConfig config = config();
            if (shouldBreakReadReady(config)) {
                clearReadPending();
                return;
            }
            final ChannelPipeline pipeline = pipeline();
            //这个allocator是一个分配器
            final ByteBufAllocator allocator = config.getAllocator();
            //这个Handler就是之前说的AdaptiveRecvByteBufAllocator
            final RecvByteBufAllocator.Handle allocHandle = recvBufAllocHandle();
            allocHandle.reset(config);

            ByteBuf byteBuf = null;
            boolean close = false;
            try {
                do {
                    //这里开始分配大小
                    byteBuf = allocHandle.allocate(allocator);
                    //读数据
                    allocHandle.lastBytesRead(doReadBytes(byteBuf));
                    if (allocHandle.lastBytesRead() <= 0) {
                        // nothing was read. release the buffer.
                        byteBuf.release();
                        byteBuf = null;
                        close = allocHandle.lastBytesRead() < 0;
                        if (close) {
                            // There is nothing left to read as we received an EOF.
                            readPending = false;
                        }
                        break;
                    }

                    allocHandle.incMessagesRead(1);
                    readPending = false;
                    pipeline.fireChannelRead(byteBuf);
                    byteBuf = null;
                } while (allocHandle.continueReading());
                //本次读取结束,记录读了多少数据,计算下次分配大小
                allocHandle.readComplete();
                //完成本次读事件处理并传递出去
                pipeline.fireChannelReadComplete();

                if (close) {
                    closeOnRead(pipeline);
                }
            } catch (Throwable t) {
                handleReadException(pipeline, byteBuf, t, close, allocHandle);
            } finally {
                // Check if there is a readPending which was not processed yet.
                // This could be for two reasons:
                // * The user called Channel.read() or ChannelHandlerContext.read() in channelRead(...) method
                // * The user called Channel.read() or ChannelHandlerContext.read() in channelReadComplete(...) method
                //
                // See https://github.com/netty/netty/issues/2254
                if (!readPending && !config.isAutoRead()) {
                    removeReadOp();
                }
            }
        }
    }
先进到allocate方法,看看是怎么缓冲区大小是怎么分配的
@Override
        public ByteBuf allocate(ByteBufAllocator alloc) {
            //这里的“猜”方法很形象,说明分配器就是每次去猜要分配多少容量
            return alloc.ioBuffer(guess());
        }
断点进入guess()方法,同时设置方法输出log,可以看到容量的大小一开始是1024

继续往下走,来到allocHandle.lastBytesRead(doReadBytes(byteBuf));这一行,看到熟悉的doReadBytes(),这个熟悉的开头表示读取数据的方法就在这里
@Override
    protected int doReadBytes(ByteBuf byteBuf) throws Exception {
        final RecvByteBufAllocator.Handle allocHandle = unsafe().recvBufAllocHandle();
        allocHandle.attemptedBytesRead(byteBuf.writableBytes());
        //这行是关键
        return byteBuf.writeBytes(javaChannel(), allocHandle.attemptedBytesRead());
    }
继续跟进这个writeBytes方法看看
@Override
    public int writeBytes(ScatteringByteChannel in, int length) throws IOException {
        ensureWritable(length);
        //这行是关键
        int writtenBytes = setBytes(writerIndex, in, length);
        if (writtenBytes > 0) {
            writerIndex += writtenBytes;
        }
        return writtenBytes;
    }
继续进入setBytes方法
@Override
    public final int setBytes(int index, ScatteringByteChannel in, int length) throws IOException {
        try {
            return in.read(internalNioBuffer(index, length));
        } catch (ClosedChannelException ignored) {
            return -1;
        }
    }
我们看到这个时候就是执行SocketChannel的read方法开始真正读数据了。为了证明开头讲的自适应分配器真的是自适应的,我提前打开了方法的log输出,看看guess()方法每次输出的大小是多少

可以看到一开始大小是1024,然后变成了512,又变成了496,看来自适应分配器还真的是自适应的
总结
到了这里,读数据的过程就走完了,总结一下,1.读数据的真正源头是SocketChannel里的read方法,2.NioServerSocketChannel的read()是创建连接,NioSocketChannel的read()是读取数据,3.一次读事件可能包括多次的读操作,4.自适应适配器的“猜”方法需要两次判断,扩容是果断的,但是收缩是谨慎的。


 985
985

 被折叠的 条评论
为什么被折叠?
被折叠的 条评论
为什么被折叠?
 到【灌水乐园】发言


