


 本文详细解析Vuex的工作流程,通过代码示例解释如何使用Store对象的dispatch方法触发action,以及action如何commit到mutation,进而改变state。文章探讨了action和mutation的执行过程,包括如何注册action钩子,以及dispatch和commit方法的核心实现。最后提到了Vuex的getter以及未涵盖的模块化、动态注册模块和浏览器调试插件等内容。
上一节前端入门之(vuex源码解析一)我们简单的过了一下vuex的源码,然后也大概了解了vuex的原理,这一节我们继续带着demo,然后对照着vuex源码做解析.
先看一张官网文档vuex工作的流程图:
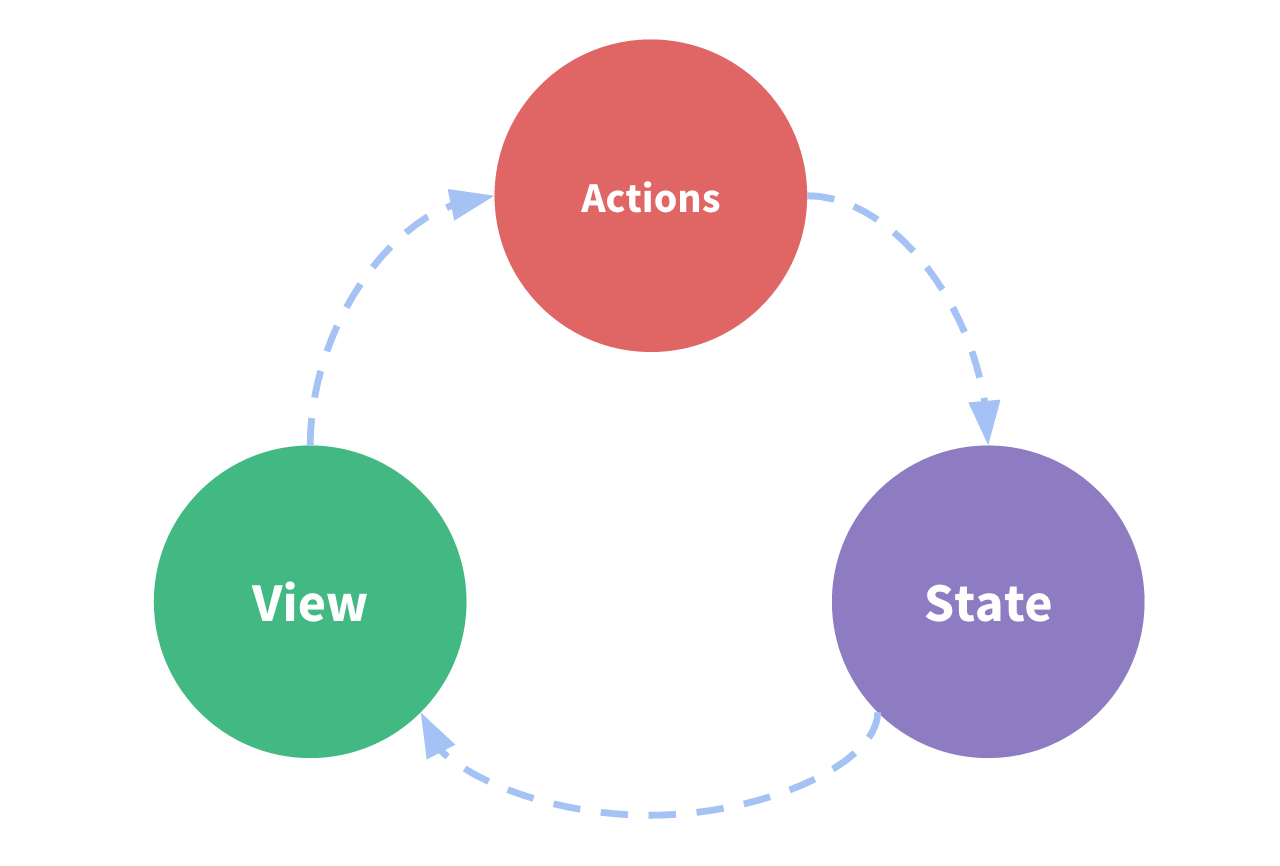
可以看到,当我们点击view中的某个按钮(+号)然后触发了一个action(‘increase‘)然后action继续commit到了mutation,mutation改变state(state.count++),然后改变view中数据(count+1)
可能文字解释起来有点抽象哈,我们直接上代码了,当我们点击+的时候,我们代码走了:
increase() {
        this.$store.dispatch('increase');
      },
我们找到vuex中Store对象的dispatch方法:
构造方法中
Store.prototype.dispatch = function dispatch (_type, _payload) {


    var this$1 = this;

  // check object-style dispatch
  //格式化我们传过来的参数
  var ref = unifyObjectStyle(_type, _payload);
    var type = ref.type;
    var payload = ref.payload;

  var action = { type: type, payload: payload };
  //获取store中的actions
  var entry = this._actions[type];
  if (!entry) {
    {
      console.error(("[vuex] unknown action type: " + type));
    }
    return
  }
  //触发action的钩子函数
  this._actionSubscribers.forEach(function (sub) {

    return sub(action, this$1.state); });
  //返回对应的action的处理结果
  return entry.length > 1
    ? Promise.all(entry.map(function (handler) {

    return handler(payload); }))
    : entry[0](payload)
};
不要被吓到哈,不难,我们一行一行解释,首先看到这么一行:
//格式化我们传过来的参数
  var ref = unifyObjectStyle(_type, _payload);
    var type = ref.type;
    var payload = ref.payload;
继续看unifyObjectStyle方法:
function unifyObjectStyle (type, payload, options) {


  if (isObject(type) && type.type) {


    options = payload;
    payload = type;
    type = type.type;
  }

  {
    assert(typeof type === 'string', ("Expects string as the type, but found " + (typeof type) + "."));
  }

  return { type
最低0.47元/天 解锁文章


 562
562

 被折叠的 条评论
为什么被折叠?
被折叠的 条评论
为什么被折叠?
 到【灌水乐园】发言


