


 本文介绍了如何使用UI视图配置来实现多个视图的显示,包括视图的命名方式、相对与绝对路径的区别,以及如何在不同状态下针对特定视图进行内容替换。
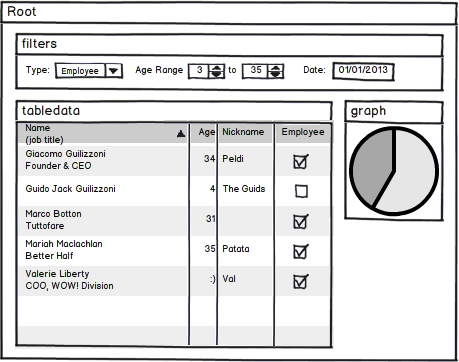
你可以命名你的视图名称这样你就可以拥有多个视图。比如说你有一个应用程序的状态中需要动态的图形,很多的表格和表格的筛选器像这样:
当设定多个视图时,你需要state的views属性,views是一个object对象。
view覆盖state的templeate属性
如果你定义了views属性,state的templateUrl, template and templateProvider将会被忽略。所有这种情况下,你需要一个父级别的布局,你可以定义一个抽象的状态包含模板,并且子状态中包含视图
Example - Name Matching
views属性中的keys需要和views名称匹配,像这样
<!-- index.html -->
<body>
  <div ui-view="filters"></div>
  <div ui-view="tabledata"></div>
  <div ui-view="graph"></div>
</body>

$stateProvider
  .state('report', {
    views: {
      'filters': { ... templates and/or controllers ... },
      'tabledata': {},
      'graph': {},
    }
  })
views中的每个视图都可以拥有自己的模板(template, templateUrl, templateProvider)和控制器(controller, controllerProvider).
$stateProvider
  .state('report',{
    views: {
      'filters': {
        templateUrl: 'report-filters.html',
        controller: function($scope){ ... controller stuff just for filters view ... }
      },
      'tabledata': {
        templateUrl: 'report-table.html',
        controller: function($scope){ ... controller stuff just for tabledata view ... }
      },
      'graph': {
        templateUrl: 'report-graph.html',
        controller: function($scope){ ... controller stuff just for graph view ... }
      },
    }
  })
视图名称-相对名称 vs 绝对名称
在幕后,每个视图都会分配到绝对名称的viewname@statename,其中viewname是在视图指示器中使用的名称,statename是状态的绝对名称,如绝对名称contact.item。您也可以选择在绝对的语法写你的视图名称。
比如,你可以这样写:
.state('report',{
  views: {
    'filters@': { },
    'tabledata@': { },
    'graph@': { }
  }
})
Absolute naming lets us do some powerful view targeting. Remember! With power comes responsibility. Let's assume we had several templates set up like this (this example is not realistic, it's just to illustrate view targeting):
<!-- index.html (root unnamed template) -->
<body ng-app>
<div ui-view></div> <!-- contacts.html plugs in here -->
<div ui-view="status"></div>
</body>
<!-- contacts.html -->
<h1>My Contacts</h1>
<div ui-view></div>
<div ui-view="detail"></div>
<!-- contacts.detail.html --><h1>Contacts Details</h1><div ui-view="info"></div>
@ is used then the view path is considered absolute:
$stateProvider
  .state('contacts', {
    // This will get automatically plugged into the unnamed ui-view
    // of the parent state template. Since this is a top level state,
    // its parent state template is index.html.
    templateUrl: 'contacts.html'
  })
  .state('contacts.detail', {
    views: {
        ////////////////////////////////////
        // Relative Targeting             //
        // Targets parent state ui-view's //
        ////////////////////////////////////

        // Relatively targets the 'detail' view in this state's parent state, 'contacts'.
        // <div ui-view='detail'/> within contacts.html
        "detail" : { },

        // Relatively targets the unnamed view in this state's parent state, 'contacts'.
        // <div ui-view/> within contacts.html
        "" : { },

        ///////////////////////////////////////////////////////
        // Absolute Targeting using '@'                      //
        // Targets any view within this state or an ancestor //
        ///////////////////////////////////////////////////////

        // Absolutely targets the 'info' view in this state, 'contacts.detail'.
        // <div ui-view='info'/> within contacts.detail.html
        "info@contacts.detail" : { }

        // Absolutely targets the 'detail' view in the 'contacts' state.
        // <div ui-view='detail'/> within contacts.html
        "detail@contacts" : { }

        // Absolutely targets the unnamed view in parent 'contacts' state.
        // <div ui-view/> within contacts.html
        "@contacts" : { }

        // absolutely targets the 'status' view in root unnamed state.
        // <div ui-view='status'/> within index.html
        "status@" : { }

        // absolutely targets the unnamed view in root unnamed state.
        // <div ui-view/> within index.html
        "@" : { }
  });
You can see how this ability to not only set multiple views within the same state but ancestor states could become a veritable playground for a developer :).


 616
616

 被折叠的 条评论
为什么被折叠?
被折叠的 条评论
为什么被折叠?
 到【灌水乐园】发言


