


一、什么是 fastlane
fastlane is the easiest way to automate beta deployments and releases for your iOS and Android apps. 🚀 It handles all tedious tasks, like generating screenshots, dealing with code signing, and releasing your application.
fastlane是自动化iOS和Android应用程序Beta部署和发布的最简单方法。 🚀它可以处理所有繁琐的任务,例如生成屏幕截图,处理代码签名以及发布应用程序。【谷歌翻译】
二、软件环境
- maxOS Mojave 10.14.4
- Xcode11.2.1
- swift demo project
- fastlane 2.99.1
- ruby 2.3.7
- Homebrew 2.2.0
- gem 2.7.7
三、安装 fastlane
1. 安装Xcode命令行工具
xcode-select --install
2. 安装 fastlane
- 使用Homebrew安装 (我使用的方式)
brew cask install fastlane - 使用RubyGems安装
sudo gem install fastlane -NV
3.检测是否安装成功

4. 如果终端报错:zsh: command not found: fastlane?
在 .bashrc、.bash_profile、.zshrc文件中加上 export PATH="$HOME/.fastlane/bin:$PATH",重启终端即可。
四、初始化 fastlane
- 在终端中进入项目根目录,执行命令:
fastlane init- 初始化过程中,会有一下几个选项,我选的是第四个,接着一路回车,完成
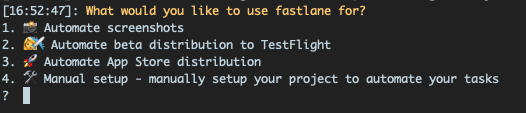
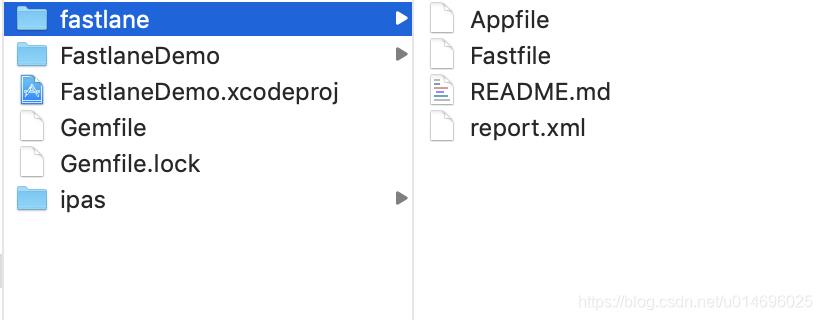
- 初始化完成,目录结构如下:
- 初始化过程中,会有一下几个选项,我选的是第四个,接着一路回车,完成
五、配置fastlane
1. Gemfile
source "https://rubygems.org"
gem "fastlane"
- 如果你的
gem source是https://gems.ruby-china.com/,可能会有以下警告:

执行gem sources --add https://rubygems.org命令,警告消失。
2. Fastfile
# 变量
APP_NAME = "FastlaneDemo"

default_platform(:ios)

platform :ios do
  lane :dev do
  gym(
    scheme: "#{APP_NAME}",
    workspace: "#{APP_NAME}.xcworkspace",
    clean: true,
    silent: true,
    export_xcargs: "-allowProvisioningUpdates",
    output_directory: "./fastlane/ipa",
    export_method: "development"
  )
  end
end
3. Fastfile封装示例
# 变量
IPA_NAME = ""
APP_NAME = "FastlaneDemo"
IPA_TIME = Time.now.strftime("%Y%m%d_%H%M")
PROJECT = "#{APP_NAME}.xcodeproj"
APP_INFO_PLIST_PATH = "./#{APP_NAME}/Info.plist"
ENV_PREFIX=""
OUTPUT_DIRECTORY = "ipas"

default_platform(:ios)

platform :ios do
  # debug
  lane :dev do
    ENV_PREFIX="debug_"
    execPackage(configuration: "Debug", method: "development", profile: "dev_com.pintec.xxx")
  end
  # app store
  lane :iosappstore do
    ENV_PREFIX="appstore_"
    execPackage(configuration: "Release", method: "app-store", profile: "pro_com.pintec.xxx")
  end
  # ******************************* 华丽的分割线 *******************************
  # 打包
  lane :execPackage do |arvg|
      puts "================================="
      puts arvg[:configuration]
      puts "================================="
      # 配置变量
      PLIST_INFO_VERSION = get_version_number(target: "#{APP_NAME}")
      PLIST_BUILD_VERSION = get_info_plist_value(path: "#{APP_INFO_PLIST_PATH}", key: 'CFBundleVersion')
      IPA_NAME = "#{ENV_PREFIX}" + "#{APP_NAME}_"  +  "#{IPA_TIME}_" + "#{PLIST_INFO_VERSION}" +"_#{PLIST_BUILD_VERSION}"+ ".ipa"
     # 开始打包
     gym(	# gym: build_ios_app 的别名
      clean: true,	# 打包前是否clean
      scheme: "#{APP_NAME}",
      project: "#{PROJECT}",    # 未使用cocopods,如使用cocopods,请使用workspace
      configuration: arvg[:configuration], # 指定构建App的配置(Release、Debug、自定义)
      output_directory: "#{OUTPUT_DIRECTORY}", # ipa输出目录
      include_symbols: true,	# 是否包含调试符号
      include_bitcode: false, # 是否开启bitcode
      xcargs: 'DEBUG_INFORMATION_FORMAT="dwarf-with-dsym"',
      output_name: "#{IPA_NAME}",	# ipa名称
      export_xcargs: "-allowProvisioningUpdates",
      export_options: {
        method: arvg[:method], # app-store, ad-hoc, package, enterprise, development
        provisioningProfiles: {
          # 示例中,测试和生产环境的Bundle Identifier是一样的,所以这里硬编码
          "com.pintec.xxx": arvg[:profile]
        }
      }
    )
    xcclean(
      project: "#{PROJECT}",
      scheme: "#{APP_NAME}"
    )
  end
end
六、开始打包
- 测试环境:
fastlane dev - 生产环境:
fastlane iosappstore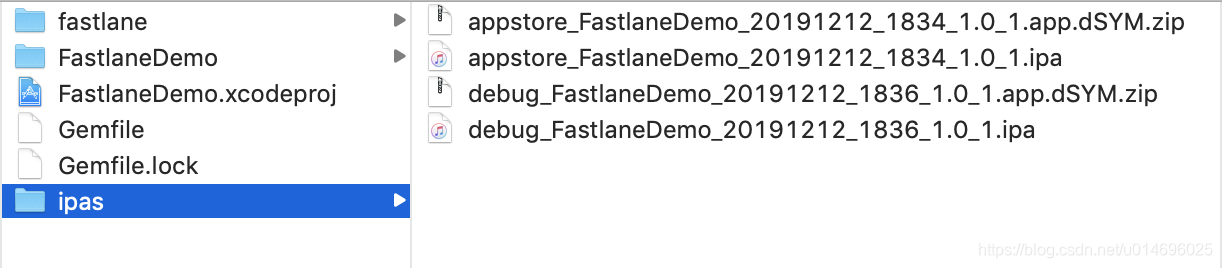
 #### 八、参考文档


 7838
7838

 被折叠的 条评论
为什么被折叠?
被折叠的 条评论
为什么被折叠?
 到【灌水乐园】发言


