


 本文详细介绍了Vue项目的优化方法,包括拆分项目模块、按需加载、提取公共代码等方面。通过路由按需加载、ECharts、iView、Vant的按需引入等方式减少资源占用。此外,还讲解了如何拆分公共代码、利用externals和Dllplugin分离代码,以及推荐使用webpack辅助插件提高构建效率。
Vue 项目优化
之前写了一篇解析 vue-cli 脚手架的博客 https://blog.youkuaiyun.com/u014168594/article/details/90174169,讲了 vue-cli 构建项目时是如何优化的,最近在优化项目,看看我们还能在项目中做些什么。
1.拆分项目模块
- 按软件工程项目拆分文件
- 拆分 css
- 抽离代码块,使用全局命令
2.按需加载
- 路由按需加载
- echarts
- iview
- vant
3.提取公共代码
- 拆分公共代码
- externals 分离
- Dllplugin 分离
4.webppack 辅助插件推荐
一、拆分模块
按软件工程项目拆分文件
按照软件工程项目,建立公共组件、路由、静态文件等文件夹;在路由按模块拆分文件夹,把同一模块路由写进一个文件等。
如:
assets				//静态文件
components			//公共组件
plugins				//插件
router				//路由
......
......
拆分 css
可把 css 模块拆分为全局模块和局部模块,这样就无需把所有 css 文件一次性打包,导致文件过大阻塞 js 加载,而是按需加载,利于首屏加载。
在每个文件增加模块
<style scoped>......</style>
属性详情可看我之前的文章 Vue style 属性 scoped 原理详解
但是为每个页面增加各自的局部样式模块,维护未免过于困难,所以最好的做法,我认为还是应该把某个模块的样式内容集中在一个文件,然后这个模块里的每个页面都引入该样式文件。
例子:

全局样式模块,就是公共样式模块,在 main.js 引入
import style from 'ASSETS/css/style.css'
模块 1 的每个页面引入模块 1 的样式文件
<style scoped src="ASSETS/css/module1.css"></style>
模块 2 的每个页面引入模块 2 的样式文件
<style scoped src="ASSETS/css/module2.css"></style>
最好记得在 webpack 中设置相对路径,这里 ASSETS 就是直接指向样式文件夹
注意:局部模块一定要用 src 引用而不是 import ,因为无论在什么地方 import 样式文件,最终的结果都会变成全局模块。
抽离代码块,使用全局命令
使用全局变量、函数以及组件,而不是每个页面都 import 一次
全局变量路径 global_val.js:
const baseUrl = 'www.baiud.com';
const name = 'panda';

export default {
	baseUrl,
	name
}
全局函数路径 api/golbal.js:
export default{
    install(Vue, options) {
        Vue.prototype.func = function (){
	   		......
			......
        };
    }
}
main.js
import global_func 	from '.../api/global_func.js'
import global_val 	from '.../api/global_val.js'
import nav			from '......'

//注册全局变量
Vue.prototype.global = global_val;
//注册全局函数
Vue.use(global_func);
//注册全局组件
Vue.component('nav',nav)

new Vue({......})
Vue.use() 会自动执行内部的 install 方法,因为是添加在 vue 实例中,所以在整个 vue 项目中都可引用。
二、按需加载
1.路由按需加载
const A1 = () => import('VIEWS/a/a1')
const A2 = () => import('VIEWS/a/a2')

......
{
	name: 'a1',
	path: '/a1',
	component: A1
},
{
	name: 'a2',
	path: '/a2',
	component: A2
}
2.echarts
//引入基本模板
import  echarts	from 'echarts/lib/echarts'
//按实际使用情况引入组件
import  'echarts/lib/chart/line'
import  'echarts/lib/component/tooltip'
import  'echarts/lib/component/title'
import  'echarts/lib/component/legendScroll'
import  'echarts/lib/component/grid'
......
按实际使用情况需要什么组件就引入相应 echarts 组件
3.iview
在 npm 内引入插件 babel-plugin-import(按需引入插件)
在 .babelrc 文件中设置
"plugins": ["transform-runtime",
	["import", {
		"libraryName": "iview",
		"libraryDirectory": "src/components"
    }]
]
在 build/webpack.base.conf.js 中设置:
module: {
    rules: [
      	......
		......
		{
        	test: /iview.src.*?js$/,
        	loader: 'babel-loader'
       },
	]
}
这样 import 引入 iview 的时候就会自动在 src/components 中查找组件,按需引入。
如:import {Carousel,CarouselItem} from 'iview';
4.vant
与 iview 相似
"plugins": [
    ["import",
        {
            "libraryName": "vant",
            "libraryDirectory": "es",
            "style": true
        }
    ]
]

import { Button, List  } from 'vant';
三、提取公共代码
拆分公共代码
vue-cli 脚手架之前已经做了拆分公共的基础代码块 node_module
new webpack.optimize.CommonsChunkPlugin({
  name: 'vendor',
  minChunks: function (module) {
    // any required modules inside node_modules are extracted to vendor
    return (
      module.resource &&
      /\.js$/.test(module.resource) &&
      module.resource.indexOf(
        path.join(__dirname, '../node_modules')
      ) === 0
    )
  }
})
但是如果是按需加载的话,我在 webpack 3.x 里面发现该插件并不会遍历所有入口,导致个别按需加载页面的 node_module 并没有被提取,我们还需要把所有页面的公共代码再进行一次提取。
new webpack.optimize.CommonsChunkPlugin({
      name: 'app',
      async: 'commons',
      children: true,
      minChunks: x,
})
把从 app.js 入口里面的所有子页面再提取一次,力度 minChunks 由实际情况决定。
externals 分离
main.js:
import "babel-polyfill"
import Vue from 'vue'
import router from 'router'
webpack.base.conf:
externals: { //把第三方库的js文件从打包文件里去掉
    'vue' : 'Vue',
    'vue-router' : 'VueRouter',
    'babel-polyfill': 'window',
}
最后在 index.html 文件中引入插件(最好存到 cdn 网址内)。
注意:如果引入是 import xxx from ‘xxx/src/xx’ 这种有地址形式或者按需引入,则分离失效
Dllplugin 分离
把需要独立打包的第三方库提前打包,由于打包完一次,在无需改动的情况下,以后都不需要再次打包第三方插件。比起 externals ,不仅抽离文件,也加快了打包速度。
使用 Dllplugin 有三步:
(1)新建文件 webpack.dll.config:
const webpack = require('webpack')
const path = require('path')

// 需要独立打包的第三方库,自行添加
let vendors = [
    'vue/dist/vue.esm.js',
    'vue-router/dist/vue-router.esm.js',
    'axios',
    'babel-polyfill',
    'vuex'
]

module.exports = {
  entry:{
    vendor: vendors
  },

  output:{
    path: path.resolve(__dirname, '../static'),      // 路径
    filename: '[name].dll.js',   // 文件名
    library: '[name]_[hash]'
  },

  plugins:[
    new webpack.DllPlugin({
      context: __dirname,       // 可选参数,manifest 文件中请求的上下文(默认值为 webpack 的上下文)
      path: path.join(__dirname, '../static', '[name]-manifest.json'),   // manifest.json 文件的路径
      name: '[name]_[hash]'     // 暴露出来的Dll函数名,必须跟output.library保持一致
    }),
    new webpack.optimize.UglifyJsPlugin({
      compress: {
        warnings: false
      },
      sourceMap: true
    }),
  ]
}
执行此文件,会生成 vender.dll.js(打包的文件)和 vendor-manifest.json(文件引入映射)
二、新建命令
"scripts": {
    ......
    ......
    "dll": "webpack -p --progress --config build/webpack.dll.config.js"
  },
运行 npm run dll 执行上一步文件
三、确定已分离的第三方插件
打包时,根据 vendor-manifest.json 文件的映射关系确定已缓存的插件不被打包
在 webpack.base.conf.js 中:
plugins:[
	......
    new webpack.DllReferencePlugin({
      context: __dirname,    // manifest中请求的上下文(即依赖的相对路径)
      manifest: require('../static/vendor-manifest.json')
    })
 ]
最后记得在 html 文件中加上对 vendor.dll.js 的引用
四、webppack 辅助插件推荐
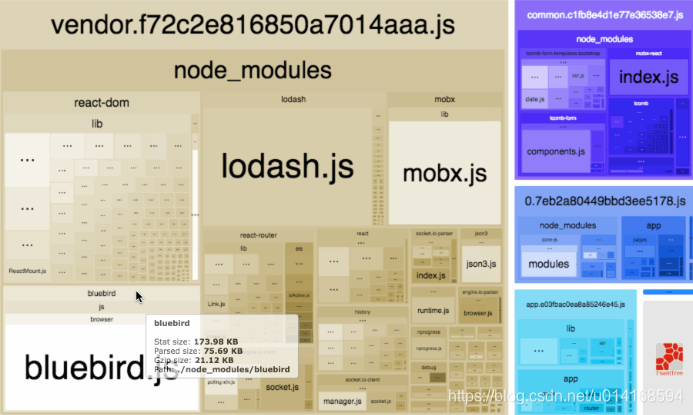
1.webpack-bundle-analyzer:用于分析打包后文件的工具
2.happypack:开启多进程处理打包(js是单线程的),用于优化webpack启动和打包的速度
module: {
    rules: [
      ......
      ......
      {
        test: /\.js$/,
        //loader: 'babel-loader',
        loader: ['happypack/loader?id=babel'],
        include: [resolve('src'), resolve('test')]
      },
      ]
}
......
......
new HappyPack({
  // id 标识符,要和 rules 中指定的 id 对应起来
  id: 'babel',
  // 需要使用的 loader,用法和 rules 中 Loader 配置一样
  // 可以直接是字符串,也可以是对象形式
  loaders: ['babel-loader?cacheDirectory']
})


 5180
5180

 被折叠的 条评论
为什么被折叠?
被折叠的 条评论
为什么被折叠?
 到【灌水乐园】发言


