


 本文介绍了如何在Vue项目中设置图标ICON,包括从Iconfont获取图标并引用,以及在`router/index.js`中配置。同时,详细说明了设置浏览器图标和文字的过程,涉及`vue.config.js`和`src/settings.js`文件的修改。此外,还讲解了如何设置侧边栏图标和文字,通过`src/settings.js`开启侧边栏,并在`Sidebar/Logo.vue`中调整。
vue-element-admin中设置icon+浏览器+侧边栏等图标、标题
一、设置图标ICON:
1、引入图标ICON:
https://www.iconfont.cn/
可以到https://www.iconfont.cn/上选择并生成自己的业务图标库,再进行使用。或者其它 svg 图标网站,下载 svg 并放到文件夹之中就可以了。

2、使用步骤
(1).src/router/index.js
直接在meta: { title: ‘主页’, icon: ‘dashboard’ }的icon后面输入icon的名字就行。

参考资料:
二、设置浏览器图标和文字:
如下面效果:

1、设置浏览器图标
图标:public文件夹下的index.html文件
<!DOCTYPE html>
<html>
  <head>
    <meta charset="utf-8">
    <meta http-equiv="X-UA-Compatible" content="IE=edge,chrome=1">
    <meta name="viewport" content="width=device-width, initial-scale=1, maximum-scale=1, user-scalable=no">
    <!--浏览器的图标-->
    <link rel="icon" href="<%= BASE_URL %>favicon.ico">
    <title><%= webpackConfig.name %></title>
  </head>
  <body>
    <noscript>
      <strong>We're sorry but <%= webpackConfig.name %> doesn't work properly without JavaScript enabled. Please enable it to continue.</strong>
    </noscript>
    <div id="app"></div>
    <!-- built files will be auto injected -->
  </body>
</html>

注意<link rel="icon" href="<%= BASE_URL %>favicon.ico">
中的favicon.ico就是存放在同目录下的ico类型的小图标,直接替换即可。
<title><%= webpackConfig.name %></title>:浏览器标题
2、设置浏览器显示的文字
(1)//vue.config.js
const name = defaultSettings.title || 'vue Admin Template' // page title
注意:name会优先取src/settings.js中的title,取不到会使用||后面的名称
(2)//src/settings.js
module.exports = {

  title: '****系统',//修改浏览器标题

  /**
   * @type {boolean} true | false
   * @description Whether fix the header
   */
  fixedHeader: false,//为true则固定头部,为false则滚动,

  /**
   * @type {boolean} true | false
   * @description Whether show the logo in sidebar
   */
  sidebarLogo: true //为true则显示侧边栏logo,为false则隐藏
}

注意:修改title中的文字即可。
但是vue-element-admin的浏览器标题默认是【侧边栏打开的模块名称+这个title】
(3)他是如何把侧边栏拼接到浏览器标题的:
//src/permission.js
router.beforeEach(async(to, from, next) => {
  // 开始进度条 start progress bar
  NProgress.start()

  // 设置浏览器头部的标题内容 set page title
  document.title = getPageTitle(to.meta.title)
  ...
}

注意:在路由守卫这里,可以看到每一次加载理由会执行 getPageTitle(to.meta.title)
//src/utils/get-page-title.js
import defaultSettings from '@/settings'

const title = defaultSettings.title || 'Vue Admin Template'

export default function getPageTitle(pageTitle) {
  if (pageTitle) {
    return `${pageTitle} - ${title}`
  }
  return `${title}`
}

注意:return `${pageTitle} - ${title}` 可以看到,
每一次route都会把路由的标题拼接上settings里面的title,去改变浏览器标题。
三、设置侧边栏图标和文字:
(1)//src/settings.js:开启侧边栏
module.exports = {

  title: '****系统',//修改浏览器标题

  /**
   * @type {boolean} true | false
   * @description Whether fix the header
   */
  fixedHeader: false,//为true则固定头部,为false则滚动,

  /**
   * @type {boolean} true | false
   * @description Whether show the logo in sidebar
   */
  sidebarLogo: true //为true则显示侧边栏logo,为false则隐藏
}

注意:vue-element-admin默认是关闭侧边栏图标的。
设置true开启:sidebarLogo: true
如下所示:
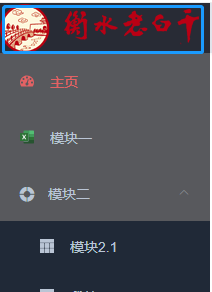
(2)//src/layout/components/Sidebar/Logo.vue:设置图片和文字
<template>
  <div class="sidebar-logo-container" :class="{'collapse':collapse}">
    <transition name="sidebarLogoFade">

      <router-link v-if="collapse" key="collapse" class="sidebar-logo-link" to="/">
        <img v-if="logo" :src="logo" class="sidebar-logo">  //侧边栏图标
        <h1 v-else class="sidebar-title">{{ title }} </h1>  //侧边栏标题
      </router-link>

      <router-link v-else key="expand" class="sidebar-logo-link" to="/">
        <img v-if="logo" :src="logo" class="sidebar-logo">
        <h1 class="sidebar-title">{{ title }} </h1>
      </router-link>

    </transition>
  </div>
</template>
<script>
export default {
  name: 'SidebarLogo',
  props: {
    collapse: {
      type: Boolean,
      required: true
    }
  },
  data() {
    return {
      title: '***系统',  //设置标题
      logo: require('../../../assets/logo/logo.png')   //设置图片
    }
  }
}
</script>

注意:图片设置成200*50的比较好,可以省去标题设置。


 1万+
1万+


 到【灌水乐园】发言


