


React Native使用Mobx
先说一下Mobx的接入
注意:如果是57版本以前的版本,那么你要按照下面的步骤配置mobx
- 安装mobx和mobx-react
- 安装一些babel插件,应为ES6不支持decorator修饰器特性所以要对这种特性进行适配。
我们用npm管理包工具安装mobx和mobx-react,命令如下(我是用的MacOS系统,Windows系统暂时还没用过):
npm i mobx mobx-react --save在安装babel插件,命令如下:
npm i babel-plugin-transform-decorators-legacy babel-preset-react-native-stage-0 --save-dev--save-dev表示添加的依赖会添加开发时依赖的插件,而save则是添加为运行的代码,而不只是开发时的插件。
然后用js编辑工具webStorm或者是VSCode打开项目文件夹,我们可以在根目录下找到.babelrc配置文件,添加配置,如下图(我用的是VSCode):
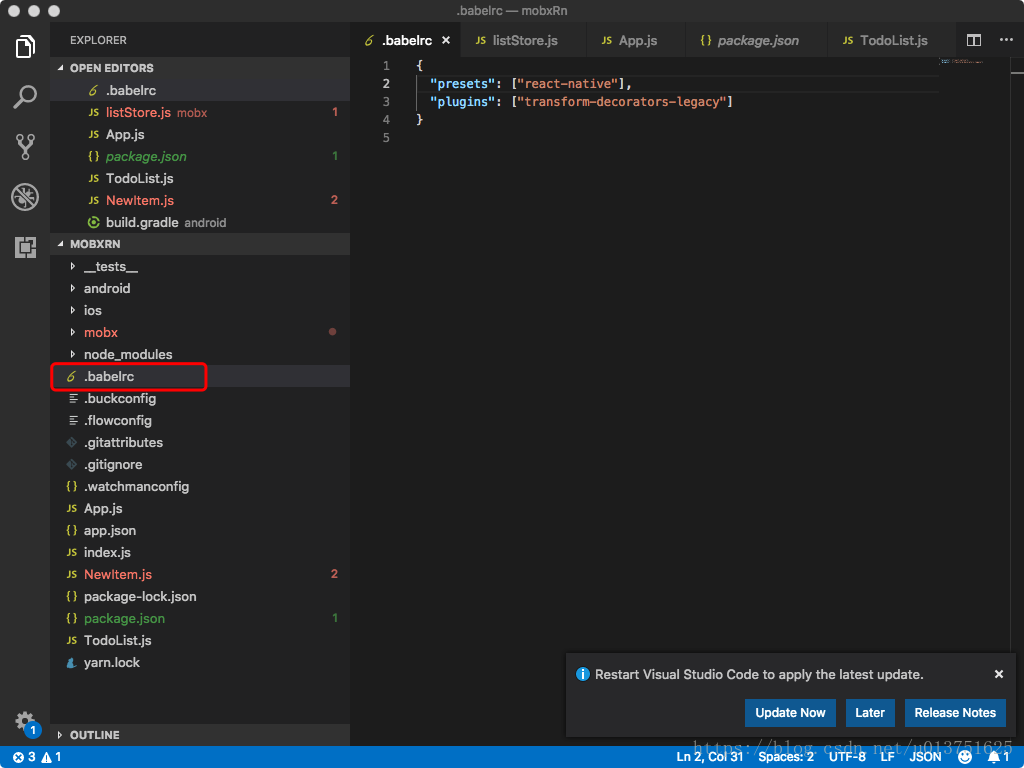
配置代码为:"plugins": ["transform-decorators-legacy"]。
这样我们就完成了57版本以前的配置了。
接下来我们介绍一下57版本rn的配置
由于57版本支持了decorator修饰器特性,所以方便了许多,我们只需要安装下面几个插件:
@babel/core、@babel/plugin-proposal-decorators、@babel/plugin-transform-runtime、@babel/runtime、mobx
、mobx-react。
同样的我们可以用npm i的方式添加,这里我是用的是yarn命令
$yarn add mobx
$yarn add mobx-react
$yarn add @babel/core
$yarn add @babel/plugin-proposal-decorators
$yarn add @babel/plugin-transform-runtime
$yarn add @babel/runtime
同时我们需要在.babelrc文件里面添加如下配置:
"plugins": [
    ["@babel/plugin-proposal-decorators", { "legacy": true }],
    ["@babel/transform-runtime", {
      "helpers": true,
      "regenerator": false
    }]
]可以参考这里
Mobx的状态管理实现
我们知道react native是通过改变状态来渲染刷新界面,mobx提供了观察器来观察状态是否更新。首先我们对某个状态使用observable对该状态添加观察属性。这样只要改变这个状态,就会触发状态变更的事件,mobx就能知道是否要对相应的observer进行重新渲染,这就是他的基本思想。
首先我们先添加状态观察属性observable代码如下:
import { observable } from "mobx";
import { observer } from "mobx-react";

class AppTime {
  @observable//观察属性类AppTime的属性timer。
  timer = 0;
  constructor(num){
    this.timer = num;
  }

  addTimer(){
    this.timer+=1;
    console.log('>>>>>>>>',this.timer);
  }

  minusTimer(){
    this.timer-=1;
    console.log('>>>>>>>>',this.timer);
  }
}
然后对使用到该属性的组件添加observer,把该组件作为触发对象。代码如下
@observer  //观察组件NumItem以便随时render该组件
class NumItem extends Component {
  render() {
    return (
      <View style={styles.NumItemStyle}>
          <Text style={styles.welcome} onPress={()=>{
            //      这里添加修改观察属性的方法,让被观察属性值增加
            this.props.appTime&&this.props.appTime.addTimer();
          }}>+</Text>
          <Text style={styles.instructions}>  {this.props.appTime&&this.props.appTime.timer}  </Text>
          <Text style={styles.welcome} onPress={()=>{
            //      这里添加修改观察属性的方法,让被观察属性值减少
            this.props.appTime&&this.props.appTime.minusTimer();
          }}>-</Text>

      </View>
    );
  }
}
这样我们的前期工作都做好了,然后我们要开始在界面中添加该组件,并修改该组件的观察属性:
export default class App extends Component {
  constructor(props){
    super(props);
    this.data = [];
    for(var i=0;i<3;i++){
      this.data.push(new AppTime(0));
    }
  }
  render() {
    return (
      <View style={styles.container}>
        {this.data.length>0&&this.data.map((item,index)=>{
           //实例化多个被观察的组件
           return <NumItem key={'item'+index} appTime={item}/>
        })}
      </View>
    );
  }
}
然后测试一下我们的效果吧:
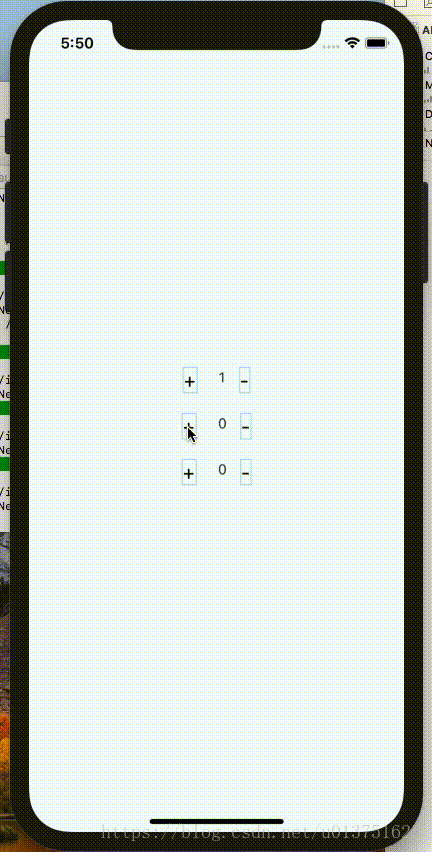
gif有点烂。。。。。。。。。。。。。。。。
这里附上GitHub上Demo地址


 864
864

 被折叠的 条评论
为什么被折叠?
被折叠的 条评论
为什么被折叠?
 到【灌水乐园】发言


