


 该文章展示了如何在JavaSpring框架中利用SseEmitter进行服务器发送事件(Server-SentEvents,SSE)的实现,包括创建连接、处理超时和错误、以及在客户端通过EventSource接收和处理来自服务器的数据流。示例代码中包含了创建连接、关闭连接的方法以及对应的JSP页面交互逻辑。
package com.webstockdemo;


import lombok.extern.slf4j.Slf4j;
import org.springframework.web.servlet.mvc.method.annotation.SseEmitter;
import java.util.Map;
import java.util.concurrent.ConcurrentHashMap;
import java.util.function.Consumer;

@Slf4j
public class SseEmitterUtil {


    /**
     * 使用 map 对象缓存userId
     */
    private static Map<String, SseEmitter> sseEmitterMap = new ConcurrentHashMap<>();

    /**
     *
     *  创建连接
     * @param userId 用户ID
     * @return SseEmitter
     */
    public static SseEmitter connect(String userId) {
        // 设置超时时间,0表示不过期。默认30秒,超过时间未完成会抛出异常:AsyncRequestTimeoutException
        SseEmitter sseEmitter = new SseEmitter(1L);
        // 注册回调
        sseEmitter.onCompletion(completionCallBack(userId));
        sseEmitter.onError(errorCallBack(userId));
        sseEmitter.onTimeout(timeoutCallBack(userId));

        // 缓存
        sseEmitterMap.put(userId, sseEmitter);


        log.info("创建新的sse连接,当前用户:{}", userId);
        return sseEmitter;
    }
    /**
     * 移除用户连接
     */
    public static void removeUser(String userId) {
        sseEmitterMap.remove(userId);
        log.info("移除用户:{}", userId);
    }
    private static Runnable completionCallBack(String userId) {
        return () -> {
            log.info("结束连接:{}", userId);
            removeUser(userId);
        };
    }
    private static Runnable timeoutCallBack(String userId) {
        return () -> {
            log.info("连接超时:{}", userId);
            removeUser(userId);
        };
    }
    private static Consumer<Throwable> errorCallBack(String userId) {
        return throwable -> {
            log.info("连接异常:{}", userId);
            removeUser(userId);
        };
    }
}
package com.webstockdemo;

import lombok.extern.slf4j.Slf4j;
import org.springframework.web.bind.annotation.*;
import org.springframework.web.servlet.mvc.method.annotation.SseEmitter;
import java.io.IOException;
import java.util.Random;

@RestController
@Slf4j
public class WebStockController {

    /**
     * 用于创建连接
     */
    @CrossOrigin
    @GetMapping("/sse/connect/{userId}")
    public SseEmitter connect(@PathVariable String userId) throws IOException {
        SseEmitter connect = SseEmitterUtil.connect(userId);
        connect.send(new Random().nextInt());
        return connect;
    }


    /**
     * 关闭连接
     */
    @CrossOrigin
    @GetMapping("/sse/close/{userid}")
    public String close(@PathVariable("userid") String userid) {
        SseEmitterUtil.removeUser(userid);
        return "连接关闭";
    }

}
jsp 页面代码
<!DOCTYPE html>
<html lang="en">
<head>
<meta charset="UTF-8">
<title>消息推送</title>
</head>
<body>
<div>
<button onclick="closeSse()">关闭连接</button>
<div id="message"></div>
</div>
</body>
<script>
let source = null;
const userId = new Date().getTime();
if (window.EventSource) {
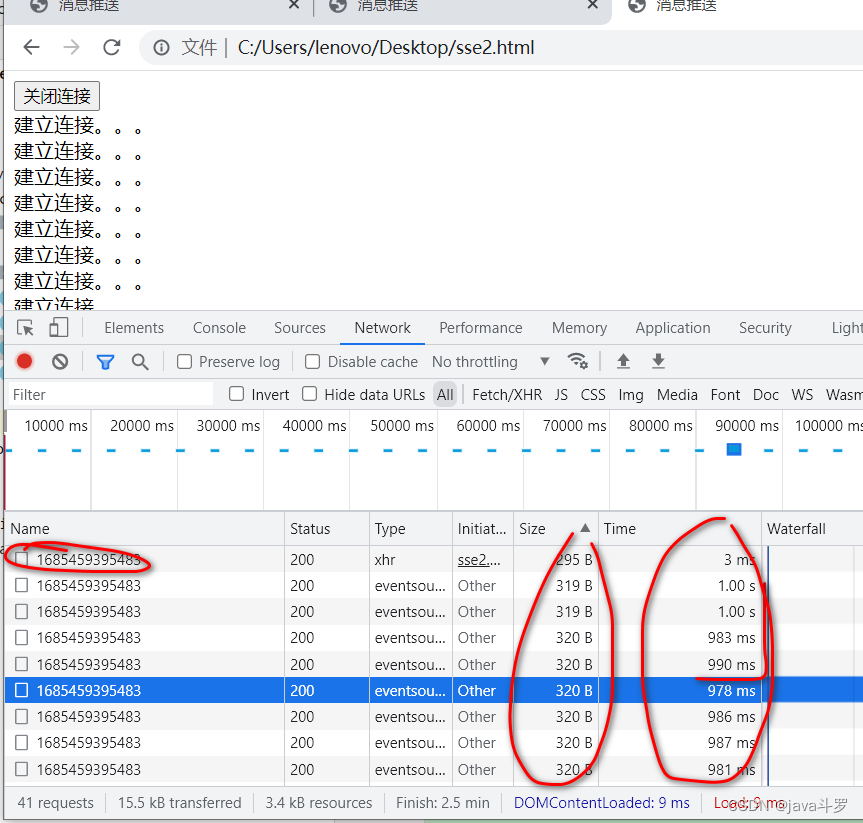
// 建立连接
source = new EventSource('http://localhost:8080/sse/connect/' + userId);
/**
* 触发open事件
*
*/
source.addEventListener('open', function (e) {
setMessageInnerHTML("建立连接。。。");
}, false);
/**
* 客户端收到服务器发来的数据
*
*/
// 监听消息并打印
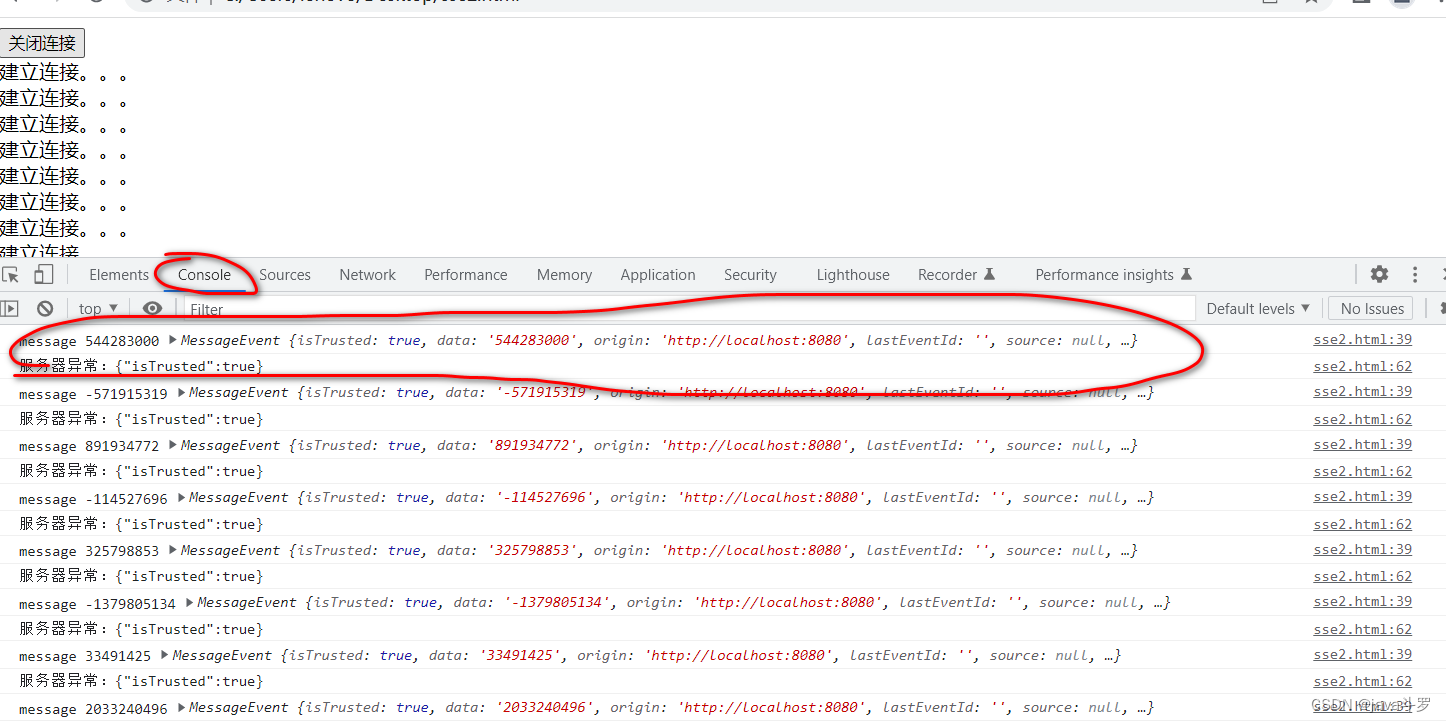
source.onmessage = function (evt) {
console.log("message", evt.data, evt)
}
source.addEventListener("me", function (evt) {
console.log("event", evt.data)
// 事件流如果不关闭会自动刷新请求,所以我们需要根据条件手动关闭
// if (evt.data == 3) {
// source.close();
// }
setMessageInnerHTML(evt.data);
})
/**
* 触发error事件
*
*
*/
source.addEventListener('error', function (e) {
if (e.readyState === EventSource.CLOSED) {
setMessageInnerHTML("连接关闭");
} else {
console.log("服务器异常:"+JSON.stringify(e));
}
}, false);
} else {
setMessageInnerHTML("你的浏览器不支持SSE");
}
// 监听窗口关闭事件,主动去关闭sse连接,如果服务端设置永不过期,浏览器关闭后手动清理服务端数据
window.onbeforeunload = function () {
// closeSse();
};
// 关闭Sse连接
function closeSse() {
source.close();
const httpRequest = new XMLHttpRequest();
httpRequest.open('GET', 'http://localhost:8080/sse/close/' + userId, true);
httpRequest.send();
console.log("close");
}
// 将消息显示在网页上
function setMessageInnerHTML(innerHTML) {
document.getElementById('message').innerHTML += innerHTML + '<br/>';
}
</script>
</html>
效果


 1625
1625

 被折叠的 条评论
为什么被折叠?
被折叠的 条评论
为什么被折叠?
 到【灌水乐园】发言


