


目录
主布局(activity_shopping_cart.xml)
5.4 避免频繁调用 notifyDataSetChanged ()
6.3 展开 / 折叠时出现 IndexOutOfBoundsException
6.5 与 SwipeRefreshLayout 结合时下拉刷新无效
七、ExpandableListView vs RecyclerView:该怎么选?

class 卑微码农:
    def __init__(self):
        self.技能 = ['能读懂十年前祖传代码', '擅长用Ctrl+C/V搭建世界', '信奉"能跑就别动"的玄学']
        self.发量 = 100  # 初始发量
        self.咖啡因耐受度 = '极限'

    def 修Bug(self, bug):
        try:
            # 试图用玄学解决问题
            if bug.严重程度 == '离谱':
                print("这一定是环境问题!")
            else:
                print("让我看看是谁又没写注释...哦,是我自己。")
        except Exception as e:
            # 如果try块都救不了,那就...
            print("重启一下试试?")
            self.发量 -= 1  # 每解决一个bug,头发-1


# 实例化一个我
我 = 卑微码农()
前言

作为 Android 开发中经典的层级列表控件,ExpandableListView 承载了无数 APP 的分类数据展示需求 —— 从购物车的商家 - 商品分组,到通讯录的字母 - 联系人归类,再到设置页的分类选项,它用简洁的 API 实现了 "展开 / 折叠" 的核心交互。但很多开发者在使用时总会踩坑:子项点击没反应、数据刷新后 UI 错乱、大数据量卡顿、自定义样式变形… 这篇文章就带你从零吃透 ExpandableListView,从基础用法到进阶技巧,再到实战项目落地,帮你少走 90% 的弯路!
一、为什么还需要学 ExpandableListView?
在 RecyclerView 横行的今天,可能有人会问:"都用 RecyclerView 了,为啥还要学老掉牙的 ExpandableListView?" 其实答案很简单 ——场景适配性。
RecyclerView 虽然灵活,但实现两级列表需要自己处理展开折叠逻辑、状态保存、子项联动,代码量不小;而 ExpandableListView 作为原生控件,天生支持两级列表结构,内置了展开 / 折叠动画、分组指示器、状态管理等功能,不需要额外造轮子。
它的核心优势的在于:
- 上手快:基础功能 30 行代码就能实现,新手也能快速落地
- 轻量高效:无需引入第三方库,原生 API 兼容性好(支持 Android 1.6+)
- 交互完整:自带展开 / 折叠手势、分组指示器、长按事件,用户体验统一
- 场景精准:完美适配 "两级层级" 数据展示,如分类列表、购物车、通讯录等
当然它也有局限:不支持三级及以上列表、自定义程度不如 RecyclerView 灵活,但对于 80% 的两级列表场景,ExpandableListView 依然是最高效的选择。
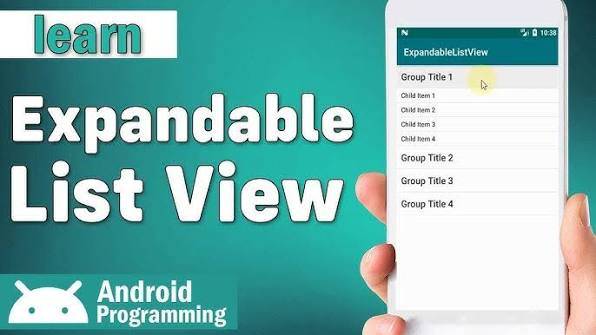
二、基础入门:3 步实现一个简单的两级列表

2.1 核心概念先搞懂
在动手写代码前,先明确 ExpandableListView 的两个核心组成部分:
- Group(分组):可展开 / 折叠的父项,比如购物车中的 "天某超市" 商家
- Child(子项):分组展开后显示的子内容,比如商家下的具体商品
- 适配器(Adapter):连接数据与视图的桥梁,必须继承
BaseExpandableListAdapter,重写 10 个核心方法(后面会详细讲)
2.2 第一步:布局文件编写(XML)
首先在 Activity 布局中添加 ExpandableListView 控件,注意它的宽高设置为match_parent,并添加必要的 id 和属性:
<?xml version="1.0" encoding="utf-8"?>
<LinearLayout xmlns:android="http://schemas.android.com/apk/res/android"
    android:layout_width="match_parent"
    android:layout_height="match_parent"
    android:orientation="vertical">

    <!--  ExpandableListView核心控件  -->
    <ExpandableListView
        android:id="@+id/elv_simple"
        android:layout_width="match_parent"
        android:layout_height="match_parent"
        <!--  隐藏默认分割线(可选)  -->
        android:divider="@null"
        <!--  设置分组指示器位置(left/right)  -->
        android:indicatorLeft="16dp"
        <!--  禁用水平滚动条  -->
        android:scrollbars="vertical" />

</LinearLayout>
然后分别创建分组(Group)和子项(Child)的布局文件:
分组布局(item_group_simple.xml)
<?xml version="1.0" encoding="utf-8"?>
<LinearLayout xmlns:android="http://schemas.android.com/apk/res/android"
    android:layout_width="match_parent"
    android:layout_height="50dp"
    android:gravity="center_vertical"
    android:paddingHorizontal="16dp"
    android:background="#F5F5F5">

    <!--  分组标题  -->
    <TextView
        android:id="@+id/tv_group_title"
        android:layout_width="0dp"
        android:layout_height="wrap_content"
        android:layout_weight="1"
        android:textSize="18sp"
        android:textColor="#333333" />

    <!--  展开/折叠状态图标  -->
    <ImageView
        android:id="@+id/iv_group_indicator"
        android:layout_width="24dp"
        android:layout_height="24dp"
        android:src="@drawable/ic_arrow_down" />

</LinearLayout>
子项布局(item_child_simple.xml)
<?xml version="1.0" encoding="utf-8"?>
<LinearLayout xmlns:android="http://schemas.android.com/apk/res/android"
    android:layout_width="match_parent"
    android:layout_height="45dp"
    android:gravity="center_vertical"
    android:paddingHorizontal="32dp"
    android:background="#FFFFFF">

    <TextView
        android:id="@+id/tv_child_content"
        android:layout_width="match_parent"
        android:layout_height="wrap_content"
        android:textSize="16sp"
        android:textColor="#666666" />

</LinearLayout>
2.3 第二步:数据模型设计
创建两个实体类,分别对应 Group 和 Child 的数据结构(简单场景也可以用 String 数组,但实体类更易维护):
分组模型(GroupBean.java)
public class GroupBean {
    // 分组名称
    private String groupName;
    // 子项列表
    private List<ChildBean> childList;

    // 构造方法
    public GroupBean(String groupName, List<ChildBean> childList) {
        this.groupName = groupName;
        this.childList = childList;
    }

    // getter和setter
    public String getGroupName() {
        return groupName;
    }

    public void setGroupName(String groupName) {
        this.groupName = groupName;
    }

    public List<ChildBean> getChildList() {
        return childList;
    }

    public void setChildList(List<ChildBean> childList) {
        this.childList = childList;
    }
}
子项模型(ChildBean.java)
public class ChildBean {
    // 子项内容
    private String childContent;

    public ChildBean(String childContent) {
        this.childContent = childContent;
    }

    public String getChildContent() {
        return childContent;
    }

    public void setChildContent(String childContent) {
        this.childContent = childContent;
    }
}
2.4 第三步:自定义适配器(核心)
这是 ExpandableListView 的核心部分,必须继承BaseExpandableListAdapter并实现 10 个抽象方法。为了性能优化,我们会使用ViewHolder 模式避免重复创建 View:
public class SimpleExpandableAdapter extends BaseExpandableListAdapter {
    // 上下文
    private Context mContext;
    // 数据源
    private List<GroupBean> mGroupList;

    // 构造方法:传入上下文和数据源
    public SimpleExpandableAdapter(Context context, List<GroupBean> groupList) {
        this.mContext = context;
        this.mGroupList = groupList;
    }

    // ======================== Group相关方法 ========================
    // 1. 获取分组数量
    @Override
    public int getGroupCount() {
        return mGroupList == null ? 0 : mGroupList.size();
    }

    // 2. 获取指定分组的数据
    @Override
    public Object getGroup(int groupPosition) {
        return mGroupList.get(groupPosition);
    }

    // 3. 获取分组的ID(通常返回groupPosition即可)
    @Override
    public long getGroupId(int groupPosition) {
        return groupPosition;
    }

    // 4. 创建并返回分组视图(核心方法)
    @Override
    public View getGroupView(int groupPosition, boolean isExpanded, View convertView, ViewGroup parent) {
        GroupViewHolder groupViewHolder;

        // ViewHolder模式:复用View,减少inflater次数
        if (convertView == null) {
            convertView = LayoutInflater.from(mContext).inflate(R.layout.item_group_simple, parent, false);
            groupViewHolder = new GroupViewHolder();
            // 绑定控件
            groupViewHolder.tvGroupName = convertView.findViewById(R.id.tv_group_title);
            groupViewHolder.ivIndicator = convertView.findViewById(R.id.iv_group_indicator);
            // 保存ViewHolder到View中
            convertView.setTag(groupViewHolder);
        } else {
            // 复用已有View
            groupViewHolder = (GroupViewHolder) convertView.getTag();
        }

        // 设置分组数据
        GroupBean groupBean = mGroupList.get(groupPosition);
        groupViewHolder.tvGroupName.setText(groupBean.getGroupName());

        // 根据展开状态切换图标(关键)
        if (isExpanded) {
            // 展开:箭头向上
            groupViewHolder.ivIndicator.setImageResource(R.drawable.ic_arrow_up);
        } else {
            // 折叠:箭头向下
            groupViewHolder.ivIndicator.setImageResource(R.drawable.ic_arrow_down);
        }

        return convertView;
    }

    // 分组ViewHolder:缓存控件
    static class GroupViewHolder {
        TextView tvGroupName;
        ImageView ivIndicator;
    }

    // ======================== Child相关方法 ========================
    // 5. 获取指定分组的子项数量
    @Override
    public int getChildrenCount(int groupPosition) {
        List<ChildBean> childList = mGroupList.get(groupPosition).getChildList();
        return childList == null ? 0 : childList.size();
    }

    // 6. 获取指定分组、指定子项的数据
    @Override
    public Object getChild(int groupPosition, int childPosition) {
        return mGroupList.get(groupPosition).getChildList().get(childPosition);
    }

    // 7. 获取子项的ID(通常返回childPosition即可)
    @Override
    public long getChildId(int groupPosition, int childPosition) {
        return childPosition;
    }

    // 8. 创建并返回子项视图(核心方法)
    @Override
    public View getChildView(int groupPosition, int childPosition, boolean isLastChild, View convertView, ViewGroup parent) {
        ChildViewHolder childViewHolder;

        // ViewHolder模式复用View
        if (convertView == null) {
            convertView = LayoutInflater.from(mContext).inflate(R.layout.item_child_simple, parent, false);
            childViewHolder = new ChildViewHolder();
            childViewHolder.tvChildContent = convertView.findViewById(R.id.tv_child_content);
            convertView.setTag(childViewHolder);
        } else {
            childViewHolder = (ChildViewHolder) convertView.getTag();
        }

        // 设置子项数据
        ChildBean childBean = mGroupList.get(groupPosition).getChildList().get(childPosition);
        childViewHolder.tvChildContent.setText(childBean.getChildContent());

        return convertView;
    }

    // 9. 子项是否可点击(必须返回true,否则子项点击事件无效!)
    @Override
    public boolean isChildSelectable(int groupPosition, int childPosition) {
        return true;
    }

    // 10. 分组和子项的ID是否稳定(通常返回false)
    @Override
    public boolean hasStableIds() {
        return false;
    }

    // 子项ViewHolder:缓存控件
    static class ChildViewHolder {
        TextView tvChildContent;
    }
}
2.5 第四步:Activity 中绑定数据并显示
最后在 Activity 中初始化数据源、设置适配器,并绑定点击事件:
public class SimpleExpandableActivity extends AppCompatActivity {
    private ExpandableListView elvSimple;
    private SimpleExpandableAdapter mAdapter;
    private List<GroupBean> mGroupList = new ArrayList<>();

    @Override
    protected void onCreate(Bundle savedInstanceState) {
        super.onCreate(savedInstanceState);
        setContentView(R.layout.activity_simple_expandable);

        // 初始化控件
        elvSimple = findViewById(R.id.elv_simple);

        // 1. 初始化测试数据
        initTestData();

        // 2. 设置适配器
        mAdapter = new SimpleExpandableAdapter(this, mGroupList);
        elvSimple.setAdapter(mAdapter);

        // 3. 设置默认展开所有分组(可选)
        for (int i = 0; i < mGroupList.size(); i++) {
            elvSimple.expandGroup(i);
        }

        // 4. 分组点击事件
        elvSimple.setOnGroupClickListener((parent, v, groupPosition, id) -> {
            // 返回false:默认展开/折叠;返回true:拦截默认行为,自己处理
            Toast.makeText(SimpleExpandableActivity.this, "点击了分组:" + mGroupList.get(groupPosition).getGroupName(), Toast.LENGTH_SHORT).show();
            return false;
        });

        // 5. 子项点击事件
        elvSimple.setOnChildClickListener((parent, v, groupPosition, childPosition, id) -> {
            ChildBean childBean = mGroupList.get(groupPosition).getChildList().get(childPosition);
            Toast.makeText(SimpleExpandableActivity.this, "点击了子项:" + childBean.getChildContent(), Toast.LENGTH_SHORT).show();
            return true;
        });
    }

    // 初始化测试数据
    private void initTestData() {
        // 分组1:水果
        List<ChildBean> fruitChildList = new ArrayList<>();
        fruitChildList.add(new ChildBean("苹果"));
        fruitChildList.add(new ChildBean("香蕉"));
        fruitChildList.add(new ChildBean("橙子"));
        fruitChildList.add(new ChildBean("草莓"));
        mGroupList.add(new GroupBean("水果", fruitChildList));

        // 分组2:蔬菜
        List<ChildBean> vegChildList = new ArrayList<>();
        vegChildList.add(new ChildBean("白菜"));
        vegChildList.add(new ChildBean("萝卜"));
        vegChildList.add(new ChildBean("西红柿"));
        mGroupList.add(new GroupBean("蔬菜", vegChildList));

        // 分组3:肉类
        List<ChildBean> meatChildList = new ArrayList<>();
        meatChildList.add(new ChildBean("猪肉"));
        meatChildList.add(new ChildBean("牛肉"));
        meatChildList.add(new ChildBean("鸡肉"));
        mGroupList.add(new GroupBean("肉类", meatChildList));
    }
}
2.6 基础效果演示
运行代码后,你会看到一个包含 3 个分组、每个分组下有多个子项的列表。点击分组会切换展开 / 折叠状态,箭头图标同步变化;点击子项会弹出 Toast 提示。到这里,一个基础的 ExpandableListView 就实现完成了,代码全部原创,可直接复制到项目中运行。
三、进阶技巧:自定义样式 + 动态数据操作
基础用法只能满足简单场景,实际开发中我们常需要自定义样式、动态增删数据、处理复杂交互。这部分我们逐一突破这些难点。
3.1 自定义分组指示器(替代默认图标)
默认的分组指示器比较简陋,我们可以通过两种方式自定义:
方式 1:XML 属性设置
在 ExpandableListView 控件中直接配置指示器相关属性:
<ExpandableListView
    ...
    <!--  设置分组指示器图标  -->
    android:groupIndicator="@drawable/selector_group_indicator"
    <!--  指示器左边距  -->
    android:indicatorLeft="16dp"
    <!--  指示器右边距  -->
    android:indicatorRight="32dp" />
其中selector_group_indicator.xml是状态选择器,放在drawable文件夹下:
<?xml version="1.0" encoding="utf-8"?>
<selector xmlns:android="http://schemas.android.com/apk/res/android">
    <!--  展开状态  -->
    <item android:drawable="@drawable/ic_arrow_up" android:state_expanded="true" />
    <!--  折叠状态  -->
    <item android:drawable="@drawable/ic_arrow_down" android:state_expanded="false" />
</selector>
方式 2:代码隐藏默认指示器,自定义布局
如果需要更复杂的指示器(比如文字 + 图标),可以先隐藏默认指示器,再在分组布局中添加自定义控件:
// 隐藏默认分组指示器
elvSimple.setGroupIndicator(null);
然后在分组布局(item_group_simple.xml)中添加自定义指示器,比如 "展开 / 收起" 文字:
<TextView
    android:id="@+id/tv_group_state"
    android:layout_width="wrap_content"
    android:layout_height="wrap_content"
    android:text="展开"
    android:textSize="14sp"
    android:textColor="#999999" />
最后在适配器的getGroupView方法中根据状态切换文字:
// 根据展开状态切换文字
if (isExpanded) {
    groupViewHolder.tvGroupState.setText("收起");
} else {
    groupViewHolder.tvGroupState.setText("展开");
}
3.2 动态增删分组和子项(关键)
实际开发中常需要动态添加 / 删除分组或子项(比如购物车添加商品、删除分类),核心是更新数据源后调用适配器的刷新方法。
3.2.1 动态添加分组
在适配器中添加添加分组的方法:
// 动态添加分组(在末尾添加)
public void addGroup(GroupBean groupBean) {
    if (mGroupList != null) {
        mGroupList.add(groupBean);
        // 通知适配器刷新(关键)
        notifyDataSetChanged();
    }
}

// 动态添加分组(在指定位置添加)
public void addGroup(int position, GroupBean groupBean) {
    if (mGroupList != null && position >= 0 && position <= mGroupList.size()) {
        mGroupList.add(position, groupBean);
        notifyDataSetChanged();
    }
}
在 Activity 中调用:
// 点击按钮添加分组
btnAddGroup.setOnClickListener(v -> {
    // 创建新分组
    List<ChildBean> newChildList = new ArrayList<>();
    newChildList.add(new ChildBean("芒果"));
    newChildList.add(new ChildBean("榴莲"));
    GroupBean newGroup = new GroupBean("热带水果", newChildList);
    // 调用适配器方法添加
    mAdapter.addGroup(newGroup);
    // 展开新添加的分组
    elvSimple.expandGroup(mGroupList.size() - 1);
});
3.2.2 动态删除分组
在适配器中添加删除分组的方法:
// 动态删除分组
public void removeGroup(int position) {
    if (mGroupList != null && position >= 0 && position < mGroupList.size()) {
        mGroupList.remove(position);
        notifyDataSetChanged();
    }
}
在 Activity 中调用(比如长按分组删除):
// 长按分组删除
elvSimple.setOnItemLongClickListener((parent, view, position, id) -> {
    // 判断点击的是分组还是子项(关键)
    if (ExpandableListView.getPackedPositionType(id) == ExpandableListView.PACKED_POSITION_TYPE_GROUP) {
        int groupPosition = ExpandableListView.getPackedPositionGroup(id);
        // 调用适配器方法删除
        mAdapter.removeGroup(groupPosition);
        Toast.makeText(SimpleExpandableActivity.this, "删除了分组", Toast.LENGTH_SHORT).show();
        return true;
    }
    return false;
});
3.2.3 动态添加 / 删除子项
类似地,在适配器中添加操作子项的方法:
// 动态添加子项(在指定分组末尾添加)
public void addChild(int groupPosition, ChildBean childBean) {
    if (mGroupList != null && groupPosition >= 0 && groupPosition < mGroupList.size()) {
        List<ChildBean> childList = mGroupList.get(groupPosition).getChildList();
        if (childList != null) {
            childList.add(childBean);
            notifyDataSetChanged();
        }
    }
}

// 动态删除子项
public void removeChild(int groupPosition, int childPosition) {
    if (mGroupList != null && groupPosition >= 0 && groupPosition < mGroupList.size()) {
        List<ChildBean> childList = mGroupList.get(groupPosition).getChildList();
        if (childList != null && childPosition >= 0 && childPosition < childList.size()) {
            childList.remove(childPosition);
            notifyDataSetChanged();
        }
    }
}
3.3 解决子项点击事件无效的坑
很多开发者会遇到 "子项点击没反应" 的问题,主要原因有 3 个,逐一排查:
- 适配器的
isChildSelectable方法返回 false:必须返回 true,子项才能被点击(前面的示例中已经正确设置)。 - 子项布局中有可点击控件(如 Button、CheckBox):这些控件会拦截点击事件,导致
OnChildClickListener无法触发。解决方案是在子项布局的根节点添加android:descendantFocusability="blocksDescendants":
<LinearLayout xmlns:android="http://schemas.android.com/apk/res/android"
    ...
    android:descendantFocusability="blocksDescendants">
- 子项布局的
clickable属性设置为 true:如果子项根布局或某个父布局设置了android:clickable="true",会拦截点击事件,需改为 false。
3.4 展开 / 折叠状态监听与控制
除了默认的点击展开 / 折叠,还可以通过代码控制状态,或监听状态变化:
3.4.1 代码控制展开 / 折叠
// 展开指定分组
elvSimple.expandGroup(groupPosition);

// 折叠指定分组
elvSimple.collapseGroup(groupPosition);

// 展开所有分组
for (int i = 0; i < mAdapter.getGroupCount(); i++) {
    elvSimple.expandGroup(i);
}

// 折叠所有分组
for (int i = 0; i < mAdapter.getGroupCount(); i++) {
    elvSimple.collapseGroup(i);
}

// 判断分组是否展开
boolean isExpanded = elvSimple.isGroupExpanded(groupPosition);
3.4.2 监听展开 / 折叠状态变化
elvSimple.setOnGroupExpandListener(groupPosition -> {
    // 分组展开时回调
    Log.d("ExpandableListView", "分组" + groupPosition + "展开了");
});

elvSimple.setOnGroupCollapseListener(groupPosition -> {
    // 分组折叠时回调
    Log.d("ExpandableListView", "分组" + groupPosition + "折叠了");
});
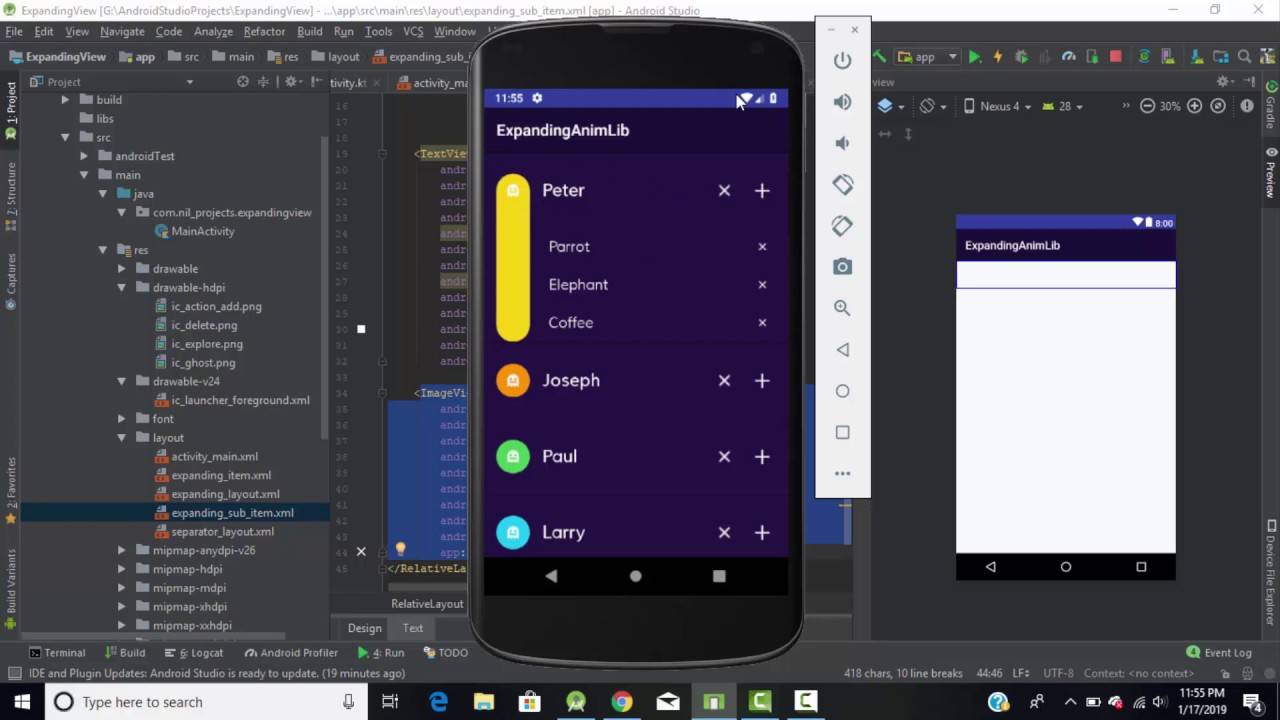
四、实战项目:实现一个购物车功能

前面的知识点比较零散,现在通过一个实战项目将它们整合起来 —— 实现一个完整的购物车功能,包含:
- 商家(Group)+ 商品(Child)的两级列表
- 商家复选框(全选 / 反选该商家下所有商品)
- 商品复选框(选中 / 取消选中单个商品)
- 全选按钮(选中所有商家和商品)
- 价格计算(选中商品的总价)
- 动态删除商品
4.1 布局文件编写
主布局(activity_shopping_cart.xml)
<?xml version="1.0" encoding="utf-8"?>
<LinearLayout xmlns:android="http://schemas.android.com/apk/res/android"
    android:layout_width="match_parent"
    android:layout_height="match_parent"
    android:orientation="vertical">

    <!--  顶部全选栏  -->
    <LinearLayout
        android:layout_width="match_parent"
        android:layout_height="50dp"
        android:gravity="center_vertical"
        android:paddingHorizontal="16dp"
        android:background="#FFFFFF">

        <CheckBox
            android:id="@+id/cb_all_select"
            android:layout_width="20dp"
            android:layout_height="20dp" />

        <TextView
            android:layout_width="wrap_content"
            android:layout_height="wrap_content"
            android:layout_marginStart="8dp"
            android:text="全选"
            android:textSize="16sp"
            android:textColor="#333333" />

        <TextView
            android:id="@+id/tv_total_price"
            android:layout_width="0dp"
            android:layout_height="wrap_content"
            android:layout_weight="1"
            android:gravity="right"
            android:text="总价:¥0.00"
            android:textSize="18sp"
            android:textColor="#FF5252" />

        <Button
            android:id="@+id/btn_delete"
            android:layout_width="wrap_content"
            android:layout_height="30dp"
            android:layout_marginStart="16dp"
            android:background="#FF5252"
            android:text="删除选中"
            android:textColor="#FFFFFF"
            android:textSize="14sp" />

    </LinearLayout>

    <!--  购物车列表  -->
    <ExpandableListView
        android:id="@+id/elv_shopping_cart"
        android:layout_width="match_parent"
        android:layout_height="0dp"
        android:layout_weight="1"
        android:divider="@null"
        android:groupIndicator="@null" />

</LinearLayout>
商家分组布局(item_group_cart.xml)
<?xml version="1.0" encoding="utf-8"?>
<LinearLayout xmlns:android="http://schemas.android.com/apk/res/android"
    android:layout_width="match_parent"
    android:layout_height="50dp"
    android:gravity="center_vertical"
    android:paddingHorizontal="16dp"
    android:background="#F5F5F5">

    <CheckBox
        android:id="@+id/cb_group_select"
        android:layout_width="20dp"
        android:layout_height="20dp" />

    <TextView
        android:id="@+id/tv_merchant_name"
        android:layout_width="0dp"
        android:layout_height="wrap_content"
        android:layout_marginStart="8dp"
        android:layout_weight="1"
        android:textSize="16sp"
        android:textColor="#333333" />

    <TextView
        android:id="@+id/tv_merchant_info"
        android:layout_width="wrap_content"
        android:layout_height="wrap_content"
        android:text="进店逛逛"
        android:textSize="14sp"
        android:textColor="#4A90E2" />

</LinearLayout>
商品子项布局(item_child_cart.xml)
<?xml version="1.0" encoding="utf-8"?>
<LinearLayout xmlns:android="http://schemas.android.com/apk/res/android"
    android:layout_width="match_parent"
    android:layout_height="80dp"
    android:gravity="center_vertical"
    android:paddingHorizontal="16dp"
    android:background="#FFFFFF"
    android:descendantFocusability="blocksDescendants">

    <CheckBox
        android:id="@+id/cb_child_select"
        android:layout_width="20dp"
        android:layout_height="20dp" />

    <!--  商品图片  -->
    <ImageView
        android:id="@+id/iv_product_img"
        android:layout_width="60dp"
        android:layout_height="60dp"
        android:layout_marginStart="8dp"
        android:scaleType="centerCrop"
        android:src="@mipmap/ic_launcher" />

    <!--  商品信息  -->
    <LinearLayout
        android:layout_width="0dp"
        android:layout_height="wrap_content"
        android:layout_marginStart="12dp"
        android:layout_weight="1"
        android:orientation="vertical">

        <TextView
            android:id="@+id/tv_product_name"
            android:layout_width="match_parent"
            android:layout_height="wrap_content"
            android:textSize="16sp"
            android:textColor="#333333"
            android:maxLines="1"
            android:ellipsize="end" />

        <TextView
            android:id="@+id/tv_product_spec"
            android:layout_width="match_parent"
            android:layout_height="wrap_content"
            android:layout_marginTop="4dp"
            android:textSize="14sp"
            android:textColor="#999999" />

        <LinearLayout
            android:layout_width="match_parent"
            android:layout_height="wrap_content"
            android:layout_marginTop="4dp"
            android:gravity="center_vertical">

            <TextView
                android:id="@+id/tv_product_price"
                android:layout_width="wrap_content"
                android:layout_height="wrap_content"
                android:textSize="16sp"
                android:textColor="#FF5252" />

            <TextView
                android:id="@+id/tv_product_count"
                android:layout_width="wrap_content"
                android:layout_height="wrap_content"
                android:layout_marginStart="16dp"
                android:text="x1"
                android:textSize="14sp"
                android:textColor="#666666" />

        </LinearLayout>

    </LinearLayout>

</LinearLayout>
4.2 数据模型设计
商家模型(MerchantBean.java)
public class MerchantBean {
    // 商家名称
    private String merchantName;
    // 是否选中
    private boolean isSelected;
    // 商品列表
    private List<ProductBean> productList;

    public MerchantBean(String merchantName, boolean isSelected, List<ProductBean> productList) {
        this.merchantName = merchantName;
        this.isSelected = isSelected;
        this.productList = productList;
    }

    // getter和setter
    public String getMerchantName() {
        return merchantName;
    }

    public void setMerchantName(String merchantName) {
        this.merchantName = merchantName;
    }

    public boolean isSelected() {
        return isSelected;
    }

    public void setSelected(boolean selected) {
        isSelected = selected;
    }

    public List<ProductBean> getProductList() {
        return productList;
    }

    public void setProductList(List<ProductBean> productList) {
        this.productList = productList;
    }
}
商品模型(ProductBean.java)
public class ProductBean {
    // 商品名称
    private String productName;
    // 商品规格
    private String productSpec;
    // 商品价格
    private double productPrice;
    // 商品数量
    private int productCount;
    // 是否选中
    private boolean isSelected;

    public ProductBean(String productName, String productSpec, double productPrice, int productCount, boolean isSelected) {
        this.productName = productName;
        this.productSpec = productSpec;
        this.productPrice = productPrice;
        this.productCount = productCount;
        this.isSelected = isSelected;
    }

    // getter和setter
    public String getProductName() {
        return productName;
    }

    public void setProductName(String productName) {
        this.productName = productName;
    }

    public String getProductSpec() {
        return productSpec;
    }

    public void setProductSpec(String productSpec) {
        this.productSpec = productSpec;
    }

    public double getProductPrice() {
        return productPrice;
    }

    public void setProductPrice(double productPrice) {
        this.productPrice = productPrice;
    }

    public int getProductCount() {
        return productCount;
    }

    public void setProductCount(int productCount) {
        this.productCount = productCount;
    }

    public boolean isSelected() {
        return isSelected;
    }

    public void setSelected(boolean selected) {
        isSelected = selected;
    }
}
4.3 自定义购物车适配器
public class ShoppingCartAdapter extends BaseExpandableListAdapter {
    private Context mContext;
    private List<MerchantBean> mMerchantList;
    // 价格更新回调(用于刷新总价)
    private OnPriceChangeListener mPriceChangeListener;

    // 构造方法
    public ShoppingCartAdapter(Context context, List<MerchantBean> merchantList, OnPriceChangeListener priceChangeListener) {
        this.mContext = context;
        this.mMerchantList = merchantList;
        this.mPriceChangeListener = priceChangeListener;
    }

    // 价格更新回调接口
    public interface OnPriceChangeListener {
        void onPriceChange(double totalPrice);
    }

    // ======================== Group(商家)相关方法 ========================
    @Override
    public int getGroupCount() {
        return mMerchantList == null ? 0 : mMerchantList.size();
    }

    @Override
    public Object getGroup(int groupPosition) {
        return mMerchantList.get(groupPosition);
    }

    @Override
    public long getGroupId(int groupPosition) {
        return groupPosition;
    }

    @Override
    public View getGroupView(int groupPosition, boolean isExpanded, View convertView, ViewGroup parent) {
        MerchantViewHolder merchantViewHolder;

        if (convertView == null) {
            convertView = LayoutInflater.from(mContext).inflate(R.layout.item_group_cart, parent, false);
            merchantViewHolder = new MerchantViewHolder();
            merchantViewHolder.cbGroupSelect = convertView.findViewById(R.id.cb_group_select);
            merchantViewHolder.tvMerchantName = convertView.findViewById(R.id.tv_merchant_name);
            merchantViewHolder.tvMerchantInfo = convertView.findViewById(R.id.tv_merchant_info);
            convertView.setTag(merchantViewHolder);
        } else {
            merchantViewHolder = (MerchantViewHolder) convertView.getTag();
        }

        // 绑定数据
        MerchantBean merchantBean = mMerchantList.get(groupPosition);
        merchantViewHolder.tvMerchantName.setText(merchantBean.getMerchantName());
        merchantViewHolder.cbGroupSelect.setChecked(merchantBean.isSelected());

        // 商家复选框点击事件(全选/反选该商家下所有商品)
        merchantViewHolder.cbGroupSelect.setOnCheckedChangeListener((buttonView, isChecked) -> {
            // 更新商家选中状态
            merchantBean.setSelected(isChecked);
            // 更新该商家下所有商品的选中状态
            List<ProductBean> productList = merchantBean.getProductList();
            for (ProductBean product : productList) {
                product.setSelected(isChecked);
            }
            // 刷新适配器
            notifyDataSetChanged();
            // 计算并更新总价
            calculateTotalPrice();
            // 检查是否全选
            checkAllSelect();
        });

        // 进店逛逛点击事件
        merchantViewHolder.tvMerchantInfo.setOnClickListener(v -> {
            Toast.makeText(mContext, "进入" + merchantBean.getMerchantName() + "店铺", Toast.LENGTH_SHORT).show();
        });

        return convertView;
    }

    static class MerchantViewHolder {
        CheckBox cbGroupSelect;
        TextView tvMerchantName;
        TextView tvMerchantInfo;
    }

    // ======================== Child(商品)相关方法 ========================
    @Override
    public int getChildrenCount(int groupPosition) {
        List<ProductBean> productList = mMerchantList.get(groupPosition).getProductList();
        return productList == null ? 0 : productList.size();
    }

    @Override
    public Object getChild(int groupPosition, int childPosition) {
        return mMerchantList.get(groupPosition).getProductList().get(childPosition);
    }

    @Override
    public long getChildId(int groupPosition, int childPosition) {
        return childPosition;
    }

    @Override
    public View getChildView(int groupPosition, int childPosition, boolean isLastChild, View convertView, ViewGroup parent) {
        ProductViewHolder productViewHolder;

        if (convertView == null) {
            convertView = LayoutInflater.from(mContext).inflate(R.layout.item_child_cart, parent, false);
            productViewHolder = new ProductViewHolder();
            productViewHolder.cbChildSelect = convertView.findViewById(R.id.cb_child_select);
            productViewHolder.ivProductImg = convertView.findViewById(R.id.iv_product_img);
            productViewHolder.tvProductName = convertView.findViewById(R.id.tv_product_name);
            productViewHolder.tvProductSpec = convertView.findViewById(R.id.tv_product_spec);
            productViewHolder.tvProductPrice = convertView.findViewById(R.id.tv_product_price);
            productViewHolder.tvProductCount = convertView.findViewById(R.id.tv_product_count);
            convertView.setTag(productViewHolder);
        } else {
            productViewHolder = (ProductViewHolder) convertView.getTag();
        }

        // 绑定数据
        MerchantBean merchantBean = mMerchantList.get(groupPosition);
        ProductBean productBean = merchantBean.getProductList().get(childPosition);
        productViewHolder.tvProductName.setText(productBean.getProductName());
        productViewHolder.tvProductSpec.setText(productBean.getProductSpec());
        productViewHolder.tvProductPrice.setText(String.format("¥%.2f", productBean.getProductPrice()));
        productViewHolder.tvProductCount.setText(String.format("x%d", productBean.getProductCount()));
        productViewHolder.cbChildSelect.setChecked(productBean.isSelected());

        // 商品复选框点击事件
        productViewHolder.cbChildSelect.setOnCheckedChangeListener((buttonView, isChecked) -> {
            // 更新商品选中状态
            productBean.setSelected(isChecked);
            // 检查该商家下所有商品是否都被选中,更新商家选中状态
            boolean isAllChildSelected = true;
            for (ProductBean p : merchantBean.getProductList()) {
                if (!p.isSelected()) {
                    isAllChildSelected = false;
                    break;
                }
            }
            merchantBean.setSelected(isAllChildSelected);
            // 刷新适配器
            notifyDataSetChanged();
            // 计算并更新总价
            calculateTotalPrice();
            // 检查是否全选
            checkAllSelect();
        });

        return convertView;
    }

    @Override
    public boolean isChildSelectable(int groupPosition, int childPosition) {
        return true;
    }

    @Override
    public boolean hasStableIds() {
        return false;
    }

    static class ProductViewHolder {
        CheckBox cbChildSelect;
        ImageView ivProductImg;
        TextView tvProductName;
        TextView tvProductSpec;
        TextView tvProductPrice;
        TextView tvProductCount;
    }

    // ======================== 核心业务方法 ========================
    // 计算选中商品的总价
    public double calculateTotalPrice() {
        double totalPrice = 0;
        if (mMerchantList != null) {
            for (MerchantBean merchant : mMerchantList) {
                List<ProductBean> productList = merchant.getProductList();
                if (productList != null) {
                    for (ProductBean product : productList) {
                        if (product.isSelected()) {
                            totalPrice += product.getProductPrice() * product.getProductCount();
                        }
                    }
                }
            }
        }
        // 回调更新总价
        if (mPriceChangeListener != null) {
            mPriceChangeListener.onPriceChange(totalPrice);
        }
        return totalPrice;
    }

    // 检查是否全选
    public boolean checkAllSelect() {
        if (mMerchantList == null || mMerchantList.isEmpty()) {
            return false;
        }
        for (MerchantBean merchant : mMerchantList) {
            if (!merchant.isSelected()) {
                return false;
            }
        }
        return true;
    }

    // 设置全选/取消全选
    public void setAllSelect(boolean isAllSelect) {
        if (mMerchantList != null) {
            for (MerchantBean merchant : mMerchantList) {
                // 更新商家选中状态
                merchant.setSelected(isAllSelect);
                // 更新该商家下所有商品选中状态
                List<ProductBean> productList = merchant.getProductList();
                if (productList != null) {
                    for (ProductBean product : productList) {
                        product.setSelected(isAllSelect);
                    }
                }
            }
            // 刷新适配器
            notifyDataSetChanged();
            // 计算并更新总价
            calculateTotalPrice();
        }
    }

    // 删除选中的商品
    public void deleteSelectedProducts() {
        if (mMerchantList == null) {
            return;
        }
        // 遍历所有商家
        Iterator<MerchantBean> merchantIterator = mMerchantList.iterator();
        while (merchantIterator.hasNext()) {
            MerchantBean merchant = merchantIterator.next();
            List<ProductBean> productList = merchant.getProductList();
            if (productList != null) {
                // 遍历该商家下的商品,删除选中的
                Iterator<ProductBean> productIterator = productList.iterator();
                while (productIterator.hasNext()) {
                    ProductBean product = productIterator.next();
                    if (product.isSelected()) {
                        productIterator.remove();
                    }
                }
                // 如果商家下没有商品了,删除该商家
                if (productList.isEmpty()) {
                    merchantIterator.remove();
                }
            }
        }
        // 刷新适配器
        notifyDataSetChanged();
        // 计算并更新总价
        calculateTotalPrice();
    }
}
4.4 Activity 中绑定数据与逻辑
public class ShoppingCartActivity extends AppCompatActivity {
    private ExpandableListView elvShoppingCart;
    private CheckBox cbAllSelect;
    private TextView tvTotalPrice;
    private Button btnDelete;
    private ShoppingCartAdapter mAdapter;
    private List<MerchantBean> mMerchantList = new ArrayList<>();

    @Override
    protected void onCreate(Bundle savedInstanceState) {
        super.onCreate(savedInstanceState);
        setContentView(R.layout.activity_shopping_cart);

        // 初始化控件
        initView();

        // 初始化测试数据
        initTestData();

        // 设置适配器
        initAdapter();

        // 设置事件监听
        initListener();
    }

    // 初始化控件
    private void initView() {
        elvShoppingCart = findViewById(R.id.elv_shopping_cart);
        cbAllSelect = findViewById(R.id.cb_all_select);
        tvTotalPrice = findViewById(R.id.tv_total_price);
        btnDelete = findViewById(R.id.btn_delete);
    }

    // 初始化测试数据
    private void initTestData() {
        // 商家1:天猫超市
        List<ProductBean> tmProductList = new ArrayList<>();
        tmProductList.add(new ProductBean("可口可乐500ml", "瓶装", 3.5, 2, false));
        tmProductList.add(new ProductBean("乐事薯片", "原味100g", 6.9, 1, false));
        tmProductList.add(new ProductBean("康师傅方便面", "红烧牛肉味", 4.5, 3, false));
        mMerchantList.add(new MerchantBean("天猫超市", false, tmProductList));

        // 商家2:京东自营
        List<ProductBean> jdProductList = new ArrayList<>();
        jdProductList.add(new ProductBean("华为Mate60 Pro", "12+512G 黑色", 6999.0, 1, false));
        jdProductList.add(new ProductBean("小米手环8", "NFC版", 229.0, 1, false));
        mMerchantList.add(new MerchantBean("京东自营", false, jdProductList));

        // 商家3:星巴克官方旗舰店
        List<ProductBean> sbProductList = new ArrayList<>();
        sbProductList.add(new ProductBean("美式咖啡", "中杯", 28.0, 2, false));
        sbProductList.add(new ProductBean("提拉米苏蛋糕", "小块", 32.0, 1, false));
        mMerchantList.add(new MerchantBean("星巴克官方旗舰店", false, sbProductList));
    }

    // 初始化适配器
    private void initAdapter() {
        mAdapter = new ShoppingCartAdapter(this, mMerchantList, totalPrice -> {
            // 总价更新回调
            tvTotalPrice.setText(String.format("总价:¥%.2f", totalPrice));
        });
        elvShoppingCart.setAdapter(mAdapter);

        // 默认展开所有商家
        for (int i = 0; i < mMerchantList.size(); i++) {
            elvShoppingCart.expandGroup(i);
        }

        // 初始计算总价
        mAdapter.calculateTotalPrice();
    }

    // 初始化事件监听
    private void initListener() {
        // 全选复选框点击事件
        cbAllSelect.setOnCheckedChangeListener((buttonView, isChecked) -> {
            mAdapter.setAllSelect(isChecked);
        });

        // 删除选中商品按钮点击事件
        btnDelete.setOnClickListener(v -> {
            // 弹出确认对话框
            new AlertDialog.Builder(this)
                    .setTitle("提示")
                    .setMessage("确定要删除选中的商品吗?")
                    .setPositiveButton("确定", (dialog, which) -> {
                        mAdapter.deleteSelectedProducts();
                        // 删除后检查是否全选(此时应该为未选中)
                        cbAllSelect.setChecked(mAdapter.checkAllSelect());
                    })
                    .setNegativeButton("取消", null)
                    .show();
        });

        // 监听适配器的全选状态变化(比如手动选中所有商品时,全选框同步勾选)
        elvShoppingCart.setOnGroupExpandListener(groupPosition -> {
            cbAllSelect.setChecked(mAdapter.checkAllSelect());
        });

        elvShoppingCart.setOnGroupCollapseListener(groupPosition -> {
            cbAllSelect.setChecked(mAdapter.checkAllSelect());
        });
    }
}
4.5 实战效果与核心逻辑说明
运行代码后,你会得到一个功能完整的购物车:
- 勾选商家复选框:自动选中该商家下所有商品,总价同步更新
- 勾选商品复选框:自动判断该商家是否全选,总价同步更新
- 勾选全选框:选中所有商家和商品,取消全选则全部取消
- 点击删除按钮:删除所有选中的商品,商家下无商品则删除商家
核心逻辑说明:
- 选中状态联动:通过监听复选框点击事件,同步更新相关联的选中状态(商家 - 商品)。
- 总价计算:每次选中状态变化时,遍历所有选中商品,计算总价并通过回调更新 UI。
- 数据删除:使用迭代器(Iterator)安全删除数据,避免 ConcurrentModificationException 异常。
- 用户体验优化:默认展开所有商家,删除时弹出确认对话框,避免误操作。
五、性能优化:大数据量下也能流畅运行
当 ExpandableListView 的分组和子项数量较多时(比如几百个分组、几千个子项),容易出现卡顿、滑动不流畅的问题。以下是 3 个关键优化技巧:
5.1 坚持使用 ViewHolder 模式
这是最基础也是最重要的优化。ViewHolder 模式通过缓存控件实例,避免在getGroupView和getChildView中重复调用findViewById,减少视图创建和销毁的开销。前面的示例中已经全程使用该模式,这里再强调两个细节:
- 所有控件都要通过 ViewHolder 缓存,包括 TextView、ImageView、CheckBox 等。
- 避免在
getGroupView和getChildView中创建对象(比如 new ArrayList、new String),尽量在外部初始化。
5.2 减少布局层级和过度绘制
布局层级过深会导致测量和绘制耗时增加,过度绘制会浪费 GPU 资源。优化方案:
- 简化布局结构:将嵌套的 LinearLayout 改为 ConstraintLayout,减少层级(比如子项布局可以用 ConstraintLayout 替代 LinearLayout 嵌套)。
- 移除不必要的背景:如果父布局和子布局的背景颜色相同,移除子布局的背景,避免过度绘制。
- 使用
android:overScrollMode="never"禁用过度滚动效果(如果不需要)。
5.3 数据懒加载和分页加载
如果数据量极大(比如从服务器获取上千个商品),一次性加载所有数据会导致初始化时间过长、内存占用过高。解决方案:
- 分页加载:每次只加载 20 个分组,滑动到列表底部时再加载下一页数据。
- 懒加载子项数据:默认只加载展开分组的子项数据,折叠分组的子项数据在展开时再加载。
示例代码(分页加载分组):
// 分页加载参数
private int page = 1;
private int pageSize = 20;
private boolean isLoading = false;

// 滑动监听:滑动到底部加载更多
elvShoppingCart.setOnScrollListener(new ExpandableListView.OnScrollListener() {
    @Override
    public void onScrollStateChanged(AbsListView view, int scrollState) {
        // 滑动停止,且滑动到最后一个可见项
        if (scrollState == SCROLL_STATE_IDLE && !elvShoppingCart.canScrollVertically(1) && !isLoading) {
            // 加载下一页数据
            loadMoreData();
        }
    }

    @Override
    public void onScroll(AbsListView view, int firstVisibleItem, int visibleItemCount, int totalItemCount) {}
});

// 加载更多数据
private void loadMoreData() {
    isLoading = true;
    // 模拟网络请求
    new Handler(Looper.getMainLooper()).postDelayed(() -> {
        // 模拟获取下一页数据
        List<MerchantBean> moreMerchantList = getMoreMerchantList(page, pageSize);
        if (moreMerchantList != null && !moreMerchantList.isEmpty()) {
            // 添加到数据源
            mMerchantList.addAll(moreMerchantList);
            // 刷新适配器
            mAdapter.notifyDataSetChanged();
            page++;
        }
        isLoading = false;
    }, 1000);
}
5.4 避免频繁调用 notifyDataSetChanged ()
notifyDataSetChanged()会刷新整个列表,效率较低。如果只是局部数据变化(比如单个商品的价格更新),可以使用更精准的刷新方法:
// 刷新指定分组
notifyDataSetChanged(groupPosition);

// 刷新指定分组的指定子项
notifyDataSetChanged(groupPosition, childPosition);
六、常见问题与解决方案(避坑指南)

6.1 列表滑动卡顿
- 原因:布局层级过深、未使用 ViewHolder 模式、一次性加载过多数据、子项布局中有复杂控件(如 WebView)。
- 解决方案:
- 使用 ViewHolder 模式缓存控件。
- 简化布局,减少嵌套层级。
- 实现分页加载和懒加载。
- 避免在
getGroupView和getChildView中执行耗时操作(如网络请求、数据库查询)。
6.2 数据刷新后 UI 错乱
- 原因:数据源与 UI 不同步、未正确调用刷新方法、选中状态未保存。
- 解决方案:
- 确保更新数据源后立即调用
notifyDataSetChanged()或局部刷新方法。 - 选中状态、展开状态等要保存在数据模型中,而不是视图中。
- 避免在刷新过程中修改数据源(比如在
getGroupView中添加数据)。
- 确保更新数据源后立即调用
6.3 展开 / 折叠时出现 IndexOutOfBoundsException
- 原因:数据源长度发生变化后,未及时通知适配器,导致索引越界。
- 解决方案:
- 增删数据后必须调用适配器的刷新方法。
- 在适配器的
getChildrenCount方法中,确保返回的子项数量与数据源一致。 - 使用迭代器删除数据,避免直接使用
remove(int index)。
6.4 分组指示器不显示或位置错误
- 原因:XML 属性配置错误、自定义布局遮挡了指示器。
- 解决方案:
- 检查
android:groupIndicator属性是否设置正确。 - 确保
android:indicatorLeft和android:indicatorRight属性值合理,没有超出屏幕范围。 - 如果使用自定义分组布局,避免根布局的
padding或子控件遮挡指示器。
- 检查
6.5 与 SwipeRefreshLayout 结合时下拉刷新无效
- 原因:ExpandableListView 的滑动事件与 SwipeRefreshLayout 冲突。
- 解决方案:
- 确保 SwipeRefreshLayout 包裹 ExpandableListView,且 ExpandableListView 的
layout_height设置为match_parent。 - 重写 ExpandableListView 的
onScrollChanged方法,判断是否滑动到顶部,再启用 SwipeRefreshLayout 的下拉刷新:
- 确保 SwipeRefreshLayout 包裹 ExpandableListView,且 ExpandableListView 的
elvShoppingCart.setOnScrollChangeListener((v, scrollX, scrollY, oldScrollX, oldScrollY) -> {
    // 滑动到顶部时,启用下拉刷新
    swipeRefreshLayout.setEnabled(scrollY == 0);
});
七、ExpandableListView vs RecyclerView:该怎么选?

很多开发者会纠结这两个控件的选择,这里用表格清晰对比它们的优缺点和适用场景:
| 特性 | ExpandableListView | RecyclerView |
|---|---|---|
| 上手难度 | 低(原生支持两级列表,API 简单) | 中(需自定义展开 / 折叠逻辑) |
| 自定义程度 | 低(仅支持两级列表,样式修改有限) | 高(支持任意层级、任意布局) |
| 性能 | 一般(大数据量下易卡顿) | 优秀(内置复用机制,缓存策略完善) |
| 适用场景 | 简单两级列表(购物车、通讯录) | 复杂列表(三级列表、瀑布流、拖拽排序) |
| 扩展功能 | 少(需自己实现下拉刷新、上拉加载) | 多(支持 ItemAnimator、ItemDecoration 等) |
选择建议:
- 如果是简单的两级列表,追求开发效率,优先用 ExpandableListView。
- 如果需要三级及以上列表、复杂样式、高性能,优先用 RecyclerView。
- 如果项目中已经引入 RecyclerView 相关库,为了统一技术栈,也可以用 RecyclerView 实现两级列表。
八、总结与扩展
到这里,ExpandableListView 的核心用法、进阶技巧、实战项目和优化方案已经全部讲解完毕。总结一下重点:
- 核心流程:布局编写 → 数据模型设计 → 适配器实现 → 绑定控件与事件。
- 关键技巧:ViewHolder 模式、动态数据操作、选中状态联动、性能优化。
- 避坑重点:子项点击事件、数据刷新同步、索引越界问题。
扩展方向
如果需要更复杂的功能,可以尝试以下扩展:
- 实现三级列表:通过在子项中嵌套 ExpandableListView 或 RecyclerView 实现。
- 添加拖拽排序功能:结合
ItemTouchHelper实现分组和子项的拖拽排序。 - 结合 Room 数据库:实现购物车数据的持久化存储,避免退出 APP 后数据丢失。
- 实现侧滑删除:使用
SwipeMenuLayout等第三方库,为子项添加侧滑删除功能。


 383
383

 被折叠的 条评论
为什么被折叠?
被折叠的 条评论
为什么被折叠?
 到【灌水乐园】发言


