


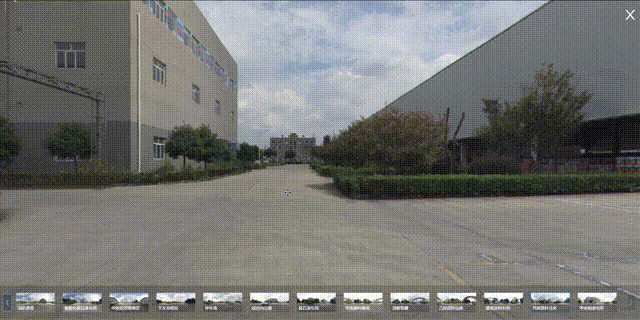
 本文介绍了一个基于 Vue 的全景图展示组件实现方法,包括如何安装和使用 photo-sphere-viewer 插件来创建全景视图,以及如何通过自定义的轮播组件实现图片的切换和导航。
- 下载插件
npm install photo-sphere-viewer --save
或者
yarn add photo-sphere-viewer
- 引入插件
import * as PhotoSphereViewer from 'photo-sphere-viewer';
import 'photo-sphere-viewer/dist/photo-sphere-viewer.css';
- 全景遮罩盒子
<!-- 全景图预览 -->
<div v-show="vsible" class="mask">
	<div class="mask-close" @click="closeImg"><close-outlined /></div>
	<div v-if="vsible" id="viewer"></div>
	<ImaTabs ref="imgList" @sendImg="sendImg" />
</div>
// vsible控制显示与否
const vsible: Ref<boolean> = ref(false);
// 全景对象
const Viewer = ref();
// 底部轮播图片
const imgList = ref();
// 设置全景图片
const setImg = (img: AnyObject) => {
	Viewer.value?.destroy();
	imgList.value.activeIndex = imgList.value.progressList.findIndex(
		(item: AnyObject) => item.id == img.features[0].properties.id,
	);
	imgList.value.activeVsib = false;
	vsible.value = true;
	imgList.value.initgoRightArrow();
	setTimeout(() => {
		Viewer.value = new PhotoSphereViewer.Viewer({
			container: document.querySelector('#viewer') as
				| string
				| HTMLElement,
			panorama: '图片路径',
			size: {
				width: document.body.offsetWidth as
					| number
					| string
					| any,
				height: document.body.offsetHeight as
					| number
					| string
					| any,
			},
			navbar: undefined,
		});
		setTimeout(() => {
			Viewer.value?.hideError();
			Viewer.value.resize({
				width: document.documentElement.clientWidth as
					| number
					| string
					| any,
				height: document.documentElement.clientHeight as
					| number
					| string
					| any,
			});
		}, 1000);
		Viewer.value.on('ready', () => {
			imgList.value.activeVsib = true;
			Viewer.value?.hideError();
			Viewer.value.resize({
				width: document.documentElement.clientWidth as
					| number
					| string
					| any,
				height: document.documentElement.clientHeight as
					| number
					| string
					| any,
			});
		});
	}, 200);
};
// 关闭全景
const closeImg = () => {
	vsible.value = false;
	imgList.value.activeVsib = true;
};
// 底部轮播点击显示全景图片方法
const sendImg = (item: AnyObject) => {
	Viewer.value?.destroy();
	imgList.value.activeVsib = false;
	setTimeout(() => {
		const container = document.querySelector('#viewer') as
			| string
			| HTMLElement;
		Viewer.value = new PhotoSphereViewer.Viewer({
			container,
			panorama: `图片路径`,
			size: {
				width: '100%' as number | string | any,
				height: '100%' as number | string | any,
			},
			navbar: undefined,
		});
		setTimeout(() => {
			Viewer.value.resize({
				width: '100%' as number | string | any,
				height: '100%' as number | string | any,
			});
		}, 500);
		Viewer.value.on('ready', () => {
			imgList.value.activeVsib = true;
			Viewer.value?.hideError();
		});
	}, 200);
};
- ImaTabs组件
<!-- 全景轮播 -->
<template>
	<div v-if="progressList && progressList.length" class="imgTool">
		<div class="imgTool-proce">
			<div
				class="imgTool-proce-arrow"
				:class="
					currentClickNumber > 0 ? '' : 'imgTool-proce-arrowOpacity'
				"
				@click="fnPrev"
			>
				<img src="左箭头图片地址" alt="" />
			</div>
			<div ref="fixedBox" class="imgTool-proce-fixed">
				<div
					class="imgTool-proce-fixed-center"
					:style="`width:${
						signleWidth * progressList.length
					}px;transform:translate(${scrollResultWidth}px,0);transition:1s;`"
				>
					<div
						v-for="(itemP, indexP) in progressList"
						:key="itemP.id"
						class="imgTool-proce-fixed-center-signle"
						:class="
							activeIndex == indexP
								? 'imgTool-proce-fixed-center-signle-active'
								: ''
						"
						@click="activeImg(itemP, indexP)"
					>
						<div class="imgTool-proce-fixed-center-signle-icon">
							<img
								class="imgTool-proce-fixed-center-signle-icon-img"
								:src="src + itemP.compressPath"
								alt=""
							/>
						</div>
						<div
							class="imgTool-proce-fixed-center-signle-title"
							:title="itemP.title"
						>
							{{ itemP.title }}
						</div>
					</div>
				</div>
			</div>

			<div
				class="imgTool-proce-arrow"
				:class="noScrollRight ? '' : 'imgTool-proce-arrowOpacity'"
				@click="fnNext"
			>
				<img src="右箭头图片地址" alt="" />
			</div>
		</div>
	</div>
</template>

<script lang="ts">
import { ref, defineComponent, nextTick } from 'vue';
import { ImgDatas } from './src/interface';
import { ImgList } from './src/hooks';
import { src } from '@api/config/request';
export default defineComponent({
	name: 'ImgTabs',
	setup(prop, { emit }) {
		const progressList = ref<ImgDatas[]>([]);
		const scrollResultWidth = ref<number>(0); //transform滚动的距离
		const signleWidth = ref<number>(140); //单个流程的宽度
		const currentClickNumber = ref<number>(0);
		const noScrollRight = ref<boolean>(true);
		const activeIndex = ref<number>(0);
		const fixedBox = ref();
		const activeVsib = ref(true);
		const { initgoRightArrow, fnPrev, fnNext, activeImg } = ImgList(
			progressList,
			scrollResultWidth,
			signleWidth,
			currentClickNumber,
			noScrollRight,
			activeIndex,
			fixedBox,
			emit,
			activeVsib,
		);
		nextTick(() => {
			setTimeout(() => {
				initgoRightArrow();
			});
		});
		return {
			progressList,
			scrollResultWidth,
			signleWidth,
			currentClickNumber,
			noScrollRight,
			activeIndex,
			fixedBox,
			fnPrev,
			fnNext,
			activeImg,
			initgoRightArrow,
			src: src.value.FILE_URL,
			activeVsib,
		};
	},
});
</script>
- 轮播方法
import { Ref } from 'vue';
export const ImgList = (
	progressList: Ref<ImgDatas[]>,
	scrollResultWidth: Ref<number>,
	signleWidth: Ref<number>,
	currentClickNumber: Ref<number>,
	noScrollRight: Ref<boolean>,
	activeIndex: Ref<number>,
	fixedBox,
	emit,
	activeVsib: Ref<boolean>,
) => {
	interface ImgDatas {
		id: number;
		compressPath: string;
		title: string;
	}
	//初始化判断是否可以向右滚动
	const initgoRightArrow = () => {
		const currentScrollWidth = fixedBox.value.clientWidth;
		const canNumber = Math.floor(currentScrollWidth / signleWidth.value); //可以放下的个数
		//如果最后一个流程图标已经展示出来,则停止滚动
		if (currentClickNumber.value + canNumber >= progressList.value.length) {
			noScrollRight.value = false;
			return;
		}
	};
	//点击上一个
	const fnPrev = () => {
		//如果右点击的次数大于0,才可以左滚
		if (currentClickNumber.value > 0) {
			currentClickNumber.value -= 1;
			noScrollRight.value = true;
			fnScrollWidth('reduce');
		} else {
			return false;
		}
	};
	//点击下一个
	const fnNext = () => {
		const currentScrollWidth = fixedBox.value.clientWidth;
		const canNumber = Math.floor(currentScrollWidth / signleWidth.value); //可以放下的个数
		//如果最后一个流程图标已经展示出来,则停止滚动
		if (currentClickNumber.value + canNumber >= progressList.value.length) {
			return;
		}
		//说明放不下有滚动条
		if (progressList.value.length > canNumber) {
			currentClickNumber.value += 1;
			if (
				currentClickNumber.value + canNumber >=
				progressList.value.length
			) {
				noScrollRight.value = false;
			}
			fnScrollWidth('add');
		}
	};
	//translate的宽度
	const fnScrollWidth = (type: string) => {
		let result = 0;
		if (type === 'reduce') {
			result = 140;
		} else if (type === 'add') {
			result = -140;
		} else {
			result = 0;
		}
		scrollResultWidth.value += result;
	};
	const activeImg = (item: ImgDatas, index: number) => {
		if (activeIndex.value == index) {
			return;
		}
		if (activeVsib.value) {
			activeIndex.value = index;
			emit('sendImg', item);
		}
	};
	return {
		initgoRightArrow,
		fnPrev,
		fnNext,
		fnScrollWidth,
		activeImg,
	};
};
- 样式
.mask {
	width: 100%;
	height: 100%;
	position: fixed;
	top: 0;
	left: 0;
	right: 0;
	bottom: 0;
	margin: auto;
	z-index: 999;
}
.imgTool {
	width: 100%;
	position: fixed;
	bottom: 10px;
	z-index: 99999;
	background: rgba($color: #000000, $alpha: 0.2);
	padding: 0 13px;
	&-proce {
		display: flex;
		align-items: center;
		justify-content: space-between;
		&-arrow {
			width: 28px;
			height: 52px;
			cursor: pointer;
			&>img{
				width: 100%;
				height: 100%;
			}
		}
		&-arrowOpacity {
			cursor: default;
			opacity: 0.4;
		}
		&-fixed {
			flex: 1;
			overflow: hidden;
			&-center {
				// flex: 1;
				box-sizing: border-box;
				padding: 20px 0;
				white-space: nowrap;
				display: flex;
				&-signle {
					width: 120px;
					position: relative;
					margin: 0 10px;
					border: 2px solid rgba($color: #000000, $alpha: 0);
					box-sizing: border-box;
					&-icon {
						width: 100%;
						height: 100%;
						text-align: center;
						cursor: pointer;
						&-img {
							width: 100%;
							height: 100%;
						}
					}
					&-active {
						border: 2px solid #1f75e5;
					}
					&-title {
						width: 100%;
						position: absolute;
						bottom: 0px;
						left: 0px;
						background: rgba($color: #000000, $alpha: 0.3);
						padding: 1px 5px;
						border-radius: 0 3px 0 0;
						font-size: 12px;
						overflow: hidden; //超出的文本隐藏
						text-overflow: ellipsis; //溢出用省略号显示
						white-space: nowrap; // 默认不换行;
					}
				}
			}
		}
	}
}


 2180
2180

 被折叠的 条评论
为什么被折叠?
被折叠的 条评论
为什么被折叠?
 到【灌水乐园】发言


