


 本文深入解析React包的基础概念,探讨其核心API如createElement和Component的工作原理。通过源码阅读,揭示了React如何创建数据结构以支持多端渲染,以及JSX语法糖背后的技术细节。
react包基础概念以及React包的两个核心api阅读。阅读React包的源码版本为16.8.6。
基础概念
react包
react包的本质上是建立一个react相关数据类型的抽象屏障,它创建了一系列符合react渲染调度的数据结构,在各个react相关平台(dom,native,render)上进行渲染调度。
在阅读源码前,我一度认为诸如createElement和Component相关包,会有一系列复杂诸如生命周期,组件更新,setState等复杂的逻辑,实际上react包在做的是生成符合规范的数据结构,对特定数据进行打标(标志数据类型),react包当中最复杂的一个js文件就是ReactChildren.js文件,中途进行了对应的递归数组展开和到contextPour中拿取一系列数据。
代码   |    react抽象层输出数据    |      多端适配渲染

                               -> 服务端渲染     -> 服务端静态html文件
code  ->  react  ->  reactType -> react-dom    -> html
                               -> react-native -> 移动端
jsx与babel
jsx是react框架的精髓,jsx允许以js的方式来书写html和css,使得react的dom更新熏染的方式真正活起来。jsx实质是createElement的语法糖,也是React当中使用最多的api。
const Box = <div id="box" data-num="3">123</div>;
const ContentBox = <Box />;

// bable tarnslate

var Box = React.createElement("div", {
  id: "box",
  "data-num": "3"
}, "123");
var ContentBox = React.createElement(Box, null);
我们可以看到,在编译过程中,如果是html自身存在的元素,createElement的第一个参数将为一个html标签名的字符串,而如果是自带的组件,则为变量名。因此为了方便编译区分,自定义组件变量名规定为大写。
React入口与分层
我们可以从package.json的main文件入口开始,来找寻React包的入口文件。// package.json
"main": "index.js"
// index.js
'use strict';
const React = require('./src/React');
// TODO: decide on the top-level export form.
// This is hacky but makes it work with both Rollup and Jest.
module.exports = React.default || React;
确定主文件入口为React.js后,来简单看一下react包的文件目录结构。
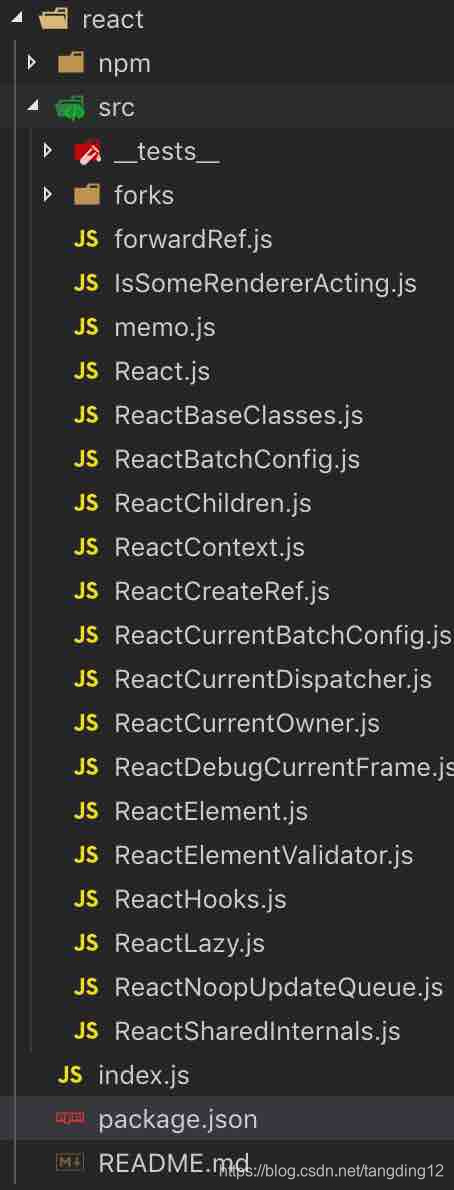
react包就是以各个api为js文件,然后React.js为主文件汇总的暴露的一个总分式文件结构。忽略掉引入文件以及dev模型的判断语句,React.js就是一个很简单的对象-api结构。
// __DEV__ 为是否打开dev模式
const React = {
  Children: {
    map,
    forEach,
    count,
    toArray,
    only,
  },
  createRef,
  Component,
  PureComponent,
  createContext,
  forwardRef,
  lazy,
  memo,
  useCallback,
  useContext,
  useEffect,
  useImperativeHandle,
  useDebugValue,
  useLayoutEffect,
  useMemo,
  useReducer,
  useRef,
  useState,
  Fragment: REACT_FRAGMENT_TYPE,
  Profiler: REACT_PROFILER_TYPE,
  StrictMode: REACT_STRICT_MODE_TYPE,
  Suspense: REACT_SUSPENSE_TYPE,
  unstable_SuspenseList: REACT_SUSPENSE_LIST_TYPE,
  createElement: __DEV__ ? createElementWithValidation : createElement,
  cloneElement: __DEV__ ? cloneElementWithValidation : cloneElement,
  createFactory: __DEV__ ? createFactoryWithValidation : createFactory,
  isValidElement: isValidElement,
  version: ReactVersion,
  unstable_withSuspenseConfig: withSuspenseConfig,
  __SECRET_INTERNALS_DO_NOT_USE_OR_YOU_WILL_BE_FIRED: ReactSharedInternals,
};

export default React;
React当中所有存在的api,都存在于此React对象当中。
react-core-api
上文刚刚分析过jsx的本质其实就是React.createElement的语法糖。因此react当中我们最常使用的api实质上是createElement和classComponent模式下去extends的React.Component。
在我看源码之前,我本也以为这两个api的代码量会非常庞大,涉及到及其复杂的调度逻辑。其实这两个文件代码平均下来每个文件不过百来行。去掉注释和dev相关的一些异常输出处理,核心的逻辑不过50行。这两个api,实质上更多的是去创建定义一个Reactly的数据结构。这份数据结构,能够作为一个起点,来供react-dom以及react-native去在不同环境下拆分和使用。
ReactElement
根据React.js的文件引用,我们可以很快找到createElement的api在同级目录的ReactElement.js下。我们来看一下去掉dev调试逻辑后,createElement部分的代码。
/**
 * type 标签类型
 * config 标签属性对象
 * children 除了前两个之外剩下的都为 children,创建element的子节点
*/
function createElement(type, config, children) {
  let propName;
  // 1.处理config属性
  const props = {};
  let key = null;
  let ref = null;
  let self = null;
  let source = null;
  // 如果存在element的属性对象
  if (config != null) {
    // ref和key格式检查
    if (hasValidRef(config)) {
      ref = config.ref;
    }
    if (hasValidKey(config)) {
      key = '' + config.key;
    }

    self = config.__self === undefined ? null : config.__self;
    source = config.__source === undefined ? null : config.__source;
    // Remaining properties are added to a new props object
    // 从config上拷贝一份数据到props对象上面
    for (propName in config) {
      if (
        hasOwnProperty.call(config, propName) &&
        !RESERVED_PROPS.hasOwnProperty(propName)
      ) {
        props[propName] = config[propName];
      }
    }
  }
  // 2. 处理 children, 小于1直接等于,否则复制到数组上
  const childrenLength = arguments.length - 2;
  if (childrenLength === 1) {
    props.children = children;
  } else if (childrenLength > 1) {
    const childArray = Array(childrenLength);
    for (let i = 0; i < childrenLength; i++) {
      childArray[i] = arguments[i + 2];
    }
    props.children = childArray;
  }

  // Resolve default props
  if (type && type.defaultProps) {
    const defaultProps = type.defaultProps;
    for (propName in defaultProps) {
      if (props[propName] === undefined) {
        props[propName] = defaultProps[propName];
      }
    }
  }

  return ReactElement(
    type,
    key,
    ref,
    self,
    source,
    ReactCurrentOwner.current,
    props,
  );
}
createElement就做了很简单的两件事,我在注释中都有标注出来:
- 把config(标签属性定义)数据,移植到prop对象上。在这过程中对
key/ref/defualtProps等一些特殊属性做了一个合法以及赋值的处理。 - 处理了一下children,把入参的children转换成数组,赋值到props上。最后调用了
ReactElement函数。
ReactElement函数就更简单了,它直接返回一个打了标的react对象。其中self/source的概念都是用于dev状态下的调试。无需去关心。
const ReactElement = function(type, key, ref, self, source, owner, props) {
  const element = {
    // This tag allows us to uniquely identify this as a React Element
    $$typeof: REACT_ELEMENT_TYPE,

    // Built-in properties that belong on the element
    type: type,
    key: key,
    ref: ref,
    props: props,

    // Record the component responsible for creating this element.
    _owner: owner,
  };
  return element;
}
我们可以看到,我们写的jsx代码,最终就是转换为这样一份对象数据。这份对象数据作为一个起点,作用在react各个渲染平台上dom/native/server,去实现各自的渲染逻辑。
React.Component
Component代码逻辑在React.js同目录下的ReactBaseClasses.js文件中。Component的代码更简单,就是初始化了一个Component实例,在原型上绑定了常用的一些方法。
function Component(props, context, updater) {
  this.props = props;
  this.context = context;
  // If a component has string refs, we will assign a different object later.
  this.refs = emptyObject;
  // We initialize the default updater but the real one gets injected by the
  // renderer.
  this.updater = updater || ReactNoopUpdateQueue;
}

Component.prototype.isReactComponent = {};

Component.prototype.setState = function(partialState, callback) {
  this.updater.enqueueSetState(this, partialState, callback, 'setState');
};

Component.prototype.forceUpdate = function(callback) {
  this.updater.enqueueForceUpdate(this, callback, 'forceUpdate');
};
我们最关心的setState方法,其实什么也没做,只是调用了一个updater.enqueueSetState方法。而这个方法具体实现,是在React各个包中实现,这个方法的使用,将在后续react-dom包中进行讲述,


 686
686

 被折叠的 条评论
为什么被折叠?
被折叠的 条评论
为什么被折叠?
 到【灌水乐园】发言


