SpringBoot项目框架下ThreadPoolExecutor线程池+Queue缓冲队列实现高并发中进行下单业务

本文介绍了一种在高并发环境下处理订单重复及性能问题的方法,采用ThreadPoolExecutor线程池结合Queue队列,通过Spring Boot框架实现,有效避免了订单重复提交,并在用户量激增时保持系统稳定。

主要是自己在项目中(中小型项目) 有支付下单业务(只是办理VIP,没有涉及到商品库存),目前用户量还没有上来,目前没有出现问题,但是想到如果用户量变大,下单并发量变大,可能会出现一系列的问题,趁着空闲时间,做了这个demo测试相关问题。

可能遇到的问题如下:

 1.订单重复

 2.高并发下,性能变慢

解决方式:ThreadPoolExecutor线程池 + Queue队列

开发工具:IDEA 15

1.首先是springBoot的项目框架如下
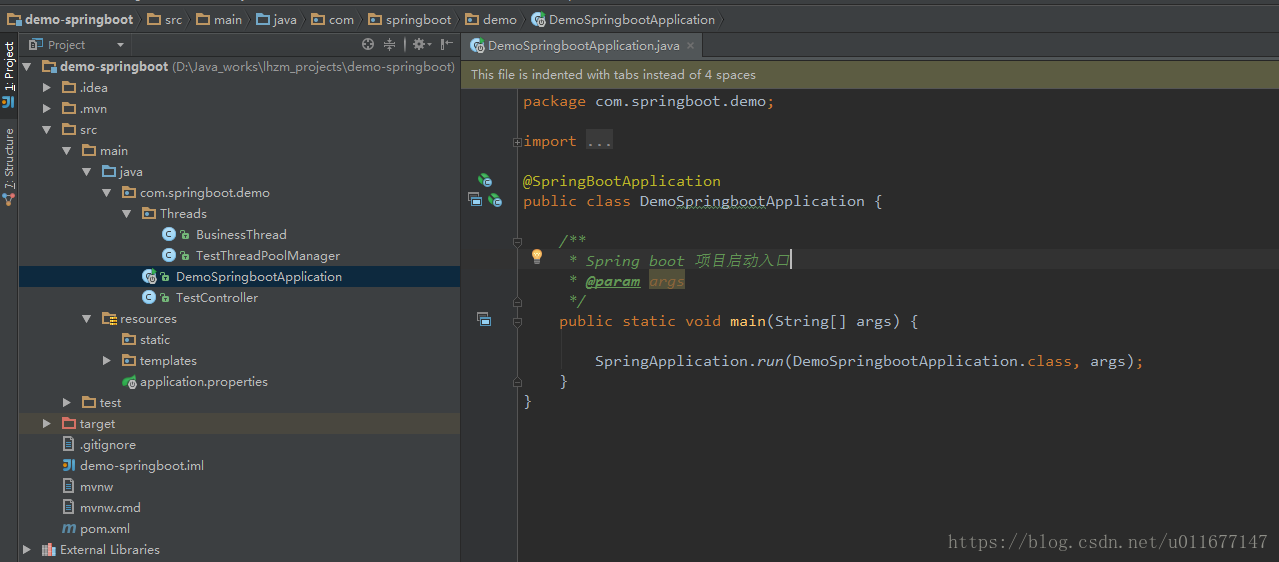


2.业务测试流程涉及的类,如下

BusinessThread 类

package com.springboot.demo.Threads;

import org.springframework.context.annotation.Scope;
import org.springframework.stereotype.Component;


/**
 * Created by Administrator on 2018/5/9.
 */
@Component
@Scope("prototype")//spring 多例
public class BusinessThread implements Runnable{

    private String acceptStr;

    public BusinessThread(String acceptStr) {
        this.acceptStr = acceptStr;
    }

    public String getAcceptStr() {
        return acceptStr;
    }

    public void setAcceptStr(String acceptStr) {
        this.acceptStr = acceptStr;
    }

    @Override
    public void run() {
        //业务操作
        System.out.println("多线程已经处理订单插入系统,订单号:"+acceptStr);

        //线程阻塞
        /*try {
            Thread.sleep(1000);
            System.out.println("多线程已经处理订单插入系统,订单号:"+acceptStr);
        } catch (InterruptedException e) {
            e.printStackTrace();
        }*/
    }
}
 

TestThreadPoolManager 类


package com.springboot.demo.Threads;

import org.springframework.beans.BeansException;
import org.springframework.beans.factory.BeanFactory;
import org.springframework.beans.factory.BeanFactoryAware;
import org.springframework.stereotype.Component;

import java.util.Map;
import java.util.Queue;
import java.util.concurrent.*;

/**
 * Created by Administrator on 2018/5/10.
 */
@Component
public class TestThreadPoolManager implements BeanFactoryAware {

    //用于从IOC里取对象
    private BeanFactory factory; //如果实现Runnable的类是通过spring的application.xml文件进行注入,可通过 factory.getBean()获取,这里只是提一下

    // 线程池维护线程的最少数量
    private final static int CORE_POOL_SIZE = 2;
    // 线程池维护线程的最大数量
    private final static int MAX_POOL_SIZE = 10;
    // 线程池维护线程所允许的空闲时间
    private final static int KEEP_ALIVE_TIME = 0;
    // 线程池所使用的缓冲队列大小
    private final static int WORK_QUEUE_SIZE = 50;

    @Override
    public void setBeanFactory(BeanFactory beanFactory) throws BeansException {
        factory = beanFactory;
    }

    /**
     * 用于储存在队列中的订单,防止重复提交,在真实场景中,可用redis代替 验证重复
     */
    Map<String, Object> cacheMap = new ConcurrentHashMap<>();


    /**
     * 订单的缓冲队列,当线程池满了,则将订单存入到此缓冲队列
     */
    Queue<Object> msgQueue = new LinkedBlockingQueue<Object>();


    /**
     * 当线程池的容量满了,执行下面代码,将订单存入到缓冲队列
     */
    final RejectedExecutionHandler handler = new RejectedExecutionHandler() {
        @Override
        public void rejectedExecution(Runnable r, ThreadPoolExecutor executor) {
            //订单加入到缓冲队列
            msgQueue.offer(((BusinessThread) r).getAcceptStr());
            System.out.println("系统任务太忙了,把此订单交给(调度线程池)逐一处理,订单号:" + ((BusinessThread) r).getAcceptStr());
        }
    };


    /**创建线程池*/
   final ThreadPoolExecutor threadPool = new ThreadPoolExecutor(CORE_POOL_SIZE, MAX_POOL_SIZE, KEEP_ALIVE_TIME, TimeUnit.SECONDS, new ArrayBlockingQueue(WORK_QUEUE_SIZE), this.handler);


    /**将任务加入订单线程池*/
    public void addOrders(String orderId){
        System.out.println("此订单准备添加到线程池,订单号:" + orderId);
        //验证当前进入的订单是否已经存在
        if (cacheMap.get(orderId) == null) {
            cacheMap.put(orderId, new Object());
            BusinessThread businessThread = new BusinessThread(orderId);
            threadPool.execute(businessThread);
        }
    }

    /**
     * 线程池的定时任务----> 称为(调度线程池)。此线程池支持 定时以及周期性执行任务的需求。
     */
    final ScheduledExecutorService scheduler = Executors.newScheduledThreadPool(5);


    /**
     * 检查(调度线程池),每秒执行一次,查看订单的缓冲队列是否有 订单记录,则重新加入到线程池
     */
    final ScheduledFuture scheduledFuture = scheduler.scheduleAtFixedRate(new Runnable() {
        @Override
        public void run() {
            //判断缓冲队列是否存在记录
            if(!msgQueue.isEmpty()){
                //当线程池的队列容量少于WORK_QUEUE_SIZE,则开始把缓冲队列的订单 加入到 线程池
                if (threadPool.getQueue().size() < WORK_QUEUE_SIZE) {
                    String orderId = (String) msgQueue.poll();
                    BusinessThread businessThread = new BusinessThread(orderId);
                    threadPool.execute(businessThread);
                    System.out.println("(调度线程池)缓冲队列出现订单业务,重新添加到线程池,订单号:"+orderId);
                }
            }
        }
    }, 0, 1, TimeUnit.SECONDS);


    /**获取消息缓冲队列*/
    public Queue<Object> getMsgQueue() {
        return msgQueue;
    }

    /**终止订单线程池+调度线程池*/
    public void shutdown() {
        //true表示如果定时任务在执行,立即中止,false则等待任务结束后再停止
        System.out.println("终止订单线程池+调度线程池:"+scheduledFuture.cancel(false));
        scheduler.shutdown();
        threadPool.shutdown();

    }
}


TestController 类


package com.springboot.demo;

import com.springboot.demo.Threads.TestThreadPoolManager;
import org.springframework.beans.factory.annotation.Autowired;
import org.springframework.web.bind.annotation.GetMapping;
import org.springframework.web.bind.annotation.PathVariable;
import org.springframework.web.bind.annotation.RestController;

import java.util.Queue;
import java.util.UUID;

/**
 * Created by Administrator on 2018/5/9.
 */
@RestController
public class TestController {

    @Autowired
    TestThreadPoolManager testThreadPoolManager;

    /**
     * 测试模拟下单请求 入口
     * @param id
     * @return
     */
    @GetMapping("/start/{id}")
    public String start(@PathVariable Long id) {
        //模拟的随机数
        String orderNo = System.currentTimeMillis() + UUID.randomUUID().toString();

        testThreadPoolManager.addOrders(orderNo);

        return "Test ThreadPoolExecutor start";
    }

    /**
     * 停止服务
     * @param id
     * @return
     */
    @GetMapping("/end/{id}")
    public String end(@PathVariable Long id) {

        testThreadPoolManager.shutdown();

        Queue q = testThreadPoolManager.getMsgQueue();
        System.out.println("关闭了线程服务,还有未处理的信息条数:" + q.size());
        return "Test ThreadPoolExecutor start";
    }
}


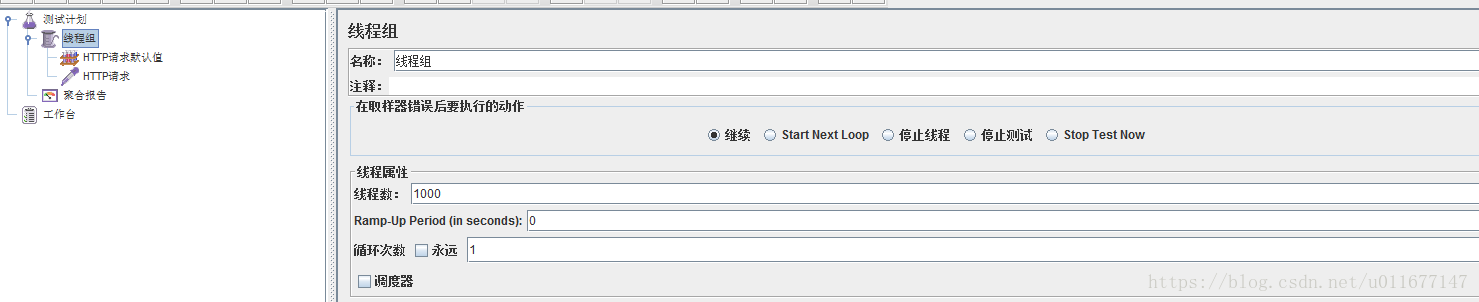
3.使用JMeter模拟并发下单请求 (JMeter使用可自行百度)


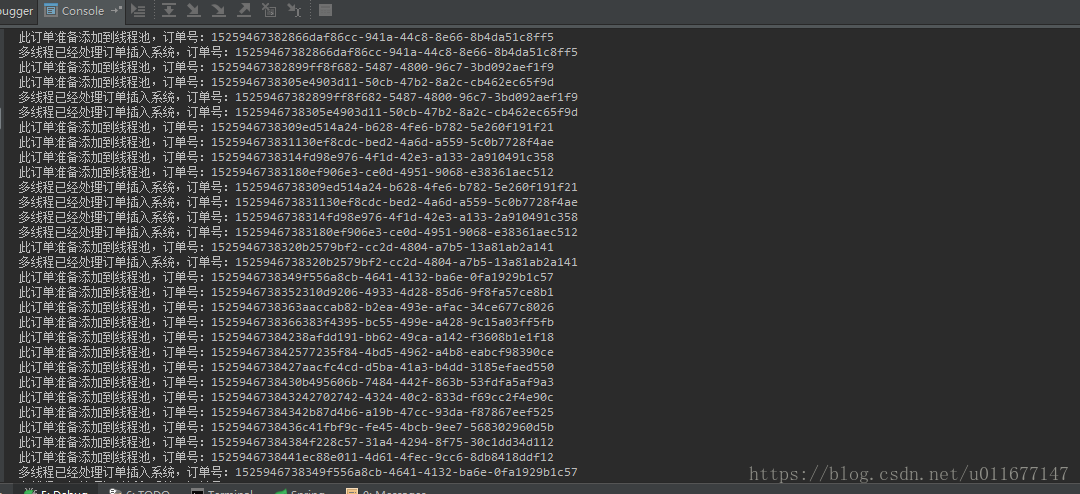
4.打印的日志说明,开始的订单直接执行插入到系统,当线程池的容量已经满了,则使用RejectedExecutionHandler方法把后面的订单添加到 Queue缓冲队列,使用ScheduledFuture方法定时(我这里是每秒一次)检查Queue队列,重新把队列里面的订单添加到线程池,执行后面的插入任务。部分日志如下


### **线程池 + 任务队列方法详解** #### **1. 核心设计目标** 在多设备(device)场景下,需满足以下需求: - **每个设备同一时间仅有一个下载任务执行**(避免并发冲突)。 - **不同设备的任务可并行执行**(提高整体吞吐量)。 - **主线程不阻塞**(避免因等待子线程完成而降低响应速度)。 - **资源高效利用**(避免频繁创建/销毁线程)。 #### **2. 关键组件** 1. **线程池(ExecutorService)** - 管理线程生命周期,复用线程资源。 - 推荐使用`ThreadPoolExecutor`(可自定义核心线程数、最大线程数、队列类型等)。 2. **设备级任务队列(BlockingQueue)** - 为每个设备维护一个独立的队列,确保同一设备的任务串行化。 - 使用`LinkedBlockingQueue`(无界队列)或`ArrayBlockingQueue`(有界队列)。 3. **设备状态管理(ConcurrentHashMap)** - 记录设备当前是否有任务在执行(避免重复提交)。 --- ### **3. 详细实现步骤** #### **3.1 初始化线程池和设备队列** ```java import java.util.concurrent.*; // 线程池配置(根据实际需求调整参数) ExecutorService executor = new ThreadPoolExecutor( 10, // 核心线程数 50, // 最大线程数 60, TimeUnit.SECONDS, // 空闲线程存活时间 new LinkedBlockingQueue<>(1000), // 任务队列(全局) new ThreadPoolExecutor.CallerRunsPolicy() // 拒绝策略:由提交任务的线程执行 ); // 设备任务队列管理 ConcurrentHashMap<String, BlockingQueue<Runnable>> deviceQueues = new ConcurrentHashMap<>(); // 设备执行状态管理 ConcurrentHashMap<String, Boolean> deviceBusy = new ConcurrentHashMap<>(); ``` #### **3.2 提交下载任务** ```java public void submitDownloadTask(String deviceId) { // 1. 检查设备是否正在执行任务 if (deviceBusy.getOrDefault(deviceId, false)) { System.out.println("Device " + deviceId + " is busy, task queued."); // 2. 将任务加入设备队列(若设备忙) BlockingQueue<Runnable> queue = deviceQueues.computeIfAbsent( deviceId, k -> new LinkedBlockingQueue<>() ); queue.add(() -> executeDownload(deviceId)); return; } // 3. 设备空闲,直接执行任务 deviceBusy.put(deviceId, true); executor.submit(() -> { try { executeDownload(deviceId); } finally { // 4. 任务完成后检查队列是否有待执行任务 synchronized (deviceQueues) { BlockingQueue<Runnable> queue = deviceQueues.get(deviceId); if (queue != null && !queue.isEmpty()) { Runnable nextTask = queue.poll(); executor.submit(nextTask); // 提交队列中的下一个任务 } else { deviceBusy.put(deviceId, false); // 标记设备为空闲 deviceQueues.remove(deviceId); // 可选:清理空队列 } } } }); } ``` #### **3.3 执行下载任务** ```java private void executeDownload(String deviceId) { System.out.println("Start downloading for device: " + deviceId + " (Thread: " + Thread.currentThread().getName() + ")"); try { // 模拟耗时下载(如从网络获取文件) Thread.sleep(5000); System.out.println("Download completed for device: " + deviceId); } catch (InterruptedException e) { Thread.currentThread().interrupt(); System.out.println("Download interrupted for device: " + deviceId); } } ``` --- ### **4. 关键优化点** #### **4.1 动态任务调度** - **问题**:若设备队列中有任务,但设备未标记为空闲,可能导致任务积压。 - **解决方案**:在任务完成时(`finally`块中)检查队列并提交下一个任务,确保串行化执行。 #### **4.2 队列清理策略** - **无界队列风险**:若设备队列长期积压任务,可能导致内存溢出。 - **优化方案**: - 使用**有界队列**(如`ArrayBlockingQueue`)限制队列大小。 - 定期清理空队列(如`deviceQueues.remove(deviceId)`)。 #### **4.3 线程池参数调优** | 参数 | 作用 | 推荐值(根据场景调整) | |--------------------|-----------------------------|--------------------------| | 核心线程数(corePoolSize) | 常驻线程数量 | `CPU核心数 * 2` | | 最大线程数(maxPoolSize) | 峰值线程数量 | `核心线程数 * 2` | | 队列容量(queueCapacity) | 缓冲任务数量 | `100~1000`(根据设备数) | | 拒绝策略(RejectedExecutionHandler) | 队列满时的处理方式 | `CallerRunsPolicy`(由提交线程执行) | #### **4.4 异常处理** - **任务抛出异常**:需捕获并记录,避免线程终止。 - **实现方式**: ```java executor.submit(() -> { try { executeDownload(deviceId); } catch (Exception e) { System.err.println("Error downloading for device " + deviceId + ": " + e.getMessage()); } }); ``` --- ### **5. 完整代码示例** ```java import java.util.concurrent.*; public class DeviceDownloadManager { private final ExecutorService executor; private final ConcurrentHashMap<String, BlockingQueue<Runnable>> deviceQueues; private final ConcurrentHashMap<String, Boolean> deviceBusy; public DeviceDownloadManager(int corePoolSize, int maxPoolSize) { this.executor = new ThreadPoolExecutor( corePoolSize, maxPoolSize, 60, TimeUnit.SECONDS, new LinkedBlockingQueue<>(1000), new ThreadPoolExecutor.CallerRunsPolicy() ); this.deviceQueues = new ConcurrentHashMap<>(); this.deviceBusy = new ConcurrentHashMap<>(); } public void submitTask(String deviceId) { if (deviceBusy.getOrDefault(deviceId, false)) { System.out.println("Device " + deviceId + " is busy, task queued."); BlockingQueue<Runnable> queue = deviceQueues.computeIfAbsent( deviceId, k -> new LinkedBlockingQueue<>() ); queue.add(() -> executeDownload(deviceId)); return; } deviceBusy.put(deviceId, true); executor.submit(() -> { try { executeDownload(deviceId); } finally { synchronized (deviceQueues) { BlockingQueue<Runnable> queue = deviceQueues.get(deviceId); if (queue != null && !queue.isEmpty()) { executor.submit(queue.poll()); } else { deviceBusy.put(deviceId, false); deviceQueues.remove(deviceId); } } } }); } private void executeDownload(String deviceId) { System.out.println("Downloading for device: " + deviceId); try { Thread.sleep(5000); // 模拟耗时下载 } catch (InterruptedException e) { Thread.currentThread().interrupt(); } System.out.println("Download completed for device: " + deviceId); } public void shutdown() { executor.shutdown(); } public static void main(String[] args) { DeviceDownloadManager manager = new DeviceDownloadManager(10, 50); // 模拟提交多个设备的任务 for (int i = 0; i < 20; i++) { String deviceId = "device-" + (i % 5); // 5个设备循环提交 manager.submitTask(deviceId); } // 等待一段时间后关闭 try { Thread.sleep(20000); } catch (InterruptedException e) { Thread.currentThread().interrupt(); } manager.shutdown(); } } ``` --- ### **6. 方案对比与适用场景** | 方案 | 优点 | 缺点 | 适用场景 | |--------------------|-----------------------------|-----------------------------|----------------------------| | **线程池 + 任务队列** | 高并发支持,资源复用,任务串行化控制 | 实现较复杂,需管理队列和状态 | 物联网设备下载、批量任务处理 | | **设备级锁 + 回调** | 简单直观,易于实现 | 锁管理需谨慎,可能死锁 | 轻量级任务调度 | | `CompletableFuture` | 代码简洁,非阻塞 | Java 8+,错误处理稍复杂 | 现代Java异步编程 | --- ### **7. 常见问题解答** 1. **如何避免队列积压?** - 使用有界队列(如`ArrayBlockingQueue`),并在队列满时触发告警或拒绝策略。 2. **设备任务失败如何重试?** - 在`executeDownload`中捕获异常,通过计数器实现指数退避重试。 3. **如何监控线程池状态?** - 通过`ThreadPoolExecutor`的`getActiveCount()`、`getQueue().size()`等方法获取实时指标。 ---
评论
添加红包

请填写红包祝福语或标题

红包个数最小为10个

红包金额最低5元

当前余额3.43前往充值 >
需支付:10.00
成就一亿技术人!
领取后你会自动成为博主和红包主的粉丝 规则
hope_wisdom
发出的红包
实付
使用余额支付
点击重新获取
扫码支付
钱包余额 0

抵扣说明:

1.余额是钱包充值的虚拟货币,按照1:1的比例进行支付金额的抵扣。
2.余额无法直接购买下载,可以购买VIP、付费专栏及课程。

余额充值