


 本文介绍了如何在Django中创建一个登录页面,包括HTML表单设计、CSS样式布局以及后端视图处理登录逻辑。前端部分展示了手动编写的HTML和CSS,用于用户输入用户名和密码,并提供了错误提示。后端视图函数处理POST请求,验证用户名和密码,确保数据长度合法,并与数据库中的用户信息进行匹配。若登录成功,则重定向到首页,否则显示错误消息。此外,还提及了静态文件的引入方法和注意事项。
上文我们已经写好了视图和URL跳转链接,以及html都已经定义好了,现在只需要往其中添加上具体的处理逻辑即可。
现在我们先去补充HTML的登录表单,这部分涉及到前端的设计,请自己补充前端知识,我这里是自己利用HTML+CSS自己写的一个登录表单。
<!DOCTYPE html>
<html lang="en">
<head>
<meta charset="UTF-8">
<title>Title</title>
<style>
*{
margin: 0 0;
padding: 0 0;
}
.loginpage{
width: 100%;
height: 100%;
background-color: cornsilk;
line-height: 100%;
text-align: center;
padding: 20px 0 20px;
}
.loginpage label{
font-size: 20px;
}
.loginpage input{
width: 300px;
height: 28px;
}
.loginpage input:last-child{
width: 80px;
height: 35px;
background-color: burlywood;
margin-top: 30px;
}
a{
text-decoration: black;
color: black;
padding-right: 180px;
font-size: 14px;
margin-top: 30px;
}
.altermessage{
font-size: 15px;
color: red;
}
</style>
</head>
<body>
{% load static %}
<h1 style="text-align: center">welcome login! </h1>
<br><br>
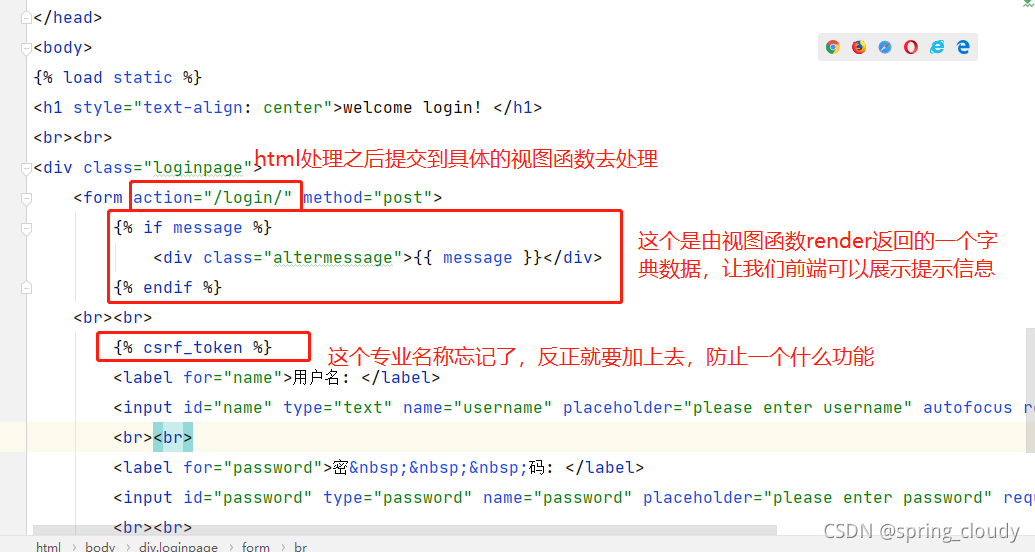
<div class="loginpage">
<form action="/login/" method="post">
{% if message %}
<div class="altermessage">{{ message }}</div>
{% endif %}
<br><br>
{% csrf_token %}
<label for="name">用户名: </label>
<input id="name" type="text" name="username" placeholder="please enter username" autofocus required autocomplete="off"/>
<br><br>
<label for="password">密 码: </label>
<input id="password" type="password" name="password" placeholder="please enter password" required autocomplete="off"/>
<br><br>
<a href="register.html">没有账号?去注册</a>
<input type="submit" value="提交">
</form>
</div>
</body>
</html>
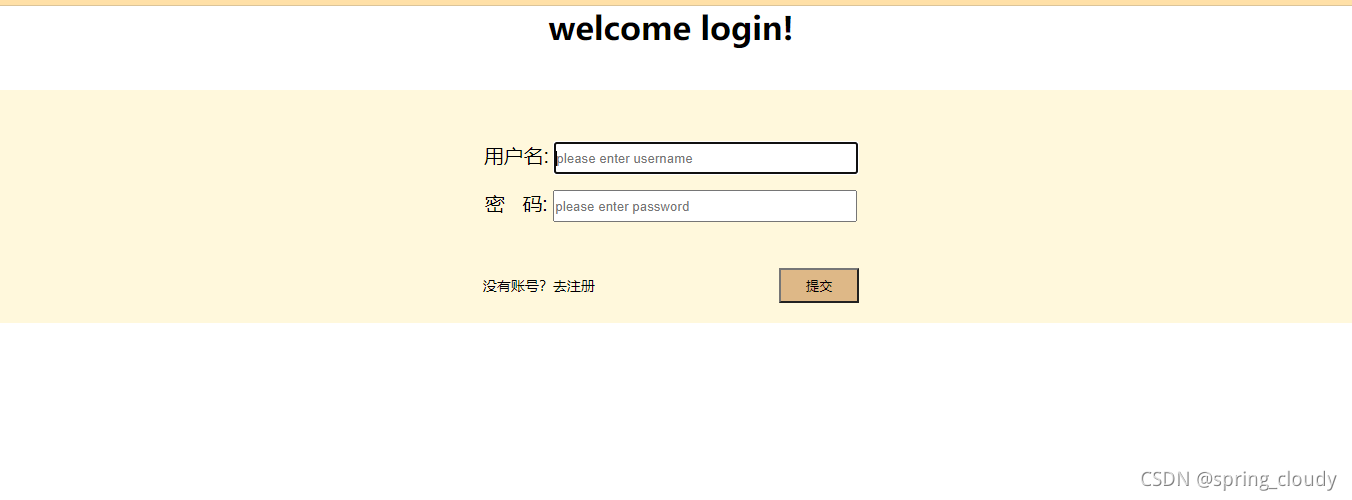
这个简单的前端页面我没有使用其它第三方操作,全部手写哦,如果你们前端比较优秀,可以自己去使用第三方的工具或者页面去美化它。
下面我们注意一下HTML中的以下信息。
接着去处理login视图函数的功能,主要需要我们处理的是,获取HTML传入的用户名和密码,然后做判断,跟注册之后存入数据库的数据判断,通过name去判断密码是否相等(现在密码是明文方式存入数据库的,所以可以直接从数据库获取数据然后比较。当然真实环境不可能是明文传输的)
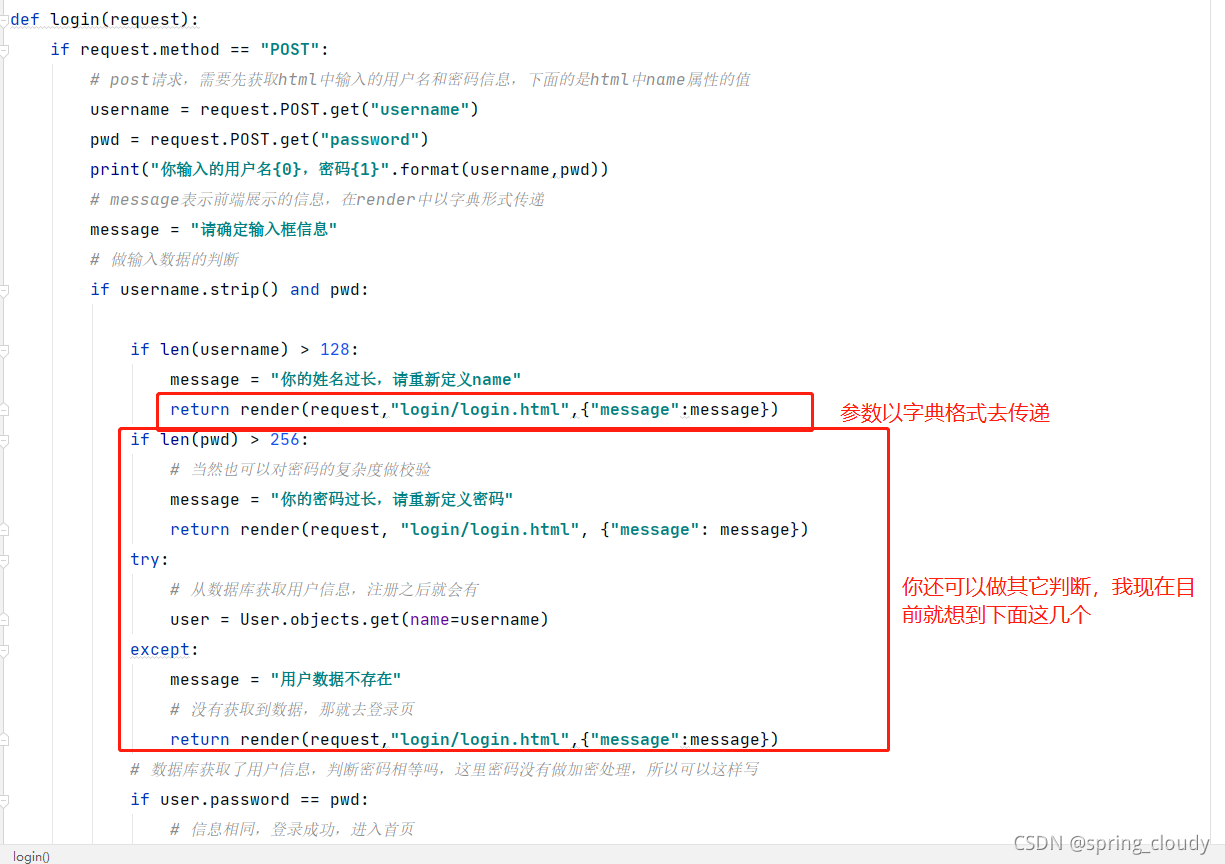
# 登录页面
def login(request):
    if request.method == "POST":
        # post请求,需要先获取html中输入的用户名和密码信息,下面的是html中name属性的值
        username = request.POST.get("username")
        pwd = request.POST.get("password")
        print("你输入的用户名{0},密码{1}".format(username,pwd))
        # message表示前端展示的信息,在render中以字典形式传递
        message = "请确定输入框信息"
        # 做输入数据的判断
        if username.strip() and pwd:

            if len(username) > 128:
                message = "你的姓名过长,请重新定义name"
                return render(request,"login/login.html",{"message":message})
            if len(pwd) > 256:
                # 当然也可以对密码的复杂度做校验
                message = "你的密码过长,请重新定义密码"
                return render(request, "login/login.html", {"message": message})
            try:
                # 从数据库获取用户信息,注册之后就会有
                user = User.objects.get(name=username)
            except:
                message = "用户数据不存在"
                # 没有获取到数据,那就去登录页
                return render(request,"login/login.html",{"message":message})
            # 数据库获取了用户信息,判断密码相等吗,这里密码没有做加密处理,所以可以这样写
            if user.password == pwd:
                # 信息相同,登录成功,进入首页
                return redirect("/index/")
            else:
                message = "密码错误,请重新输入"
                return render(request,"login/login.html",{"message":message})
        return render(request,"login/login.html",{"message":message})
    # 不是post请求,返回登录页
    return render(request, "login/login.html")
    # return HttpResponse("hello login")
下面对一些做解释,这些都是django的简单语法。
以我的能力,基本就是只能写成这个样子,大家有什么好的功能或者操作可以补充哈。
哦,对了如果还有加入静态文件的操作,比如你的css写在的地方不在HTML内部,而是自己新建了文件去导入,那么你需要在setting.py中添加一些代码去导入。
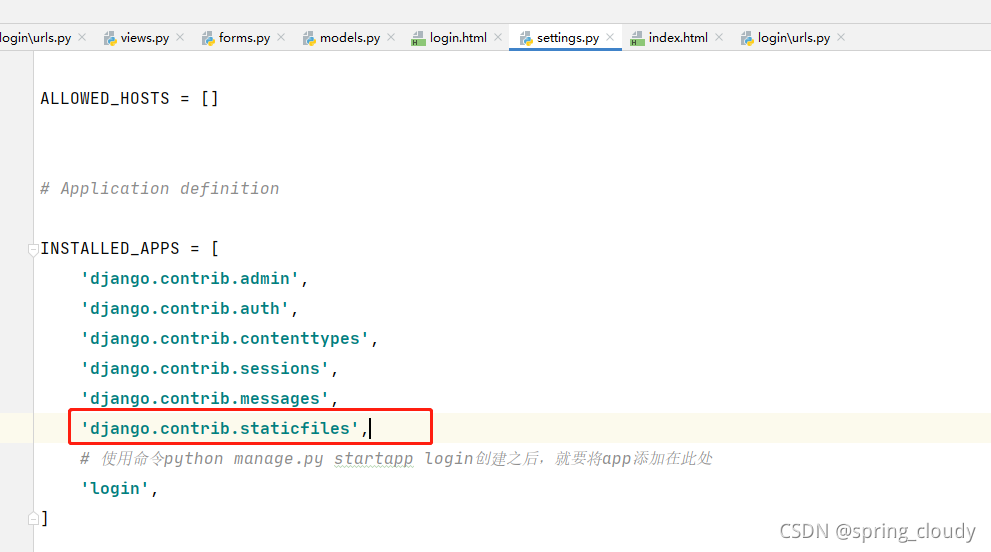
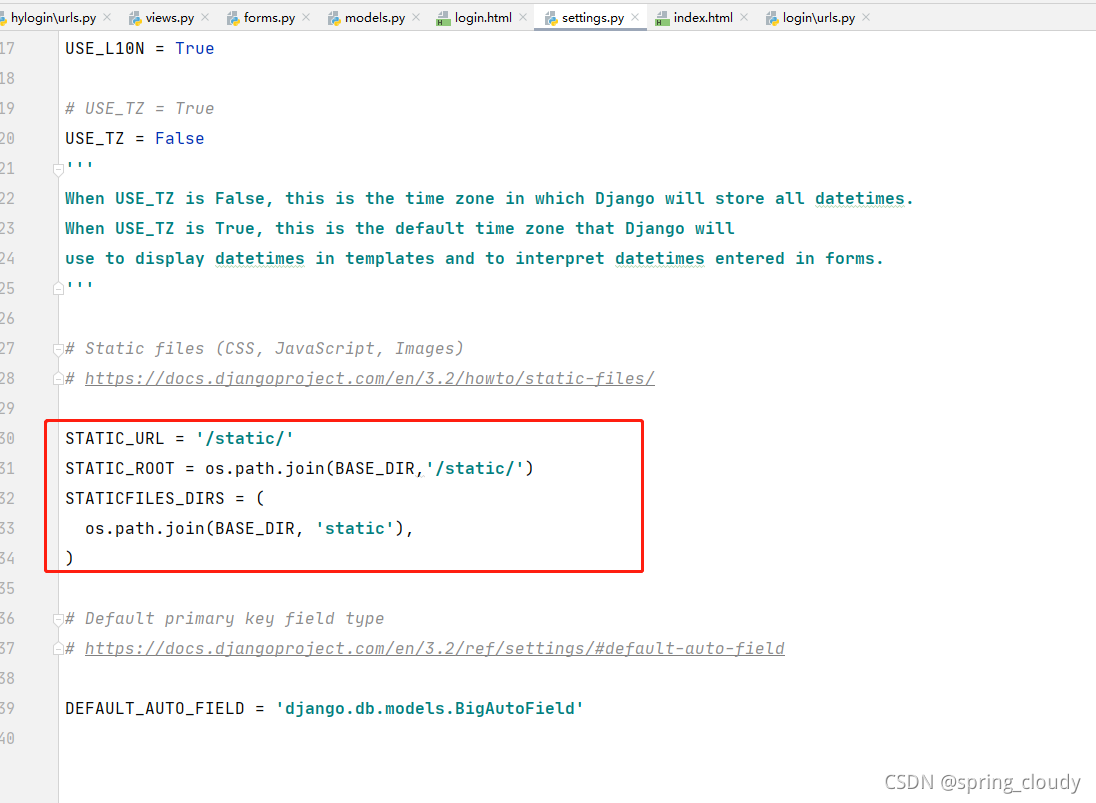
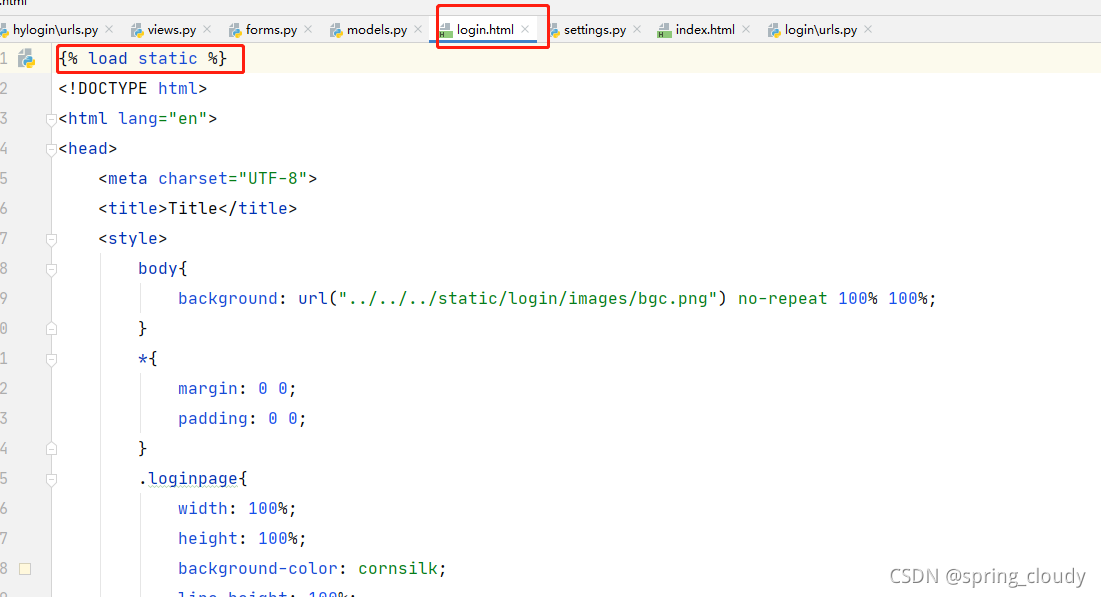
然后创建一static静态文件目录,在你的HTML代码中写入下面那句代码,让他导入静态数据。这样你就可以导入css,js,img等其它第三方需要导入的内容。(注意一下,这个static的要求,我现在这里只是简单提前)


 1万+
1万+

 被折叠的 条评论
为什么被折叠?
被折叠的 条评论
为什么被折叠?
 到【灌水乐园】发言


