


 本文介绍了如何使用Java CXF进行Web服务的开发,包括服务端和客户端的编写步骤,以及如何在SpringBoot中整合CXF。内容涉及了WS-DL文档的理解、CXF的拦截器功能,并提供了添加自定义拦截器的示例。
webservice
webservice是独立低耦合可编程的web应用程序,使用开放的XML,用于开发分布式的互操作的应用程序。
学习webservice首先要了解xml,soap(简单对象存取协议 个人理解HTTP协议+XML数据格式)。
编写服务端:
第一步:编写服务接口类。
import javax.jws.WebMethod;

@javax.jws.WebService
public interface WebService {
    @WebMethod
    String sayhello(String name);
}
第二步:实现服务接口类
import org.springframework.web.bind.annotation.RequestMapping;

@javax.jws.WebService
@RequestMapping
public class WebServiceImpl implements WebService {
    @Override
    public String sayhello(String name) {
        return name;
    }
}
第三部:发布服务
import javax.xml.ws.Endpoint;


public class WebServicePublish {
    public static void main(String[] args) {
        String address="http://localhost:8080/WS_Server/Webservice";
        Endpoint.publish(address,new WebServiceImpl());
        System.out.println("发布成功");

    }
}
输入http://localhost:8080/WS_Server/Webservice?wsdl如果有以下信息 则说明发布服务成功。

编写客户端
第一步:首先cmd运行
wsimport -s 你创建的客户端项目路径 -keep wsdl文件路径(这里就是http://localhost:8080/WS_Server/Webservice?wsdl)

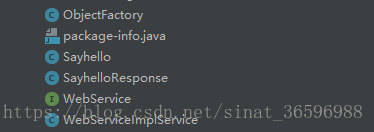
运行之后生成如图下文件
第二步:自己创建一个测试类
public class WebServiceTest {
    public static void main(String[] args) {
       WebServiceImplService factory=new WebServiceImplService();
       WebService ws=factory.getWebServiceImplPort();
        System.out.println(ws.sayhello("123"));

    }
}
如果输出123 则成功。
关于wsdl文档的元素意思可以去这边查看http://www.runoob.com/wsdl/wsdl-tutorial.html
cxf
Apache CXF = Celtix + XFire,开始叫 Apache CeltiXfire,后来更名为 Apache CXF 了,以下简称为 CXF。CXF 继承了 Celtix 和 XFire 两大开源项目的精华,提供了对 JAX-WS 全面的支持,并且提供了多种 Binding 、DataBinding、Transport 以及各种 Format 的支持,并且可以根据实际项目的需要,采用代码优先(Code First)或者 WSDL 优先(WSDL First)来轻松地实现 Web Services 的发布和使用。Apache CXF已经是一个正式的Apache顶级项目。
下载地址http://cxf.apache.org/download.html
把lib文件下的jar包导入到项目的lib文件夹中。
编写服务端
前两步与webservice的前两步一样。
第三步:发布服务
   JaxWsServerFactoryBean jaxWsServerFactoryBean=new JaxWsServerFactoryBean();
        // 设置webservice服务地址
        jaxWsServerFactoryBean.setAddress("http://localhost:8080/WS_Server/Webservice");
        // 设置接口类型
        jaxWsServerFactoryBean.setServiceClass(WebService.class);
        // 设置服务提供者
        jaxWsServerFactoryBean.setServiceBean(new WebServiceImpl());

        // 发布服务
        jaxWsServerFactoryBean.create();
        System.out.println("发布成功");
编写客户端
编写测试类
 JaxWsDynamicClientFactory jaxWsClientFactoryBean = JaxWsDynamicClientFactory.newInstance();
        String address = "http://localhost:8080/WS_Server/Webservice?wsdl";
        Client client = jaxWsClientFactoryBean.createClient(address);
        try {
            Object[] result=client.invoke("sayhello", "456");
            System.out.println(result[0]);
        } catch (Exception e) {

        }
如果输出456,则成功。
ps:cxf可以添加拦截器
添加log拦截器
在发布服务时
  JaxWsServerFactoryBean jaxWsServerFactoryBean=new JaxWsServerFactoryBean();
        // 设置webservice服务地址
        jaxWsServerFactoryBean.setAddress("http://localhost:8080/WS_Server/Webservice");
        // 设置接口类型
        jaxWsServerFactoryBean.setServiceClass(WebService.class);
        // 设置服务提供者
        jaxWsServerFactoryBean.setServiceBean(new WebServiceImpl());
        //拦截器
        jaxWsServerFactoryBean.getInInterceptors().add(new LoggingInInterceptor());
        jaxWsServerFactoryBean.getOutInterceptors().add(new LoggingOutInterceptor());
        // 发布服务
        jaxWsServerFactoryBean.create();
        System.out.println("发布成功");
在客户端使用时
 JaxWsDynamicClientFactory jaxWsClientFactoryBean = JaxWsDynamicClientFactory.newInstance();
        String address = "http://localhost:8080/WS_Server/Webservice?wsdl";
        Client client = jaxWsClientFactoryBean.createClient(address);
        client.getInInterceptors().add(new LoggingInInterceptor());
        client.getOutInterceptors().add(new LoggingOutInterceptor());
        try {
            Object[] result=client.invoke("sayhello", "456");
            System.out.println(result[0]);
        } catch (Exception e) {

        }
可以自定义拦截器
查看LoggingInInterceptor源码继承AbstractLoggingInterceptor这个类
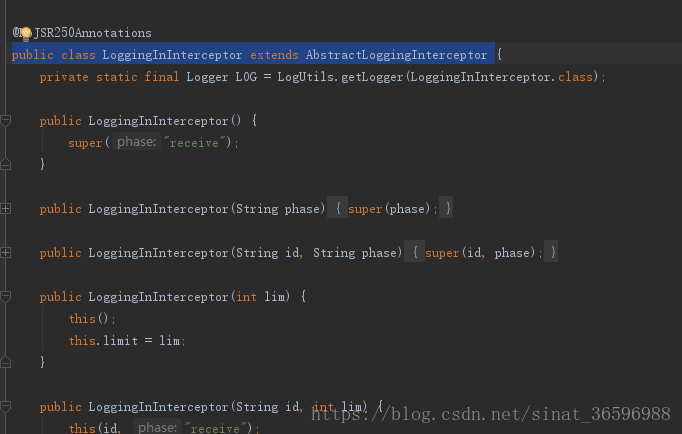
然后可以看到这个方法:public void handleMessage(Message message)
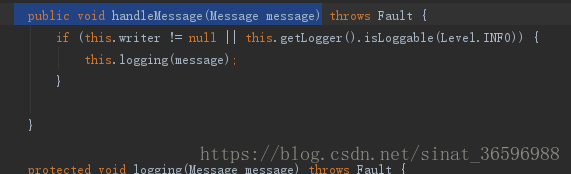
在里面可以自己写所需代码
可以查看这个例子:https://blog.youkuaiyun.com/eson_15/article/details/52055549
在springboot中整合cxf
springboot版本2.0.1
添加最新版本到pom.xml
	<dependency>
			<groupId>org.apache.cxf</groupId>
			<artifactId>cxf-spring-boot-starter-jaxws</artifactId>
			<version>3.2.5</version>
		</dependency>
第一步:编写接口类
@WebService
public interface CxfService {
    @WebMethod
    String sayCxfHello(String name);
}
第二步:接口实现类 别忘了@Component注解
@WebService
@Component
public class CxfServiceImpl implements CxfService {
    @Override
    public String sayCxfHello(String name) {
        return name+"hello,cxf";
    }
}
第三部:写个配置类
import org.apache.cxf.Bus;
import org.apache.cxf.jaxws.EndpointImpl;
import org.springframework.beans.factory.annotation.Autowired;
import org.springframework.context.annotation.Bean;
import org.springframework.context.annotation.Configuration;
import javax.xml.ws.Endpoint;

@Configuration
public class CxfConfig {
    @Autowired
    private Bus bus;
    @Autowired
    private CxfService cxfService;


    @Bean
    public Endpoint endpoint() {
        EndpointImpl endpoint = new EndpointImpl(bus,cxfService);
        endpoint.publish("/cxfService");


        return endpoint;


    }
}
查看wsdl 地址默认是http://localhost:8080/services/发布服务的名字?wsdl
写个测试类
 @org.junit.Test
   public void test1() {
        JaxWsDynamicClientFactory jaxWsDynamicClientFactory = JaxWsDynamicClientFactory.newInstance();
        Client client = jaxWsDynamicClientFactory.createClient("http://localhost:8080/services/cxfService?wsdl");
        try {
            Object[] result=client.invoke("sayCxfHello","tony");
            System.out.println(result[0]);
        } catch (Exception e) {
            e.printStackTrace();
        }
    }


 652
652

 被折叠的 条评论
为什么被折叠?
被折叠的 条评论
为什么被折叠?
 到【灌水乐园】发言


