为什么整合?
1.Shiro整合Thymeleaf,导包
        <!--Shiro整合Thymeleaf-->
        <!-- https://mvnrepository.com/artifact/com.github.theborakompanioni/thymeleaf-extras-shiro -->
        <dependency>
            <groupId>com.github.theborakompanioni</groupId>
            <artifactId>thymeleaf-extras-shiro</artifactId>
            <version>2.0.0</version>
        </dependency>
2.在ShiroConfig类中也需要配置,并交给Spring管理
    //整合ShiroDialect:用来整合Shiro Thymeleaf
    @Bean
    public ShiroDialect getShiroDialect(){
        return new ShiroDialect();
    }
3.html页面判断
- xmlns:shiro=“http://www.thymeleaf.org/thymeleaf-extras-shiro”(整合shiro标签)
<!DOCTYPE html>
<html lang="en" xmlns:th="http://www.thymeleaf.org"
      xmlns:shiro="http://www.thymeleaf.org/thymeleaf-extras-shiro">
<head>
    <meta charset="UTF-8">
    <title>Title</title>
</head>
<body>
<h1>首页</h1>
<p th:text="${msg}"></p>
<!--从session中判断值-->
<div th:if="${session.loginUser==null}">
    <a th:href="@{/toLogin}">登录</a>
</div>

<div shiro:hasPermission="user:add">
    <a th:href="@{/user/add/}">add</a>
</div>
<div shiro:hasPermission="user:update">
    <a th:href="@{/user/update}">update</a>
</div>

</body>
</html>
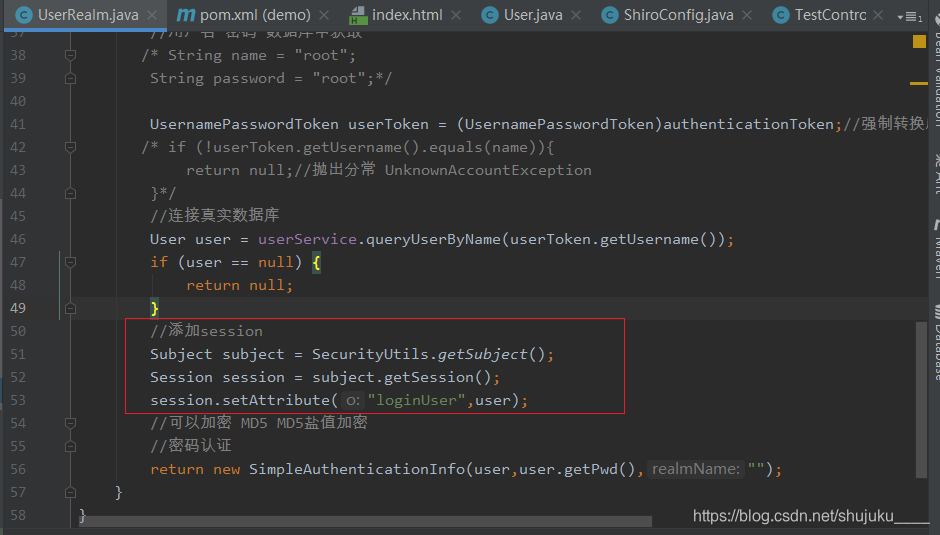
4.认证成功后,将User信息放到session,方便前端判断用户是否登录
  Subject subject = SecurityUtils.getSubject();
        Session session = subject.getSession();
        session.setAttribute("loginUser",user);


 本文详细介绍了如何整合Shiro与Thymeleaf,实现基于权限的页面显示控制。通过添加依赖、配置ShiroDialect及使用shiro标签,确保登录用户能访问相应权限的页面。


 344
344

 被折叠的 条评论
为什么被折叠?
被折叠的 条评论
为什么被折叠?
 到【灌水乐园】发言


