


目录
配置服务器依赖项(WildFly 11、12、13、14、15、16、17)
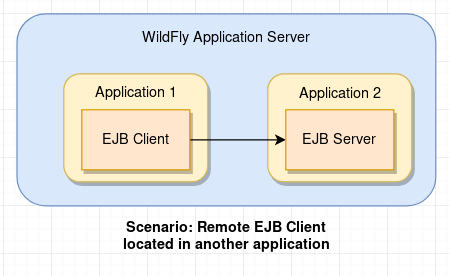
本教程的目的是演示如何从位于另一个应用程序中的另一个EJB查找和调用部署在WildFly服务器实例上的EJB 。
这是我们的场景:
另一方面,如果您的场景需要从独立的远程客户端调用 EJB,请查看本教程:WildFly 远程 EJB 客户端教程
为了演示如何从远程 EJB 客户端调用 EJB,我们需要完成以下步骤:
- 创建 EJB 服务器项目,其中包含 EJB 的接口和实现
- 创建查找远程 EJB的 EJB 客户端项目
- 在客户端项目中配置安全性,使其有权调用远程 EJB
创建 EJB 服务器项目
因此,假设您有一个简单的服务器项目,其中包括以下有状态和无状态 EJB:
package com.mastertheboss.ejb;

import javax.ejb.Remote;
import javax.ejb.Stateful;
import com.mastertheboss.exception.InsufficientFundsException;

@Stateful
@Remote(Account.class)
public class AccountEJB implements Account {

    long money;


    @Override
    public long getMoney() {
        return money;

    }

    public void createAccount(long amount)
    {
        this.money= amount;

    }

    @Override
    public void deposit(long amount)
    {

            this.money+= amount;

        System.out.println("Money deposit. total is "+money);
    }


    @Override
    public void withdraw(long amount) throws InsufficientFundsException {

        long newAmount = money - amount;
        if (newAmount < 0) {
            throw new InsufficientFundsException("Unsufficient funds for account! ");
        }

        money = newAmount;
        System.out.println("Money withdrawal. total is "+money);

    }
}

package com.mastertheboss.ejb;

import javax.ejb.Remote;
import javax.ejb.Stateless;

@Stateless
@Remote(Calculator.class)
public class CalculatorEJB implements Calculator {

    float interest=5;

    @Override
    public float calculateInterest(long money) {

        return money * (1+ (interest/100));

   }

}
这两个类的接口是:
package com.mastertheboss.ejb;

import com.mastertheboss.exception.InsufficientFundsException;

public interface Account {

    public void deposit(long amount);
    public void withdraw(long amount) throws InsufficientFundsException;

    public long getMoney();
    public void createAccount(long amount);
}

package com.mastertheboss.ejb;

public interface Calculator {

    public float calculateInterest(long money);

}
配置服务器依赖项(WildFly 18 及更高版本)
服务器项目需要以下一组依赖项:
<dependencyManagement>
    <dependencies>
        <dependency>
            <groupId>org.wildfly.bom</groupId>
            <artifactId>wildfly-jakartaee8-with-tools</artifactId>
            <version>${version.server.bom}</version>
            <type>pom</type>
            <scope>import</scope>
        </dependency>
    </dependencies>
</dependencyManagement>
<dependencies>
      <dependency>
         <groupId>org.jboss.spec.javax.annotation</groupId>
         <artifactId>jboss-annotations-api_1.3_spec</artifactId>
         <scope>provided</scope>
      </dependency>
      <dependency>
         <groupId>org.jboss.spec.javax.ejb</groupId>
         <artifactId>jboss-ejb-api_3.2_spec</artifactId>
         <scope>provided</scope>
      </dependency>
</dependencies>属性version.server.bom包含应用程序服务器版本,例如:
<properties>
   <version.server.bom>18.0.0.Final</version.server.bom>
</properties>
配置服务器依赖项(WildFly 11、12、13、14、15、16、17)
如果您的 WildFly 版本仍未通过 Jakarta EE 认证,那么您需要应用的唯一更改是您的 BOM,这将是用于服务器和客户端应用程序的wildfly-javaee8-with-tools 。无需其他更改:
<dependencyManagement>
   <dependencies>
      <dependency>
         <groupId>org.wildfly.bom</groupId>
         <artifactId>wildfly-javaee8-with-tools</artifactId>
         <version>${version.server.bom}</version>
         <type>pom</type>
         <scope>import</scope>
      </dependency>
   </dependencies>
</dependencyManagement>
部署 EJB 服务器项目
由于我们的 pom.xml 包含 WildFly 的 maven 插件,您可以简单地构建和部署 EJB Server 项目,如下所示:
mvn install wildfly:deploy从服务器日志中检查 EJB 项目已部署并且 JNDI 绑定可用:
08:24:43,534 INFO  [org.jboss.as.ejb3.deployment] (MSC service thread 1-3) WFLYEJB0473: JNDI bindings for session bean named 'AccountEJB' in deployment unit 'deployment "ejb-client-basic.war"' are as follows:

    java:global/ejb-client-basic/AccountEJB!com.mastertheboss.ejb.Account
    java:app/ejb-client-basic/AccountEJB!com.mastertheboss.ejb.Account
    java:module/AccountEJB!com.mastertheboss.ejb.Account
    java:jboss/exported/ejb-client-basic/AccountEJB!com.mastertheboss.ejb.Account
    ejb:/ejb-client-basic/AccountEJB!com.mastertheboss.ejb.Account?stateful
    java:global/ejb-client-basic/AccountEJB
    java:app/ejb-client-basic/AccountEJB
    java:module/AccountEJB
创建 EJB 客户端项目
现在让我们编写一个 EJB 客户端应用程序。为了简单起见,我们的应用程序将仅由一个 Servlet FE 和一个调用 Account 和 Calculator EJB 的 EJB 组成。这是Servlet:
package com.mastertheboss.ejbclient;

import java.io.IOException;
import javax.naming.Context;
import javax.naming.InitialContext;
import javax.naming.NamingException;
import javax.servlet.annotation.WebServlet;
import javax.servlet.http.HttpServlet;
import javax.servlet.http.HttpServletRequest;
import javax.servlet.http.HttpServletResponse;
import javax.ejb.*;


@WebServlet(urlPatterns = "/ejbclient")
public class ServletFE extends HttpServlet {
    @EJB EJBClient ejb;

    protected void doGet(HttpServletRequest request, HttpServletResponse response) {

        response.setContentType("html");
        write(response, "Example Servlet to show how EJB can invoke an EJB in another application");

        try {
            long money= request.getParameter("money") != null ? Long.parseLong(request.getParameter("money")) : 100l;
            float moneyWithInterest = ejb.callRemoteEJBs(money);
            write(response, "Amount: " + moneyWithInterest);
            } catch (Exception n) {
                  write(response, "Failed to invoke Remote EJB");
                write(response, n.getMessage());

            }

    }

    private static void write(HttpServletResponse writer, String message) {

        try {
            writer.getWriter().write(message + "\n");
        } catch (IOException e) {
            e.printStackTrace();
        }
    }

}
如您所见,它只是我们 EJB 的一个小包装器,其中包含实际的 EJB 客户端交互:
package com.mastertheboss.ejbclient;

import java.util.Hashtable;

import javax.naming.Context;
import javax.naming.InitialContext;
import javax.naming.NamingException;

import com.mastertheboss.ejb.*;
import com.mastertheboss.exception.*;


import javax.naming.spi.NamingManager;
import javax.ejb.*;
@Stateless
public class EJBClient {

    @EJB(name="ejb:/ejb-server-basic/CalculatorEJB!com.mastertheboss.ejb.Calculator")
    Calculator calculator;

    @EJB(name="ejb:/ejb-server-basic/AccountEJB!com.mastertheboss.ejb.Account?stateful")
    Account account;

    public float callRemoteEJBs(long money) throws Exception {
        account.createAccount(money);
        System.out.println("Create Account with "+money);

        account.deposit(money/2);
        System.out.println("Deposit " +(money/2));

        try {
            account.withdraw(money/3);
            System.out.println("Withdraw "+(money/3));

        } catch (InsufficientFundsException e) {

            e.printStackTrace();
        }
        money = account.getMoney();
        System.out.println("Money left " + money);
        float totalMoney = calculator.calculateInterest(money);
        System.out.println("Money plus interests " + totalMoney);
        return totalMoney;
    }
}
请注意,由于我们将调用驻留在同一应用程序服务器中的 EJB,因此查找远程 EJB 所需的只是以下内容:
@EJB(name="ejb:/ejb-server-basic/CalculatorEJB!com.mastertheboss.ejb.Calculator")
Calculator calculator;

@EJB(name="ejb:/ejb-server-basic/AccountEJB!com.mastertheboss.ejb.Account?stateful")
Account account;
配置客户端依赖项(WildFly 18 及更高版本)
服务器项目需要以下一组依赖项:
<dependencyManagement>
    <dependencies>
        <dependency>
            <groupId>org.wildfly.bom</groupId>
            <artifactId>wildfly-jakartaee8-with-tools</artifactId>
            <version>${version.server.bom}</version>
            <type>pom</type>
            <scope>import</scope>
        </dependency>
    </dependencies>
</dependencyManagement>
<dependencies>
<!-- We depend on the EJB remote business interfaces of this application -->
    <dependency>
     <groupId>com.itbuzzpress.chapter4</groupId>
     <artifactId>ejb-server-basic</artifactId>
     <type>ejb-client</type>
     <version>${project.version}</version>
    </dependency>
<!-- Include the ejb client jars -->
    <dependency>
     <groupId>org.wildfly</groupId>
     <artifactId>wildfly-ejb-client-bom</artifactId>
     <type>pom</type>
     <scope>compile</scope>
    </dependency>
</dependencies>
与此类似,Property version.server.bom包含 Application Server 版本,例如:
<properties>
   <version.server.bom>18.0.0.Final</version.server.bom>
</properties>
至于 EJB 服务器项目,如果您在 WildFly 11 和 WildFly 17 之间运行 WildFly 版本,请在您的依赖项管理部分中使用 artifactId wildfly-javaee8-with-tools 。
在 EJB 客户端项目中配置安全性
影响您的客户端的另一个更改是以前的jboss-ejb-client.properties文件已被弃用,因此我们鼓励您迁移到 Elytron wildfly-config.xml文件,该文件将所有客户端配置统一在一个地方。出于我们示例的目的,我们将只添加一个默认的 wildfly-confug.xml 文件,该文件使用任何可用的 SASL 机制选择器进行身份验证。
<configuration>
    <authentication-client xmlns="urn:elytron:1.0">
        <authentication-rules>
                    <rule use-configuration="default" />
        </authentication-rules>
        <authentication-configurations>
            <configuration name="default">
                <sasl-mechanism-selector selector="#ALL" />
                <set-mechanism-properties>
                    <property key="wildfly.sasl.local-user.quiet-auth" value="true" />
                 </set-mechanism-properties>
                <providers>
                    <use-service-loader/>
                </providers>
             </configuration>
        </authentication-configurations>
    </authentication-client>
</configuration>
另一方面,如果您需要提供凭据,则可以将它们添加到 authentication-configurations 块中,如下例所示:
<configuration>
    <authentication-client xmlns="urn:elytron:1.0">
        <authentication-rules>
            <rule use-configuration="default"/>
        </authentication-rules>
        <authentication-configurations>
            <configuration name="default">
                <sasl-mechanism-selector selector="DIGEST-MD5"/>
                <set-user-name name="ejbuser"/>
                <credentials>
                    <clear-password password="password1!"/>
                </credentials>
            </configuration>
        </authentication-configurations>
    </authentication-client>
</configuration>
要在服务器上创建用户,只需执行 add-user.sh 脚本,如下所示:
$ ./add-user.sh -a -u ejbuser -p password1! 测试 EJB 客户端项目
为了测试我们的应用程序,还要部署 Client 项目:
mvn clean install wildfly:deploy您可以通过 Servlet URI 测试应用程序,即“/ejbclient”:
curl http://localhost:8080/ejb-client-basic/ejbclient?money=200您可以在以下位置查看本教程的源代码: https ://github.com/fmarchioni/mastertheboss/tree/master/ejb/intra-server-remote-ejb


 被折叠的 条评论
为什么被折叠?
被折叠的 条评论
为什么被折叠?
 到【灌水乐园】发言


