笔者直接上代码,组件的详细介绍参考微信开发者文档:点击查看
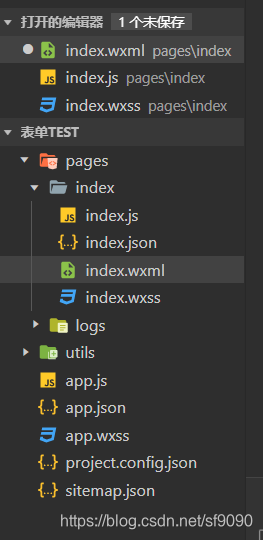
1.工程目录

2.详细代码
Page({
data: {
background:
['https://res.wx.qq.com/wxdoc/dist/assets/img/0.4cb08bb4.jpg','https://res.wx.qq.com/wxdoc/dist/assets/img/0.4cb08bb4.jpg','https://res.wx.qq.com/wxdoc/dist/assets/img/0.4cb08bb4.jpg'],
indicatorDots: true,
vertical: false,
autoplay: false,
interval: 2000,
duration: 500,
items: [
{value: 'USA', name: '美国'},
{value: 'CHN', name: '中国', checked: 'true'},
{value: 'BRA', name: '巴西'},
{value: 'JPN', name: '日本'},
{value: 'ENG', name: '英国'},
{value: 'FRA', name: '法国'}
],
inputValue: '',
radioItems: [
{name: 'USA', value: '美国'},
{name: 'CHN', value: '中国', checked: 'true'}
],
},
checkboxChange(e) {
console.log('checkbox发生change事件,携带value值为:', e.detail.value)
const items = this.data.items
const values = e.detail.value
for (let i = 0, lenI = items.length; i < lenI; ++i) {
items[i].checked = false
for (let j = 0, lenJ = values.length; j < lenJ; ++j) {
if (items[i].value === values[j]) {
items[i].checked = true
break
}
}
}
this.setData({
items
})
},
onLoad: function (options) {
},
onReady: function () {
},
onShow: function () {
},
onHide: function () {
},
onUnload: function () {
},
onPullDownRefresh: function () {
},
onReachBottom: function () {
},
onShareAppMessage: function () {
},
bindKeyInput: function (e) {
this.setData({
inputValue: e.detail.value
})
},
radioChange(e) {
const checked = e.detail.value
const changed = {}
for (let i = 0; i < this.data.radioItems.length; i++) {
if (checked.indexOf(this.data.radioItems[i].name) !== -1) {
changed['radioItems[' + i + '].checked'] = true
} else {
changed['radioItems[' + i + '].checked'] = false
}
}
this.setData(changed)
console.log(changed)
},
tapEvent() {
console.log('按钮被点击')
},
submit:function(e){
console.log(e)
}
})
内容包括添加视频播放、轮转图片、多选框、单选框、实时获取输入值、按钮提交输入控件的数据
<!--index.wxml-->
<view class="container">
<view>
 <text>hello world </text>


 <checkbox-group bindchange="checkboxChange" >
  <label  wx:for="{{items}}" wx:key="{{item.value}}">
      <view >
          <checkbox value="{{item.value}}" checked="{{item.checked}}"/>
      </view>
      <view>{{item.name}}</view>
    </label>
  </checkbox-group>
       </view>


<view class="item3" >

    <form bindsubmit="submit">
      <custom-comp>
         <input name="name" placeholder="请输入名字"></input>
        <switch name="student" />
      </custom-comp>
      <button form-type="submit" size="default" type="primary" >提交</button>
    </form>

</view>


<view class="item">
  <view>实时获取输入值:{{inputValue}}</view>

     <input   maxlength="10" bindinput="bindKeyInput" placeholder="输入同步到view中"/>
  </view>
</view>


<view class="item1">
 <text>radio-group</text>
  <radio-group class="group" bindchange="radioChange">
        <view class="label-2" wx:for="{{radioItems}}">
          <radio id="{{item.name}}" value="{{item.name}}" checked="{{item.checked}}"></radio>
          <label class="label-2-text" for="{{item.name}}"><text>{{item.name}}</text></label>
        </view>
 </radio-group>
</view>


<view class="item2">
 <text>swiper   image </text>
      <swiper indicator-dots="{{indicatorDots}}" sytle="width:300px"
        autoplay="{{autoplay}}" interval="{{interval}}" duration="{{duration}}">
        <block wx:for="{{background}}" wx:key="*this">
          <swiper-item>
      <image src="{{item}}" class="slide-image" width="355" height="300"/>

          </swiper-item>
        </block>
      </swiper>
    </view>


    <view class="item2">
     <text>video </text>
        <video
      id="myVideo"
      src="http://81.71.14.198/vx/testvx.mp4"
      binderror="videoErrorCallback"
      danmu-list="{{danmuList}}"
      enable-danmu
      danmu-btn
      show-center-play-btn='{{false}}'
      show-play-btn="{{true}}"
      controls
      picture-in-picture-mode="{{['push', 'pop']}}"
      bindenterpictureinpicture='bindVideoEnterPictureInPicture'
      bindleavepictureinpicture='bindVideoLeavePictureInPicture'
    ></video>
        </view>
.container{
height:100%;
width: 100%;
background-color:rgb(119, 151, 221);
display: flex;
flex-direction: row;
flex-wrap: wrap;
justify-content: space-between;
align-items: center;
}
.item{
width:100%;
height: 100rpx;
background-color: yellow;
border:1px solid#fff;
order: 3;
}
.item1{
width:100%;
height: 150rpx;
background-color: rgb(105, 185, 109);
border:1px solid#fff;
order: 3;
}
.item2{
height: 300px;
background-color: rgb(153, 172, 211);
border:1px solid#fff;
order: 3;
}
.item3{
background-color: rgb(241, 237, 241);
border:1px solid#fff;
order: 3;
}
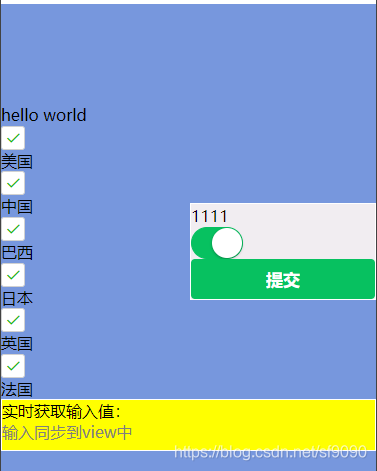
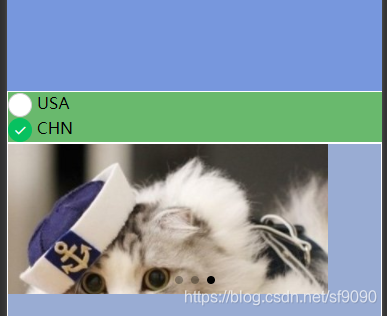
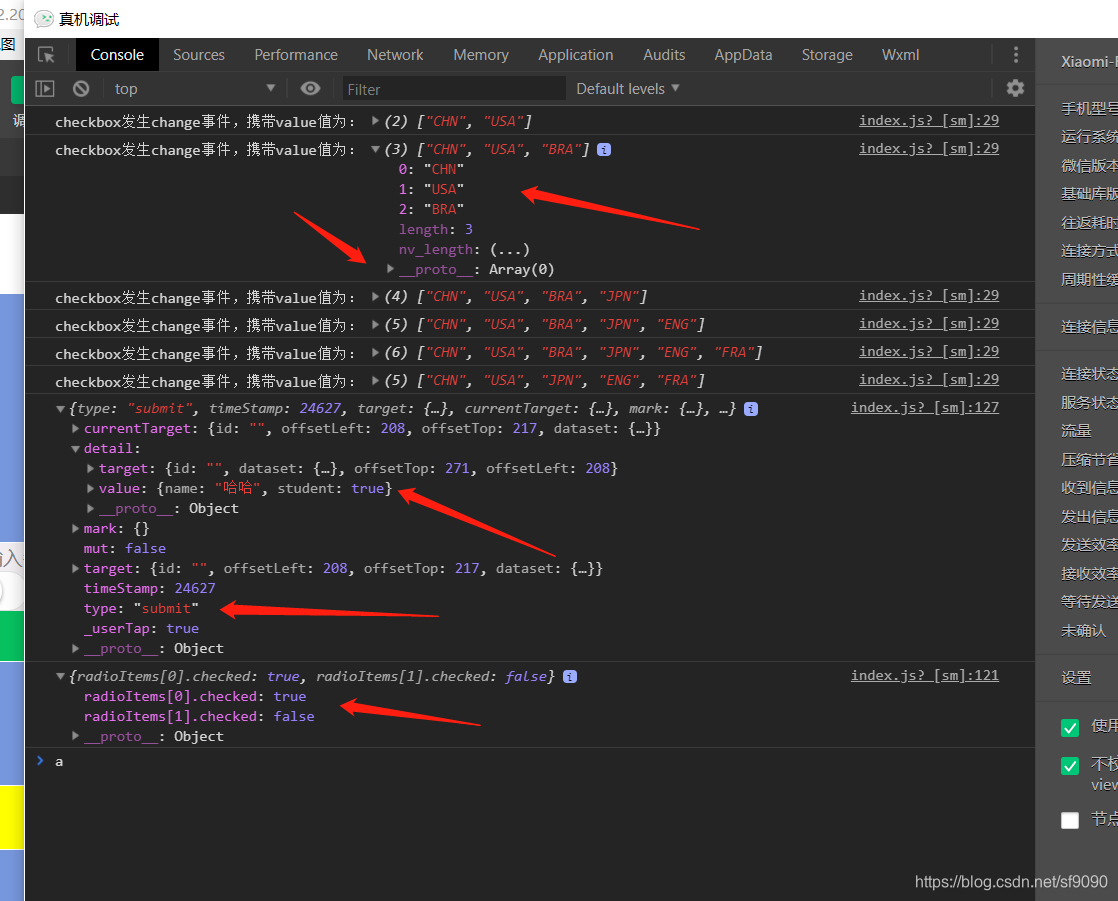
3.结果展示


在这里插入图片描述
4.获取资源
资源链接:资源获取
·


 996
996

 被折叠的 条评论
为什么被折叠?


