


 本文介绍了如何在MFC环境下利用Scintilla控件创建一个具有语法高亮、行号显示、代码折叠和代码补全功能的文本编辑器。首先,下载Scintilla和Lexilla的源码与DLL,然后在对话框工程中添加控件和相关头文件,接着设置控件风格和处理通知事件以实现功能,最后处理输入事件和自动缩进,完成编辑器的构建。
一、概述
Scintilla是一个免费的源代码编辑控件,它完全开放源代码,并且提供一个license允许用户自由地将它用在开源软件或是商业软件中。比如我们常用的notepad++就是使用了这个控件。https://github.com/notepad-plus-plus/notepad-plus-plus/pull/12624
Scintilla官方下载地址:https://www.scintilla.org/scintilla532.zip
配套的lex下载地址:https://www.scintilla.org/lexilla521.zip
编辑器控件代码是跨平台的,而如果需要在mfc中使用,则需要进行适当封装,幸好有人已经做好了相关的工作:CScintillaCtrl, CScintillaView & CScintillaDoc v1.77
该控件可以在对话框中以及视图中使用,该压缩包下载后就是一个完整的示例,可以编译;
另外有人也提供了一个相关的示例,该示例的发布信息中提供了可用的DLL文件,我们不再需要再编译可执行文件Scintilla.dll和Lexilla.dll。https://github.com/RadAd/RadNotepadMFC
本文主要讨论如何在对话框中使用和配置典型的功能。
二、需求与环境
VS2019,windows11,使用MFC开发;
1)在对话框中添加代码编辑器,
2)支持某种语言的关键字语法高亮,
3)行号显示与代码折叠
4)代码提示补全,
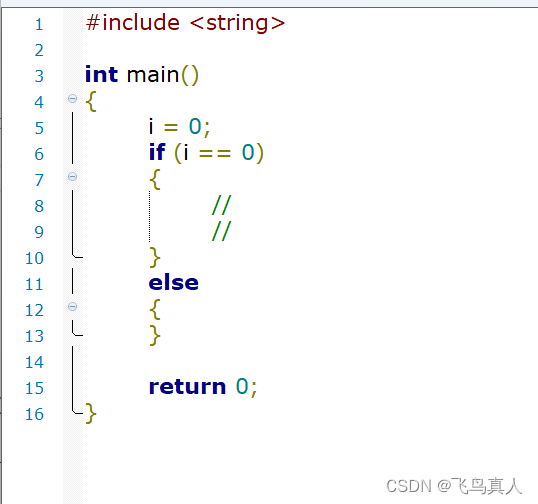
效果如下:

三、步骤
1)下载源码压缩包
https://www.scintilla.org/scintilla532.zip
https://www.scintilla.org/lexilla521.zip
http://www.naughter.com/download/scintillawrappers.zip
2)下载DLL
Releases · RadAd/RadNotepadMFC · GitHub
3)创建
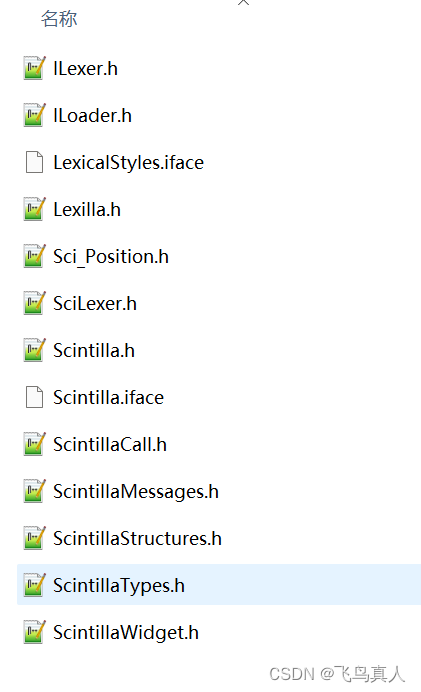
3.1 创建一个对话框工程,新建include目录,解压官网压缩包,将头文件拷贝过来:并在项目中设置相关的包含目录
将控件压缩包解开,拷贝一对文件ScintillaCtrl.h和ScintillaCtrl.cpp进来,添加到项目中;
3.2 在项目中新建一个该控件的子控件,比如RobinEditor,继承自ScintillaCtrl
3.3 项目的字符串资源中添加一个控件ID
IDS_EDITOR1 101 "test"3.4 加载库并运行
在对话框中添加成员变量:
	RobinEditor* pEditor;

	//Member variables
	HINSTANCE m_hScintilla;
	HINSTANCE m_hLexilla;
	Lexilla::CreateLexerFn m_pCreateLexer;
在BOOL CtestDiaDlg::OnInitDialog()中添加加载DLL代码如下;
    // 加载库
    m_hLexilla = LoadLibrary("D:\\TBuild\\x64\\Lexilla.dll");
	if (m_hLexilla == nullptr)
	{
		AfxMessageBox(_T("无法加载Lexilla.dll"));
		return FALSE;
	}

	m_hScintilla = LoadLibrary("D:\\TBuild\\x64\\Scintilla.dll");
	if (m_hScintilla == nullptr)
	{
		AfxMessageBox(_T("Scintilla.dll"));
		return FALSE;
	}

// 创建语法解析器,并设置使用CPP
	m_pCreateLexer = reinterpret_cast<Lexilla::CreateLexerFn>(GetProcAddress(m_hLexilla, LEXILLA_CREATELEXER));
	if (m_pCreateLexer == nullptr)
	{
		AfxMessageBox(_T("Could not find the Lexilla CreateLexer function"));
		return FALSE;
	}

	CRect rect;
	this->GetClientRect(&rect);
	pEditor = NewEditor(IDS_EDITOR1, rect, 0);

	Scintilla::ILexer5* iLex = m_pCreateLexer("cpp");
	if (iLex == nullptr)
	{
		AfxMessageBox(_T("load scheme  error"));
	}
	pEditor->SetILexer(iLex);
	//pEditor->setup();
正常情况下,到这里编译运行已经可以运行并看到编辑器了,但是此时还没有相关的语法高亮以及相关的代码补全功能;
3.5 设置对话框的OnNotify
这个很重要,因为对话框需要将通知信息自己转发到控件,在类向导中,虚函数列表中双击那个OnNotify,并编辑该段函数:
BOOL CtestDiaDlg::OnNotify(WPARAM wParam, LPARAM lParam, LRESULT* pResult)
{
	// TODO: 在此添加专用代码和/或调用基类
	if (pEditor)
	{
		pEditor->OnNotify(wParam, lParam, pResult);
	}
	return CDialogEx::OnNotify(wParam, lParam, pResult);
}
如果不添加这个函数,控件无法获取点击以及输入事件,,我们需要在点击边框事件中处理折叠动作,在输入的时候检测是否需要显示提示信息;
3.6 设置风格
在RobinEditor中添加setup函数,执行相关设置:
void RobinEditor::DefineMarker(int marker, Scintilla::MarkerSymbol markerType, COLORREF fore, COLORREF back)
{

	this->MarkerDefine(marker, markerType);
	this->MarkerSetFore(marker, fore);
	this->MarkerSetBack(marker, back);
}

void RobinEditor::SetAStyle(int style, COLORREF fore, COLORREF back, int size, const char* face)
{
	this->StyleSetFore(style, fore);
	this->StyleSetBack(style, back);
	if (size >= 1)
		this->StyleSetSize(style, size);
	if (face)
		this->StyleSetFont(style, face);
}


void RobinEditor::setup()
{

	const TCHAR* g_cppKeyWords
	{ _T("alignas alignof and and_eq asm atomic_cancel atomic_commit atomic_noexcept auto bitand bitor bool break ")
	 _T("case catch char char8_t char16_t char32_t class compl concept const consteval constexpr constinit const_cast continue ")
	 _T("co_await co_return co_yield decltype default delete do double dynamic_cast else enum explicit export extern false float for ")
	 _T("friend goto if inline int long mutable namespace new noexcept not not_eq nullptr ")
	 _T("operator or or_eq private protected public ")
	 _T("reflexpr register reinterpret_cast requires return short signed sizeof static static_assert static_cast struct switch synchronized ")
	 _T("template this thread_local throw true try typedef typeid typename union unsigned using ")
	 _T("virtual void volatile wchar_t while xor xor_eq") };
	this->SetKeyWords(0, g_cppKeyWords);


	//_setmbcp(932);

	UINT codepage = _getmbcp(); // GetConsoleOutputCP();

	this->SetCodePage(codepage);


	//Setup styles
	SetAStyle(static_cast<int>(Scintilla::StylesCommon::Default), RGB(0, 0, 0), RGB(0xff, 0xff, 0xff), 11, "Verdana");
	this->StyleClearAll();
	SetAStyle(SCE_C_DEFAULT, RGB(0, 0, 0));
	SetAStyle(SCE_C_COMMENT, RGB(0, 0x80, 0));
	SetAStyle(SCE_C_COMMENTLINE, RGB(0, 0x80, 0));
	SetAStyle(SCE_C_COMMENTDOC, RGB(0, 0x80, 0));
	SetAStyle(SCE_C_COMMENTLINEDOC, RGB(0, 0x80, 0));
	SetAStyle(SCE_C_COMMENTDOCKEYWORD, RGB(0, 0x80, 0));
	SetAStyle(SCE_C_COMMENTDOCKEYWORDERROR, RGB(0, 0x80, 0));
	SetAStyle(SCE_C_NUMBER, RGB(0, 0x80, 0x80));
	SetAStyle(SCE_C_WORD, RGB(0, 0, 0x80));
	this->StyleSetBold(SCE_C_WORD, 1);
	SetAStyle(SCE_C_STRING, RGB(0x80, 0, 0x80));
	SetAStyle(SCE_C_IDENTIFIER, RGB(0, 0, 0));
	SetAStyle(SCE_C_PREPROCESSOR, RGB(0x80, 0, 0));
	SetAStyle(SCE_C_OPERATOR, RGB(0x80, 0x80, 0));

	//Setup folding
	this->SetMarginTypeN(0, MarginType::Number);
	this->SetMarginWidthN(0, 16);
	this->SetMarginSensitiveN(0, TRUE);

	this->SetMarginTypeN(2, Scintilla::MarginType::Symbol);
	this->SetMarginWidthN(2, 16);
	this->SetMarginSensitiveN(2, TRUE);
	this->SetMarginMaskN(2, Scintilla::MaskFolders);
	this->SetSCIProperty(_T("fold"), _T("1"));
	// 设置页边显示的文本颜色-红色(注意颜色值顺序是BGR,而不是RGB,要不然颜色就反了)
	this->StyleSetFore(STYLE_LINENUMBER, RGB(0x00, 0x77, 0xAA));

	// 设置页边背景色-绿色
	//mpEditor->StyleSetBack(STYLE_LINENUMBER, 0x0000FF00);


	//Setup markers
	DefineMarker(static_cast<int>(Scintilla::MarkerOutline::FolderOpen), Scintilla::MarkerSymbol::Minus, RGB(0xff, 0xff, 0xff), RGB(0, 0, 0xFF));
	DefineMarker(static_cast<int>(Scintilla::MarkerOutline::Folder), Scintilla::MarkerSymbol::Plus, RGB(0xff, 0xff, 0xff), RGB(0, 0, 0));
	DefineMarker(static_cast<int>(Scintilla::MarkerOutline::FolderSub), Scintilla::MarkerSymbol::Empty, RGB(0xff, 0xff, 0xff), RGB(0, 0, 0));
	DefineMarker(static_cast<int>(Scintilla::MarkerOutline::FolderTail), Scintilla::MarkerSymbol::Empty, RGB(0xff, 0xff, 0xff), RGB(0, 0, 0));
	DefineMarker(static_cast<int>(Scintilla::MarkerOutline::FolderEnd), Scintilla::MarkerSymbol::Empty, RGB(0xff, 0xff, 0xff), RGB(0, 0, 0));
	DefineMarker(static_cast<int>(Scintilla::MarkerOutline::FolderOpenMid), Scintilla::MarkerSymbol::Empty, RGB(0xff, 0xff, 0xff), RGB(0, 0, 0));
	DefineMarker(static_cast<int>(Scintilla::MarkerOutline::FolderMidTail), Scintilla::MarkerSymbol::Empty, RGB(0xff, 0xff, 0xff), RGB(0, 0, 0));


	//Setup auto completion
	this->AutoCSetSeparator(10); //Use a separator of line feed

	//Setup call tips
	this->SetMouseDwellTime(1000);

	//Enable Multiple selection
	this->SetMultipleSelection(TRUE);

}
添加了这个函数并调用,就可以看到语法高亮了,行号也可以看到了,但是还是无法折叠与提示。
3.7 处理输入事件
同样的在虚函数表中重写OnNotify,
如下:
BOOL RobinEditor::OnNotify(WPARAM wParam, LPARAM lParam, LRESULT* pResult)
{
#pragma warning(suppress: 26490)
	const NotifyHeader* pNMHdr{ reinterpret_cast<NotifyHeader*>(lParam) };
#pragma warning(suppress: 26496)
	AFXASSUME(pNMHdr != nullptr);

	//Is it a notification from the embedded control
#pragma warning(suppress: 26489)
	if (pNMHdr->hwndFrom == this->GetSafeHwnd())
	{
#pragma warning(suppress: 26490)
		auto pSCNotification{ reinterpret_cast<NotificationData*>(lParam) };
		switch (pNMHdr->code)
		{

		case Notification::CharAdded:
		{
#pragma warning(suppress: 26486)
			OnCharAdded(pSCNotification);
			break;
		}

		case Notification::MarginClick:
		{
#pragma warning(suppress: 26486)
			OnMarginClick(pSCNotification);
			break;
		}

		default:
		{
			break;
		}
		}
		return TRUE; // we processed the message
	}
	else
	{
		//let the base class do its thing
		return __super::OnNotify(wParam, lParam, pResult);
	}

//	return CScintillaCtrl::OnNotify(wParam, lParam, pResult);
}
然后添加关于点击边框的代码折叠功能:
void RobinEditor::OnMarginClick(_Inout_ NotificationData* pSCNotification)
{
	//By default get the line where the click occurred and toggle its fold state

	const auto nLine{ this->LineFromPosition(pSCNotification->position) };
	this->ToggleFold(nLine);
}
再添加代码补全功能,这里主要是检测当前输入的是啥,如果前缀匹配,就可以提示列表,并确定从第几个字符开始补全:
// 这里设置自动补全功能
void RobinEditor::OnCharAdded(_Inout_ Scintilla::NotificationData* pSCNotification)
{
	UNREFERENCED_PARAMETER(pSCNotification);

	const Scintilla::Position nStartSel{ this->GetSelectionStart() };
	const Scintilla::Position nEndSel{ this->GetSelectionEnd() };


	//As another example, get the previous 2 characters and if it is "res" case sensitive
	//then display a list which allows "resize", "restart" and "restore"
	if ((nStartSel == nEndSel) && (nStartSel >= 3))
	{
		Scintilla::TextRangeFull tr{};
		tr.chrg.cpMin = nStartSel - 3;
		tr.chrg.cpMax = nEndSel;
		CStringA sText;
		tr.lpstrText = sText.GetBuffer(3);
		GetTextRangeFull(&tr);
		sText.ReleaseBuffer();

		//Display the auto completion list
		if (sText == "res")
		{
			//Display the auto completion list
			AutoCShow(3, _T("resize\nrestart\nrestore"));
		}
	}


	}
这段代码就是当检测到res字符时候,提示resize,nrestart,restore并从偏移值为3后面开始补全。
3.8) 自动缩进处理
参考官方处理:Scintilla Usage Notes
添加一个变量标记最后输入的字符,并在OnUpdateUI中进行新行的头部替换
// 计算自动缩进,最好设置使用tab
void RobinEditor::OnUpdateUI(_Inout_ NotificationData* pSCNotification)
{
	auto pos = GetCurrentPos();
	auto line = LineFromPosition(pos);
	auto  lineLength = LineLength(line);

	if (lstChar == '\r' || lstChar == '\n')
	{
		if (line > 0 && lineLength <= 2)
		{
			auto  prevLineLength = LineLength(line - 1);

			CString str = this->GetLine(line - 1);

			int i = 0;
			for (i = 0; i < str.GetLength(); i++)
			{
				if (str[i] != ' ' && str[i] != '\t')
					break;
			}
			if (i > 0)
			{

				str = str.Left(i);
				this->ReplaceSel(str);
			}
		}
	}// end \r\n
}
到这里基本就结束了。
最后的效果如下:


 到【灌水乐园】发言


