


从零实现一个简易的聊天软件(Netty版)
1、简介
官方的简介:
Netty is an asynchronous event-driven network application framework for rapid development of maintainable high performance protocol servers & clients.
Netty是 一个异步事件驱动的网络应用程序框架,用于快速开发可维护的高性能协议服务器和客户端。
2、使用Netty的原因
为什么使用Netty,我们这里就不说java自带的socket,我们这里说为什么不使用Nio呢?
2.1 Nio的缺点
NIO的类库和API繁杂,学习成本高,你需要熟练掌握Selector、ServerSocketChannel、SocketChannel、ByteBuffer等。
需要熟悉Java多线程编程。这是因为NIO编程涉及到Reactor模式,你必须对多线程和网络编程非常熟悉,才能写出高质量的NIO程序。
臭名昭著的epoll bug。它会导致Selector空轮询,最终导致CPU 100%。直到JDK1.7版本依然没得到根本性的解决。
Nio的简易代码
通过Nio简易代码和后面的Netty版实现比对后,这里的实现比较简易,但也能够发现使用Nio实现聊天软件复杂且繁琐。
**客户端代码实现 **
/**
 * @Description:
 * @author: zh
 * @Create : 2024/12/31
 * @Project_name : client
 * @Version :
 **/
public class NioClient {
    public static void main(String[] args) {
        String s = "zh";
        System.out.println(s.getBytes(Charset.forName("UTF-8")));
    }
    public void start() throws InterruptedException {
        Bootstrap bootstrap = new Bootstrap();
        NioEventLoopGroup eventExecutors = new NioEventLoopGroup(2);
        bootstrap.group(eventExecutors);
        //设置channel类型
        bootstrap.channel(NioSocketChannel.class);
        bootstrap.remoteAddress("127.0.0.1",8888);

        bootstrap.option(ChannelOption.ALLOCATOR, PooledByteBufAllocator.DEFAULT);
        //pipeline和handler设置
        bootstrap.handler(new ChannelInitializer<SocketChannel>() {
            @Override
            protected void initChannel(SocketChannel socketChannel) throws Exception {
                socketChannel.pipeline().addLast(new NettyMsgCilentHandler());
            }
        });
        ChannelFuture connect = bootstrap.connect();
        connect.addListener((ChannelFuture listener) -> {
            if(listener.isSuccess()) {
                System.out.println("连接 成功!");
            } else {
                System.out.println("连接 失败! 可以进行后续的补救措施!");
            }
        });
        connect.sync();
        Channel channel = connect.channel();
        Scanner scanner = new Scanner(System.in);
        System.out.println("请输入发送内容:");
        while(scanner.hasNext()) {
            String next = scanner.next();
            byte[] bytes = (new Date() + ">>" + next).getBytes();
            ByteBuf buffer = channel.alloc().buffer();
            buffer.writeBytes(bytes);
            channel.writeAndFlush(buffer);
            System.out.println("消息发送完成!");
        }
        eventExecutors.shutdownGracefully();


    }
}
服务端代码实现
public class NioServer {
    public static void main(String[] args) {
        start();
    }
    @SneakyThrows
    public static void start(){
        ServerBootstrap serverBootstrap = new ServerBootstrap();
//        绑定端口
        serverBootstrap.localAddress(8888);
//        绑定有多少个交换机
        EventLoopGroup main = new NioEventLoopGroup(2);
        EventLoopGroup sub = new NioEventLoopGroup(2);
        serverBootstrap.group(main,sub);
        //路由模式
        serverBootstrap.channel(NioServerSocketChannel.class);
        serverBootstrap.option(ChannelOption.ALLOCATOR, PooledByteBufAllocator.DEFAULT);
        serverBootstrap.option(ChannelOption.SO_KEEPALIVE, true);

        serverBootstrap.childHandler(new ChannelInitializer<SocketChannel>() {
            @Override
            protected void initChannel(SocketChannel channel) throws Exception {
                channel.pipeline().addLast(null);
            }
        });
        serverBootstrap.clone();

    }
}
class  ChannleHander extends ChannelInboundHandlerAdapter{
//    重写读消息
    @Override
    public void channelRead(ChannelHandlerContext ctx, Object msg) throws Exception {

        ByteBuf in = (ByteBuf) msg;
        try {
            while (in.isReadable()) {
//                这里是乱码,没有使用UTF-8格式读取
                byte b = in.readByte();
                //输出是采用UTF-8格式
                System.out.println((char) b);
            }
            System.out.println();
        } finally {
            ReferenceCountUtil.release(msg);
        }
    }
2.2 Netty的优点
Netty的优点有很多:
- API使用简单,学习成本低。
- 功能强大,内置了多种解码编码器,支持多种协议。
- 性能高,对比其他主流的NIO框架,Netty的性能最优。
- 社区活跃,发现BUG会及时修复,迭代版本周期短,不断加入新的功能。
- Dubbo、Elasticsearch都采用了Netty,质量得到验证。
3、使用Netty
这里的开发环境是idea+maven+JDK1.8,spring boot的版本是
<parent>
    <groupId>org.springframework.boot</groupId>
    <artifactId>spring-boot-starter-parent</artifactId>
    <version>2.7.11</version>
    <relativePath/> <!-- lookup parent from repository -->
</parent>
3.1、通信协议
我这的传输协议采用的是微软的protobuf序列化协议,为什么采用这个协议?
Protobuf 的优点:
- 消息格式为二进制
- 独立于平台和语言
- 比JSON 和 XML 等其他消息格式相比效率更高
定义protoMsg
syntax = "proto3";
//这里定义的包名字,是java中的类的包名,可以在target中找到
//如果通过install 下载依赖的时候,下载不成功,建议将项目的目录移至没有中文的目录下重新构建一次
package com.zh.nettyServer.pojos;

/*消息的枚举类型*/
enum HeadType {
  LOGIN_REQUEST = 0;  //登录
  LOGIN_RESPONSE = 1;
  LOGOUT_REQUEST = 2;  //退出
  LOGOUT_RESPONSE = 3;
  HEART_BEAT = 4;      //心跳
  MESSAGE_REQUEST = 5;    //IM
  MESSAGE_RESPONSE = 6;   //消息转发
  MESSAGE_NOTIFICATION = 7;  //通知
}

/*登录信息*/
// LoginRequest对应的HeadType为LOGIN_REQUEST
// 消息名称去掉下划线,更加符合Java 的类名规范
message LoginRequest {
  string uid = 1;   // 用户唯一id
  string deviceId = 2;  // 设备ID
  string token = 3;       // 用户token
  uint32 platform = 4;  //客户端平台 windows、mac、android、ios、web
  string app_version = 5;   // APP版本号
}
/*登录响应*/
message LoginResponse {
  bool result = 1;  //true表示发送成功,false表示发送失败
  uint32 code = 2;  //错误码
  string info = 3;  //错误描述
  uint32 expose = 4;  //错误描述是否提示给用户:1 提示;0 不提示
}

/*聊天消息*/
message MessageRequest {
  uint64 msg_id = 1;
  string from = 2;
  string to = 3;
  uint64 time = 4;
  uint32 msg_type = 5;
  string content = 6;
  string url = 8;
  string property = 9;
  string from_nick = 10;
  string json = 11;
}

/*聊天响应*/
message MessageResponse {
  bool result = 1;
  uint32 code = 2;
  string info = 3;
  uint32 expose = 4;
}

/*通知*/
message MessageNotification {
  uint64 no_id = 1;
  string json = 2;
  string timestamp = 3;
}

/*心跳*/
message MessageHeartBeat {
  uint32   seq = 1;
  string   uid = 2;
  string   json = 3;
}


/*顶层消息*/
//顶层消息是一种嵌套消息,嵌套了各种类型消息
//逻辑上:根据消息类型 type的值,最多只有一个有效
message Message {
  HeadType       type = 1; //通用字段: 消息类型
  uint64         sequence = 2;  //通用字段:消息序列号
  string         session_id = 3;   //通用字段:会话id
  LoginRequest   loginRequest = 4;   //登录请求
  LoginResponse  loginResponse = 5;   //登录响应
  MessageRequest  messageRequest = 6;    //IM消息请求
  MessageResponse  messageResponse = 7;      //IM消息响应
  MessageNotification  notification = 8;        //系统通知
  MessageHeartBeat     heartBeat = 9;  //心跳
}
3.2、添加依赖
在pom文件中添加上相关的依赖
<dependencies>
    <dependency>
       <groupId>org.springframework.boot</groupId>
       <artifactId>spring-boot-starter</artifactId>
    </dependency>
    <dependency>
       <groupId>org.springframework.boot</groupId>
       <artifactId>spring-boot-starter-test</artifactId>
       <scope>test</scope>
    </dependency>
    <dependency>
       <groupId>org.springframework.boot</groupId>
       <artifactId>spring-boot-devtools</artifactId>
       <optional>true</optional>
    </dependency>
    <dependency>
       <groupId>io.netty</groupId>
       <artifactId>netty-all</artifactId>
       <version>4.0.33.Final</version>
    </dependency>
    <dependency>
       <groupId>com.google.protobuf</groupId>
       <artifactId>protobuf-java</artifactId>
       <version>3.6.1</version>
    </dependency>
    <dependency>
       <groupId>commons-lang</groupId>
       <artifactId>commons-lang</artifactId>
       <version>2.6</version>
    </dependency>
    <dependency>
       <groupId>org.projectlombok</groupId>
       <artifactId>lombok</artifactId>
       <version>1.16.10</version>
    </dependency>
    <dependency>
       <groupId>com.google.guava</groupId>
       <artifactId>guava</artifactId>
       <version>17.0</version>
    </dependency>
</dependencies>
3.3、编写客户端代码
一、处理器
Netty提供了很多内置的处理器,高效地利用这些处理器,可以经过简单的配置就可以实现部分复杂功能,而不是自己花时间和精力去重复造“轮子”。
自定义编码器(Encoder)
public class ProtobufEncoder extends MessageToByteEncoder<ProtoMsg.Message> {
    @Override
    protected void encode(ChannelHandlerContext ctx, ProtoMsg.Message msg, ByteBuf out) throws Exception {
        out.writeShort(ProtoInstant.MAGIC_CODE);
        out.writeShort(ProtoInstant.VERSION_CODE);
        byte[] bytes = msg.toByteArray();
        int length = bytes.length;
        out.writeInt(length);
        out.writeBytes(bytes);
    }
}
自定义解码器(Dncoder)
public class ProtobufDecoder extends ByteToMessageDecoder {
    @Override
    protected void decode(ChannelHandlerContext ctx, ByteBuf in, List<Object> out) throws Exception {
        in.markReaderIndex(); // 将当前的 reader位置进行一个 标记
        if(in.readableBytes() < 8) {
            return;
        }
        short magic = in.readShort();
        if(magic!= ProtoInstant.MAGIC_CODE) {
            System.out.println("魔数有问题!");
            throw new UnsupportedOperationException();
        }
        short version = in.readShort();

        int length = in.readInt();
        if(length < 0) {
            ctx.close();
        }
        if(length > in.readableBytes()) {
            in.resetReaderIndex();
            return;
        }
        byte[] array;
        if(in.hasArray()) { //堆缓冲
            ByteBuf slice = in.slice();
            array = slice.array();
        } else { //直接缓冲
            array = new byte[length];
            in.readBytes(array, 0, length);
        }
        ProtoMsg.Message message = ProtoMsg.Message.parseFrom(array);
        if(message != null) {
            out.add(message);
        }
    }
}
自定义登录验证处理器(LoginResponseHandler)
本项目仅仅是一个学习使用的基于Netty的聊天软件,未使用前端和DB,所以任意用户都可以进行访问,如果有增加的需要请自行增加(后续有时间,会进行迭代升级)。
public class LoginResponseHandler extends ChannelInboundHandlerAdapter {
    @Override
    public void channelRead(ChannelHandlerContext ctx, Object msg) throws Exception {
        if(msg == null || !(msg instanceof ProtoMsg.Message)) {
            super.channelRead(ctx, msg);
            return;
        }
        ProtoMsg.Message proto = (ProtoMsg.Message) msg;
        ProtoMsg.HeadType headType = proto.getType();
        if(!headType.equals(ProtoMsg.HeadType.LOGIN_RESPONSE)) {
            super.channelRead(ctx, msg);
            return;
        }

        ProtoMsg.LoginResponse loginResponse = proto.getLoginResponse();
        ProtoInstant.ResultCodeEnum result =
                ProtoInstant.ResultCodeEnum.values()[loginResponse.getCode()];
        if(!result.equals(ProtoInstant.ResultCodeEnum.SUCCESS)) {
            System.out.println("登录失败!");
            return;
        }

        ClientSession.loginSuccess(ctx, proto);
        //登录成功了,loginhandler还有用吗?还需要在pipline管道中占资源吗?
        ChannelPipeline p = ctx.pipeline();
        p.remove(this);
        p.addAfter("encoder","heartbeat",new HeartBeatClientHandler());
    }
}
自定义心跳处理器(HeartBeatClientHandler)
心跳处理器,用于服务端与客户端进行连接,保证服务的可用性,同时验证客户端的连通性。
public class HeartBeatClientHandler extends ChannelInboundHandlerAdapter {
//还需要定义一个心跳发送的时间间隔 s为单位
private static final int HEARTBEAT_INTERVAL = 60;
//我们需要接收服务端的回包 ,所以需要用InboundHandler
@Override
public void channelRead(ChannelHandlerContext ctx, Object msg) throws Exception {
if(msg == null || !(msg instanceof ProtoMsg.Message)) {
super.channelRead(ctx, msg);
return;
}
ProtoMsg.Message proto = (ProtoMsg.Message) msg;
ProtoMsg.HeadType headType = proto.getType();
if(headType.equals(ProtoMsg.HeadType.HEART_BEAT)) {
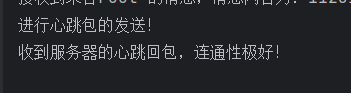
System.out.println("收到服务器的心跳回包,连通性极好!");
} else {
super.channelRead(ctx, msg);
}
}
//心跳什么时候开始发送呢? 回答:当我们的HeartBeatClientHandler加入到pipline管道的时候,就开始发送
@Override
public void handlerAdded(ChannelHandlerContext ctx) throws Exception {
ClientSession session = ClientSession.getSession(ctx);
User user = session.getUser();
HeartBeatMsgBuilder heartBeatMsgBuilder = new HeartBeatMsgBuilder(user, session);
ProtoMsg.Message message = heartBeatMsgBuilder.buildMsg(); //消息拼装完成
//发送 定时 每60s
heartBeat(ctx, message);
}
private void heartBeat(ChannelHandlerContext ctx, ProtoMsg.Message message) {
ctx.executor().schedule(() -> {
if(ctx.channel().isActive()) {
System.out.println("进行心跳包的发送!");
ctx.writeAndFlush(message);
heartBeat(ctx, message);
}
}, HEARTBEAT_INTERVAL, TimeUnit.SECONDS);
}
}
消息接收处理器(ChatMsgHandler)
@Slf4j
public class ChatMsgHandler extends ChannelInboundHandlerAdapter {
    @Override
    public void channelRead(ChannelHandlerContext ctx, Object msg) throws Exception {
        if (ObjectUtils.isEmpty(msg) || !(msg instanceof ProtoMsg.Message)) {
            log.info("消息不属于消息响应");
            super.channelRead(ctx, msg);
            return;
        }
        ProtoMsg.Message proto = (ProtoMsg.Message) msg;
        if (!proto.getType().equals(ProtoMsg.HeadType.MESSAGE_REQUEST)) {
            log.info("消息不属于消息响应");
            super.channelRead(ctx, msg);
            return;
        }
        ProtoMsg.MessageRequest response = proto.getMessageRequest();
        String content = response.getContent();
        String from = response.getFrom();
        System.err.println("收到来自"+from+"的消息:"+content);
    }
}
自定义异常处理器
public class ExceptionHandler extends ChannelInboundHandlerAdapter {
    @Override
    public void exceptionCaught(ChannelHandlerContext ctx, Throwable cause) throws Exception {
        if(cause instanceof UnsupportedOperationException) {
            System.out.println("有未知异常!");
            ClientSession.getSession(ctx).closeSession();
        } else {
            System.out.println("有异常!");
            ctx.close();
        }
        CoreStart coreStart = CoreStart.getInstance();
        coreStart.setConnectFlag(false);
        coreStart.startCore();
    }

    @Override
    public void channelReadComplete(ChannelHandlerContext ctx) throws Exception {
        ctx.flush();
    }
}
二、实体类和工具类
ProtoInstant类
ProtoInstant类用于定义消息的类型,同时与服务端同时定义区分软件的魔术和版本号。
public class ProtoInstant {
    public static final short MAGIC_CODE = 0x86;
    public static final short VERSION_CODE = 0x01;
    public enum ResultCodeEnum {
        SUCCESS(0, "Success"),
        AUTH_FAILED(1, "登录失败"),
        NO_TOKEN(2, "没有授权码"),
        UNKNOW_ERROR(3, "未知错误");

        private Integer code;
        private String desc;

        ResultCodeEnum(Integer code, String desc) {
            this.code = code;
            this.desc = desc;
        }

        public Integer getCode() {
            return code;
        }

        public String getDesc() {
            return desc;
        }
    }
}
user实体类
@Slf4j
@Data
public class User {

    String uid;
    String devId;
    String token;
    String nickName = "nickName";
    PLATTYPE platform = PLATTYPE.WINDOWS;

    // windows,mac,android, ios, web , other
    public enum PLATTYPE {
        WINDOWS, MAC, ANDROID, IOS, WEB, OTHER;
    }

    private String sessionId;


    public void setPlatform(int platform) {
        PLATTYPE[] values = PLATTYPE.values();
        for (int i = 0; i < values.length; i++) {
            if (values[i].ordinal() == platform) {
                this.platform = values[i];
            }
        }
    }

    @Override
    public String toString() {
        return "User{" +
                "uid='" + uid + '\'' +
                ", devId='" + devId + '\'' +
                ", token='" + token + '\'' +
                ", nickName='" + nickName + '\'' +
                ", platform=" + platform +
                '}';
    }

    public static User fromMsg(ProtoMsg.LoginRequest info) {
        User user = new User();
        user.uid = new String(info.getUid());
        user.devId = new String(info.getDeviceId());
        user.token = new String(info.getToken());
        user.setPlatform(info.getPlatform());
        log.info("登录中: {}", user.toString());
        return null;
    }
}
自定义消息类
@Data
public class ChatMsg {
    private User user;
    private long msgId;
    private String from;
    private String to;
    private long time;
    private String content;
    private MSGTYPE msgType;

    public ChatMsg(User user) {
        if(null == user) {
            return;
        }
        this.user = user;
        this.setTime(System.currentTimeMillis());
        this.setFrom(user.getUid());
    }

    public void fillMsg(ProtoMsg.MessageRequest.Builder cb) {
        if(msgId > 0) cb.setMsgId(msgId);
        if(StringUtils.isNotEmpty(from)) cb.setFrom(from);
        if(StringUtils.isNotEmpty(to)) cb.setTo(to);
        if(time > 0) cb.setTime(time);
        if(msgType != null) cb.setMsgType(msgType.ordinal());
        if(StringUtils.isNotEmpty(content)) cb.setContent(content);
    }

    public enum MSGTYPE {
        TEXT,VEDIO
    }
}
三、异步任务类
ExecuteTask接口用于执行任务
public interface ExecuteTask {
    void execute();
}
FutureTaskScheduler类用于完成任务的添加和删除,实现定时任务。
public class FutureTaskScheduler extends Thread{
    private ConcurrentLinkedQueue<ExecuteTask> executeTaskQueue =
            new ConcurrentLinkedQueue<>();
    private long sleepTime = 200;
    private ExecutorService pool = Executors.newFixedThreadPool(10);
    private static FutureTaskScheduler inst = new FutureTaskScheduler();
    public FutureTaskScheduler() {
        this.start();
    }
    //任务添加
    public static void add(ExecuteTask executeTask) {
        inst.executeTaskQueue.add(executeTask);
    }

    @Override
    public void run() {
        while (true) {
            handleTask();
            threadSleep(sleepTime);
        }
    }

    private void threadSleep(long sleepTime) {
        try {
            Thread.sleep(sleepTime);
        } catch (InterruptedException e) {
            e.printStackTrace();
        }
    }

    //执行任务
    private void handleTask() {
        ExecuteTask executeTask;
        while (executeTaskQueue.peek() != null) {
            executeTask = executeTaskQueue.poll();
            handleTask(executeTask);
        }
    }
    private void handleTask(ExecuteTask executeTask) {
        pool.execute(new ExecuteRunnable(executeTask));
    }

    class ExecuteRunnable implements Runnable {
        ExecuteTask executeTask;
        public ExecuteRunnable(ExecuteTask executeTask) {
            this.executeTask = executeTask;
        }
        @Override
        public void run() {
            executeTask.execute();
        }
    }
}
四、用户状态类
ClientSession用户存储用户使用状态、保存用户信息和保存服务端通信的Channel通道。
@Data
@Slf4j
public class ClientSession {
    public static final AttributeKey<ClientSession> SESSION_KEY = AttributeKey.valueOf("SESSION_KEY");
    private Channel channel;
    private User user;
    private String sessionId;
    private boolean isLogin = false;
    private boolean isConnected = false;
    //绑定channel
    public ClientSession(Channel channel) {
        this.channel = channel;
        this.sessionId = String.valueOf("-1");
        channel.attr(ClientSession.SESSION_KEY).set(this);
    }
    //登录成功后的一些逻辑处理
    public static void loginSuccess(ChannelHandlerContext ctx, ProtoMsg.Message proto) {
        Channel channel = ctx.channel();
        ClientSession session = channel.attr(ClientSession.SESSION_KEY).get();
        session.setSessionId(proto.getSessionId());
        session.setLogin(true);
        log.info("用户登录成功,用户信息为:{}", session.getUser());

    }
    //获取到clientSession
    public static ClientSession getSession(ChannelHandlerContext ctx) {
        Channel channel = ctx.channel();
        ClientSession session = channel.attr(ClientSession.SESSION_KEY).get();
        return session;
    }
    //关闭session
    public void closeSession() {
        isConnected = false;
        ChannelFuture future = channel.close();
        future.addListener(new ChannelFutureListener() {
            @Override
            public void operationComplete(ChannelFuture future) throws Exception {
                if(future.isSuccess()) {
                    System.out.println("链接断开!");
                }
            }
        });
    }

}
五、核心启动类
本机通过CoreStart类启动当前服务,并通过控制台的形式完成登录状态。
@Data
public class CoreStart {
public static CoreStart instance = new CoreStart();
public static CoreStart getInstance() {
return instance;
}
private ClientSession session;
private User user;
private Channel channel;
private NettyCilent nettyCilent = new NettyCilent();
private LoginSender loginSender = new LoginSender();
private ChatSender chatSender = new ChatSender();
private boolean connectFlag = false;
GenericFutureListener<ChannelFuture> closeListener = (ChannelFuture f) -> {
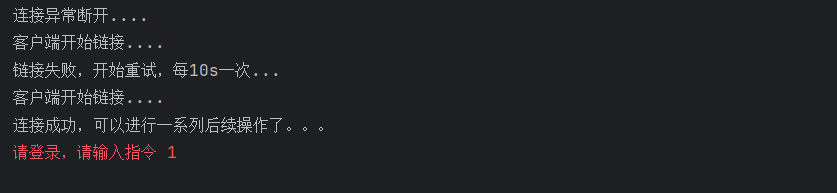
System.out.println("连接异常断开....");
channel = f.channel();
ClientSession session = channel.attr(ClientSession.SESSION_KEY).get();
session.closeSession();
};
GenericFutureListener<ChannelFuture> connectedListener = (ChannelFuture f) -> {
// 这个eventloop是为了 链接失败后的 重连,每10s进行重连,重连的时候
//需要用 eventLoop中的 schedule进行重连定时任务的触发
EventLoop eventLoop = f.channel().eventLoop();
if(!f.isSuccess()) {
System.out.println("链接失败,开始重试,每10s一次...");
eventLoop.schedule(()->nettyCilent.doConnect(), 10, TimeUnit.SECONDS);
connectFlag = false;
} else { //现在你连接成功了,这时候需要监听断开连接的消息
connectFlag = true;
System.out.println("连接成功,可以进行一系列后续操作了。。。");
channel = f.channel();
session = new ClientSession(channel);
session.setConnected(true);
channel.closeFuture().addListener(closeListener);
notifyCommandThread();
}
};
public void startCore() {
Thread.currentThread().setName("Netty主线程");
while(true) {
//建立连接
while(connectFlag == false) {
startConnectSever();
waitCommandThread();
}
//命名的处理 scanner system in
while(null != session) {
Scanner scanner = new Scanner(System.in);
scanner.useDelimiter("\n");
if(isLogin()) {
//已经登录了,可以直接发送消息
System.err.println("请输入消息,格式请参照:toUserId:content");
String[] info = null;
while(true) {
String input = scanner.next();
//消息发送是这样,比如说我给 id2 用户发送 helloworld,那么我的书写方式是
//id2:helloword
info = input.split(":");
if(info.length !=2) {
System.out.println("error: 消息格式有问题!");
} else {
break;
}
}
String toUserId = info[0];
String content = info[1];
startOneChat(toUserId, content);
} else {
System.err.println("请登录,请输入指令 1");
String key = scanner.next();
if(!key.equals("1")) {
System.err.println("指令错误!");
continue;
}
System.err.println("请输入用户名和密码。格式为 id:pass");
String[] info = null;
while (true) {
String input = scanner.next();
info = input.split(":");
if(info.length !=2) {
System.out.println("error: 消息格式有问题!");
} else {
break;
}
}
String username = info[0];
String password = info[1];
startLogin(username, password);
try {
Thread.sleep(1000);
} catch (InterruptedException e) {
e.printStackTrace();
}
}
}
}
}
//启动我们的 nettyClient
public void startConnectSever() {
FutureTaskScheduler.add(() -> {
nettyCilent.setConnectedListener(connectedListener);
nettyCilent.doConnect();
});
}
//线程的 wait和 notify
private synchronized void notifyCommandThread() {
this.notify();
}
private synchronized void waitCommandThread() {
try {
this.wait();
} catch (InterruptedException e) {
e.printStackTrace();
}
}
//发送消息
private void startOneChat(String toUserId, String message) {
if(!isLogin()) {
System.out.println("未登录,请先登录!");
return;
}
chatSender.setSession(session);
chatSender.setUser(user);
chatSender.sendChatMsg(toUserId, message);
}
//登录消息的发送
private void startLogin(String username, String password) {
if(!isConnectFlag()) {
System.out.println("连接异常,请先进行链接!");
return;
}
User user = new User();
user.setUid(username);
user.setToken(password);
user.setDevId("1111");
this.user = user;
session.setUser(user);
loginSender.setUser(user);
loginSender.setSession(session);
loginSender.sendLoginMsg();
}
private boolean isLogin() {
if(session == null) {
return false;
}
return session.isLogin();
}
}
六、客户端装载类
通过NettyCilent类完成EventLoop和handler的组装,并且监听客户端与服务端的连接状态。
@Data
public class NettyCilent {
    private GenericFutureListener<ChannelFuture> connectedListener;
    public void doConnect() {
        try {
            Bootstrap bootstrap = new Bootstrap();
            EventLoopGroup g = new NioEventLoopGroup();
            bootstrap.group(g);
            bootstrap.channel(NioSocketChannel.class);
            bootstrap.option(ChannelOption.ALLOCATOR, PooledByteBufAllocator.DEFAULT);
            bootstrap.option(ChannelOption.SO_KEEPALIVE, true);
            bootstrap.remoteAddress("127.0.0.1", 8086);
            bootstrap.handler(new ChannelInitializer<SocketChannel>() {
                @Override
                protected void initChannel(SocketChannel ch) throws Exception {
                    ch.pipeline().addLast("decoder", new ProtobufDecoder());
                    ch.pipeline().addLast("encoder", new ProtobufEncoder());
                    ch.pipeline().addLast(new LoginResponseHandler());
                    ch.pipeline().addLast(new ChatMsgHandler());
                    ch.pipeline().addLast(new ExceptionHandler());
                }
            });
            System.out.println("客户端开始链接....");
            ChannelFuture connect = bootstrap.connect();
            connect.addListener(connectedListener);
        } catch (Exception e) {
            System.out.println("链接失败!异常信息 = " + e);
        }
    }
}
七、启动客户端
@SpringBootApplication
public class ClientApplication {
    public static void main(String[] args) {
       CoreStart coreStart = CoreStart.getInstance();
       coreStart.startCore();
    }
}
3.4、编写服务端代码
一、处理器(handler)
自定义编码器(Encoder)
编码器与客户端的编码器一致。
自定义解码器(Dncoder)
解码器与客户端的解码器一致。
自定义登录请求处理器
public class   LoginRequestHandler extends ChannelInboundHandlerAdapter {
    @Override
    public void channelRead(ChannelHandlerContext ctx, Object msg) throws Exception {
        if(msg == null || !(msg instanceof ProtoMsg.Message)) {
            super.channelRead(ctx, msg);
            return;
        }
        ProtoMsg.Message pkg = (ProtoMsg.Message) msg;
        ProtoMsg.HeadType headType = pkg.getType();
        if(!headType.equals(ProtoMsg.HeadType.LOGIN_REQUEST)) {
            super.channelRead(ctx, msg);
            return;
        }
        //新的session的创建
        ServerSession session = new ServerSession(ctx.channel());
        //进行登录逻辑处理,异步进行处理。并且需要知道 处理的结果。 callbacktask就要
        //派上用场了
        CallbackTaskScheduler.add(new CallbackTask<Boolean>() {
            @Override
            public Boolean execute() throws Exception {
                //真的进行 login 逻辑的处理
                boolean result = action(session, pkg);
                return result;
            }
            //没有异常的话,我们进行处理
            @Override
            public void onBack(Boolean result) {
                if(result) {
                    ctx.pipeline().remove(LoginRequestHandler.class);
                    System.out.println("登录成功: user = " + session.getUser());
                } else {
                    session.closeSession(ctx);
                    System.out.println("登录失败: user = " + session.getUser());
                }
            }
            //有异常的话,我们进行处理
            @Override
            public void onException(Throwable t) {
                session.closeSession(ctx);
                System.out.println("登录时有未知异常: user = " + t);
            }
        });
    }

    private boolean action(ServerSession session, ProtoMsg.Message proto) {
        ProtoMsg.LoginRequest loginRequest = proto.getLoginRequest();
        long seqNo = proto.getSequence();
        User user = User.fromMsg(loginRequest);
        //user验证
        boolean isVaildUser = checkUser(user);
        if(!isVaildUser) {
            //组装失败的报文,发送给客户端失败的报文消息
            ProtoInstant.ResultCodeEnum resultCode = ProtoInstant.ResultCodeEnum.NO_TOKEN;
            ProtoMsg.Message response = loginResponse(resultCode, seqNo, "-1");
            session.writeAndFlush(response);
            return false;
        }
        //有效的 user,我们发送登录成功的报文给 客户端
        session.setUser(user); //第一个是set user信息;第二个是 创建sessionId
        session.bind();
        ProtoInstant.ResultCodeEnum resultCode = ProtoInstant.ResultCodeEnum.SUCCESS;
        ProtoMsg.Message response = loginResponse(resultCode, seqNo, session.getSessionId());
        session.writeAndFlush(response);
        return true;
    }

    private ProtoMsg.Message loginResponse(ProtoInstant.ResultCodeEnum resultCode, long seqNo, String sessionId) {
        ProtoMsg.Message.Builder mb = ProtoMsg.Message.newBuilder()
                .setType(ProtoMsg.HeadType.LOGIN_RESPONSE)
                .setSequence(seqNo)
                .setSessionId(sessionId);
        //你需要告诉我真实的 response 是什么. 所以我们需要构造 loginresponse
        ProtoMsg.LoginResponse.Builder res = ProtoMsg.LoginResponse.newBuilder()
                .setCode(resultCode.getCode())
                .setInfo(resultCode.getDesc())
                .setExpose(1);
        mb.setLoginResponse(res);
        return mb.build();
    }

    //校验合法user
    private boolean checkUser(User user) {
        //当前用户已经登录
        if(SessionMap.inst().hasLogin(user)) {
            return false;
        }
        return true;
    }
}
自定义心跳处理器
心跳处理器的逻辑是在客户端登录成功后,客户端将心跳处理器加入到pipeline中,与服务端进行心跳包的发送,用于验证客户端与服务端的连通性检测,保证客户端与服务端的连通性,可以提高用户的体验。
public class HeartBeatServerHandler extends IdleStateHandler {
    //多长时间没有心跳,就关闭连接,定义一个 时间啊
    private static final int READ_IDLE_GAP = 3000;
    public HeartBeatServerHandler(int readerIdleTimeSeconds, int writerIdleTimeSeconds, int allIdleTimeSeconds) {
        super(readerIdleTimeSeconds, writerIdleTimeSeconds, allIdleTimeSeconds);
    }
    //这个构造函数,可以指定时间单位
    public HeartBeatServerHandler(long readerIdleTime, long writerIdleTime, long allIdleTime, TimeUnit unit) {
        super(readerIdleTime, writerIdleTime, allIdleTime, unit);
    }

    public HeartBeatServerHandler() {
        super(READ_IDLE_GAP, 0, 0, TimeUnit.SECONDS);
    }

    public void channelRead(ChannelHandlerContext ctx, Object msg) throws Exception {
        //心跳包不能为空; 心跳包的类型是HEART_BEAT
        if(msg == null || !(msg instanceof ProtoMsg.Message)) {
            super.channelRead(ctx, msg);
            return;
        }
        // 如果不为null我们就进行类型转化
        ProtoMsg.Message pkg = (ProtoMsg.Message) msg;
        ProtoMsg.HeadType headType = pkg.getType();
        if(headType.equals(ProtoMsg.HeadType.HEART_BEAT)) {
            //进行心跳包的处理
            FutureTaskScheduler.add(() -> {
                if(ctx.channel().isActive()) {
                    //直接将信息 回复给客户端
                    ctx.writeAndFlush(msg);
                }
            });
        }
        super.channelRead(ctx, msg);
    }

    @Override
    protected void channelIdle(ChannelHandlerContext ctx, IdleStateEvent evt) throws Exception {
        System.out.println(READ_IDLE_GAP + "秒内,没有收到数据,关闭连接!");
        ServerSession.closeSession(ctx);
    }
}
消息处理器
消息处理器目前的功能较为简易,本地由于没有使用DB和任何存储消息的数据库,所以没有实现对于离线用户的消息转发,仅仅只能对在线用户的消息发送,后续迭代后将上线,本消息处理器仅仅是一个对于Netty入门的一个写法。
public class ChatRedirectHandler extends ChannelInboundHandlerAdapter {
@Override
public void channelRead(ChannelHandlerContext ctx, Object msg) throws Exception {
if(msg == null || !(msg instanceof ProtoMsg.Message)) {
super.channelRead(ctx, msg);
return;
}
ProtoMsg.Message proto = (ProtoMsg.Message) msg;
ProtoMsg.HeadType headType = proto.getType();
if(!headType.equals(ProtoMsg.HeadType.MESSAGE_REQUEST)) {
super.channelRead(ctx, msg);
return;
}
ServerSession session = ServerSession.getSession(ctx);
if(session == null || !session.isLogin()) {
System.out.println("用户没有登录!");
return;
}
// 进行消息的转发,异步转发
FutureTaskScheduler.add(() -> {
action(session, proto);
});
}
private void action(ServerSession session, ProtoMsg.Message proto) {
ProtoMsg.MessageRequest messageRequest = proto.getMessageRequest();
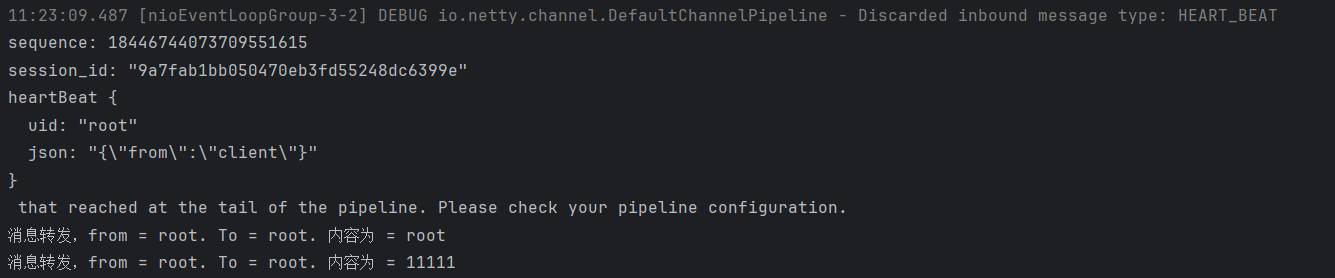
System.out.println("消息转发,from = " + messageRequest.getFrom() +
". To = " + messageRequest.getTo() + ". 内容为 = " + messageRequest.getContent());
String to = messageRequest.getTo();
//我们需要判断 接收者 是否在线
List<ServerSession> toSession = SessionMap.inst().getSessionBy(to);
if(toSession == null || toSession.size() == 0) {
System.out.println("用户离线,无法发送!");
//将离线消息进行保存,等用户上线再次发送给用户
} else {
toSession.forEach(s -> {
s.writeAndFlush(proto);
});
}
}
}
服务端异常处理器
异常处理器是用于处理在pipeline管道中出现的异常处理器。
public class ServerExceptionHandler extends ChannelInboundHandlerAdapter {
    @Override
    public void channelReadComplete(ChannelHandlerContext ctx) throws Exception {
        ctx.flush();
    }

    @Override
    public void channelInactive(ChannelHandlerContext ctx) throws Exception {
        ServerSession.closeSession(ctx);
    }

    @Override
    public void exceptionCaught(ChannelHandlerContext ctx, Throwable cause) throws Exception {
        if(cause instanceof UnsupportedOperationException) {
            ServerSession.closeSession(ctx);
        } else {
            System.out.println("获得已知异常!");
            ctx.close();
        }
    }
}
二、实体类和工具类
实体类与工具类与客户端的实体类和工具类保持一致,只需要cv过来就可以。
三、异步任务类和回调方法类
回调接口
public interface CallbackTask<T> {
    T execute() throws Exception;
    void onBack(T t); // 执行没有 异常的情况下的 返回值
    void onException(Throwable t);
}
回调接口实现类
public class CallbackTaskScheduler extends Thread {
    private ConcurrentLinkedQueue<CallbackTask> executeTaskQueue =
            new ConcurrentLinkedQueue<>();
    private long sleepTime = 200;
    private ExecutorService pool = Executors.newCachedThreadPool();
    ListeningExecutorService lpool = MoreExecutors.listeningDecorator(pool);
    private static CallbackTaskScheduler inst = new CallbackTaskScheduler();
    private CallbackTaskScheduler() {
        this.start();
    }
    //add task
    public static <T> void add(CallbackTask<T> executeTask) {
        inst.executeTaskQueue.add(executeTask);
    }

    @Override
    public void run() {
        while (true) {
            handleTask();
            threadSleep(sleepTime);
        }
    }

    private void threadSleep(long sleepTime) {
        try {
            Thread.sleep(sleepTime);
        }catch (Exception e) {
            e.printStackTrace();
        }
    }

    //任务执行
    private void handleTask() {
        CallbackTask executeTask = null;
        while (executeTaskQueue.peek() != null) {
            executeTask = executeTaskQueue.poll();
            handleTask(executeTask);
        }
    }
    private <T> void handleTask(CallbackTask<T> executeTask) {
        ListenableFuture<T> future = lpool.submit(new Callable<T>() {
            public T call() throws Exception {
                return executeTask.execute();
            }
        });
        Futures.addCallback(future, new FutureCallback<T>() {
            @Override
            public void onSuccess(T t) {
                executeTask.onBack(t);
            }

            @Override
            public void onFailure(Throwable throwable) {
                executeTask.onException(throwable);
            }
        });
    }
}
任务接口
//不需要知道异步线程的 返回值
public interface ExecuteTask {
    void execute();
}
任务执行实现类
public class FutureTaskScheduler extends Thread{
    private ConcurrentLinkedQueue<ExecuteTask> executeTaskQueue =
            new ConcurrentLinkedQueue<>();
    private long sleepTime = 200;
    private ExecutorService pool = Executors.newFixedThreadPool(10);
    private static FutureTaskScheduler inst = new FutureTaskScheduler();
    public FutureTaskScheduler() {
        this.start();
    }
    //任务添加
    public static void add(ExecuteTask executeTask) {
        inst.executeTaskQueue.add(executeTask);
    }

    @Override
    public void run() {
        while (true) {
            handleTask();
            threadSleep(sleepTime);
        }
    }

    private void threadSleep(long sleepTime) {
        try {
            Thread.sleep(sleepTime);
        } catch (InterruptedException e) {
            e.printStackTrace();
        }
    }

    //执行任务
    private void handleTask() {
        ExecuteTask executeTask;
        while (executeTaskQueue.peek() != null) {
            executeTask = executeTaskQueue.poll();
            handleTask(executeTask);
        }
    }
    private void handleTask(ExecuteTask executeTask) {
        pool.execute(new ExecuteRunnable(executeTask));
    }

    class ExecuteRunnable implements Runnable {
        ExecuteTask executeTask;
        public ExecuteRunnable(ExecuteTask executeTask) {
            this.executeTask = executeTask;
        }
        @Override
        public void run() {
            executeTask.execute();
        }
    }
}
四、用户状态存储类
@Data
public class SessionMap {
    //用单例模式进行sessionMap的创建
    private SessionMap(){}

    private static SessionMap singleInstance = new SessionMap();

    public static SessionMap inst() {
        return singleInstance;
    }

    //进行会话的保存
    //key 我们使用 sessionId;value 需要是 serverSession
    private ConcurrentHashMap<String, ServerSession> map = new ConcurrentHashMap<>(256);
    //添加session
    public void addSession(String sessionId, ServerSession s) {
        map.put(sessionId, s);
        System.out.println("用户id: = " + s.getUser().toString() + "" +
                ".在线人数:" + map.size() );
    }

    //删除session
    public void removeSession(String sessionId) {
        if(map.contains(sessionId)) {
            ServerSession s = map.get(sessionId);
            map.remove(sessionId);
            System.out.println("用户id下线: = " + s.getUser().toString() + "" +
                    "。在线人数:" + map.size() );
        }
        return;
    }

    public boolean hasLogin(User user) {
        Iterator<Map.Entry<String, ServerSession>> iterator = map.entrySet().iterator();
        while(iterator.hasNext()) {
            Map.Entry<String, ServerSession> next = iterator.next();
            User userExist = next.getValue().getUser();
            if(userExist.getUid().equals(user.getUid())) {
                return true;
            }
        }
        return false;
    }

    //如果user在线,肯定有sessionMap里保存的 serverSession
    //如果user 不在线,serverSession也没有。用这个来判断 to user是否在线
    public List<ServerSession> getSessionBy(String userId) {
        return map.values().stream().
                filter(s -> s.getUser().getUid().equals(userId)).
                collect(Collectors.toList());
    }
}
五、服务端服务类
服务端服务类(ServerSession)用于实现客户端与服务端Channel进行绑定类,从而实现数据的传输。
@Data
public class ServerSession {
    public static final AttributeKey<ServerSession> SESSION_KEY =
            AttributeKey.valueOf("SESSION_KEY");
    //通道
    private Channel channel;
    private User user;
    private final String sessionId;
    private boolean isLogin = false;

    public ServerSession(Channel channel){
        this.channel = channel;
        this.sessionId = buildNewSessionId();
    }

    private String buildNewSessionId() {
        return UUID.randomUUID().toString().replaceAll("-","");
    }

    //session需要和通道进行一定的关联,他是在构造函数中关联上的;
    //session还需要通过sessionkey和channel进行再次的关联;channel.attr方法.set当前的
    // serverSession
    //session需要被添加到我们的SessionMap中
    public ServerSession bind(){
        System.out.println("server Session 会话进行绑定 :" + channel.remoteAddress());
        channel.attr(SESSION_KEY).set(this);
        SessionMap.inst().addSession(sessionId, this);
        isLogin = true;
        return this;
    }

    //通过channel获取session
    public static ServerSession getSession(ChannelHandlerContext ctx){
        Channel channel = ctx.channel();
        return channel.attr(SESSION_KEY).get();
    }

    //关闭session
    public static void closeSession(ChannelHandlerContext ctx){
        ServerSession serverSession = ctx.channel().attr(SESSION_KEY).get();
        if(serverSession != null && serverSession.getUser() != null) {
            ChannelFuture future = serverSession.channel.close();
            future.addListener(new ChannelFutureListener() {
                @Override
                public void operationComplete(ChannelFuture future) throws Exception {
                    if(!future.isSuccess()) {
                        System.out.println("Channel close error!");
                    }
                }
            });
            SessionMap.inst().removeSession(serverSession.sessionId);
        }
    }

    public User getUser() {
        return user;
    }

    public void setUser(User user) {
        this.user = user;
        user.setSessionId(sessionId);
    }

    //写消息
    public void writeAndFlush(Object msg) {
        channel.writeAndFlush(msg);
    }

}
六、服务端装载类
public class ChatServer {
    public void run() {
        EventLoopGroup bg = new NioEventLoopGroup();
        EventLoopGroup wg = new NioEventLoopGroup();
        ServerBootstrap b = new ServerBootstrap();
        try {
            b.group(bg,wg);
            b.channel(NioServerSocketChannel.class);
            b.localAddress(new InetSocketAddress(8086));
            b.option(ChannelOption.ALLOCATOR, PooledByteBufAllocator.DEFAULT);
            b.option(ChannelOption.SO_KEEPALIVE, true);
            b.childHandler(new ChannelInitializer<SocketChannel>() {
                @Override
                protected void initChannel(SocketChannel ch) throws Exception {
                    ch.pipeline().addLast(new ProtobufDecoder());
                    ch.pipeline().addLast(new ProtobufEncoder());
                    ch.pipeline().addLast(new HeartBeatServerHandler());
                    ch.pipeline().addLast(new LoginRequestHandler());
                    ch.pipeline().addLast(new ChatRedirectHandler());
                    ch.pipeline().addLast(new ServerExceptionHandler());
                }
            });
            //绑定进行异步绑定
            ChannelFuture channelFuture = b.bind().sync();
            System.out.println("开始进行客户端的链接 监听... ...");
            //客户端关闭进行异步关闭
            ChannelFuture closeFuture = channelFuture.channel().closeFuture();
            closeFuture.sync();
        } catch (Exception e) {
            e.printStackTrace();
        } finally {
            wg.shutdownGracefully();
            bg.shutdownGracefully();
        }
    }
}
七、服务端启动类
@SpringBootApplication
public class NettyServerApplication {

    public static void main(String[] args) {
       ChatServer cs = new ChatServer();
       cs.run();
    }

}
4、系统实现效果
客户端
登录

消息发送

心跳包接收
掉线重连
服务端
异常接收
这个异常接收是客户端掉线重连的异常

客户端服务注册

消息转发
心跳包发送


 1万+
1万+

 被折叠的 条评论
为什么被折叠?
被折叠的 条评论
为什么被折叠?
 到【灌水乐园】发言


