


1、配置环境
1.1 创建实例
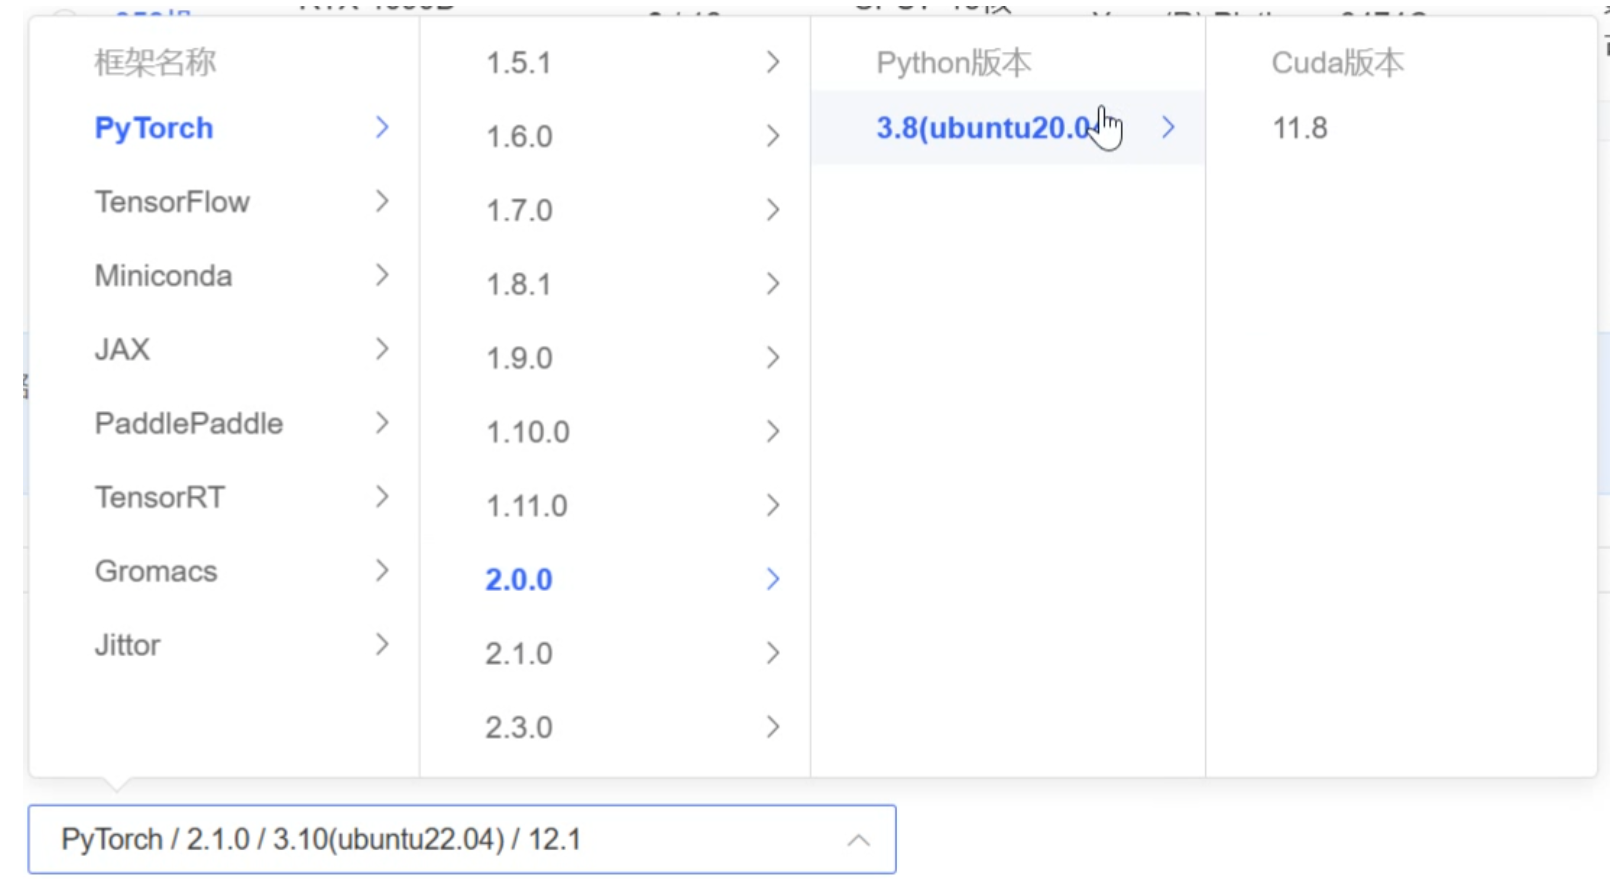
在Autodl上创建下述配置的实例(RTX3090):
创建实例后将其pip安装源换为清华源。
1.2 torch 和torchvision
运行下述命令,获取Instant-angelo的代码:
 cd autodl-tmp
 git clone https://github.com/hugoycj/Instant-angelo.git
运行下述命令查看torch 和torchvision是否安装:
pip list
如有以下信息说明安装成功:
 Package        Version
 -------------- -------
 torch          1.13.1
 torchvision    0.14.1
1.3 tiny-cuda-nn
执行如下命令,下载tiny-cuda-nn项目:
 cd autodl-tmp
 git clone https://github.com/NVlabs/tiny-cuda-nn.git
执行如下命令安装tiny-cuda-nn:
 cd autodl-tmp/tiny-cuda-nn
 mkdir build
 cd build
 cmake ../
 cmake --version
 cd autodl-tmp/tiny-cuda-nn/bindings/torch
 pip install ninja
 python setup.py install
上述命令运行的结果好像会报错,不过不要紧,继续执行以下命令安装tiny-cuda-nn:
pip install git+https://github.com/NVlabs/tiny-cuda-nn/#subdirectory=bindings/torch
通过运行如下命令查看tiny-cuda-nn库安装成功没有(包含tiny-cuda-nn就说明安装好了):
pip list
1.4 requirements.txt
requirements.txt内容如下:
pytorch-lightning<2
omegaconf==2.2.3
nerfacc==0.3.3
matplotlib
opencv-python
imageio
imageio-ffmpeg
scipy
CuMCubes
pyransac3d
torch_efficient_distloss
tensorboard
click
open3d
trimesh
pymcubes
plyfile
运行下述命令安装requirements.txt中的依赖项:
pip install -r requirements.txt1.5 安装colmap
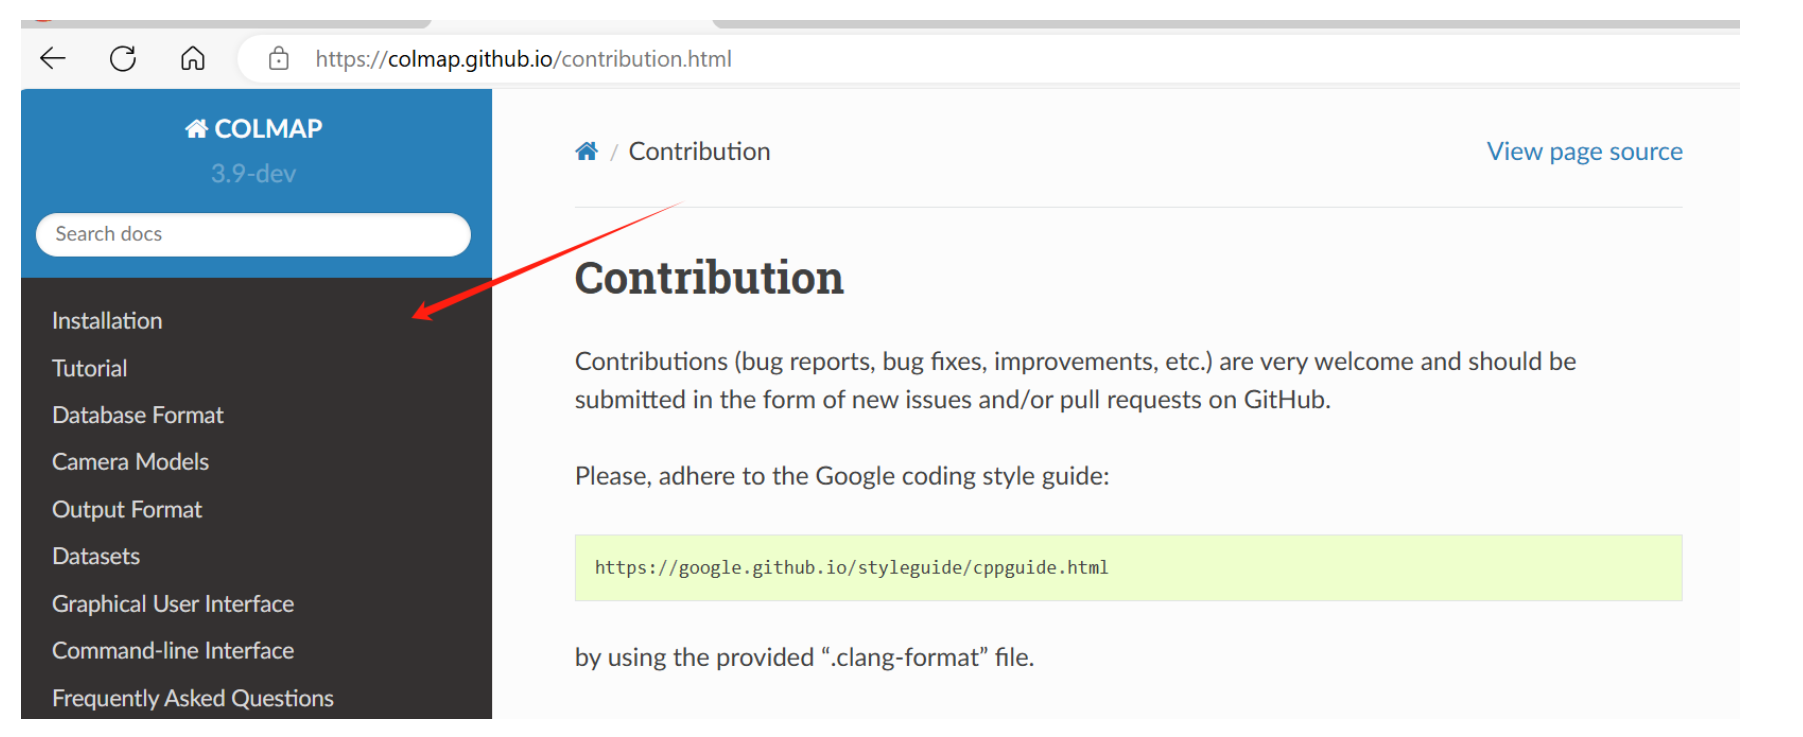
到网站COLMAP — COLMAP 3.9-dev documentation中下载colmap项目:
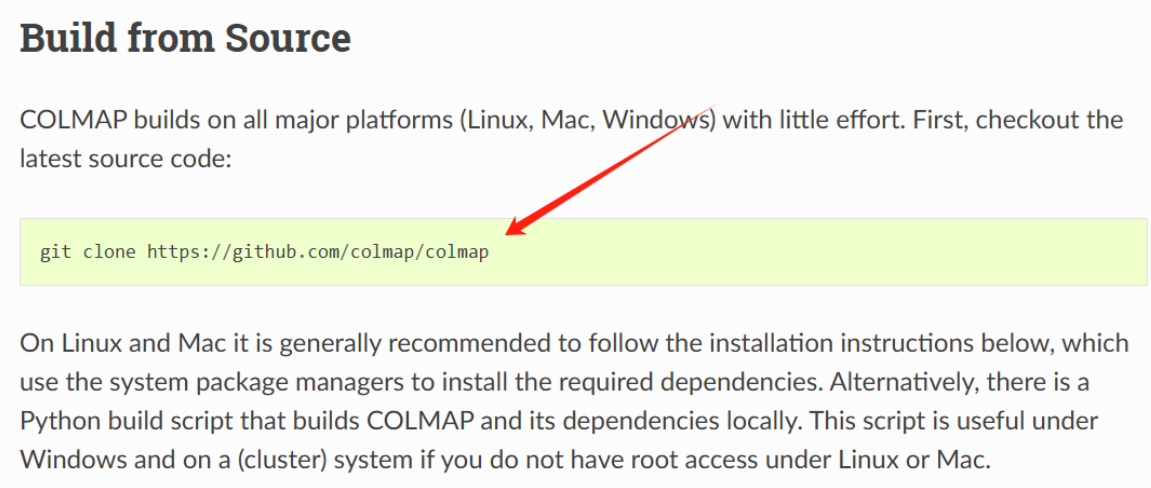
输入上述命令,下载colmap项目:
 cd autodl-tmp
 git clone https://github.com/colmap/colmap
接下来执行以下命令利用cmake编译colmap:
 cd autodl-tmp/colmap
 mkdir build
 cd build
 cmake ../
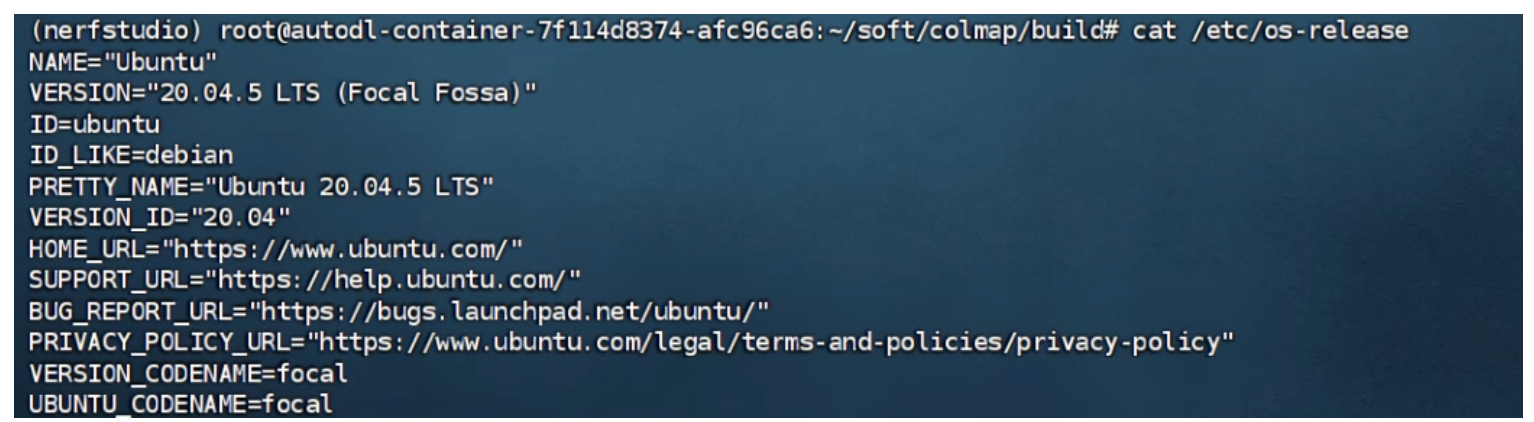
输入以下命令查看操作系统的版本信息(/etc/os-release文件就是记录的操作系统的版本信息):
cat /etc/os-release
本操作系统的版本信息如下:
执行如下命令,安装colmap在ubuntu系统中的依赖项(这些命令分开执行,因为每一条命令都可能报错):
cd autodl-tmp/colmap/build

apt update

apt upgrade -y

apt --fix-broken install

apt upgrade -y

apt-get install \
    git \
    cmake \
    ninja-build \
    build-essential \
    libboost-program-options-dev \
    libboost-filesystem-dev \
    libboost-graph-dev \
    libboost-system-dev \
    libeigen3-dev \
    libflann-dev \
    libfreeimage-dev \
    libmetis-dev \
    libgoogle-glog-dev \
    libgtest-dev \
    libsqlite3-dev \
    libglew-dev \

apt install qtbase5-dev \
    libqt5opengl5-dev \
    libcgal-dev \
    libceres-dev
重新使用cmake编译colmap:
 cd autodl-tmp/colmap/build
 ls#查看build目录下cmake的编译文件,如下:

 rm -rf ./*
 cmake ../
 make -j 6
 make install -j
运行上述命令可能报错,如果报错可能是因为没有安装Boost库,通过下述命令安装Boost库(没有报错就不管,直接运行colmap这条命令,有相对应的显示信息说明colmap就安装成功了):
 sudo apt update
 sudo apt install libboost-all-dev
安装Boost库后运行上述的四条cmake编译命令还是可能报错,可能是因为CMake没有更新其模块路径来找到新安装的库,执行下述命令手动设置Boost的路径(前提是Boost的头文件安装在/usr/include/boost,如果不是就要修改路径):
cmake -DBoost_INCLUDE_DIR=/usr/include/boost ../
执行上述命令时会报很多错,显示很多的库没安装,依次按照错误信息进行安装:
  sudo apt-get install 要安装的库的名字
  rm -rf CMakeFiles CMakeCache.txt#清理 CMake 缓存
  cmake -DBoost_INCLUDE_DIR=/usr/include/boost ..#清理缓存后,重新运行 CMake 配置命令
这些库都安装得差不多了之后,在执行这四条cmake编译命令:
 rm -rf ./*
 cmake ../
 make -j 6
 make install -j
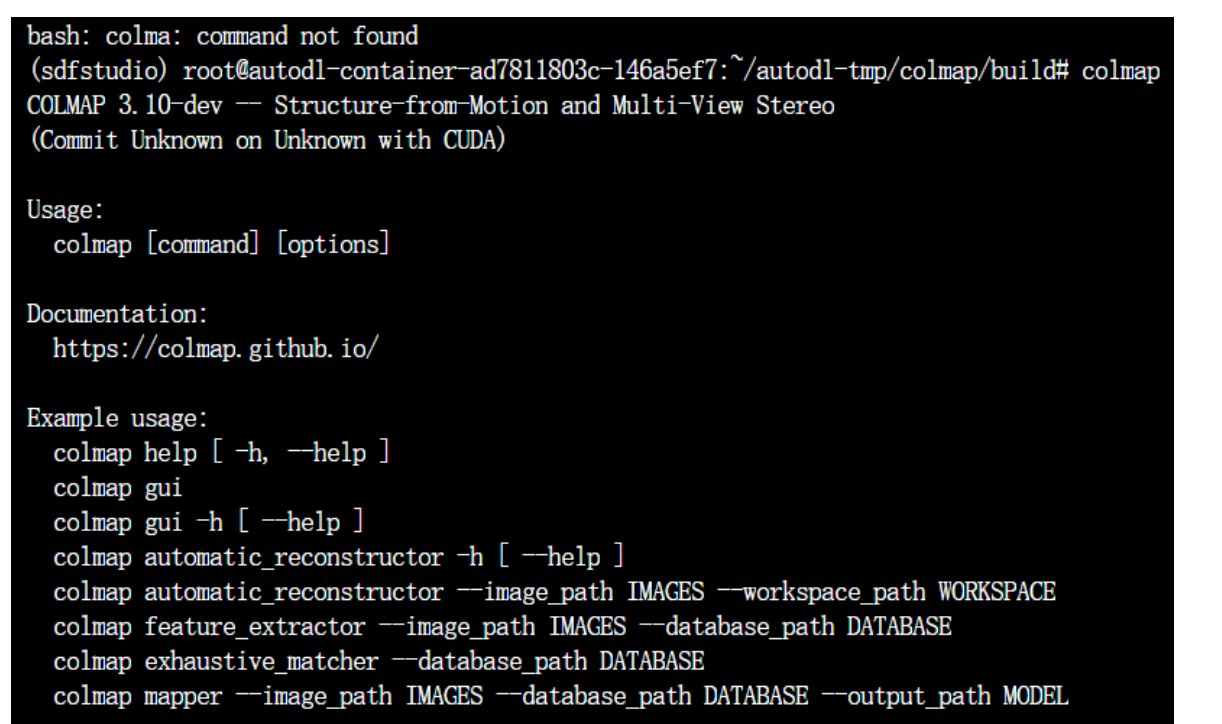
输入以下命令检查colmap是否安装成功(没有报错直接运行这一步):
colmap
有如下信息则说明colmap安装成功:
安装pycolmap依赖项,保证python脚本能够正常调用colmap:
pip install pycolmap
至此colmap安装完毕。
2、预处理数据集
2.1 稀疏重建、使用掩码进行点云过滤
将dtu数据集上传至autodl-tmp/Instant-angelo/data/dtu目录中,数据目录结构如下:
Instant-angelo/
├── data/dtu
│   ├── dtu_scan24/
│   │   ├── images/
│   │   │   ├── 000000.png
│   │   │   ├── 000001.png
│   │   │   └── ...
│   │   └── masks/  (可选,如果有遮罩数据)
│   ├── dtu_scan37/
│   │   ├── images/
│   │   │   ├── 000000.png
│   │   │   ├── 000001.png
│   │   │   └── ...
│   │   └── masks/  (可选)
│   └── ...
由于dtu数据集里面mask目录下的掩码图片名字为000.png、001.png……,但是Instant-angelo预处理时所需要的掩码图像名称为000000.png、000001.png……。所以修改相应的文件autodl-tmp/Instant-angelo/scripts/filter_colmap.py的内容为:
import os
import cv2
from tqdm import tqdm
import numpy as np
import struct
from typing import Tuple
import time
from argparse import ArgumentParser
import shutil
import json
import click

# from https://github.com/colmap/colmap/tree/dev/scripts/python
from utils.read_write_model import read_images_binary, rotmat2qvec
from utils.read_write_dense import read_array
from utils.read_write_model import read_model, write_model
from utils.database import COLMAPDatabase

colmap_bin = 'colmap'

def run_command(command, log_message):
    print(log_message)
    start_time = time.time()
    return_code = os.system(command)
    end_time = time.time()
    elapsed_time = end_time - start_time
    print(f"{log_message} completed in {elapsed_time:.2f} seconds")
    return elapsed_time, return_code

def create_cameras_and_points_txt(target: str, intrinsic_dict):
    os.makedirs(f'{target}/model', exist_ok=True)
    os.system(f'touch {target}/model/points3D.txt')
    with open(f'{target}/model/cameras.txt', 'w') as f:
        f.write(f'1 PINHOLE {intrinsic_dict["width"]} {intrinsic_dict["height"]} {intrinsic_dict["fx"]} {intrinsic_dict["fy"]} {intrinsic_dict["cx"]} {intrinsic_dict["cy"]}')

def project_pinhole(camera, point3D_camera):
    x_normalized = point3D_camera[0] / point3D_camera[2]
    y_normalized = point3D_camera[1] / point3D_camera[2]
    u = camera.params[0] * x_normalized + camera.params[2]
    v = camera.params[1] * y_normalized + camera.params[3]
    return np.array([u, v])


def load_K_Rt_from_P(P=None):
    out = cv2.decomposeProjectionMatrix(P)
    K = out[0]
    R = out[1]
    t = out[2]

    K = K / K[2, 2]
    intrinsics = np.eye(4)
    intrinsics[:3, :3] = K

    pose = np.eye(4, dtype=np.float32)
    pose[:3, :3] = R.transpose()
    pose[:3, 3] = (t[:3] / t[3])[:, 0]

    return intrinsics, pose

def load_from_dtu(source: str) -> Tuple[list, dict, dict, dict]:
    cams = np.load(os.path.join(source, 'cameras_sphere.npz'))
    id_list = list(cams.keys())
    n_images = max([int(k.split('_')[-1]) for k in id_list]) + 1

    pose_dict = dict()
    image_dict = dict()
    for i in range(n_images):
        world_mat, scale_mat = cams[f'world_mat_{i}'], cams[f'scale_mat_{i}']
        P = (world_mat @ scale_mat)[:3,:4]
        K, c2w = load_K_Rt_from_P(P)
        fx, fy, cx, cy = K[0,0], K[1,1], K[0,2], K[1,2]
        # c2w[:3,1:3] *= -1. # flip input sign

        # pose_dict[i] = np.linal
最低0.47元/天 解锁文章


 3561
3561

 被折叠的 条评论
为什么被折叠?
被折叠的 条评论
为什么被折叠?
 到【灌水乐园】发言


