


 本文是谷粒商城项目的学习笔记,主要涵盖了商品服务的三级分类实现,包括数据库完善、后端分类业务、前端配置、网关配置、数据操作(增删改查)以及界面拖拽功能的详细步骤。
谷粒商城项目(学习笔记一)
谷粒商城项目(学习笔记二)
谷粒商城项目(学习笔记三)
谷粒商城项目(学习笔记四)
谷粒商城项目(学习笔记五)
第四章:商品服务——三级分类
一、树型查询
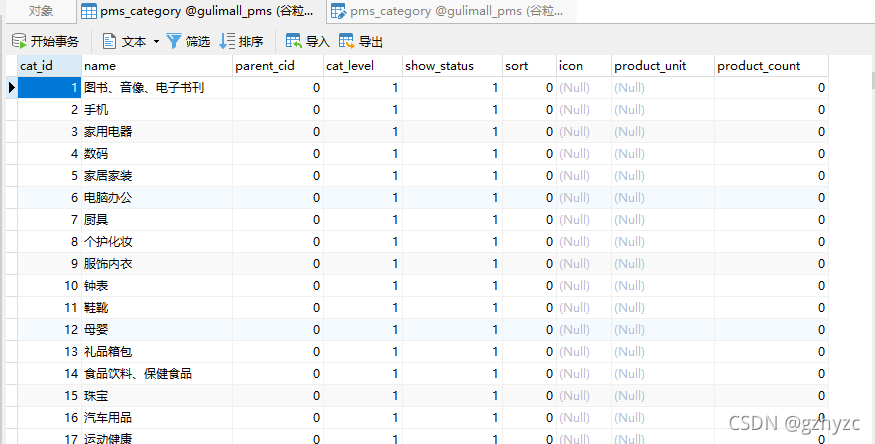
1.完善数据库
为gulimall_pms的pms_category添加数据
2.实现后端分类业务
1)为CategoryController添加控制器
/**
 * 查出所有分类以及子分类,以树形结构组装起来
 */
@RequestMapping("/list/tree")
public R list(){
     List<CategoryEntity> entities = categoryService.listWithTree();

    return R.ok().put("date", entities);
}
2)完善listwithtree接口和CategoryServiceImpl功能的实现
java8的新特性(老的了)
  /**
     * 查出所有分类以及子分类,以树形结构组装起来
     */
    @Override
    public List<CategoryEntity> listWithTree() {

//        1.查出所有分类
        List<CategoryEntity> entities = baseMapper.selectList(null);

//        2.组装父子的树型结构
//        2.1)找到一级分类
        List<CategoryEntity> level1Menus = entities.stream().filter(categoryEntity ->
                categoryEntity.getParentCid() == 0
        ).map((menu)->{
            menu.setChildren(getChildrens(menu,entities));
            return menu;
        }).sorted((menu1,menu2)->{
            return (menu1.getSort()==null?0:menu1.getSort()) - (menu2.getSort()==null?0:menu2.getSort());
        }).collect(Collectors.toList());

        return level1Menus;
    }


    private List<CategoryEntity> getChildrens(CategoryEntity root,List<CategoryEntity> all){

        List<CategoryEntity> children = all.stream().filter(categoryEntity -> {
            return categoryEntity.getParentCid().equals(root.getCatId());
        }).map(categoryEntity ->{
//            找到子菜单
            categoryEntity.setChildren(getChildrens(categoryEntity,all));
            return categoryEntity;
        }).sorted((menu1,menu2) ->{
//            菜单的排序
            return (menu1.getSort()==null?0:menu1.getSort()) - (menu2.getSort()==null?0:menu2.getSort());
        }).collect(Collectors.toList());


        return children;
    }
注意要为CategoryEntity添加这个子目录的属性
注意这个注释@TableField(exist = false)
//子分类
@TableField(exist = false) #表示数据库表中不包含这个属性
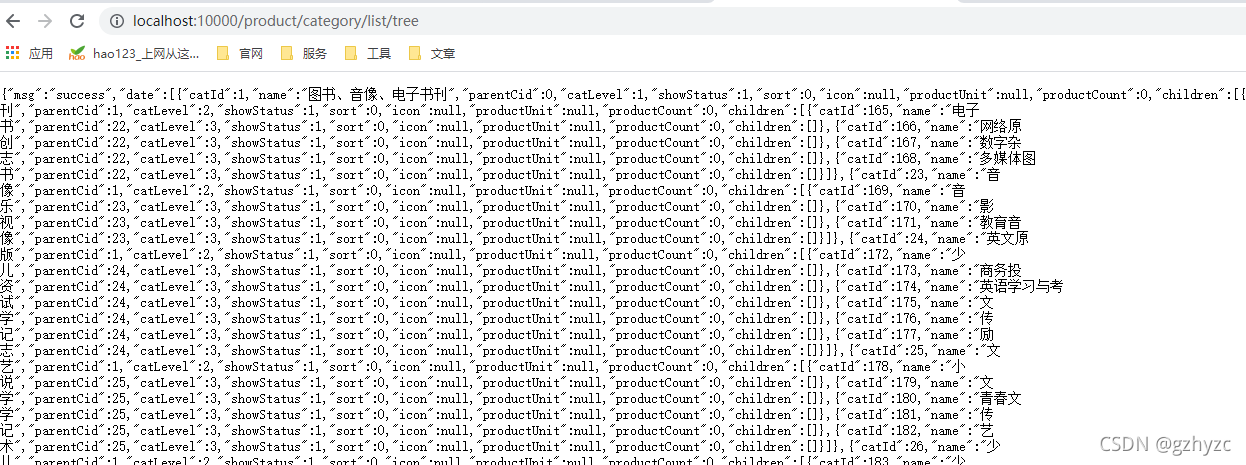
private List<CategoryEntity> children;3)访问这个页面进行测试
http://localhost:10000/product/category/list/tree
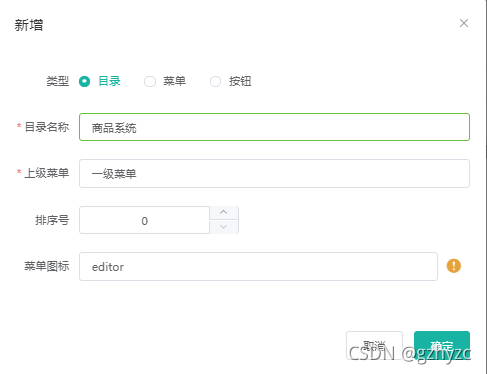
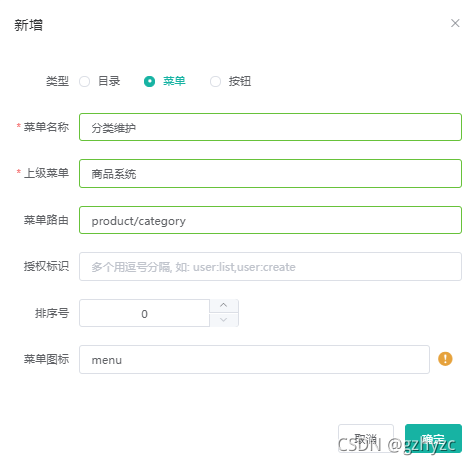
3.前端的基础配置
1)启动renren-fast的前后端开发平台,为商品系统添加目录和菜单。
2)前端业务的实现
配置数据的前端展示模板
  <el-tree
    :data="data"
    :props="defaultProps"
    @node-click="handleNodeClick"
  ></el-tree>
data() {
return {
date: [],
defaultProps: {
children: "children",
label: "label"
}
};
},配置方法,使页面初始化时,调用后台的命令,得到分类数据
  methods: {
    getMenus() {
      this.$http({
        url: this.$http.adornUrl("/product/category/list/tree"),
        method: "get"
      }).then(({ data }) => {
        console.log("成功获取到菜单数据...", data.data);
        this.menus = data.data;
      });
    }
  },
  //生命周期 - 创建完成(可以访问当前this实例)
  created() {
    this.getMenus();
  },
4.网关的配置(核心)
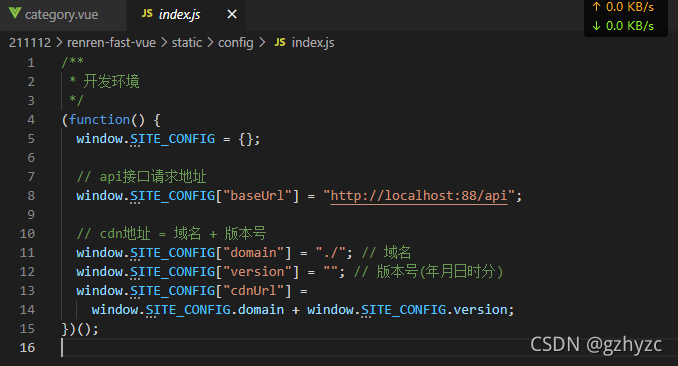
1)找到前端调用后端的接口API
修改地址为网关地址
2)将renren-fast注册到nacos中
注意:要将它和网关注册到一个命名空间中。
3)配置网关的断言
前端的地址默认发给renren-fast
注意:地址的配置
        - id: admin_route
          uri: lb://renren-fast
          predicates:
            - Path=/api/**
          filters:
            - RewritePath=/api/(?<segment>.*),/renren-fast/$\{segment}   #路径重写
4)前后端跨域问题
首先注销掉renren-fast的跨域配置CorsConfiguration
在网关中配置gulimallCorsConfiguration
注意@Configuration别忘记加
注意高版本的spring-boot要用这个addAllowedOriginPattern配置
@Configuration
public class gulimallCorsConfiguration {

    @Bean
    public CorsWebFilter corsWebFilter(){

        UrlBasedCorsConfigurationSource source = new UrlBasedCorsConfigurationSource();
        CorsConfiguration corsConfiguration = new CorsConfiguration();

//      1.  配置跨域
        corsConfiguration.addAllowedHeader("*");
        corsConfiguration.addAllowedMethod("*");
        corsConfiguration.addAllowedOriginPattern("*"); #注意spring-boot的版本,不同版本配置不同
        corsConfiguration.setAllowCredentials(true);

        source.registerCorsConfiguration("/**",corsConfiguration);
        return new CorsWebFilter(source);
    }
}
5.数据的显示
1.为product配置路由,获得访问
注意:gulimall-product的优先级要高于renren-fast,路由会优先访问上面的配置
注意:nacos的注册中心要在一个命名空间中,配置中心要在不同命名空间中
注意:这里理由地址的配置
spring:
  cloud:
    gateway:
      routes:
        - id: product_route
          uri: lb://gulimall-product
          predicates:
            - Path=/api/product/**
          filters:
            - RewritePath=/api/(?<segment>.*),/$\{segment}

        - id: admin_route
          uri: lb://renren-fast
          predicates:
            - Path=/api/**
          filters:
            - RewritePath=/api/(?<segment>.*),/renren-fast/$\{segment}
2.前端页面的展示
#数据展现的模板
<template>
  <el-tree
    :data="menus"
    :props="defaultProps"
    @node-click="handleNodeClick"
  ></el-tree>
</template>


#数据
 data() {
    return {
      menus: [],
      defaultProps: {
        children: "children",
        label: "name"
      }
    };
  },

#绑定的方法
methods: {
    handleNodeClick(data) {
      console.log(data);
    },
    getMenus() {
      this.$http({
        url: this.$http.adornUrl("/product/category/list/tree"),
        method: "get"
      }).then(({ data }) => {
        console.log("成功获取到菜单数据...", data.date);
        this.menus = data.date;
      });
    }
  },
  //生命周期 - 创建完成(可以访问当前this实例)
  created() {
    this.getMenus();
},注意:data.date中,第一个为请求得到的所有数据,第二个为后台controller中自己封装的数据名
3.结果展示
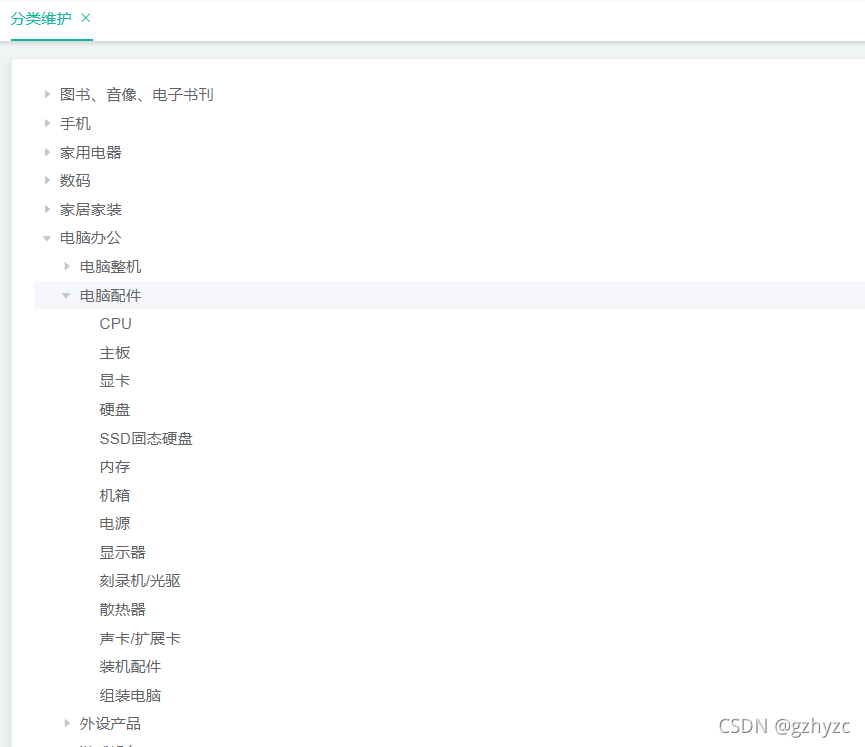
4.常用的一些功能
详情看官网Element - The world's most popular Vue UI framework
<template>
  <el-tree
    :data="menus"
    show-checkbox         #节点是否可以选择
    :props="defaultProps"
    :expand-on-click-node="false"     #只有点击箭头,节点才会展开
  >
    <span class="custom-tree-node" slot-scope="{ node, data }">
      <span>{{ node.label }}</span>
      <span>
        <el-button
          v-if="node.childNodes.length != 0"   #当有子节点时展示
          type="text"
          size="mini"
          @click="() => append(data)"        #添加放法
        >
          Append
        </el-button>
        <el-button
          v-if="node.childNodes.length == 0"   #当没有子节点时展示
          type="text"
          size="mini"
          @click="() => remove(node, data)"   #删除方法
        >
          Delete
        </el-button>
      </span>
    </span></el-tree
  >
</template>
6.数据的删除
1.配置删除的控制器
细节:@RequestBody是接收POST请求
    /**
     * 删除
     * @RequestBody为获取请求体,必须发送post请求
     */
    @RequestMapping("/delete")
    public R delete(@RequestBody Long[] catIds){

        //1.检查当前删除的菜单,是否有被别的地方引用
		categoryService.removeByIds(Arrays.asList(catIds));

        categoryService.removeMenuByIds(Arrays.asList(catIds));

        return R.ok();
    }
2.写删除实现类
细节:TODO为标注待定事件,暂时不写
    //批量删除
    @Override
    public void removeMenuByIds(List<Long> asList) {
        //TODO   1.检查当前删除的菜单,是否被别的地方引用


        baseMapper.deleteBatchIds(asList);
    }
3.逻辑删除
1)添加全局配置
注意:logic-delete-field要改成需要删除的字段
注意:mybatis-plus的版本
逻辑删除字段要在对象上添加@TableLogic注解
mybatis-plus:
  mapper-locations: classpath*:/mapper/**/*.xml
  global-config:
    db-config:
      id-type: auto
      logic-delete-field: showStatus  # 全局逻辑删除的实体字段名(since 3.3.0,配置后可以忽略不配置步骤2)
      logic-delete-value: 0 # 逻辑已删除值(默认为 1)
      logic-not-delete-value: 1 # 逻辑未删除值(默认为 0)
4.前端删除的优化
1)基础的删除post请求是实现
    remove(node, data) {
      var ids = [data.catId]
      this.$http({
        url: this.$http.adornUrl("/product/category/delete"),
        method: "post",
        data: this.$http.adornData(ids,false)
      }).then(({ data }) => {
        console.log("删除成功");
        this.getMenus
      });
      console.log("remove",node,data);
    }
2)添加确认和取消弹框
  this.$confirm('此操作将永久删除该文件, 是否继续?', '提示', {
          confirmButtonText: '确定',
          cancelButtonText: '取消',
          type: 'warning'
        }).then(() => {
          this.$message({
            type: 'success',
            message: '删除成功!'
          });
        }).catch(() => {
          this.$message({
            type: 'info',
            message: '已取消删除'
          });
        });
3)添加删除后自动刷新页面并且,不刷新父节点
	       #el-tree中添加属性
           #每个树节点用来作为唯一标识的属性,整棵树应该是唯一的
           node-key="catId"
           #默认展开的节点的 key 的数组
           :default-expanded-keys="expandedKey"


            #添加数组
            expandedKey: [],


            #删除成功方法后立即添加刷新
            //刷新出新的菜单
            this.getMenus();
            //设置需要默认展开的菜单
            this.expandedKey = [node.parent.data.catId];
4)结合后成果
<template>
  <el-tree
    :data="menus"
    show-checkbox
    :props="defaultProps"
    :expand-on-click-node="false"
    node-key="catId"
    :default-expanded-keys="expandedKey"
  ></el-tree
  >
</template>


  data() {
    return {
      menus: [],
      expandedKey: [],
      defaultProps: {
        children: "children",
        label: "name"
      }
    };
  },


    remove(node, data) {
      var ids = [data.catId];
      this.$confirm(`是否删除【${data.name}】菜单?`, "提示", {
        confirmButtonText: "确定",
        cancelButtonText: "取消",
        type: "warning"
      })
        .then(() => {
          this.$http({
            url: this.$http.adornUrl("/product/category/delete"),
            method: "post",
            data: this.$http.adornData(ids, false)
          }).then(({ data }) => {
            this.$message({
              message: "菜单删除成功",
              type: "success"
            });
            //刷新出新的菜单
            this.getMenus();
            //设置需要默认展开的菜单
            this.expandedKey = [node.parent.data.catId];
          });
        })
        .catch(() => {});

      console.log("remove", node, data);
    }
  },
7.数据的添加
1.添加添加数据的模板
注意要用<div></div>将组件都包起来
dialogFormVisible是是否隐藏对话框,在数据中定义
model="form“中form为要提交的数据,在数据中定义数据
<el-dialog title="收货地址" :visible.sync="dialogFormVisible">
  <el-form :model="form">
    <el-form-item label="活动名称" :label-width="formLabelWidth">
      <el-input v-model="form.name" autocomplete="off"></el-input>
    </el-form-item>
    <el-form-item label="活动区域" :label-width="formLabelWidth">
      <el-select v-model="form.region" placeholder="请选择活动区域">
        <el-option label="区域一" value="shanghai"></el-option>
        <el-option label="区域二" value="beijing"></el-option>
      </el-select>
    </el-form-item>
  </el-form>
  <div slot="footer" class="dialog-footer">
    <el-button @click="dialogFormVisible = false">取 消</el-button>
    <el-button type="primary" @click="dialogFormVisible = false">确 定</el-button>
  </div>
</el-dialog>
2.将数据进行调整后得到
    <el-dialog title="提示" :visible.sync="dialogVisible" width="30%">
      <el-form :model="category">
        <el-form-item label="分类名称">
          <el-input v-model="category.name" autocomplete="off"></el-input>
        </el-form-item>
      </el-form>
      <span slot="footer" class="dialog-footer">
        <el-button @click="dialogVisible = false">取 消</el-button>
        <el-button type="primary" @click="addCategoty">确 定</el-button>
      </span>
    </el-dialog>
3.修改传入的数据
      category: {
        name: "",
        parentCid: 0,
        catLevel: 0,
        showStatus: 1,
        sort: 0,
        productCount: 0
      },
      dialogVisible: false,
4.为确定按钮提供addCategoty功能
首先将数据进行处理,再提交给后台
    // 添加数据
    append(data) {
      console.log("append", data);
      this.dialogVisible = true;
      this.category.parentCid = data.catId;
      this.category.catLevel = data.catLevel * 1 + 1;
    },
//提交添加分类
addCategoty() {
console.log("提交的三级分类数据", this.category);
this.$http({
url: this.$http.adornUrl("/product/category/save"),
method: "post",
data: this.$http.adornData(this.category, false)
}).then(({ data }) => {
this.$message({
message: "菜单保存成功",
type: "success"
});
//关闭对话框
this.dialogVisible = false;
//刷新出新的菜单
this.getMenus();
//设置需要默认展开的菜单
this.expandedKey = [this.category.parentCid];
});
}8.数据的修改
1.添加修改的按钮修改对话框
          <el-button type="text" size="mini" @click="() => edit(data)">
            修改
          </el-button>
<el-dialog :title="title" :visible.sync="dialogVisible" width="30%">
<el-form :model="category">
<el-form-item label="分类名称">
<el-input v-model="category.name" autocomplete="off"></el-input>
</el-form-item>
<el-form-item label="图标地址">
<el-input v-model="category.icon" autocomplete="off"></el-input>
</el-form-item>
<el-form-item label="计量单位">
<el-input
v-model="category.productUnit"
autocomplete="off"
></el-input>
</el-form-item>
</el-form>
<span slot="footer" class="dialog-footer">
<el-button @click="dialogVisible = false">取 消</el-button>
<el-button type="primary" @click="submitData">确 定</el-button>
</span>
</el-dialog>2.添加两个属性,用于调出对话框
      title: "", //添加或更新对话框的标题
      dialogType: "", //添加或更新的判断类型
      category: {
        //提交给后台的分类数据
        name: "", //商品名
        parentCid: 0, //父分类id
        catLevel: 0, //层级
        showStatus: 1, //是否删除
        sort: 0, //排序
        productCount: 0, //商品数量
        catId: null, //商品序号
        icon: "", //图标地址
        productUnit: "" //计量单位
      },
3.修改的按钮功能实现,按下按钮回显对话框
    // 修改数据
    edit(data) {
      console.log("要修改的数据", data);
      //打开对话框
      this.dialogType = "edit";
      this.title = "是否要修改数据?";
      this.dialogVisible = true;
      //从服务器获取数据
      this.$http({
        url: this.$http.adornUrl(`/product/category/info/${data.catId}`),
        method: "get"
      }).then(({ data }) => {
        //请求成功
        console.log("回显的数据", data);
        this.category.name = data.category.name;
        this.category.catId = data.category.catId;
        this.category.icon = data.category.icon;
        this.category.productUnit = data.category.productUnit;
        this.category.parentCid = data.category.parentCid;
      });
    },
4.复用添加的对话框,进行添加或修改的判断
    // 判断是删除还是修改
    submitData() {
      if (this.dialogType == "add") {
        this.addCategoty();
      }
      if (this.dialogType == "edit") {
        this.editCategoty();
      }
    },
5.提交修改数据给后台功能的实现
    // 提交修改分类的方法
    editCategoty() {
      var { catId, name, icon, productUnit } = this.category;
      this.$http({
        url: this.$http.adornUrl("/product/category/update"),
        method: "post",
        data: this.$http.adornData({ catId, name, icon, productUnit }, false)
      }).then(({ data }) => {
        this.$message({
          message: "菜单修改成功",
          type: "success"
        });
        //关闭对话框
        this.dialogVisible = false;
        //刷新出新的菜单
        this.getMenus();
        //设置需要默认展开的菜单
        this.expandedKey = [this.category.parentCid];
      });
    }
6.调整一下前台数据的初始值
    // 添加数据
    append(data) {
      console.log("append", data);
      this.dialogType = "add";
      this.title = "是否要添加数据?";
      this.dialogVisible = true;
      this.category.parentCid = data.catId;
      this.category.catLevel = data.catLevel * 1 + 1;

      this.category.name = null;
      this.category.catId = null;
      this.category.icon = null;
      this.category.productUnit = null;
    },
9.界面的拖拽功能
1.开启拖拽功能
    <el-tree
      :data="menus"
      show-checkbox
      :props="defaultProps"
      :expand-on-click-node="false"
      node-key="catId"
      :default-expanded-keys="expandedKey"
      draggable            //开启拖拽
      :allow-drop="allowDrop"   //判断拖拽能否被放置
    >
2.判断拖动能否被放置
注意:谷粒学院54集的课里,这里没有加Math.abs取绝对值,所以可能导致没有子节点时maxLevel为0,进而deep取得负数,出现bug
    //判断拖动能否被放置
    allowDrop(draggingNode, dropNode, type) {
      //首先要判断当前节点移动后总层数是否大于三
      // (1)判断被托动的当前节点的总层数
      this.maxLevel = 0;
      console.log(draggingNode, dropNode, type);
      //当前正在拖动的节点
      this.countNodeLevel(draggingNode);
      let deep;
      if (this.maxLevel == 0) {
        deep = 1;
      } else {
        deep = Math.abs(this.maxLevel - draggingNode.level) + 1;
      }
      if (type == "inner") {
        return deep + dropNode.level <= 3;
      } else {
        return deep + dropNode.parent.level <= 3;
      }
    },
    //计算当前节点的总层数,求出最大深度
    countNodeLevel(node) {
      if (node.childNodes != null && node.childNodes.length > 0) {
        for (let i = 0; i < node.childNodes.length; i++) {
          if (node.childNodes[i].level > this.maxLevel) {
            this.maxLevel = node.childNodes[i].level;
          }
          this.countNodeLevel(node.childNodes[i]);
        }
      }
    },
3.拖拽后数据的更新
1)添加拖拽时的事件
@node-drop="handleDrop"2)更新数据的存放
      pCid: [], //更新的父节点ID
 updateNodes: [], //更新排序的信息
3)功能的实现
当节点移动时,先判断的移动到其他节点前后,还是里面
实现获取当前拖拽后节点父节点的id和兄弟节点
修改兄弟节点的order顺序,修改拖拽节点的父id
修改拖拽节点的子节点的层级,为这个功能写一个方法
注意:执行完事件要对数据 this.updateNodes = [];和 this.maxLevel = 0;进行初始化
注意:当拖动到没有父节点时,父节点id为未定义,所以要写一个方法第一拖动到1level时的父节点。
 //拖拽成功后,执行的事件
    handleDrop(draggingNode, dropNode, dropType, ev) {
      // console.log("handleDrop", draggingNode, dropNode, dropType);
      // 1.当前节点最新的父节点id
      let pCid = 0; //更新父节点
      let siblings = null; //更新兄弟节点
      if (dropType == "before" || dropType == "after") {
        pCid =
          dropNode.parent.data.catId == undefined
            ? 0
            : dropNode.parent.data.catId;
        siblings = dropNode.parent.childNodes;
      } else {
        pCid = dropNode.data.catId;
        siblings = dropNode.childNodes;
      }
      this.pCid.push(pCid);
      //2.当前拖拽节点的最新顺序
      for (let i = 0; i < siblings.length; i++) {
        if (siblings[i].data.catId == draggingNode.data.catId) {
          //当前遍历的是正在拖拽的节点,要改它的父id
          let catLevel = draggingNode.level;
          if (siblings[i].level != draggingNode.level) {
            //修改当前节点层级
            catLevel = siblings[i].level;
            //修改子节点层级
            this.updatechlidNodeLevel(siblings[i]);
          }
          this.updateNodes.push({
            catId: siblings[i].data.catId,
            sort: i,
            parentCid: pCid,
            catLevel: catLevel
          });
        } else {
          this.updateNodes.push({
            catId: siblings[i].data.catId,
            sort: i
          });
        }
      }
      //3.当前拖拽节点的最新层级
      console.log("update", this.updateNodes);
      this.$http({
        url: this.$http.adornUrl("/product/category/update/sort"),
        method: "post",
        data: this.$http.adornData(this.updateNodes, false)
      }).then(({ data }) => {
        this.$message({
          message: "菜单顺序修改成功",
          type: "success"
        });
        //刷新出新的菜单
        this.getMenus();
        //设置需要默认展开的菜单
        this.expandedKey = [pCid];
        this.updateNodes = [];
        this.maxLevel = 0;
      });
    },
    updatechlidNodeLevel(node) {
      if (node.childNodes.length > 0) {
        for (let i = 0; i < node.childNodes.length; i++) {
          let cNode = node.childNodes[i].data;
          this.updateNodes.push({
            catId: cNode.catId,
            catLevel: node.childNodes[i].level
          });
          this.updatechlidNodeLevel(node.childNodes[i]);
        }
      }
    }
4.批量修改的实现
1)后端添加一个方法就行了
    /**
     * 批量修改分类的排序
     */
    @RequestMapping("/update/sort")
    public R updateSort(@RequestBody CategoryEntity[] category){
        categoryService.updateBatchById(Arrays.asList(category));
        return R.ok();
    }
2)前端添加开关和按钮
    <el-switch
      v-model="draggable"
      active-text="关闭拖拽"
      inactive-text="开启拖拽"
    >
    </el-switch>
    <el-button v-if="draggable" @click="batchSave">批量保存</el-button>
定义一个标记draggable,默认是关的
draggable: false, //是否可以拖拽的开关3)当打开开关时,显现批量保存按钮
将提交保存的数据迁移到者,就可以自定义是否保存拖拽的数据了
注意:pCid要定义在全局数据当中,而且使用完要初始化
  //批量保存
    batchSave() {
      this.$http({
        url: this.$http.adornUrl("/product/category/update/sort"),
        method: "post",
        data: this.$http.adornData(this.updateNodes, false)
      }).then(({ data }) => {
        this.$message({
          message: "菜单顺序修改成功",
          type: "success"
        });
        //刷新出新的菜单
        this.getMenus();
        //设置需要默认展开的菜单
        this.expandedKey = [this.pCid];
        this.updateNodes = [];
        this.maxLevel = 0;
        this.pCid = 0;
      });
    },
5.批量删除
1.添加批量删除按钮
<el-button type="danger" @click="batchDelete">危险按钮</el-button>2.开启tree选中功能,获取要删除的数据
ref="menuTree"通过getCheckedNodes函数获得选中的值,封装catIds来根据id批量删除节点。
 //批量删除
    batchDelete() {
      let catIds = [];
      let checkedNodes = this.$refs.menuTree.getCheckedNodes();
      console.log("被选中的数组", checkedNodes);
      for (let i = 0; i < checkedNodes.length; i++) {
        catIds.push(checkedNodes[i].catId);
      }
      this.$confirm(`是否批量删除这些菜单?`, "提示", {
        confirmButtonText: "确定",
        cancelButtonText: "取消",
        type: "warning"
      })
        .then(() => {
          this.$http({
            url: this.$http.adornUrl("/product/category/delete"),
            method: "post",
            data: this.$http.adornData(catIds, false)
          }).then(({ data }) => {
            this.$message({
              message: "菜单批量删除成功",
              type: "success"
            });
            //刷新出新的菜单
            this.getMenus();
          });
        })
        .catch(() => {});
    },


 561
561

 被折叠的 条评论
为什么被折叠?
被折叠的 条评论
为什么被折叠?
 到【灌水乐园】发言


