


 本文详细介绍如何使用Node.js的http、url及path模块搭建一个简单的静态WEB服务器,并介绍了HTTP请求与响应对象的相关属性。
本文为 Node.js 系列笔记第三篇。文章参考:nodejs 教程;《深入浅出 Node.js》;阮一峰 nodejs 博客; Node.js v16.13.0 文档
文章目录
前言
在讲怎样搭建静态 WEB 服务器之前,首先要了解一下 http 模块、url 模块、path 模块。尽管在此前文章中有所提及,但是这里仍打算系统地回顾整理一下。
一、http 模块
1. HTTP 简介
HTTP 的全称是超文本传输协议,英文写作 HyperText Transfer Protocol。欲了解 Web,先了解 HTTP 将会极大地提高我们对 Web 的认知。
HTTP 构建在 TCP 之上,属于应用层协议。在 HTTP 的两端是 服务器 和 浏览器,即著名的 B/S 模式,如今精彩纷呈的 Web 即是 HTTP 的应用。
从协议的角度来说,现在的应用,如浏览器,其实是一个 HTTP 的代理。用户的行为将会通过它转化为HTTP 请求报文发送给服务器端,服务器端在处理请求后,发送响应报文给代理,代理在解析报文后,将用户需要的内容呈现在界面上。
2. http 模块
Node 的 http 模块包含对 HTTP 处理的封装,http 模块主要用于搭建 HTTP 服务。如下代码为使用 Node 搭建简单的 HTTP 服务器。
const http = require('http');

http.createServer(function (request, response) {
    response.writeHead(200, { 'Content-Type': 'text/plain' });
    response.end('Hello World');
}).listen(8081);

console.log('Server running at http://127.0.0.1:8081/');
简单分析一下:
const http = require("http"),表示加载 http 模块。- 然后,调用 http 模块的
createServer方法,创造一个服务器实例。 ceateServer方法接受一个函数作为参数,该函数的request参数是一个对象,表示客户端的 HTTP 请求;response参数也是一个对象,表示服务器端的 HTTP 响应。response.writeHead方法用来写入 HTTP 响应头信息(状态码:200;文件类型:plain)
这里说一下
'text/plain':将文件设置为纯文本的形式,浏览器在获取到这种文件时并不会对其进行处理 。对应于不同的文件应该有不同的设置。比如,你也可以设置为'text/html'。那么,浏览器在获取到这种文件时会自动调用 html 的解析器对文件进行相应的处理。
response.end方法用来写入 HTTP 响应的具体内容,以及回应完成后关闭本次对话。- 最后的
listen(8081)表示启动服务器实例,监听本机的 8081 端口。(当然,你也可以绑定其他端口,但是建议绑定 3000 以上端口)
在终端输入(文件名为 app.js),即可运行
node app.js
当然,你也可以通过 supervisor 工具或者其他工具启用
supervisor app.js
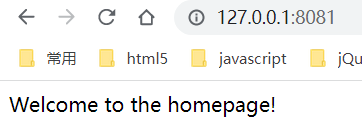
这时命令行窗口将显示一行提示 Server running at http://127.0.0.1:8081/。打开浏览器,访问 http://localhost:8081,网页显示 Hello world 。
于是,你就可以实现一个网站的雏形了。根据不同网址的请求,显示不同的内容。
var http = require('http');
http.createServer(function(req, res) {
// 主页
if (req.url == "/") {
res.writeHead(200, { "Content-Type": "text/html" });
res.end("Welcome to the homepage!");
}
// About页面
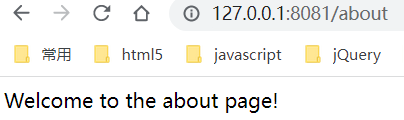
else if (req.url == "/about") {
res.writeHead(200, { "Content-Type": "text/html" });
res.end("Welcome to the about page!");
}
// 404错误
else {
res.writeHead(404, { "Content-Type": "text/plain" });
res.end("404 error! File not found.");
}
}).listen(8081, "localhost");
3. HTTP 请求对象
createServer 方法的回调函数的第一个参数是一个 request 对象,拥有以下属性:
- url:发出请求的网址。如
'/',"/register"等等。 - method:HTTP 请求的方法。常见的请求方法有 GET、POST、DELETE、PUT、CONNECT 等。
- headers:HTTP 请求的所有 HTTP 头信息。
如下,获取请求的路径名
var url = require('url');
var pathname = url.parse(request.url).pathname;
现在,
url.parse()方法不再推荐使用。
官方说明:不鼓励使用旧版的
url.parse()方法。 用户应使用 WHATWG URL API。 由于url.parse()方法使用一种宽松的非标准算法来解析网址字符串,因此可能会引入安全问题。 具体来说,已经确定了主机名欺骗以及用户名和密码处理不当的问题。WHATWG 是国际权威的技术标准组织
4. HTTP 响应对象
再来看看 HTTP 响应对象 response。HTTP 响应相对简单一些,它封装了对底层连接的写操作,可以将其看成一个可写的流对象。
它影响响应报文头部信息的 API 为 res.setHeader() 和 res.writeHead()。我们可以调用 setHeader 进行多次设置,但只有调用 writeHead 后,报头才会写入到连接中。如前面例子中:
response.writeHead(200, { 'Content-Type': 'text/plain' });
报文体部分则是调用 res.write() 和 res.end() 方法实现,后者与前者的差别在于 res.end() 会先调用 write() 发送数据,然后发送信号告知服务器这次响应结束。
需要注意,无论服务器端在处理业务逻辑时是否发生异常,务必在结束时调用 res.end() 结束请求,否则客户端将一直处于等待的状态。
二、url 模块
1. url 模块简介
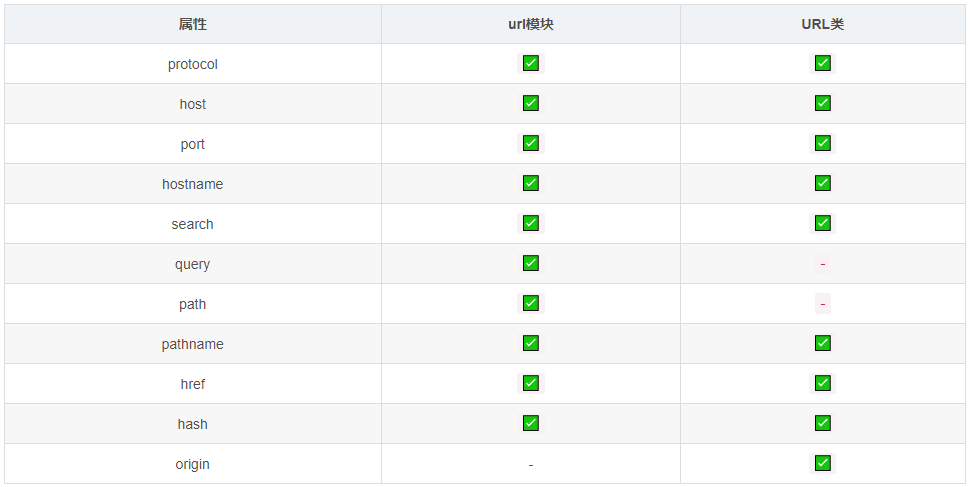
url 模块提供了两种用于处理网址的 API:一种是 Node.js 特定的旧版 API,一种是实现了与 Web 浏览器使用的相同的 WHATWG 网址标准的新版 API。
下面提供了 WHATWG 和 旧版 API 之间的比较。上方显示的是由旧版 url.parse() 返回的对象的属性。 下方则是 WHATWG URL 对象的属性。
┌────────────────────────────────────────────────────────────────────────────────────────────────┐
│          url.parse()                         href                                              │
├──────────┬──┬─────────────────────┬────────────────────────┬───────────────────────────┬───────┤
│ protocol │  │        auth         │          host          │           path            │ hash  │
│          │  │                     ├─────────────────┬──────┼──────────┬────────────────┤       │
│          │  │                     │    hostname     │ port │ pathname │     search     │       │
│          │  │                     │                 │      │          ├─┬──────────────┤       │
│          │  │                     │                 │      │          │ │    query     │       │
"  https:   //    user   :   pass   @ sub.example.com : 8080   /p/a/t/h  ?  query=string   #hash "
│          │  │          │          │    hostname     │ port │          │                │       │
│          │  │          │          ├─────────────────┴──────┤          │                │       │
│ protocol │  │ username │ password │          host          │          │                │       │
├──────────┴──┼──────────┴──────────┼────────────────────────┤          │                │       │
│   origin    │                     │         origin         │ pathname │     search     │ hash  │
├─────────────┴─────────────────────┴────────────────────────┴──────────┴────────────────┴───────┤
│          WHATWG URL                          href                                              │
└────────────────────────────────────────────────────────────────────────────────────────────────┘
URL 类使用的示例:
const urlStr = "http://127.0.0.1:3000/index.html";

const myURL = new URL(urlStr);
console.log(myURL.pathname);        // /index.html
2. 常用 API
此模块相关 API 有很多,此处不再详解,只是单纯说一下常用。可参考官方说明 http://nodejs.cn/api/url.html
- new URL(input[, base])
input:要解析的绝对或相对的输入网址base:如果 input 不是绝对的,则为要解析的基本网址。
通过相对于 base 解析 input 来创建新的 URL 对象。 如果 base 作为字符串传入,则其将被解析为等效于 new URL(base)。
const myURL = new URL('/foo', 'https://example.org/');
// https://example.org/foo
- url.origin
获取网址的源的只读的序列化。
const myURL = new URL('https://example.org/foo/bar?baz');
console.log(myURL.origin);
// 打印 https://example.org
- url.pathname
获取和设置网址的路径部分。
const myURL = new URL('https://example.org/abc/xyz?123');
console.log(myURL.pathname);
// 打印 /abc/xyz
- url.search
获取和设置网址的序列化的查询部分。
const myURL = new URL('https://example.org/abc?123');
console.log(myURL.search);
// 打印 ?123

myURL.search = 'abc=xyz';
console.log(myURL.href);
// 打印 https://example.org/abc?abc=xyz
三、path 模块
1. path 模块简介
path 模块提供了用于处理文件和目录的路径的实用工具。 可以使用以下方式访问它:
const path = require('path');
path 模块的默认操作因运行 Node.js 应用程序的操作系统而异。例如,Unix 系统是 “/”,Windows 系统是 “\”。
2. 常用 API
- path.resolve([…paths])
path.resolve() 方法将路径或路径片段的序列解析为绝对路径。
path.resolve('/foo/bar', './baz');
// 返回: '/foo/bar/baz'

path.resolve('/foo/bar', '/tmp/file/');
// 返回: '/tmp/file'

path.resolve('wwwroot', 'static_files/png/', '../gif/image.gif');
// 如果当前工作目录是 /home/myself/node,
// 则返回 '/home/myself/node/wwwroot/static_files/gif/image.gif'
- path.parse(path)
path.parse() 方法返回一个对象,其属性表示 path 的重要元素。返回的对象将具有以下属性:dir、root、base、name、ext
path.parse('C:\\path\\dir\\file.txt');
// 返回:
// {
//		root: 'C:\\',
//		dir: 'C:\\path\\dir',
//		base: 'file.txt',
//		ext: '.txt',
//   	name: 'file'
//	}
- path.dirname(path)
path.dirname() 方法返回 path 的目录名。
path.dirname('/foo/bar/baz/asdf/quux');
// 返回: '/foo/bar/baz/asdf'
- path.extname(path)
path.extname() 方法返回 path 的扩展名,即 path 的最后一部分中从最后一次出现的 . 字符到字符串的结尾。
path.extname('index.html');
// 返回: '.html'

path.extname('index.coffee.md');
// 返回: '.md'
- path.format()
path.format() 方法从对象返回路径字符串。 这与 path.parse() 相反。
path.format({
  dir: 'C:\\path\\dir',
  base: 'file.txt'
});
// 返回: 'C:\\path\\dir\\file.txt'
四、创建静态 WEB 服务器
1. WEB 服务器介绍
Web 服务器一般指网站服务器,是指驻留于因特网上某种类型计算机的程序,可以处理浏览器等 Web 客户端的请求并返回相应响应,也可以放置网站文件,让全世界浏览;可以放置数据文件,让全世界下载。目前最主流的三个Web服务器是 Apache、 Nginx 、IIS。
2. 利用 nodejs 创建
实现:可以访问 web 服务器上面的网站,同时可以下载上面的文件。

- 几点说明
-
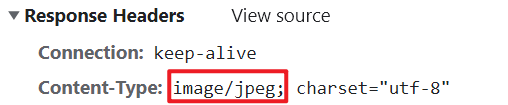
需要根据文件类型去更改相应的内容类型(Content-Type),如 css 对应
text/css、jpg 对应image/jpeg等。
-
可以引入 content-type 对照表,用于判断对应的相应类型

-
引用对照表(
mime.json)时,不免要用到fs.readFile()异步操作,需要利用 async 和 await 处理异步请求。当然你也可以利用同步方法fs.readFileSync()来读取文件,这样就不必考虑异步处理了。注意:当读取一个文件时,采用同步方法
fs.readFileSync()是没有问题的,但是当你读取多个文件且前后有依赖时,还是得使用异步操作。
- 再说一下 url.parse()
对于 json 文件的访问请求地址,如: http://127.0.0.1:3000/json/all.json?5062004654474874,需要去掉后缀 ?5062004654474874,才可以获取其后缀进而判断其为 json 文件。
解决方法:
const url = require('url');
let pathname = url.parse(req.url).pathname;
但是前面说过,url.parse() 方法已经不推荐使用。因此,可以使用下面 URL 类的方法:
let myURL = new URL(req.url, 'http://127.0.0.1:3000/');
let pathname = myURL.pathname;
3. 未封装版本
const http = require('http');
const fs = require('fs');
const common = require('./module/common.js');
const path = require('path');

http.createServer(function (req, res) {

    // http://127.0.0.1:3000/login.html
    // http://127.0.0.1:3000/index.html

    let myURL = new URL(req.url, 'http://127.0.0.1:3000/');
    let pathname = myURL.pathname;
    // let pathname = req.url;

    // 默认加载
    pathname = pathname == '/' ? '/index.html' : pathname;

    // 获取后缀名  path.extname()
    let extname = path.extname(pathname);


    if (pathname != '/favicon.ico') {
        fs.readFile('./static' + pathname, async (err, data) => {
            if (err) {
                res.writeHead(404, { 'Content-Type': 'text/html; charset="utf-8"' });
                res.end('这个页面不存在');
            }

            let mime = await common.getFileMime(extname);

            res.writeHead(200, { 'Content-Type': `${mime}; charset="utf-8"` });
            res.end(data);
        })
    }
}).listen(3000);

console.log('Server running at http://127.0.0.1:3000/');
common.js 模块代码
const fs = require('fs');

// 对文件的响应类型进行判断,根据后缀名更改响应头 text/html、 text/css 等
exports.getFileMime = function (extname) {
    // 涉及异步要利用 await,需要封装为 Promise
    return new Promise((resolve, reject) => {
        fs.readFile('./data/mime.json', (err, data) => {
            if (err) {
                console.log(err);
                return;
            }
            // 首先将字节流转为字符串,再将字符串转为对象类型,如 ".html":"text/html"
            let mimeObj = JSON.parse(data.toString());
            // 将 extname 对应的 值 返回
            resolve(mimeObj[extname]);
        })
    })
}
4. 封装版本
我们可以对上面代码进行封装。以后每次调用 routes.static 即可创建静态 Web 服务。
const http = require('http');
const routes = require('./module/routes.js')

http.createServer(function (req, res) {

    // 创建静态 WEB 服务
    routes.static(req, res, 'static');

}).listen(3000);

console.log('Server running at http://127.0.0.1:3000/');
routes.js 模块
const fs = require('fs');
const path = require('path');

// 私有方法,只在当前模块使用
function getFileMime(extname) {
    // 同步方法
    var data = fs.readFileSync('./data/mime.json');
    let mimeObj = JSON.parse(data.toString());
    return mimeObj[extname];
}

exports.static = function (req, res, staticPath) {
    // 获取地址
    let myURL = new URL(req.url, 'http://127.0.0.1:3000/');
    let pathname = myURL.pathname;
    pathname = pathname == '/' ? '/index.html' : pathname;
    let extname = path.extname(pathname);

    // 读取文件
    if (pathname != '/favicon.ico') {
        fs.readFile('./' + staticPath + pathname, (err, data) => {
            if (err) {
                res.writeHead(404, { 'Content-Type': 'text/html; charset="utf-8"' });
                res.end('这个页面不存在');
            }
            let mime = getFileMime(extname);
            res.writeHead(200, { 'Content-Type': `${mime}; charset="utf-8"` });
            res.end(data);
        })
    }
}


 1791
1791

 被折叠的 条评论
为什么被折叠?
被折叠的 条评论
为什么被折叠?
 到【灌水乐园】发言


