


 本文详细介绍了SpringBoot项目如何进行多环境配置,包括使用Profile文件和@Profile注解的方式,以及如何在配置文件中设置随机值和参数间引用。通过实例演示了不同环境的切换和测试,帮助开发者理解如何根据开发、测试和生产环境灵活配置应用。
零、学习目标
1、掌握使用Profile文件进行多环境配置
2、掌握使用@Profile注解进行多环境配置
3、熟悉随机值设置以及参数间引用
一、项目进行多环境配置的必要性
在实际开发中,应用程序通常需要部署到不同的运行环境中,例如开发环境、测试环境、生产环境等。不同的环境可能需要不同的环境配置,针对这种情况,不可能手动变更配置文件来适应不同的开发环境,通常需要对项目进行多环境配置,Spring Boot框架提供了两种多环境配置的方式,分别是Profile文件多环境配置和@Profile注解多环境配置。同时,会额外讲解在Spring Boot配置文件中设置属性时,除了可以像前面示例中显示的配置属性值外,还可以使用随机值和参数间引用对属性值进行设置。
原文链接:https://blog.youkuaiyun.com/howard2005/article/details/107917841
二、使用Profile文件进行多环境配置
(一)创建Spring Boot Web项目ProfileDemo01
项目初始化过程可以参看上一讲ConfigDemo01的创建过程
(二)创建多环境配置文件
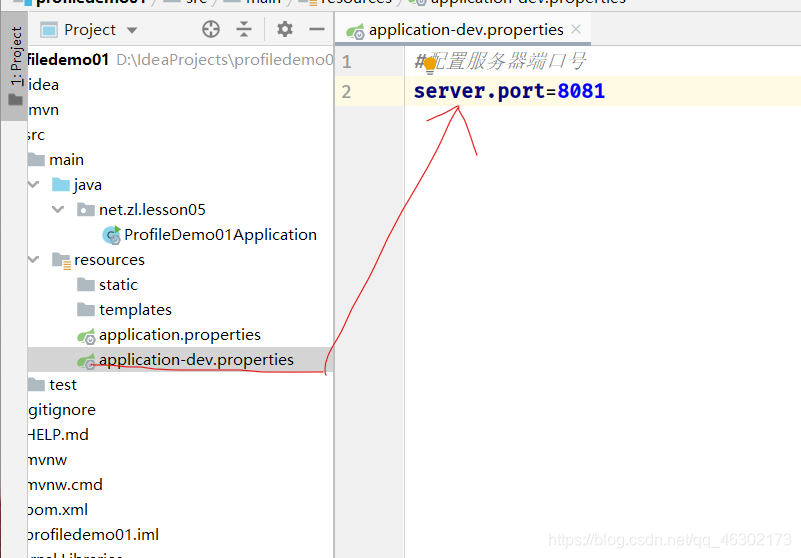
配置文件命名格式:application-xxx.properties
此例仅演示端口号的配置,实际应用中可以配置许多内容
1、模拟开发环境,创建配置文件application-dev.properties
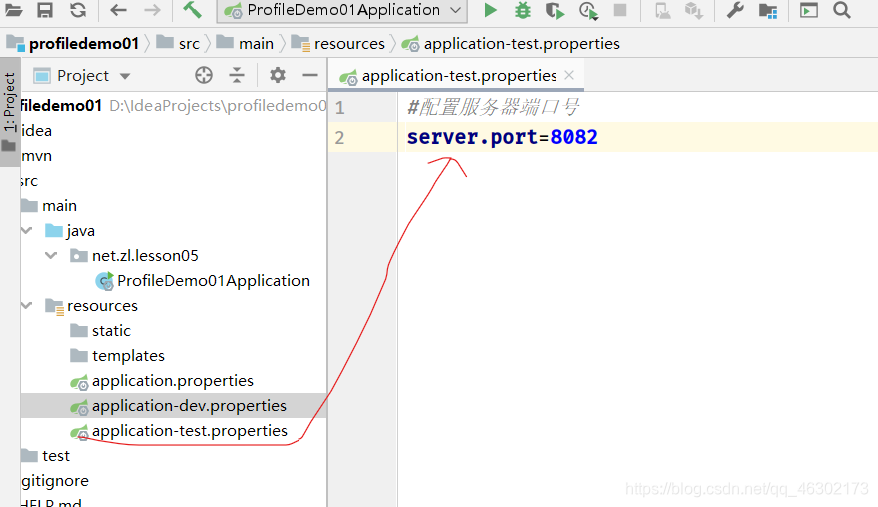
2、模拟测试环境,创建配置文件application-test.properties2、模拟测试环境,创建配置文件application-test.properties
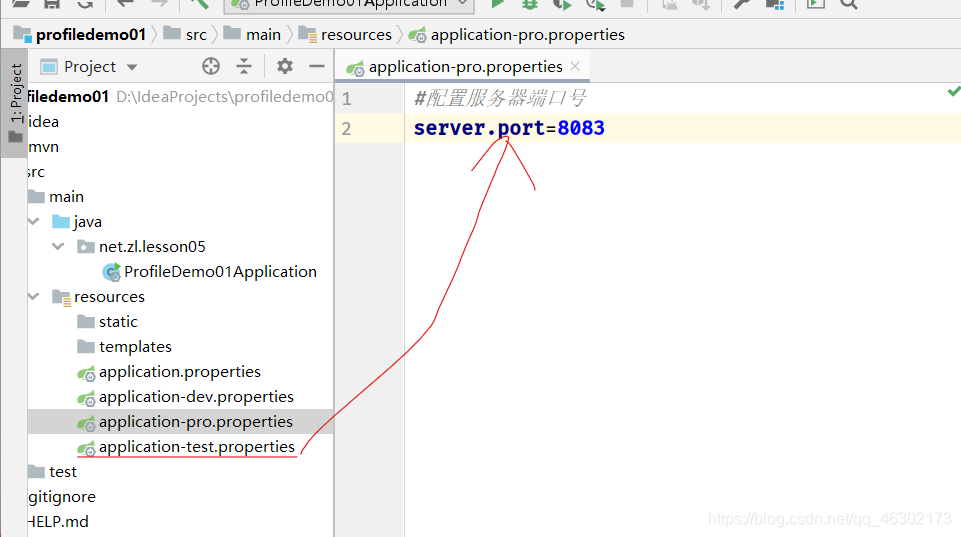
3、模拟生产环境,创建配置文件application-pro.properties
(三)指定使用环境
方式1、使用配置文件全局指定使用环境
(1) 在全局配置文件里指定当前使用环境 - 开发环境
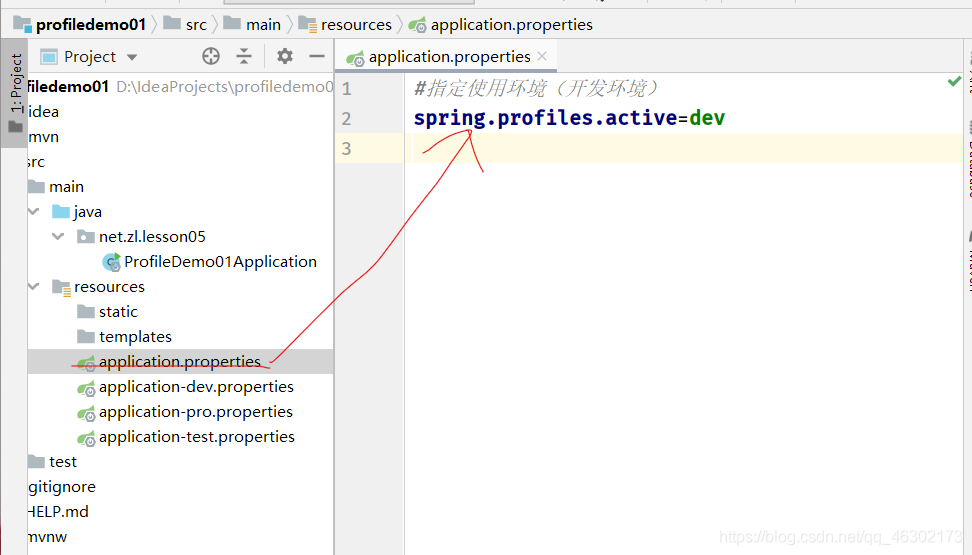
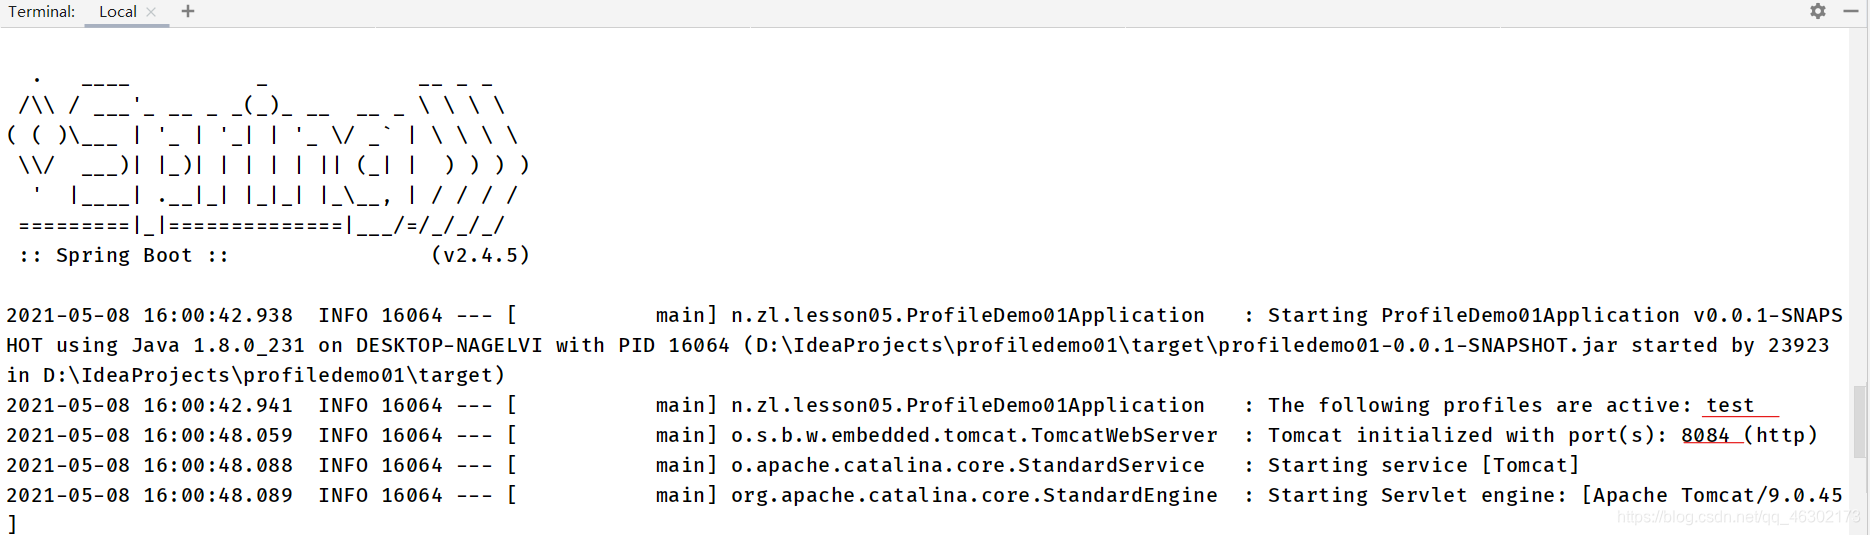
spring.profiles.active=dev,表明当前生效的环境配置文件是application-dev.properties
启动项目,查看采用的使用环境及服务器端口号

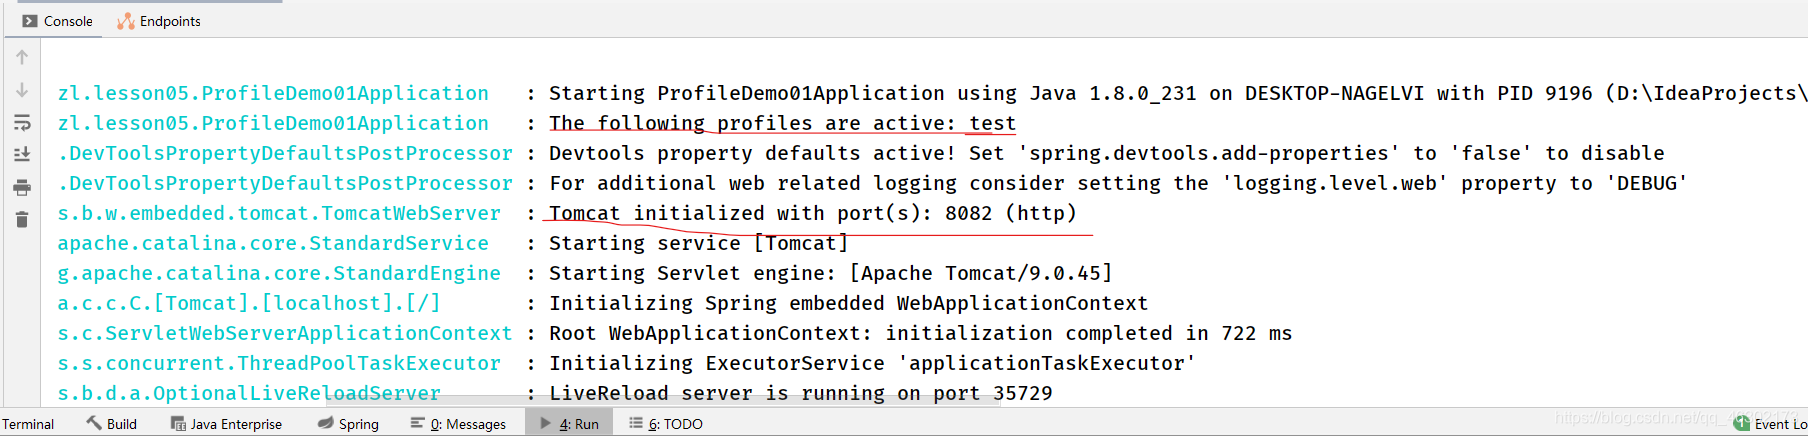
(2) 在全局配置文件里指定当前使用环境 - 测试环境
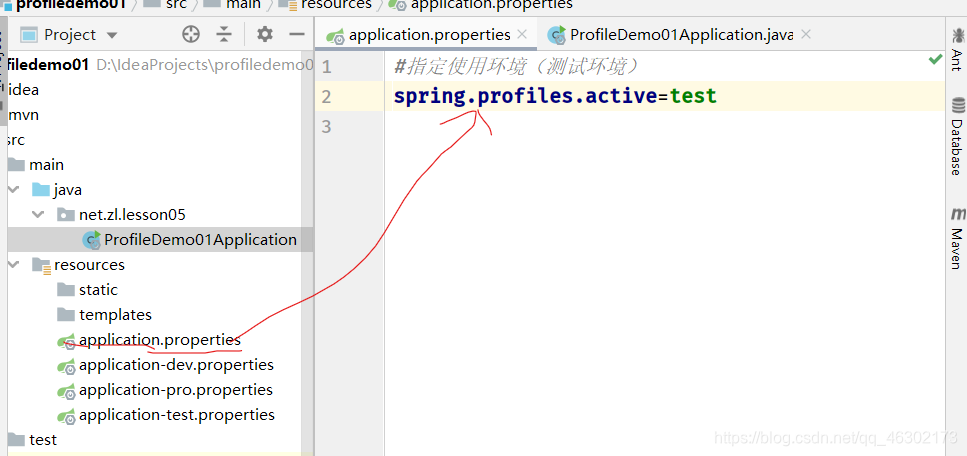
spring.profiles.active=test,表明当前生效的环境配置文件是application-test.properties
启动项目,查看采用的使用环境及服务器端口号
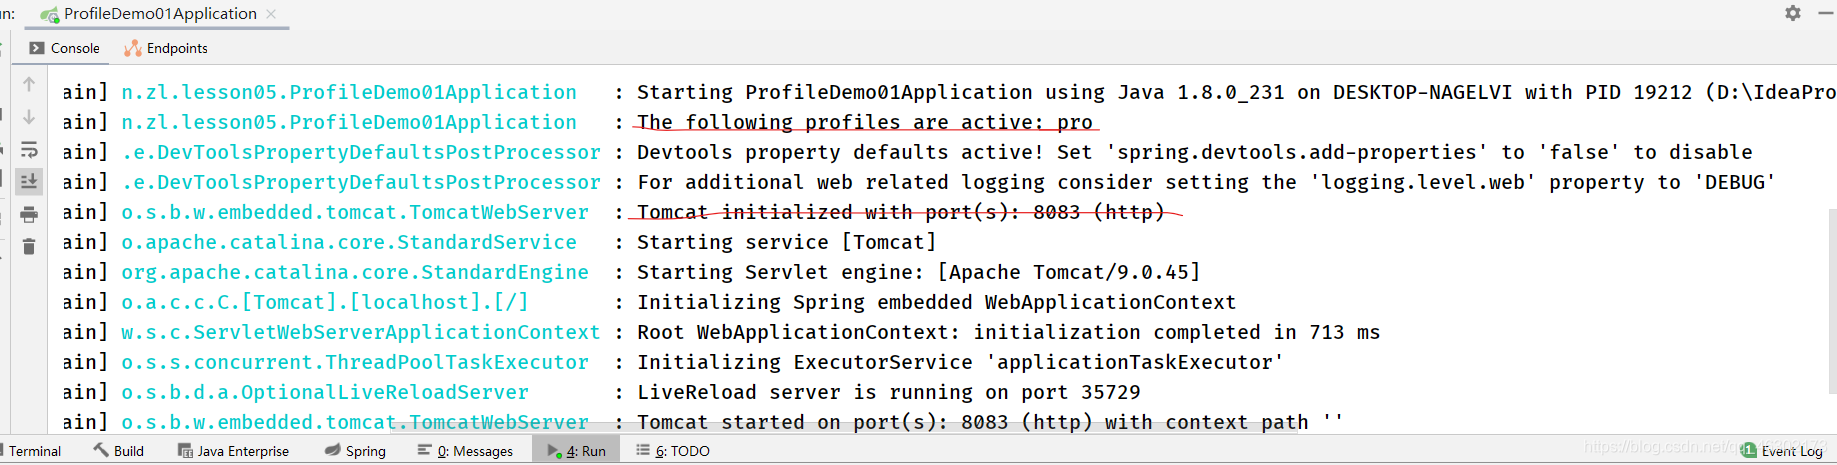
(3) 在全局配置文件里指定当前使用环境 - 生产环境
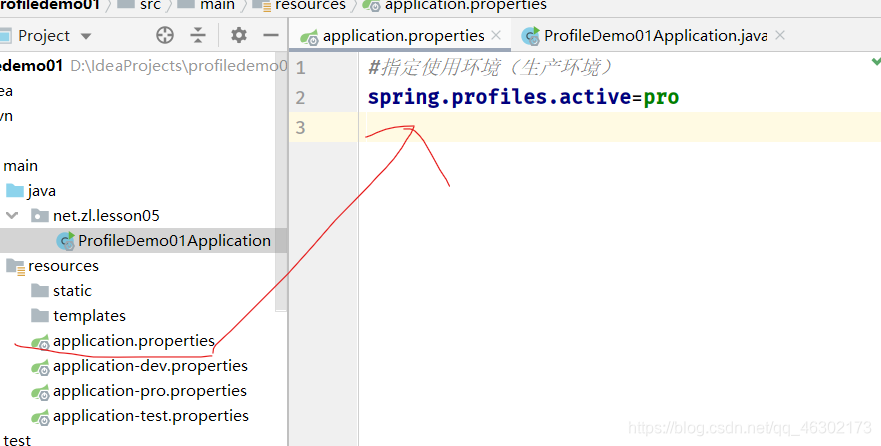
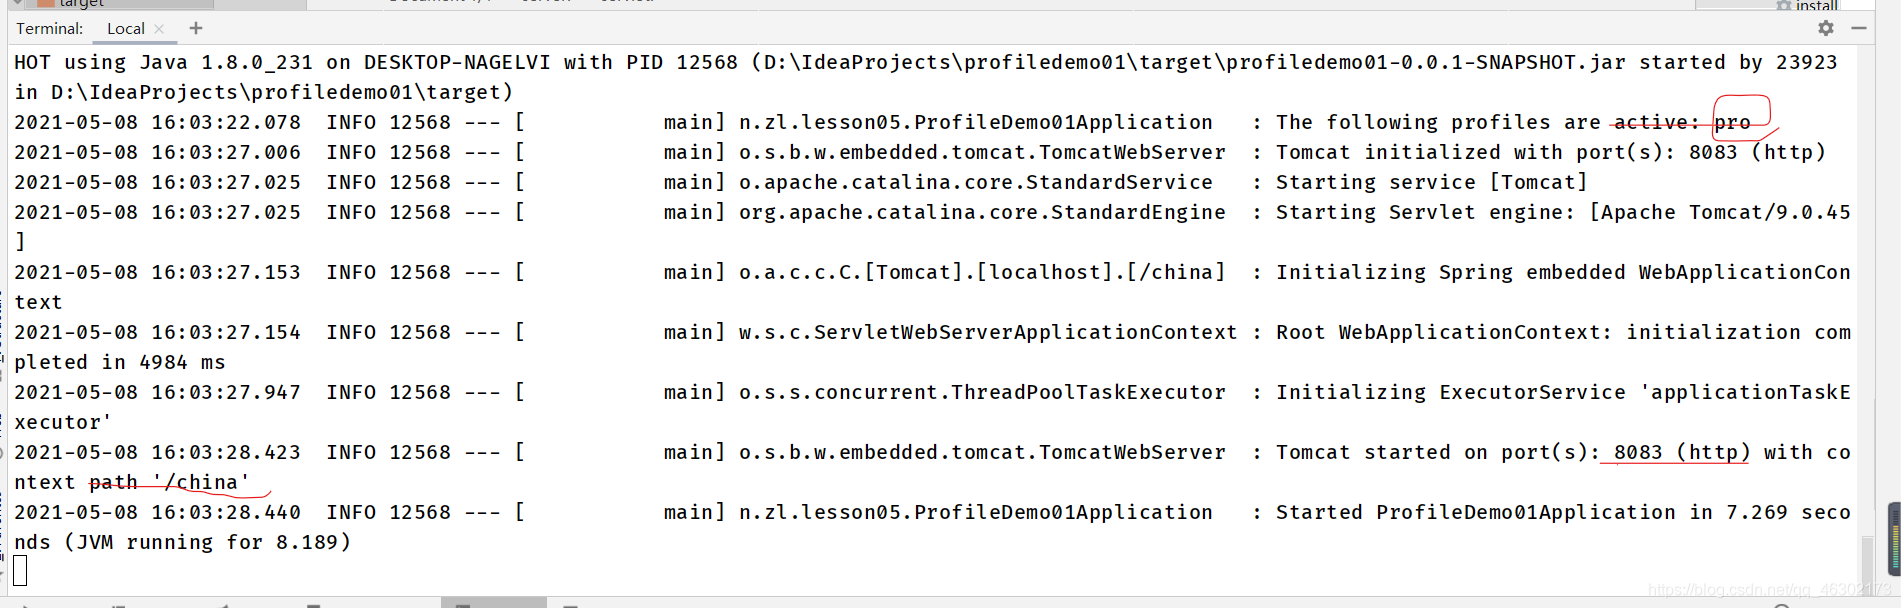
spring.profiles.active=pro,表明当前生效的环境配置文件是application-pro.properties
启动项目,查看采用的使用环境及服务器端口号
方式2、通过命令行方式指定使用环境
(1)使用IDEA将Maven项目打成jar包
Maven - ProfileDemo01 - LifeCycle - package,单击右键,在快捷菜单里执行“Run Maven Build"
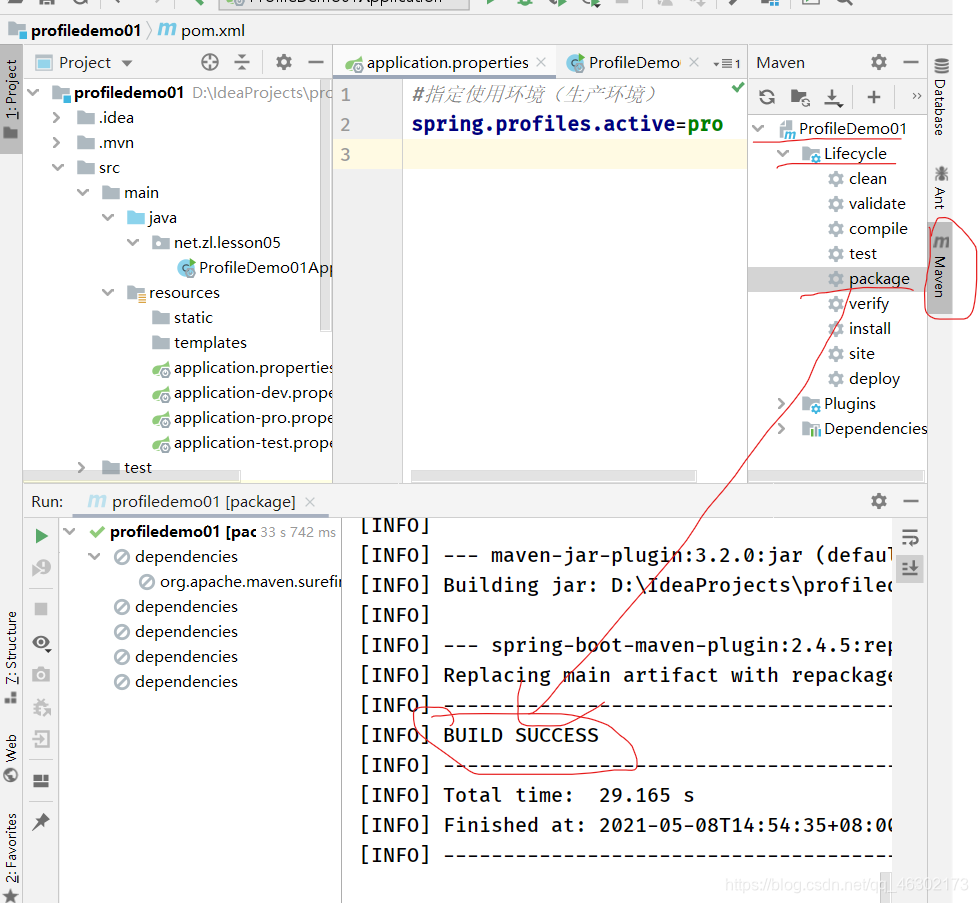
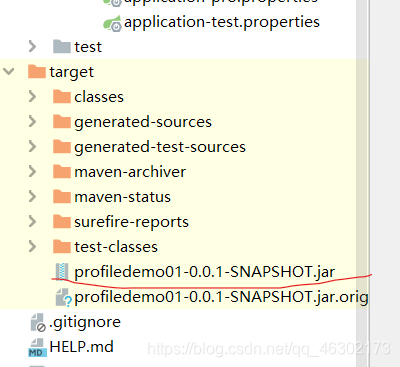
在target目录里查看生成的项目jar包profiledemo01-0.0.1-SNAPSHOT.jar
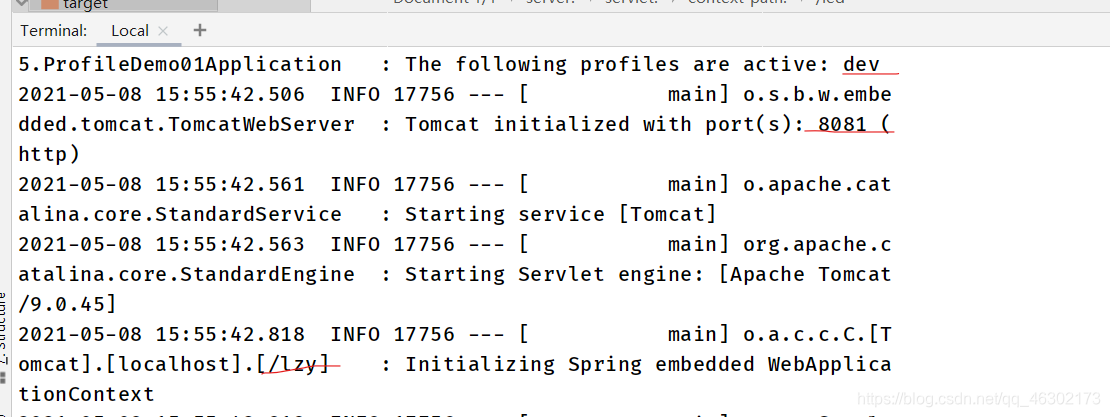
(2)在终端执行jar包,选择使用环境 - 开发环境
D:\IdeaProjects\ProfileDemo01>cd target
D:\IdeaProjects\ProfileDemo01\target>java -jar profiledemo01-0.0.1-SNAPSHOT.jar --spring.profiles.active=dev

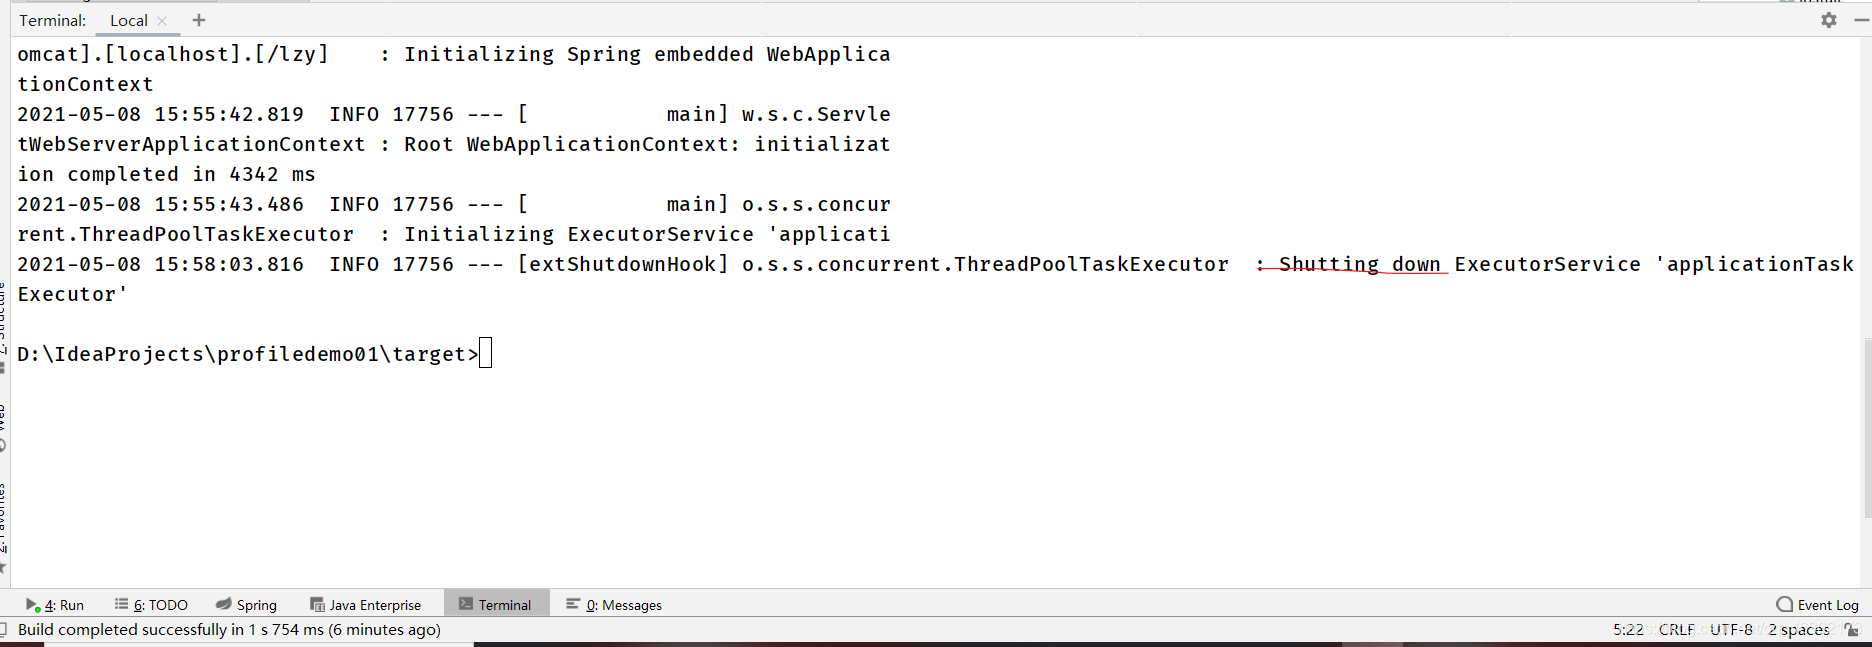
按Ctrl + C组合键,停止项目的运行
(3)在终端执行jar包,选择使用环境 - 测试环境
D:\IdeaProjects\ProfileDemo01\target>java -jar profiledemo01-0.0.1-SNAPSHOT.jar --spring.profiles.active=test

按Ctrl + C组合键,停止项目的运行
(4)在终端执行jar包,选择使用环境 - 生产环境
D:\IdeaProjects\ProfileDemo01\target>java -jar profiledemo01-0.0.1-SNAPSHOT.jar --spring.profiles.active=pro

按Ctrl + C组合键,停止项目的运行
三、使用@Profile注解进行多环境配置
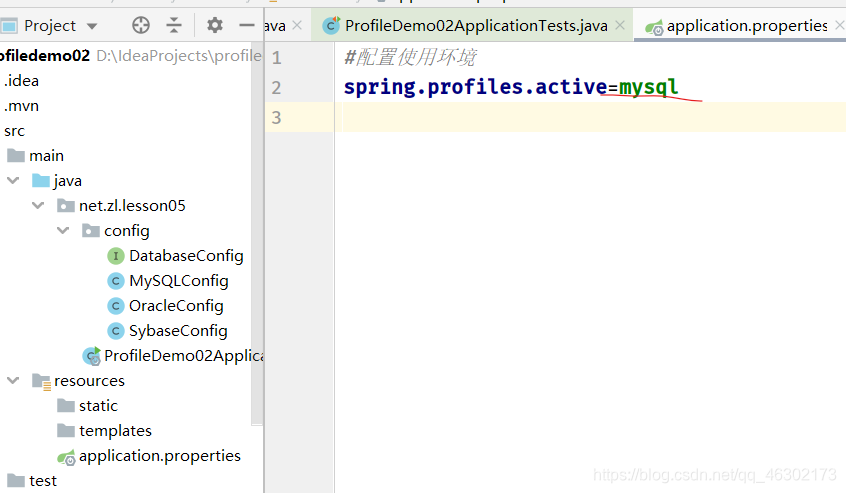
如果项目可能用到三种不同的数据库环境,比如MySQL、Oracle和Sybase,那么我们如何利用@Profile注解来实现多数据库环境配置呢?
(一)创建Spring Boot Web项目ProfileDemo02
项目初始化过程可以参看上一讲ConfigDemo01的创建过程
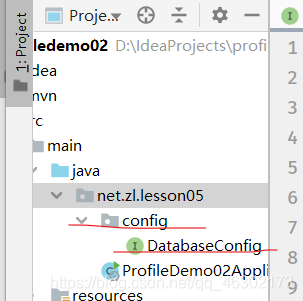
(二)创建数据库配置接口DatabaseConfig
package net.zl.lesson05.config;
/**
 * 功能:数据库配置接口
 * 作者:周璐
 * 日期:2021年05月08日
 */
public interface DatabaseConfig {
    void connector();
}
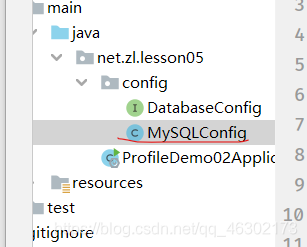
(三)创建三个数据库配置实现类
1、创建数据库配置实现类MySQLConfig
package net.zl.lesson05.config;
import org.springframework.context.annotation.Configuration;
import org.springframework.context.annotation.Profile;
/**
* 功能:MySQL数据库配置类
* 作者:周璐
* 日期:2021年05月08日
*/
@Configuration // 指定为配置类
@Profile("mysql") // 配置环境名称
public class MySQLConfig implements DatabaseConfig{
@Override
public void connector() {
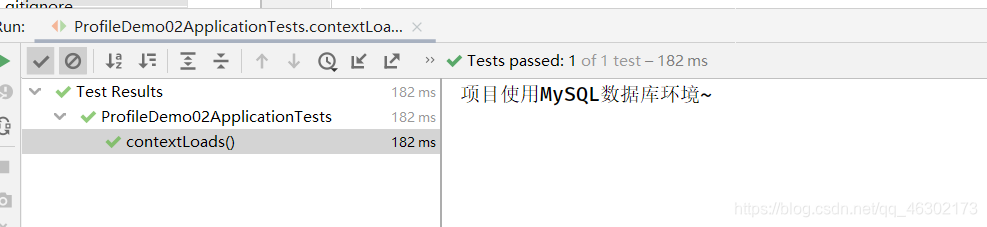
System.out.println("项目使用MySQL数据库环境~");
}
}
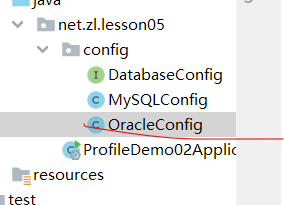
2、创建数据库配置实现类OracleConfig
package net.zl.lesson05.config;

import org.springframework.context.annotation.Configuration;
import org.springframework.context.annotation.Profile;

/**
 * 功能:Oracle数据库配置类
 * 作者:周璐
 * 日期:2021年05月08日
 */
@Configuration // 指定为配置类
@Profile("oracle") // 配置环境名称
public class OracleConfig implements DatabaseConfig{
    @Override
    public void connector() {
        System.out.println("项目使用Oracle数据库环境~");
    }
}
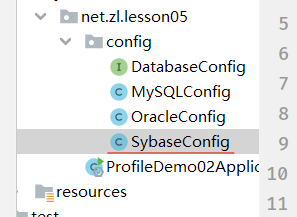
3、创建数据库配置实现类SybaseConfig
package net.zl.lesson05.config;
import org.springframework.context.annotation.Configuration;
import org.springframework.context.annotation.Profile;
/**
* 功能:Sybase数据库配置类
* 作者:周璐
* 日期:2021年05月08日
*/
@Configuration // 指定为配置类
@Profile("sybase") // 配置环境名称
public class SybaseConfig implements DatabaseConfig{
@Override
public void connector() {
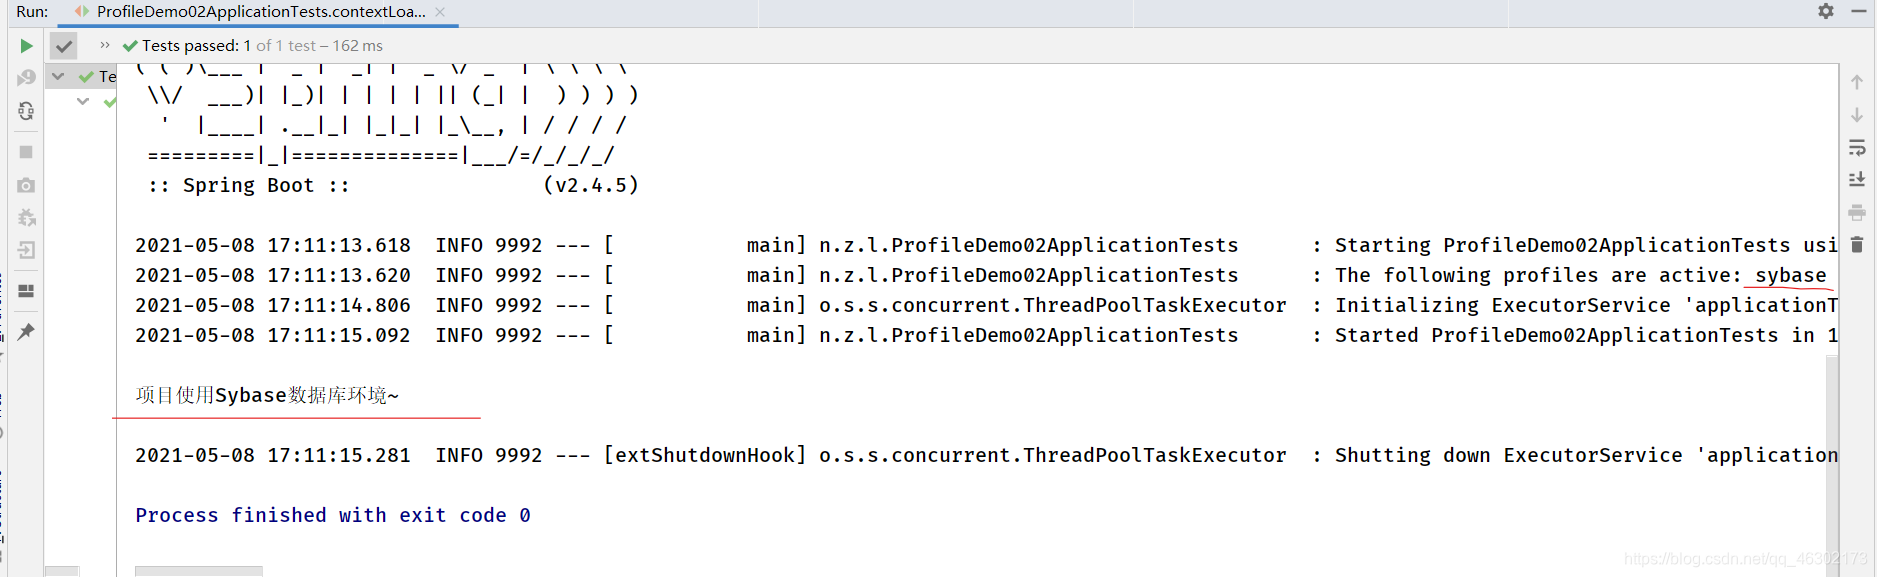
System.out.println("项目使用Sybase数据库环境~");
}
}
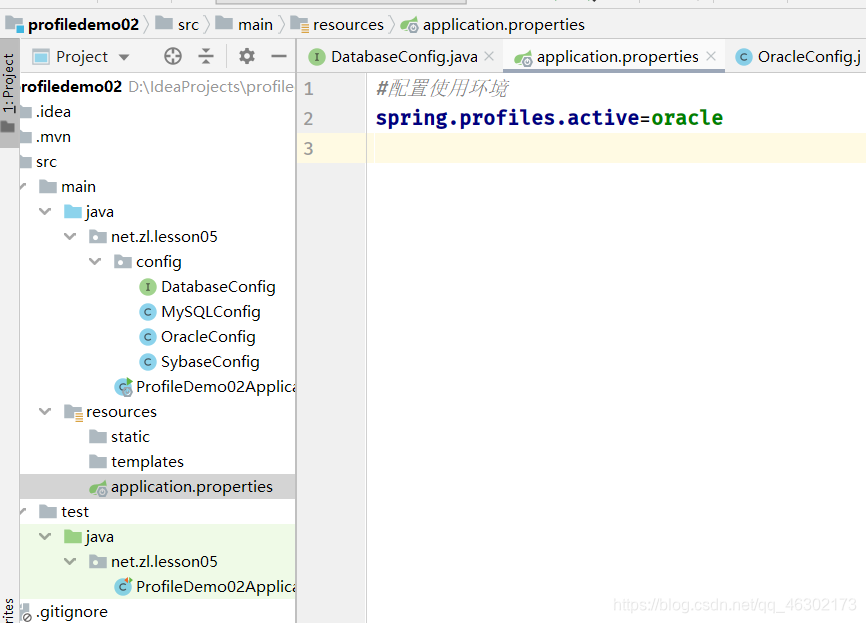
(四)在全局配置文件里设置使用环境
在全局配置文件application.properties里配置使用环境
(五)打开测试类,编写测试方法
注入数据配置实体
调用数据库配置实体的方法
package net.zl.lesson05;

import net.zl.lesson05.config.DatabaseConfig;
import org.junit.jupiter.api.Test;
import org.springframework.beans.factory.annotation.Autowired;
import org.springframework.boot.test.context.SpringBootTest;

@SpringBootTest
class ProfileDemo02ApplicationTests {

    @Autowired//注入数据库配置实体
    private DatabaseConfig databaseConfig;
    @Test
    void contextLoads() {
        //调用数据库配置实体的方法
        databaseConfig.connector();
    }
}
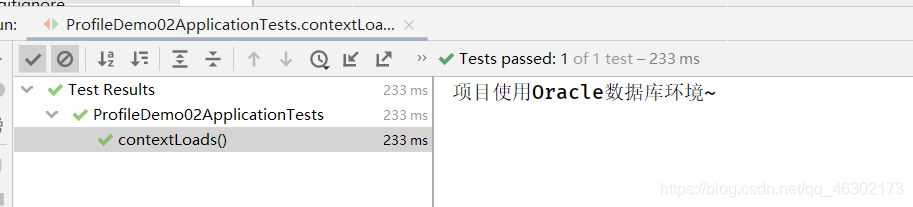
(六)运行测试方法,查看结果
运行测试方法contextLoads()
课堂练习
1、设置使用环境 - MySQL数据库环境,并测试

2、设置使用环境 - Sybase数据库环境,并测试

四、随机值设置以及参数间引用
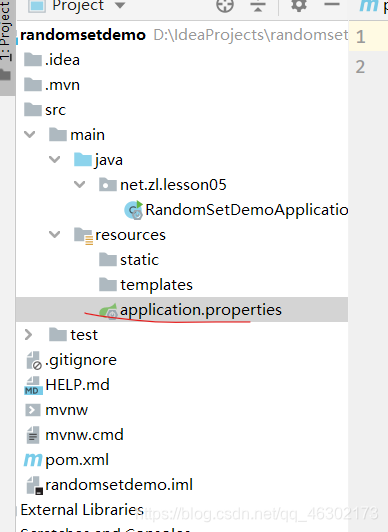
(一)创建Spring Boot Web项目RandomSetDemo
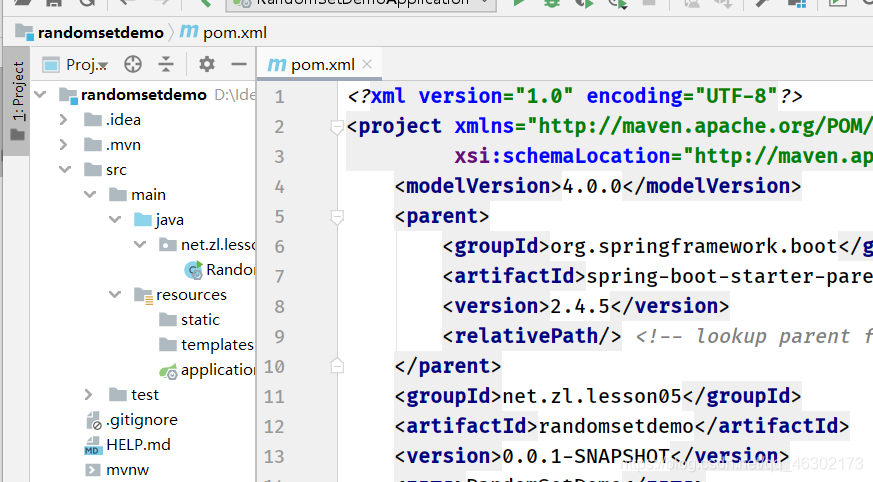
(二)在全局配置文件里配置随机值
#任意一个随机数
my.number=${random.value}
#一个随机整数
my.integer=${random.int}
#一个长整型的随机数
my.long=${random.long}
#获取一个随机的UUID值
my.uuid=${random.uuid}
#小于10的随机整数
my.number.less=${random.int(10)}
#随机产生1024至65535之间的数
my.number.range=${random.int[1024,65535]}
(三)在测试类里测试配置的随机数
点开测试类RandomSetDemoApplicationTests
1、测试随机数my.number
注入配置文件里的属性
输出配置文件里的属性
package net.zl.lesson05;

import org.junit.jupiter.api.Test;
import org.springframework.beans.factory.annotation.Value;
import org.springframework.boot.test.context.SpringBootTest;

@SpringBootTest
class RandomSetDemoApplicationTests {
    // 注入配置文件里的属性
    @Value("${my.number}")
    private String number;

    @Test
    void contextLoads() {
        // 输出配置文件里的属性
        System.out.println(number);
    }
 }
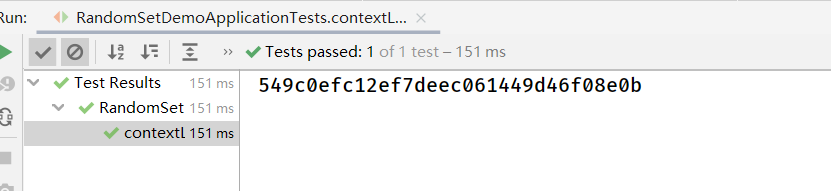
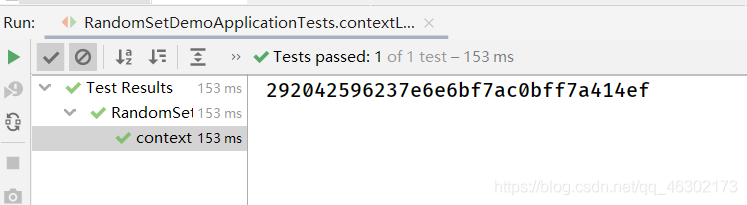
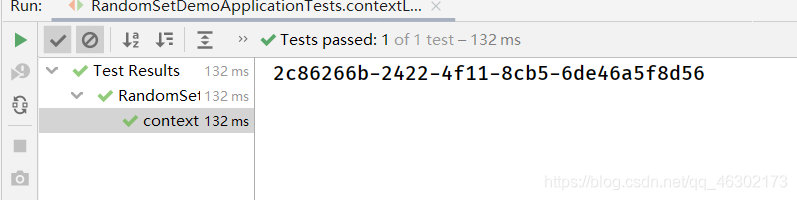
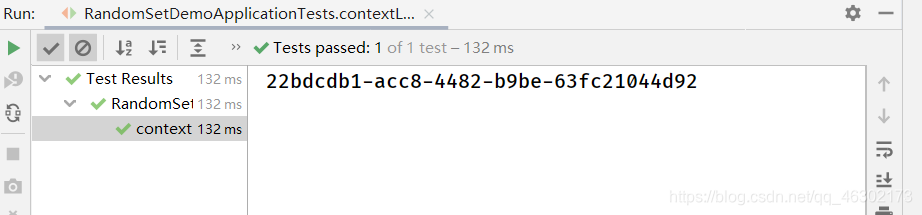
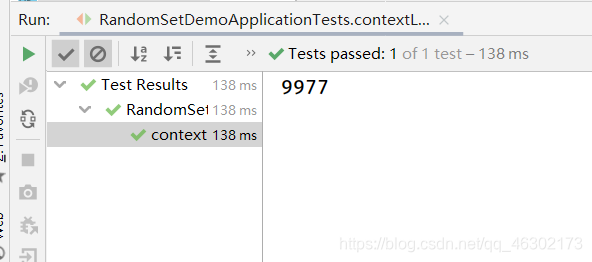
反复运行测试方法contextLoads(),查看结果
第一次
第二次
第三次
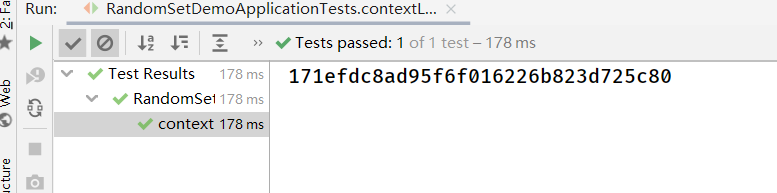
大家可以看到,产生的是32位的十六进制数对应的字符串
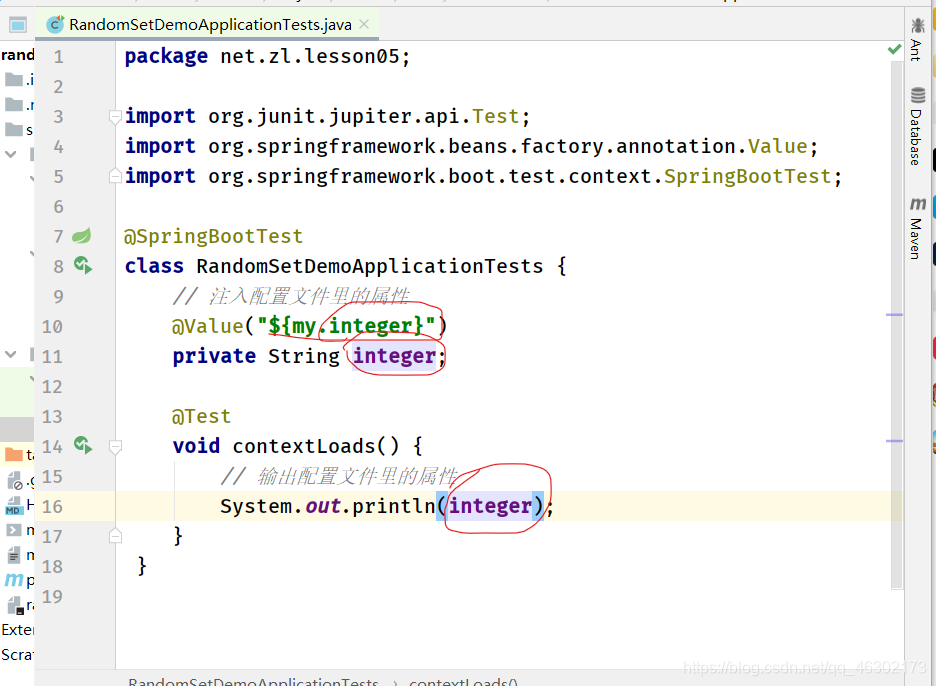
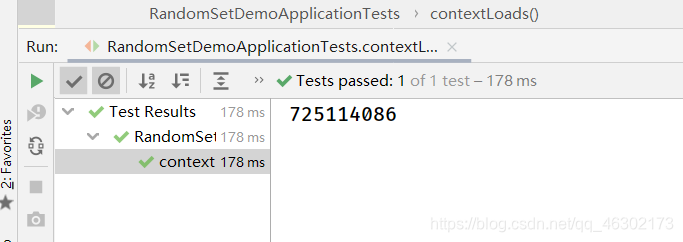
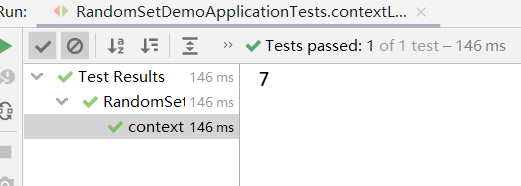
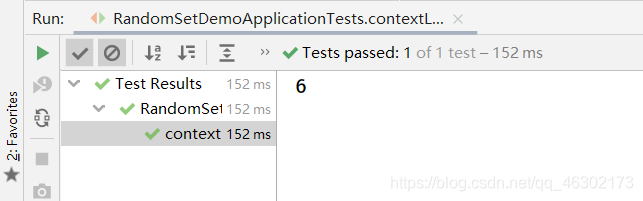
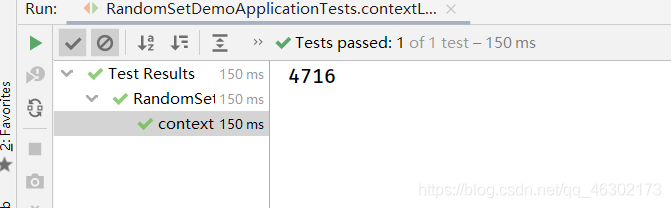
2、测试随机整数my.integer
注入配置文件里的属性
输出配置文件里的属性
反复运行测试方法contextLoads(),查看结果
运行了三次之后的结果
课堂练习
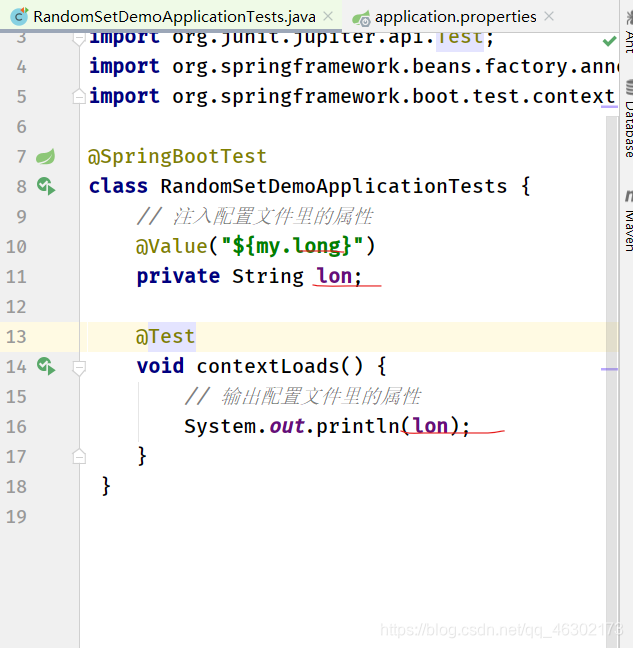
1、测试长整型随机数my.long
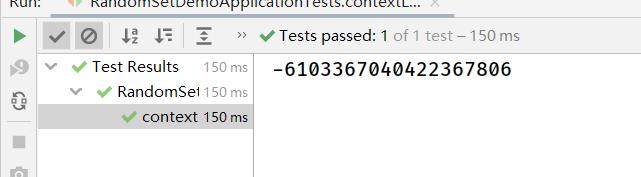

后面的如下。
2、测试随机UUID值my.uuid
3、测试小于10的随机整数my.number.less
4、测试1024至65535之间的随机整数my.number.range
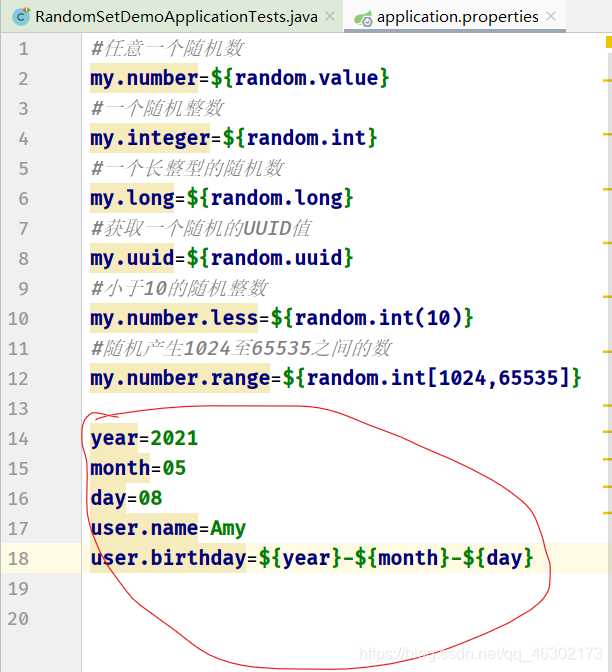
(四)演示参数间的引用
在appication.properties文件里,后定义的属性可引用前面定义的属性
定义三个属性year、month和day
定义属性user.name
定义属性user.birthday,引用属性year、month和day
修改测试类RandomSetDemoApplicationTests
package net.zl.lesson05;
import org.junit.jupiter.api.Test;
import org.springframework.beans.factory.annotation.Value;
import org.springframework.boot.test.context.SpringBootTest;

@SpringBootTest
class RandomSetDemoApplicationTests {
    // 注入配置文件里的属性
    @Value("${user.name}")
    private String name;
    @Value("${user.birthday}")
    private String birthday;

    @Test
    void contextLoads() {
        // 输出配置文件里的属性
        System.out.println(name + " : " + birthday);
    }
}
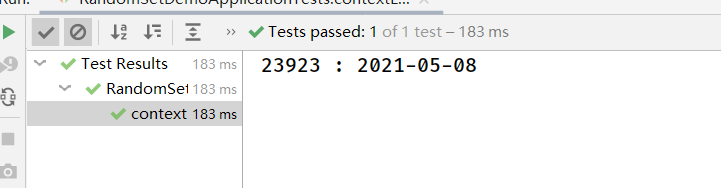
运行测试方法,查看结果


 320
320

 被折叠的 条评论
为什么被折叠?
被折叠的 条评论
为什么被折叠?
 到【灌水乐园】发言


