


 本文介绍了Springboot中@PropertySource和@ImportResource注解的使用。@PropertySource用于从自定义配置文件中加载属性,可与@ConfigurationProperties或@Value结合使用。在注入配置时,应用优先考虑appliaction.properties或application.yml中的数据。@ImportResource则允许在Springboot中引入XML配置文件,以支持传统的XML配置方式。
@PropertySource
一,什么要使用@PropertySource
所有的配置都是写在appliaction.properties或application.yml文件里,如果不想写在这两个文件里面可以使用注解@PropertySource解决。实现步骤:
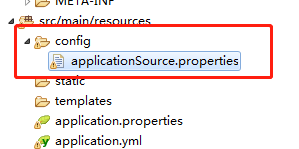
1,新建自定义的配置文件
2,向配置文件中写内容
spring.myuser.uid=1
spring.myuser.username=zhangsan1
spring.myuser.age=${random.int[10,100]}
spring.myuser.birth=1998/09/10
spring.myuser.hobby=a,b,c,d,e
spring.myuser.lists=a,b,c,d,e
spring.myuser.sets=a,b,c,d,e
spring.myuser.maps.key1=${random.int}
spring.myuser.maps.key2=${random.value}
spring.myuser.maps.key3=${random.long}
3, 在实体类中使用@propertySource
@Getter
@Setter
@ToString
@Component
@ConfigurationProperties(prefix = "spring.myuser")
@PropertySource(value = {"classpath:config/applicationSource.properties"})//@PropertySource不支持YAML文件。
public class User {
	private Integer uid;
	private String username;
	private Integer age;
	private Date birth;
	private String[] hobby;
	private List<String> lists;
	private Set<String> sets;
	private Map<String,String> maps;
}
4,测试
@PropertySource要和@ConfigurationProperties或者@Value注解一起配合使用。
二,注入优先级的问题
注意:所在的配置都是优先注入appliaction.properties或application.yml里面的数据,再才是自定义的文件,如果要不一样,必须修改配置文件引入的前缀。
@ImportResource
一,为什么要使用@ImportResource
从上面所有的配置中可以看出我们没有使用以前的spring的xml的配置方法,如果还是要使用spring里面的xml的配置方式要怎么办,这就可以使用@ImportResource,实现步骤:
1,新建applicationContext.xml
<?xml version="1.0" encoding="UTF-8"?>
<beans xmlns="http://www.springframework.org/schema/beans"
	xmlns:p="http://www.springframework.org/schema/p"
	xmlns:xsi="http://www.w3.org/2001/XMLSchema-instance"
	xsi:schemaLocation="http://www.springframework.org/schema/beans http://www.springframework.org/schema/beans/spring-beans-4.0.xsd
	http://www.springframework.org/schema/util http://www.springframework.org/schema/util/spring-util-4.0.xsd">

	<bean id="user" class="com.example.demo.pojo.User">
		<property name="username" value="张三疯"></property>
		<property name="age" value="12"></property>
	</bean>
</beans>
2,新建实体类
@Getter
@Setter
@ToString
public class User {
	private String username;
	private Integer age;
}
3,启动类中使用@ImportResource注解
@SpringBootApplication
@ImportResource(value = {"classpath:applicationContext.xml"})//导入自定义配置文件
public class Demo1Application {
	public static void main(String[] args) {
		SpringApplication.run(Demo1Application.class, args);
	}
}


 2606
2606

 被折叠的 条评论
为什么被折叠?
被折叠的 条评论
为什么被折叠?
 到【灌水乐园】发言


