


链路聚合简介
(英语:Link Aggregation) 是一个计算机网络术语,指将多个物理端口汇聚在一起,形成一个逻辑端口,以实现出/入流量吞吐量在各成员端口的负荷分担,交换机根据用户配置的端口负荷分担策略决定网络封包从哪个成员端口发送到对端的交换机。当交换机检测到其中一个成员端口的链路发生故障时,就停止在此端口上发送封包,并根据负荷分担策略在剩下的链路中重新计算报文的发送端口,故障端口恢复后再次担任收发端口。
- 链路聚合在增加链路带宽、实现链路传输弹性和工程冗余等方面是一项很重要的技术。
- 原理 : 多个物理的端口绑定在一起当成一个逻辑端口来使用,以便提高带宽,实现负载平衡或高可用的功能
- 应用场景:
网卡的链路聚合就是将多块网卡连接起来,当一块网卡损坏时,其余网卡仍工作,网络依旧可以正常运行,可以有效的防止因为网卡损坏带来的损失,同时也可以提高网络访问速度,说白了就是替补,防患于未然 - 配置的模式:网卡的链路聚合常用的有 bond 和 team 两种模式,bond模式最多可以添加两块网卡,team模式最多可以添加八块网卡
| team网络支持负载均衡 | bond不支持负载均衡 |
| team网络支持ipv6 | bond不支持ipv6 |
| team网络支持hash加密 | bond不支持hash加密 |

链路聚合
添加两块网卡(不用添加配置文件)
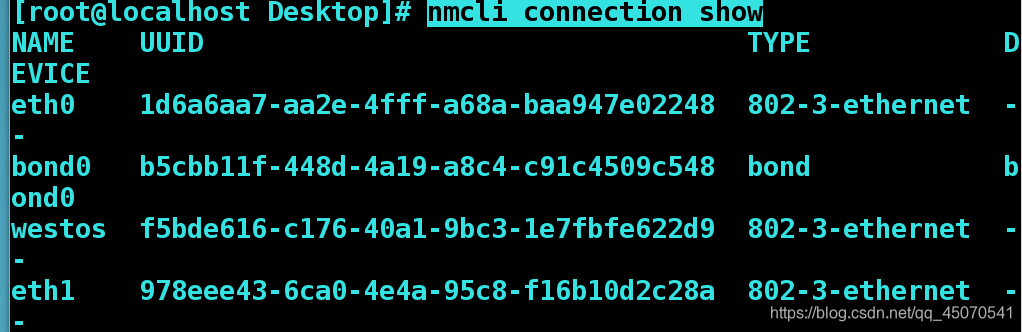
nmcli connection show #显示配置文件和网卡设备
nmcli connection add type team con-name hanteamfile ifname hanteamdevice config '{"runner":{"name":"activebackup"}}' #添加一个大网卡
nmcli connetion modify hanteamfile ipv4.method manual ipv4.address "192.168.100.88/24 192.168.100.1" ipv4.dns 192.168.100.1 connection.autoconnect yes #为大网卡配置IP
nmcli connection add type team-slave con-name hanteamslave1 ifname eno33554984 master hanteamdevice #网卡的绑定,主网卡为hanteamdevice
nmcli connection add type team-slave con-name hanteamslave2 ifname eno50332208 master hanteamdevice
nmcli connection down hanteamfile #down一下配置文件
nmcli connection up hanteamfile #up一下配置文件
nmcli connection up hanteamslave1
nmcli connection up hanteamslave2
nmcli connection show
2.查看状态
ifconfig | grep ether   #查看各设备的mac地址
teamdctl hanteamdevice state  #查看hanteamdevice的状态
teamnl hanteamdevice ports #查看端口
teamnl hanteamdevice getoption activeport   #查看活跃的端口
nmcli device disconnect eno33554984         #模拟网卡挡了
teamnl hanteamdevice geetoption acticeport  #查看活跃的端口
teamdctl hanteamdevice state                #查看设配的状态
bond模式
bond聚合有两种方式:
- 轮询聚合,提高效率(两块网卡同时工作);
- 主备聚合,提高安全性(一个网卡工作,另一个网卡看,工作的那个网卡坏了就顶替上去
命令设置
在虚拟机中编辑nm-connection-editor添加两块网卡
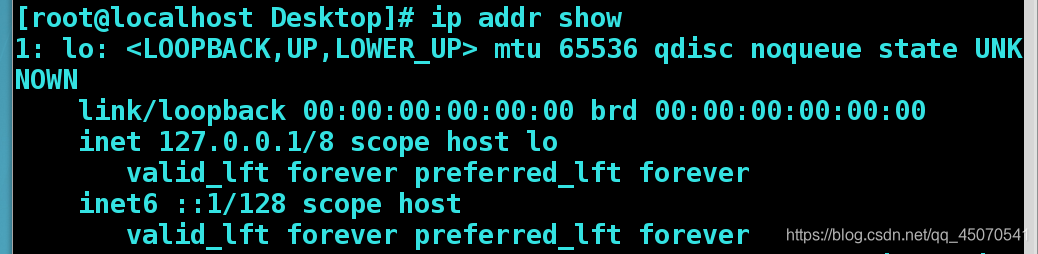
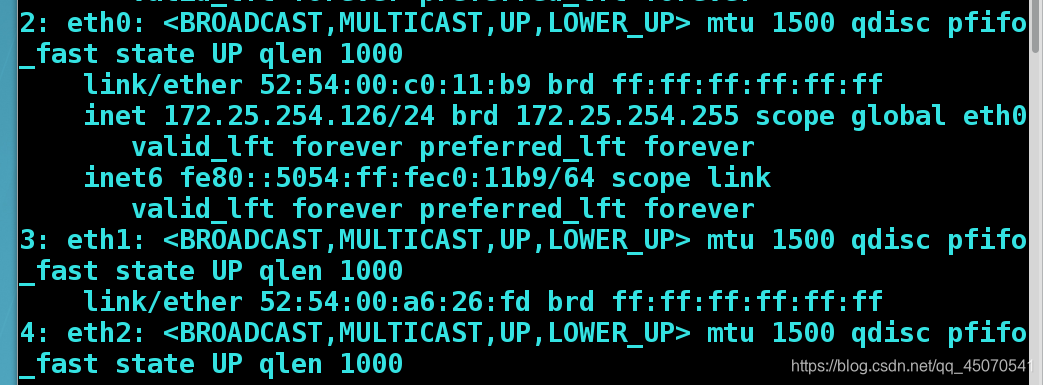
先查看虚拟机的网络配置可以看到有两个网卡
建立bond0接口
nmcli connection add con-name bond0 ifname bond0 type bond mode active-backup ip4 172.25.254.203/24
为聚合连接提供配置(连接名 – bond0,类型 – bond,运行器 – active-backup轮询式,IP地址 --172.25.254.203/24)
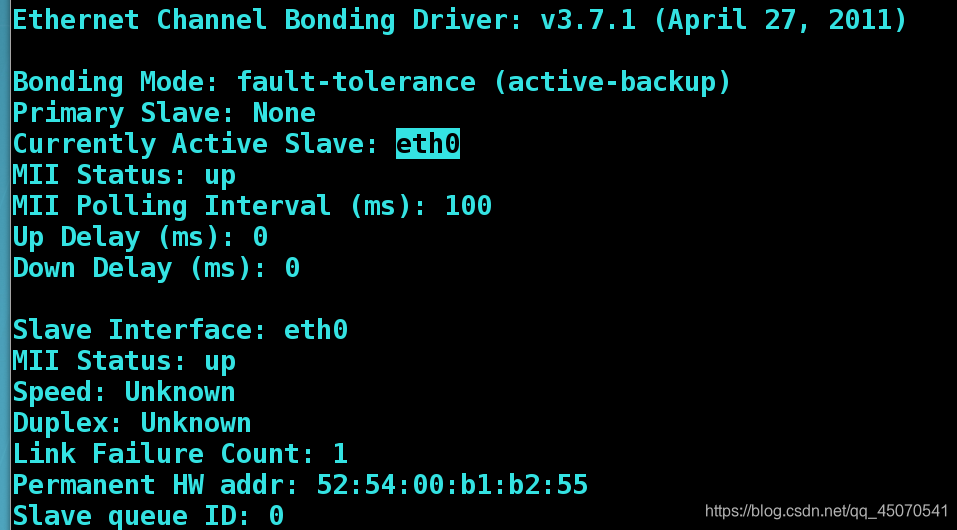
cat /proc/net/bonding/bond0 查看bond0状态
将虚拟出来的端口绑定两个真实的物理网卡
nmcli connection add con-name eth0 ifname eth0 type bond-slave master bond0 添加eth0设备与bond0
nmcli connection add con-name eth1 ifname eth1 type bond-slave master bond0 添加eth1设备与bond0

查看聚和网卡是否添加成功
查看网卡的工作状态,eth0正在工作
停止eth0时eth1顶替eth0工作

当我们修复好eth0网卡,为bond0连接工作的还是eth1,而eth0则是备用网卡,只有在eth1出现问题eth0才会顶替eth1为bond0工作
配置文件设置
编辑cd /etc/sysconfig/network-scripts/进入网络配置目录
编辑vim ifcfg-bond0
DEVICE=bond0
ONBOOT=yes
BOOTPROTO=none
IPADDR=172.25.254.203
NETMASK=255.255.255.0
TYPE=Bond
BONDING_OPTS=mode=active-backup
编辑vim ifcfg-eth0
DEVICE=eth0
ONBOOT=yes
BOOTPROTO=none
MASTER=bond0
编辑vim ifcfg-eth1
DEVICE=eth1
ONBOOT=yes
BOOTPROTO=none
MASTER=bond0
编辑systemctl restart network 重新启动网络

team模式
| team的种类 | 名称 |
|---|---|
| broadcast | 广播容错 |
| roundrobin | 平衡轮叫 |
| activebackup | 主备 |
| loadbalance | 负载均衡,和bond聚合的不同之处,好处 |
命令设置
添加team聚合接口
nmcli connection add con-name team0 ifname team0 type team config '{"runner":{"name":"activebackup"}}' ip4 172.25.254.203/24
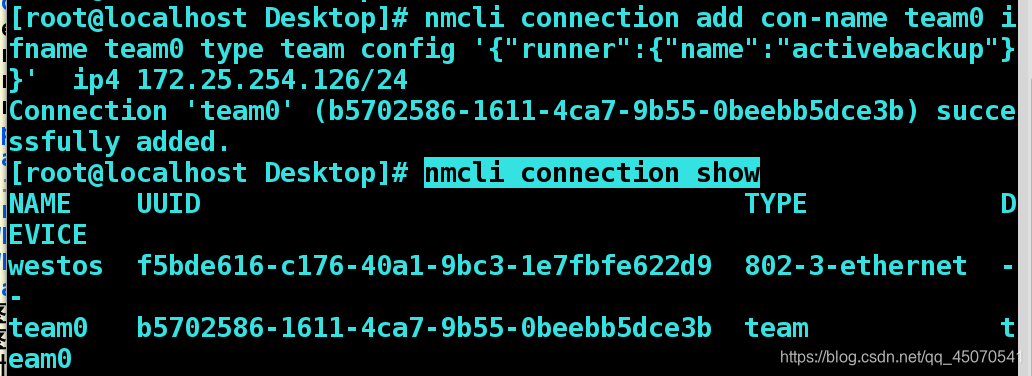
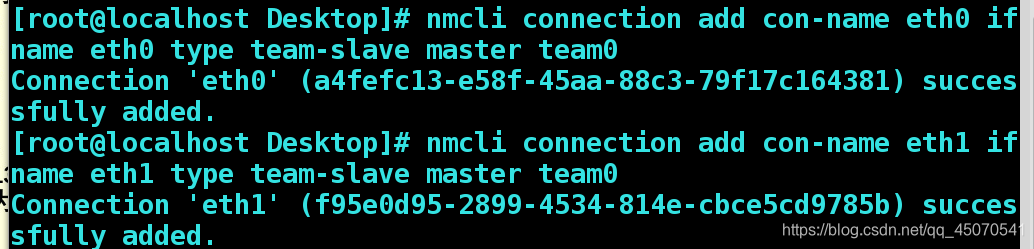
分别将两块网卡绑定到此team接口
nmcli connection add con-name eth0 ifname eth0 type team-slave master team0  添加eth0设备与team0
nmcli connection add con-name eth1 ifname eth1 type team-slave master team0  添加eth1设备与team1
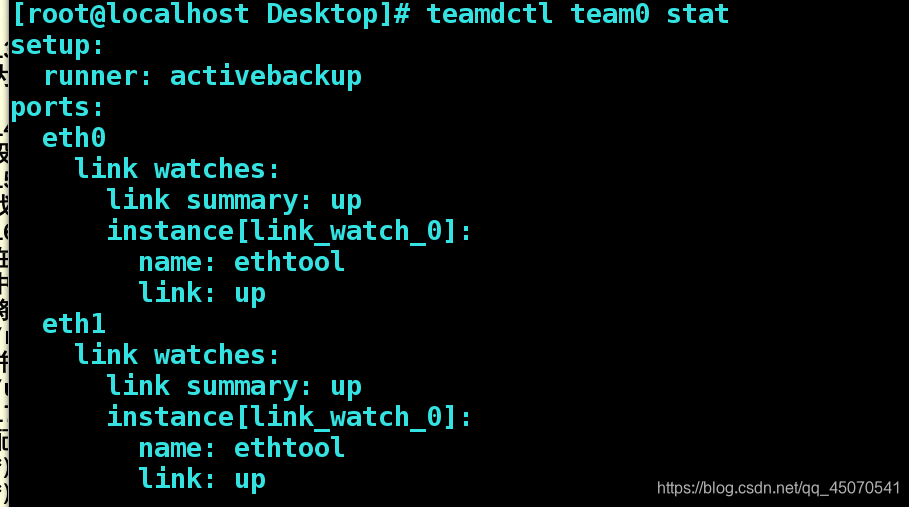
查看工作状态,两块网卡都在工作
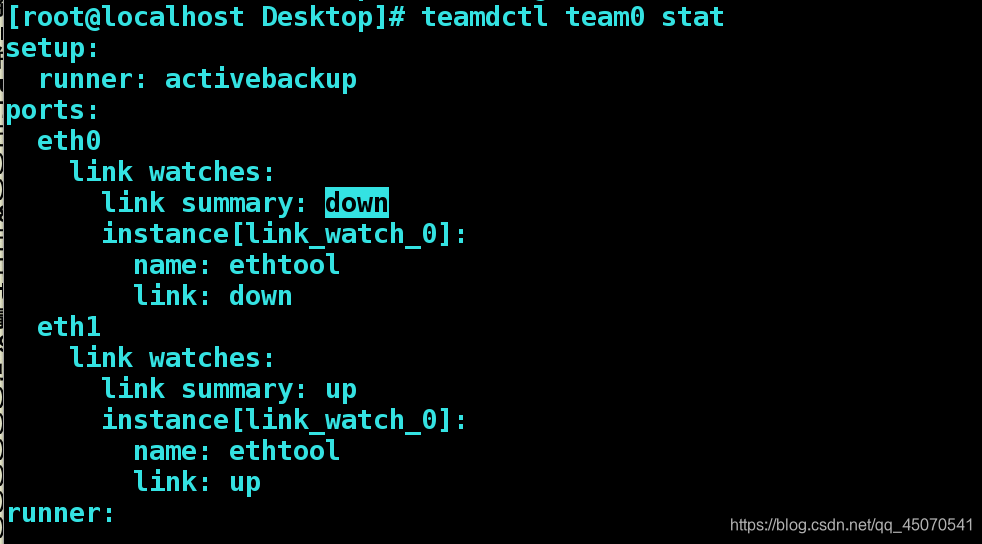
关闭eth0
配置文件设置
编辑vim /etc/sysconfig/network-scripts/ifcfg-team0
DEVICE=team0
TEAM_CONFIG="{\"runner\":{\"name\":\"activebackup\"}}"
DEVICETYPE=team
BOOTPROTO=none
IPADDR=172.25.254.203
PREFIX=24
NAME=team0
0NBOOT=yes
vim /etc/sysconfig/network-scripts/ifcfg-eth0 编辑eth0网卡
BOOTPROTO=none
DEVICE=eth0
ONBOOT=yes
TEAM_MASTER=team0
DEVICETYPE=TeamPort
vim /etc/sysconfig/network-scripts/ifcfg-eth1
BOOTPROTO=none
DEVICE=eth1
ONBOOT=yes
TEAM_MASTER=team0
DEVICETYPE=TeamPort
重启网络
网桥连接
默认主机是没有网桥的(内核不开放的),虚拟机内核和系统和真机的内核和系统是相互独立的!
真机上网是通过内核调用网卡与外界进行联系的,而虚拟机的网卡是虚拟化的,不能直接上网。所以在真机的内核上面开一个网络桥接的口,将虚拟机的内核和真机的网卡连接在一起,从而虚拟机可以通过真机的网卡上网。
即在网卡上开一个接口,而该接口绑定一个IP,同一网段的虚拟机直接通过此接口绑定的IP与外界通信,相当于在虚拟机和真机上面架了一个桥,不需要受内核路由的控制,直接可以与外界通信!
NAT和网桥的对比 :
- 相对于NAT,网桥不需要地址转换,也不需要路由转发,也不需要配置网关,就可以与外界通信(配置的繁琐性)
- 网桥是工作在数据链路层(不需要IP,通过MAC通信),而NAT是在网络层(需要IP),所以前者的速度比后者快
- NAT每次都需要NAT然后内核路由转发!
| brctl | 桥接管理命令 |
|---|---|
| show | 显示 |
| addbr | 添加网桥 |
| delbr | 删除网桥 |
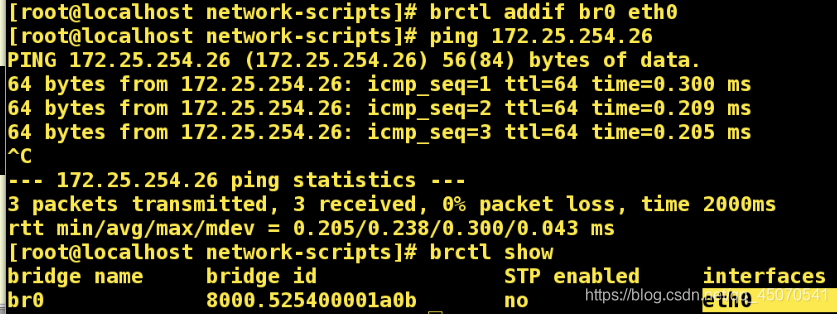
| addif | 添加网桥连接 |
| delif | 删除网桥连接 |
3.桥接
nmcli connection add type bridge con-name hanbrfile ifname hanbrdevice    #创建一个桥接的配置文件和设备
nmcli connection modify hanbrfile ipv4.method manual ipv4.addresses "192.168.100.88/24 192.168.100.1" ipv4.dns 192.168.100.1 connection.autoconnect yes             #为配置文件设置IP
nmcli connection show
nmcli connection add type bridge-slave con-name hanbrslave ifname eno16777736 master hanbrdevice                                                                #eno16777736桥接在hanbrdevice上面
nmcli connection down hanbrfile                               #down一下hanbrfile
nmcli connection up   hanbrfile                               #up一下hanbrfile
nmcli connection up   hanbrslave
nmcli connection show
ping -I hanbrdevice  192.168.100.2   #ping 192.168.100.2来源于hanbrdevice
1.网络配置文件目录:/etc/sysconfig/network-scrpits/
2.备份网络配置文件:
实验前先将原本的配置文件,进行备份。
ifcfg-enp5s0           网卡配置文件
ifcfg-br0                  桥接配置文件
cd /etc/sysconfig/network-scrpits/
mkdir /backup
mv ifconfig-enp0s25 ifcfg-br0 /backup/
注意:网卡名称随主机不同有差异。
3.删除
nm-connection-editor   图形方式删除除了Bridge enpo0s25,virbr1,virbr0,以避免对实验结果造成影响。

删除后查看虚拟机安装界面,可以看到是没有桥接接口
vim /etc/sysconfig/network-scrpits/ifcfg-westos
BOOTPROTO=none       网卡工作模式
DEVICE=enp0s25          网卡设备名称
ONBOOT=yes                 网卡服务启动时自动激活
BRIDGE=br0                   桥接接口设备名称
vim /etc/sysconfig/network-scrpits/ifcfg-br0 新建一个网卡桥接配置文件
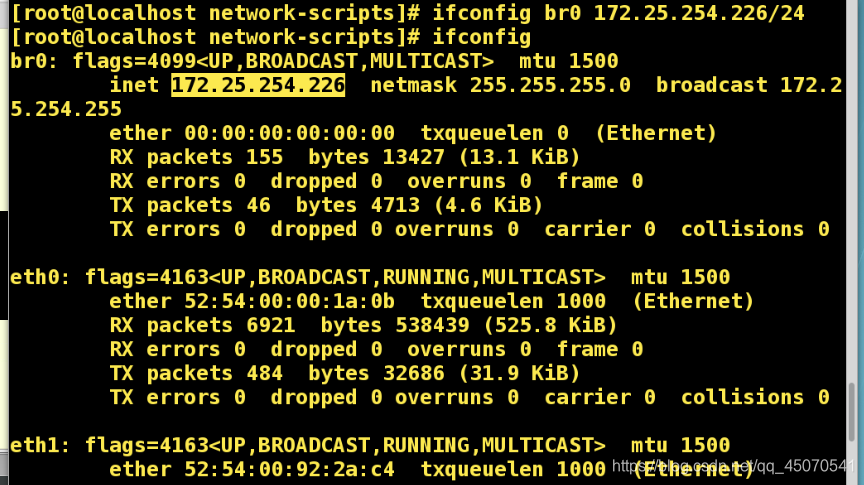
DEVICE=br0 接口使用设备
ONBOOT=yes
BOOTPROTO=none
IPADDR=172.25.254.11
PREFIX=24
TYPE=Bridge 接口类型,桥接(默认ethernet)
systemctl restart network 重启网络
查看网络状态


 926
926

 被折叠的 条评论
为什么被折叠?
被折叠的 条评论
为什么被折叠?
 到【灌水乐园】发言


