


 本文详细介绍了在Shell脚本中常用的命令,包括diff用于比较文件和目录差异,cut用于字符截取,sort实现排序,uniq去除重复行,以及逻辑操作符&&和||的使用。还详细讲解了test命令的各种比较操作,如文件属性检查和数值比较。此外,文中还提到了tr命令用于大小写转换以及如何更改终端字体和背景颜色。
1.diff 命令
(1)diff命令的用法:
- diff 命令是用来比较两个文件或目录的不同
diff [options] target1 target2
diff file1 file2
diff direcory1 directory2
(2)diff 在比较文件过程中结果读取方式
[num1 , num2][a|c|d][num3,num4]
num1,num2 表示在第一个文件中的行数
< 表示第一个文件中的内容, > 表示第二个文件中的内容,
num3,num4 表示在第二个文件中的行数
2,4c2,4 表示改变第一个文件中的第二行和第四行才能匹配第二个文件中的第二行和第四行
| a | 表示添加------- add |
|---|---|
| c | 表示更改-------change |
| d | 表示删除 ----delete |
例:
比较两个文件的不同
<1>切换到mnt下,将目录清理干净
[root@shell_example ~]# cd /mnt
[root@shell_example mnt]# rm -fr *
[root@shell_example mnt]# ls

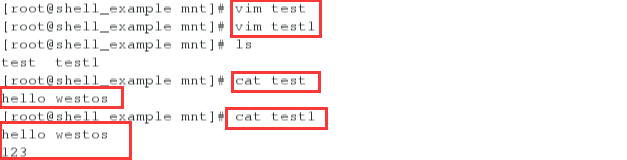
<2>编辑两个文件test 和 test1
[root@shell_example mnt]# vim test
[root@shell_example mnt]# vim test1
[root@shell_example mnt]# ls
test  test1
[root@shell_example mnt]# cat test
hello westos
[root@shell_example mnt]# cat test1
hello westos
123
<3>diff 比较两个文件的不同
##显示第一个文件中添加第二个文件第二行的123才可以匹配,
[root@shell_example mnt]# diff test test1
1a2
> 123

##改变顺序后显示第一个文件中的第二行删除后才可以和第二个文件的第一行匹配
[root@shell_example mnt]# diff test1 test
2d1
< 123

<4>编辑test文件,在文将中添加一个空白行
[root@shell_example mnt]# vim test
[root@shell_example mnt]# cat test
hello westos


<5>再次比较两个文件中的内容
[root@shell_example mnt]# diff test1 test
2c2
< 123
---
>
##显示第一个文件改变第二行后才能和第二个文件的第二行匹配,
第一个文件中的内容是123,第二个文件中的内容是空白

改变文件顺序后再次比较
[root@shell_example mnt]# diff test test1
2c2
<
---
> 123
##显示第一个文件改变第二行才可以匹配,第一个文件中的内容是空白行,
第二个文件中的内容是123

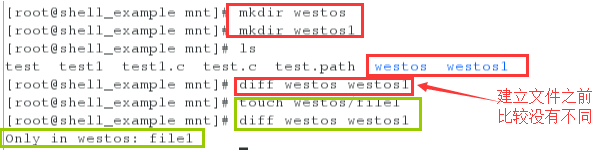
(3)diff 在比较目录过程中结果的读取
- Only in directroy/: filename
directory 表示在那个目录中
filename 表示在这个目录
[root@shell_example mnt]# mkdir westos
[root@shell_example mnt]# mkdir westos1
[root@shell_example mnt]# ls
test  test1  test1.c  test.c  test.path  westos  westos1
[root@shell_example mnt]# diff westos westos1
[root@shell_example mnt]# touch westos/file1
[root@shell_example mnt]# diff westos westos1
Only in westos: file1
[root@shell_example mnt]# diff -r westos westos1
Only in westos: file1

4.diff 中常用的参数
| -b 或 --ignore-space-change | 不检查空格字符的不同 |
|---|---|
| -B 或 --ignore-blank-lines | 不检查空白行 |
| -c | 显示全部内文,并标出不同之处 |
| -i 或 --ignore-case | 不检查大小写的不同 |
| -p | :若比较的文件为 C 语言的程序码文件时,显示差异所在的函数名称; |
| -q 或 --brief | 仅显示有无差异,不显示详细的信息 |
| -r 或 --recursive | 比较子目录中的文件 |
| -u | 以合并的方式来显示文件内容的不同 |
例:
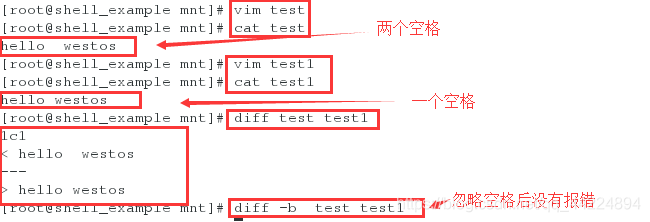
<1>-b
[root@shell_example mnt]# vim test
[root@shell_example mnt]# cat test
hello  westos
[root@shell_example mnt]# vim test1
[root@shell_example mnt]# cat test1
hello westos
[root@shell_example mnt]# diff test test1
1c1
< hello  westos
---
> hello westos
[root@shell_example mnt]# diff -b  test test1
test中有两个空格,而test1中只有一个空格,
不加-b时比较会提示第一个文件改变第一行才可以和第二个文件匹配,
但是加了-b之后忽略空格字符的不同,不会报错
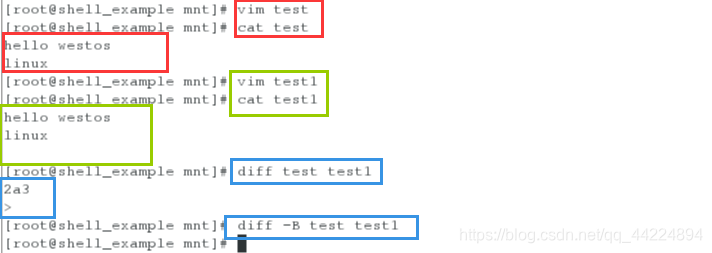
<2>-B
[root@shell_example mnt]# vim test
[root@shell_example mnt]# cat test
hello westos
linux
[root@shell_example mnt]# vim test1
[root@shell_example mnt]# cat test1
hello westos
linux

[root@shell_example mnt]# diff test test1
2a3
>
[root@shell_example mnt]# diff -B test test1
可以看到test中只有两行,但test1中有三行,前两行内容和test中相同,第三行是空白行,不加-B比较时提示,第一个文件中添加第二和文件的第三行空白行才可以匹配,加上-B之后不会报错,不检查空白行
<3>-c(1/2/3)
[root@shell_example mnt]# vim test
[root@shell_example mnt]# cat test
hello westos
linux
123

haha
python
[root@shell_example mnt]# vim test1
[root@shell_example mnt]# cat test1
hello westos
linux
123
redhat
haha
python

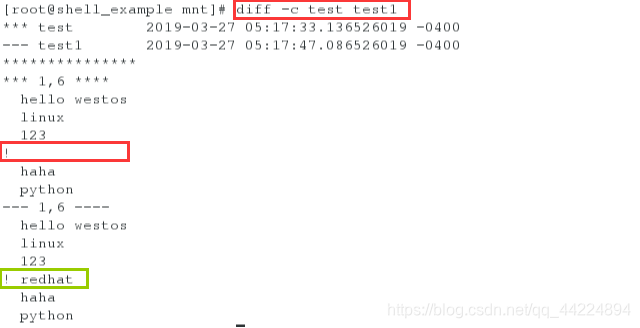
1>-c 将所有的内容都显示出来,标记不同之处
[root@shell_example mnt]# diff -c test test1
*** test	2019-03-27 05:17:33.136526019 -0400
--- test1	2019-03-27 05:17:47.086526019 -0400
***************
*** 1,6 ****
  hello westos
  linux
  123
!
  haha
  python
--- 1,6 ----
  hello westos
  linux
  123
! redhat
  haha
  python
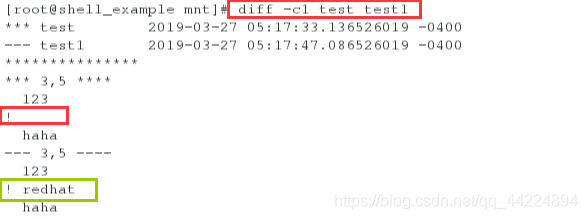
<2>-c1 显示不同前一条和不同后一条
[root@shell_example mnt]# diff -c1 test test1
*** test	2019-03-27 05:17:33.136526019 -0400
--- test1	2019-03-27 05:17:47.086526019 -0400
***************
*** 3,5 ****
  123
!
  haha
--- 3,5 ----
  123
! redhat
  haha
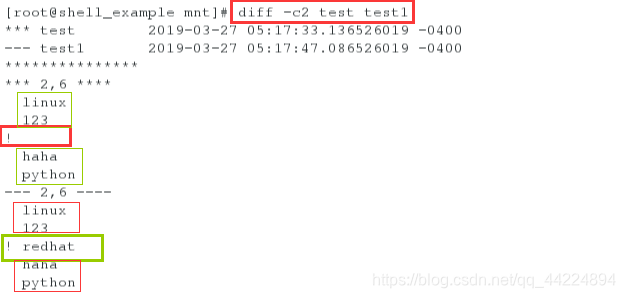
<3>-c2 显示不同的前两行和后两行
[root@shell_example mnt]# diff -c2 test test1
*** test	2019-03-27 05:17:33.136526019 -0400
--- test1	2019-03-27 05:17:47.086526019 -0400
***************
*** 2,6 ****
  linux
  123
!
  haha
  python
--- 2,6 ----
  linux
  123
! redhat
  haha
  python
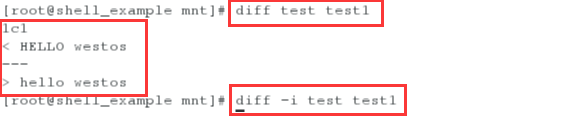
<4>-i 不检查大小写不同
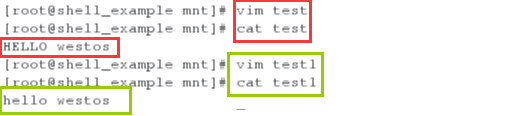
[root@shell_example mnt]# vim test
[root@shell_example mnt]# cat test
HELLO westos
[root@shell_example mnt]# vim test1
[root@shell_example mnt]# cat test1
hello westos
[root@shell_example mnt]# diff test test1
1c1
< HELLO westos
---
> hello westos
[root@shell_example mnt]# diff -i test test1
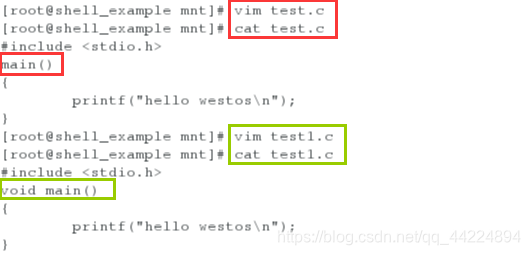
<5>-p 比较C语言的程序码文件时显示差异所在的函数名
[root@shell_example mnt]# vim test.c
[root@shell_example mnt]# cat test.c
#include <stdio.h>
main()
{
	printf("hello westos\n");
}
[root@shell_example mnt]# vim test1.c
[root@shell_example mnt]# cat test1.c
#include <stdio.h>
void main()
{
	printf("hello westos\n");
}
将.c文件编译成C语言程序码文件进行比较
[root@shell_example mnt]# ls
test test1 test1.c test.c test.path westos westos1
[root@shell_example mnt]# rm -fr test test1
[root@shell_example mnt]# ls
test1.c test.c test.path westos westos1
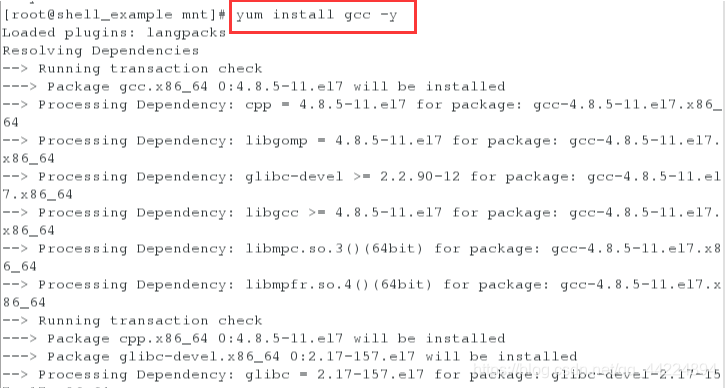
安装gcc
[root@shell_example mnt]# yum install gcc -y
[root@shell_example mnt]# gcc test.c -o test
[root@shell_example mnt]# gcc test1.c -o test1
[root@shell_example mnt]# ls
test test1 test1.c test.c test.path westos westos1


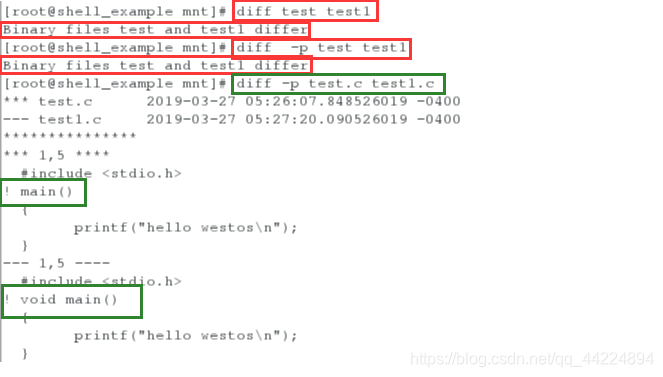
[root@shell_example mnt]# diff test test1
Binary files test and test1 differ
[root@shell_example mnt]# diff  -p test test1
Binary files test and test1 differ
[root@shell_example mnt]# diff -p test.c test1.c
*** test.c	2019-03-27 05:26:07.848526019 -0400
--- test1.c	2019-03-27 05:27:20.090526019 -0400
***************
*** 1,5 ****
  #include <stdio.h>
! main()
  {
  	printf("hello westos\n");
  }
--- 1,5 ----
  #include <stdio.h>
! void main()
  {
  	printf("hello westos\n");
  }
<6>-q见显示有无不同,不显示内容
[root@shell_example mnt]# diff -q test.c test1.c
Files test.c and test1.c differ

<7>-r 比较子目录中的文件

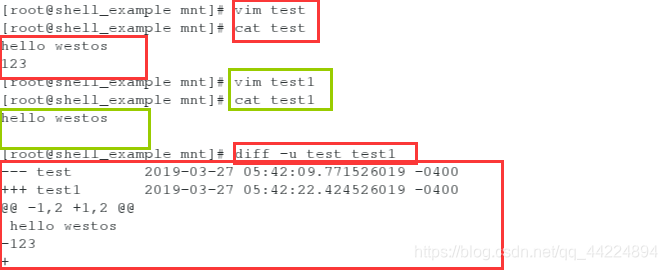
<8>-u 以合并的方式来显示文件的不同
[root@shell_example mnt]# vim test
[root@shell_example mnt]# cat test
hello westos
123
[root@shell_example mnt]# vim test1
[root@shell_example mnt]# cat test1
hello westos

[root@shell_example mnt]# diff -u test test1
--- test	2019-03-27 05:42:09.771526019 -0400
+++ test1	2019-03-27 05:42:22.424526019 -0400
@@ -1,2 +1,2 @@
 hello westos
-123
+
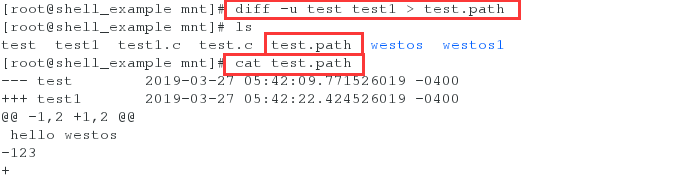
将文件的不同导入到test.path文件中
[root@shell_example mnt]# diff -u test test1 > test.path
[root@shell_example mnt]# ls
test  test1  test1.c  test.c  test.path  westos  westos1
[root@shell_example mnt]# cat test.path
--- test	2019-03-27 05:42:09.771526019 -0400
+++ test1	2019-03-27 05:42:22.424526019 -0400
@@ -1,2 +1,2 @@
 hello westos
-123
+
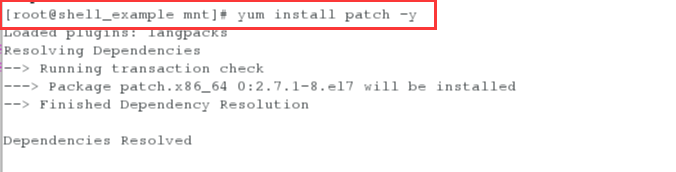
patch
- 用于文件不同文件打布丁
patch [options] file.old file.path
patch的用法:
[root@shell_example mnt]# yum install patch -y
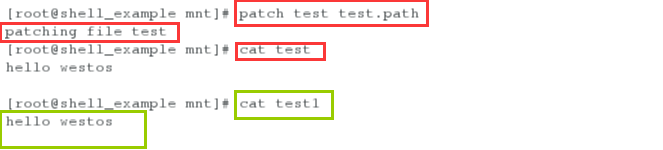
用patch命令修改文件内容,修改后文件内容相同
[root@shell_example mnt]# patch test test.path
patching file test
[root@shell_example mnt]# cat test
hello westos
[root@shell_example mnt]# cat test1
hello westos
2.cut命令
- cut 命令多用与字符截取
cut -d --------->指定分隔符
cut -f 1,7|1-7--------------> 指定截取的列
cut -c 1,4|1-4 ------------->指定截取的字符位置
例:
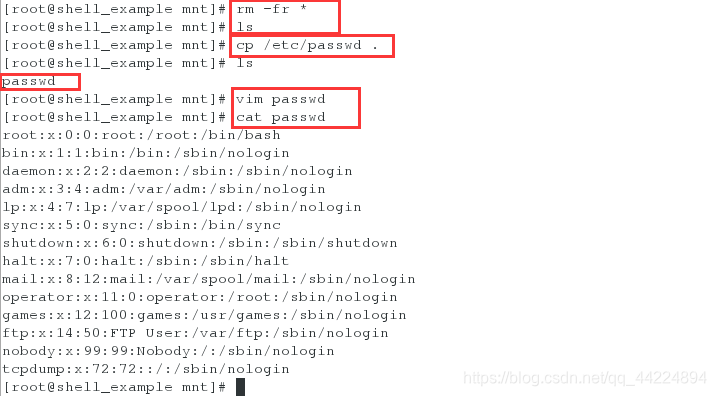
(1)将passwd文件复制到当前,将过长的行都删除掉
[root@shell_example mnt]# rm -fr *
[root@shell_example mnt]# ls
[root@shell_example mnt]# cp /etc/passwd .
[root@shell_example mnt]# ls
passwd
[root@shell_example mnt]# vim passwd
[root@shell_example mnt]# cat passwd
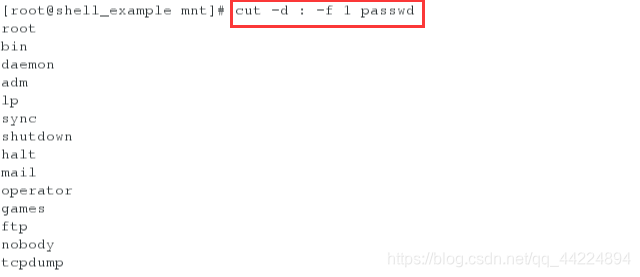
(2)截取passwd文件以:为分隔符的第一列
[root@shell_example mnt]# cut -d : -f 1 passwd
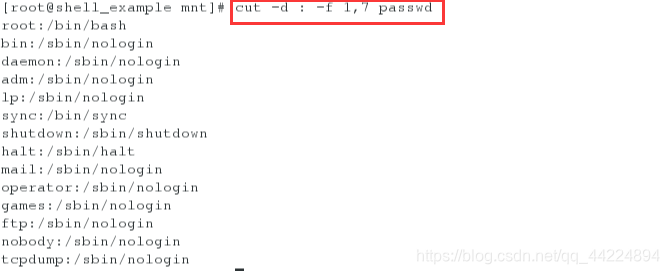
(3)截取passwd文件以:为分隔符的第一列和第七列
[root@shell_example mnt]# cut -d : -f 1,7 passwd
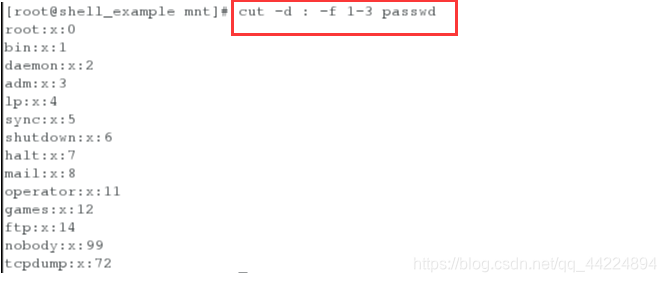
(4)截取passwd文件以:为分隔符的第一列到第三列
[root@shell_example mnt]# cut -d : -f 1-3 passwd
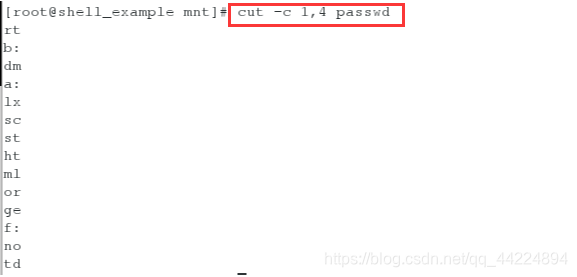
(5)截取passwd文件的第一个字符和第四个字符
[root@shell_example mnt]# cut -c 1,4 passwd
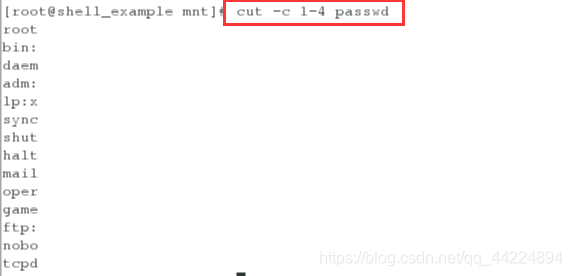
(6)截取passwd文件的第一个字符到第四个字符
[root@shell_example mnt]# cut -c 1-4 passwd
练习:
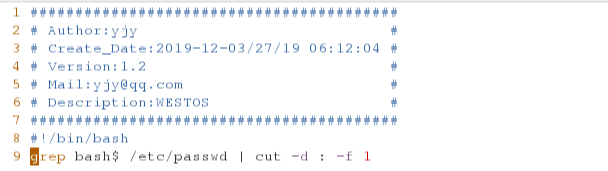
1.编写一个脚本,可以自动检测系统中可登陆的用户
#!/bin/bash
grep bash$ /etc/passwd | cut -d : -f 1
[root@shell_example mnt]# vim login_user.sh
[root@shell_example mnt]# sh login_user.sh
root
student

3.sort 命令
| sort | 多用于字符排序 |
|---|---|
| sort -n | 纯数字排序 |
| sort -r | 倒序 |
| sort -u | 去掉重复数字 |
| sort -o | 输出到指定文件中 |
| sort -t | 指定分隔符 |
| sort -k | 指定要排序的列 |
例:
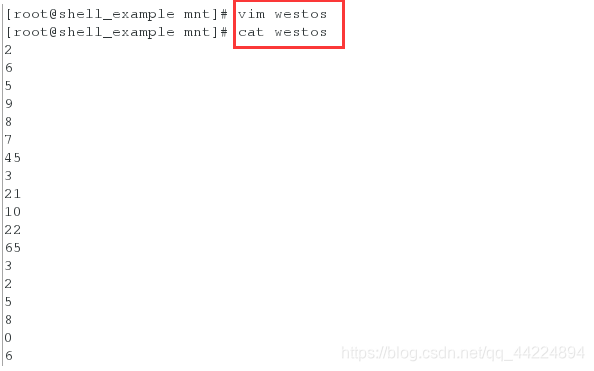
(1)编辑一个文件,里面写入一些无序的数字
[root@shell_example mnt]# vim westos
[root@shell_example mnt]# cat westos
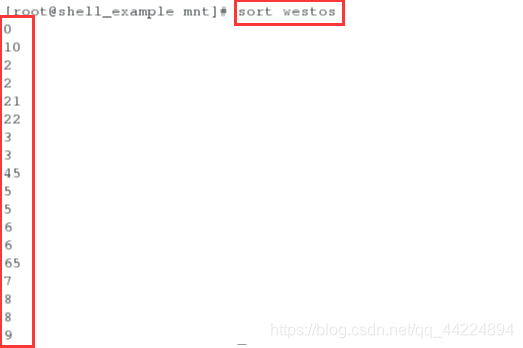
(2)sort排序
[root@shell_example mnt]# sort westos
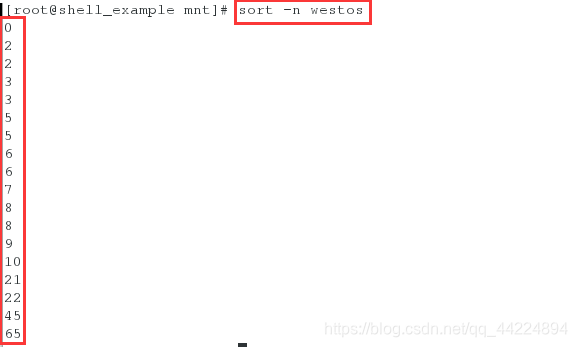
(3) sort -n
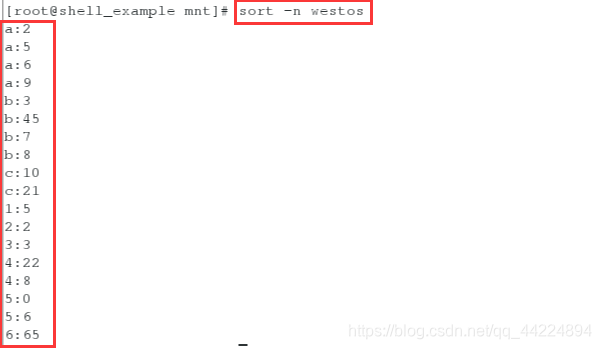
[root@shell_example mnt]# sort -n westos
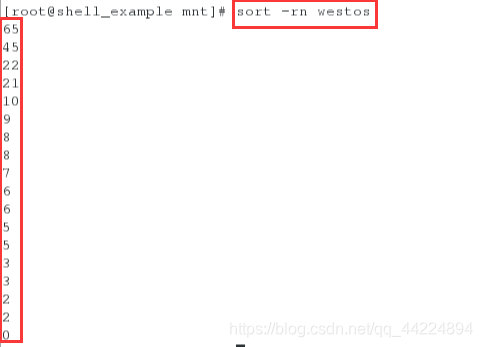
(4)sort -rn
[root@shell_example mnt]# sort -rn westos
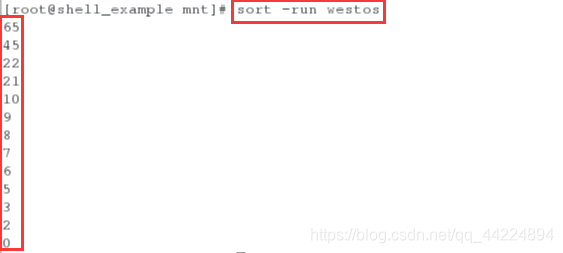
(5)sort -run
[root@shell_example mnt]# sort -run westos
4.uniq命令
| uniq | 对重复字符做相应的处理 |
|---|---|
| uniq -u | 显示唯一的行的内容 |
| uniq -d | 显示重复的行的内容 |
| uniq -c | 每行显示一次并统计重复次数 |
例:sort和uniq一起使用
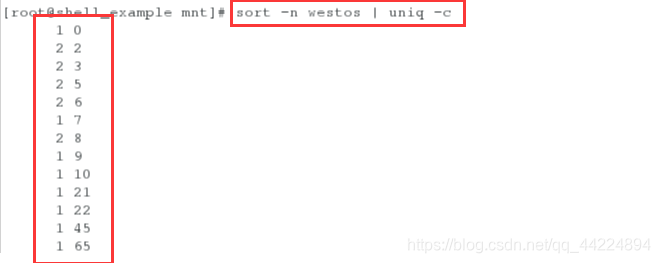
(1)uniq -c
[root@shell_example mnt]# sort -n westos | uniq -c
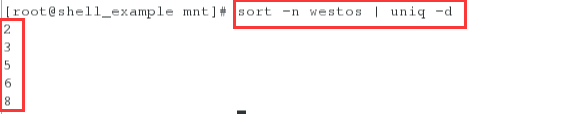
(2)uniq -d
[root@shell_example mnt]# sort -n westos | uniq -d
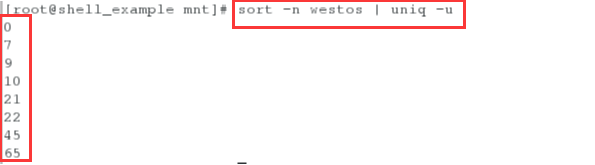
(3)uniq -u
[root@shell_example mnt]# sort -n westos | uniq -u
例2:
(1)给之前建立的westos文件中在添加一列
[root@shell_example mnt]# vim westos
[root@shell_example mnt]# cat westos
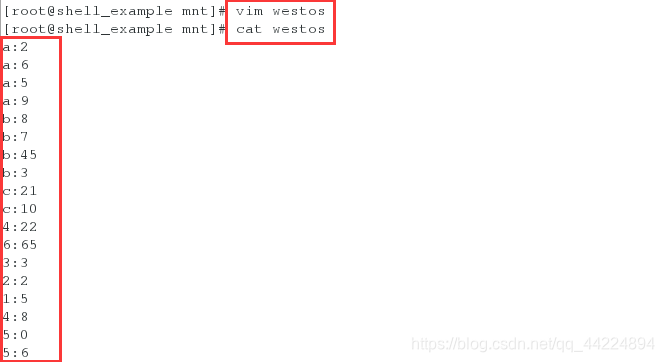
(2)默认对第一列排序
[root@shell_example mnt]# sort -n westos
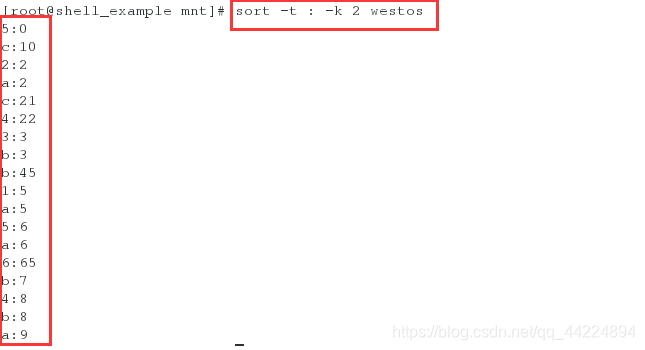
(3)对以:为分隔符的第二列排序
[root@shell_example mnt]# sort -t : -k 2 westos
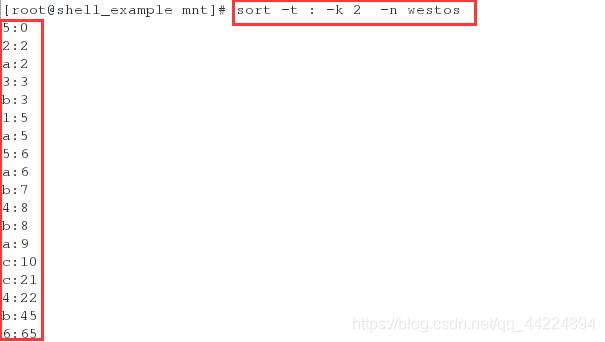
[root@shell_example mnt]# sort -t : -k 2 -n westos
5…&& 和 ||
- && 用来执行条件成立后执行的命令
|| 用来执行条件不成立后执行的命令
例如:
[root@shell_example mnt]# ping -c1 -w1 172.25.254.68 &> /dev/null && echo up || echo down
up
[root@shell_example mnt]# ping -c1 -w1 172.25.254.666 &> /dev/null && echo up || echo down
down

6.test 命令
- test 命令和 [] 等同
用法 1:
test "$A" == "$B" 等同 [ "$A" == "$B" ]

[ "$A" = "$B" ]             ##A等于B
[ "$A" != "$B" ]            ##A不等于B
[ "$A" -eq "$B" ]           ##A等于B
[ "$A" -ne "$B" ]           ##A不等于B
[ "$A" -le "$B" ]           ##A小于等于B
[ "$A" -lt "$B" ]           ##A小于B
例1:
(1)定义两个变量,比较大小
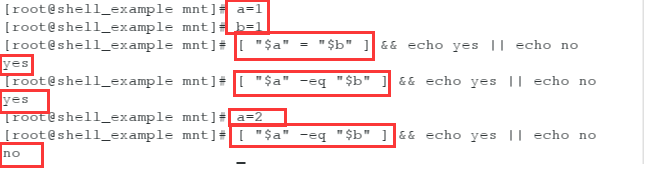
[root@shell_example mnt]# a=1
[root@shell_example mnt]# b=1
[root@shell_example mnt]# test "$a" = "$b" && echo yes || echo no
yes

(2)改变其中一个的值,再次比较
[root@shell_example mnt]# a=2
[root@shell_example mnt]# test "$a" = "$b" && echo yes || echo no  ##test比较
no
[root@shell_example mnt]# [ "$a" = "$b" ] && echo yes || echo no  ##[]比较
no
[root@shell_example mnt]# [ "$a" != "$b" ] && echo yes || echo no ##不等于
yes
[root@shell_example mnt]# test "$a" != "$b" && echo yes || echo no
yes
[root@shell_example mnt]# [ ! "$a" = "$b" ] && echo yes || echo no ##表示整个条件的反
yes


(3)-eq
[root@shell_example mnt]# a=1
[root@shell_example mnt]# b=1
[root@shell_example mnt]# [ "$a" = "$b" ] && echo yes || echo no
yes
[root@shell_example mnt]# [ "$a" -eq "$b" ] && echo yes || echo no
yes
[root@shell_example mnt]# a=2   ##再次定义改变大小
[root@shell_example mnt]# [ "$a" -eq "$b" ] && echo yes || echo no
no
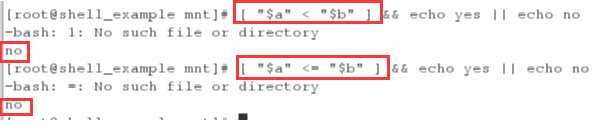
(4)“<”、“>”和“-lt”、“le”
[root@shell_example mnt]# [ "$a" < "$b" ] && echo yes || echo no
-bash: 1: No such file or directory
no
[root@shell_example mnt]# [ "$a" <= "$b" ] && echo yes || echo no
-bash: =: No such file or directory
no
[root@shell_example mnt]# [ "$a" -eq "$b" ] && echo yes || echo no   ##-eq相等
no
[root@shell_example mnt]# [ "$a" -lt "$b" ] && echo yes || echo no  ##-lt小于
no
[root@shell_example mnt]# [ "$a" -le "$b" ] && echo yes || echo no  ##-le小于等于
no

[root@shell_example mnt]# a=-1   ##改变a的大小
[root@shell_example mnt]# [ "$a" -le "$b" ] && echo yes || echo no
yes
[root@shell_example mnt]# [ "$a" -lt "$b" ] && echo yes || echo no
yes

(5)-ne
[root@shell_example mnt]# [ "$a" -ne "$b" ] && echo yes || echo no  ##-ne不等于
no
[root@shell_example mnt]# echo $a
1
[root@shell_example mnt]# echo $b
1

[root@shell_example mnt]# a=3
[root@shell_example mnt]# [ "$a" -ne "$b" ] && echo yes || echo no
yes

用法 2- - -大于,大于等于:
["$A" -ge "$B" ]           ##大于等于
["$A" -gt "$B" ]           ##大于
["$A" -ne "$B" -a "$A" -gt "$B" ]          ##-a表示and  且
["$A" -ne "$B" -o "$A" -gt "$B" ]          ##-o表示or  或
例2:
(1)-ge、-gt
[root@shell_example mnt]# [ "$a" -ge "$b" ] && echo yes || echo no
yes
[root@shell_example mnt]# [ "$a" -gt "$b" ] && echo yes || echo no
yes
[root@shell_example mnt]# a=1
[root@shell_example mnt]# [ "$a" -gt "$b" ] && echo yes || echo no
no
[root@shell_example mnt]# [ "$a" -ge "$b" ] && echo yes || echo no
yes

(2)-a、-o
[root@shell_example mnt]# [ "$a" -ne "$b"  -a "$a" -gt "$b" ] && echo yes || echo no
no
[root@shell_example mnt]# [ "$a" -ne "$b"  -o "$a" -gt "$b" ] && echo yes || echo no
no
[root@shell_example mnt]# [ "$a" -ne "$b"  -o "$a" -ge "$b" ] && echo yes || echo no
yes
[root@shell_example mnt]# [ "$a" -ne "$b"  -a "$a" -ge "$b" ] && echo yes || echo no
no

用法 3:
[-z "$A" ]         ##文件不存在,或者值不为空
[-n "$A" ]         ##文件存在或者值为空
["file1" -ef "file2" ]           ##-ef是不是相等
["file1" -nt "file2" ]           ##-nt 前一个比后一个新(最后一次被操作的时间
                                       而不是文件被建立的时间)
["file1" -ot "file2" ]           ##-ot是不是比后一个旧
例3:
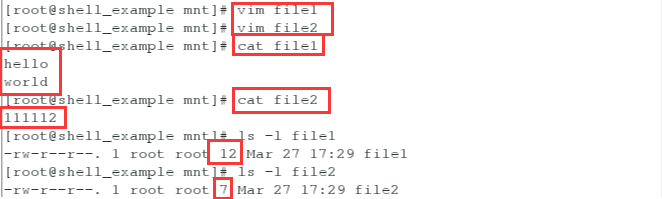
(1)建立两个文件,写入不同的内容
[root@shell_example mnt]# vim file1
[root@shell_example mnt]# vim file2
[root@shell_example mnt]# cat file1
hello
world
[root@shell_example mnt]# cat file2
111112
[root@shell_example mnt]# ls -l file1
-rw-r--r--. 1 root root 12 Mar 27 17:29 file1
[root@shell_example mnt]# ls -l file2
-rw-r--r--. 1 root root 7 Mar 27 17:29 file2
(2)进行比较
[root@shell_example mnt]# [ "file1" -ef "file2" ] && echo yes || echo no
##比较文件1和文件2大小是否相等
no
[root@shell_example mnt]# [ "file1" -nt "file2" ] && echo yes || echo no
##比较文件1最后一次被操作的时间是否比文件2新(距离当前时间越近表示越新,越远表示越老)
no
[root@shell_example mnt]# [ "file1" -ot "file2" ] && echo yes || echo no
##比较文件1最后一次被操作的时间是否比文件2老
yes

(3)用“<”,“>”,“=”比较
[root@shell_example mnt]# [ "file1" <  "file2" ] && echo yes || echo no
yes
[root@shell_example mnt]# [ "file1" >  "file2" ] && echo yes || echo no
yes
[root@shell_example mnt]# [ "file1" =  "file2" ] && echo yes || echo no
no

(4)-z,-n
[root@shell_example mnt]# [ -z "fiel1" ] && echo yes || echo no   ##-z表示不存在
no
[root@shell_example mnt]# [ -n "fiel1" ] && echo yes || echo no  ##-n表示存在
yes

[root@shell_example mnt]# a=0
[root@shell_example mnt]# [ -z "$a" ] && echo yes || echo no
no
[root@shell_example mnt]# [ -n "$a" ] && echo yes || echo no
yes

用法 4:
| [-e “file” ] | e 是否存在 |
|---|---|
| [-f “file” ] | f 是否是一个文本文件或 空文件 |
| [-L “file” ] | L 是否是一个链接文件 |
| [-S “file” ] | S 是否是一个套接字 |
| [-b “file” ] | b 是否是一个块设备 |
| [-d “file” ] | d 是否是一个目录 |
| [-c “file” ] | c 是否是一个字符设备 |
注:一般先判断文件是否是一个链接再判断是否是一个纯文本
因为链接也有可能是一个纯文本
inode id的节点号 在设备中对文件寻址的一个记录符号(一个节点对应两个数据区域)
文件内容被系统记录的次数
重装数据库软件时不仅要卸载软件,还要删除数据目录(/var/lib/mysql)
例4:
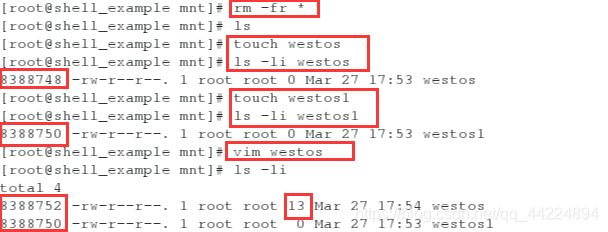
(1)ls -li 查看文件的属性以及文件的id(文件的id每操作一次后会改变)
[root@shell_example mnt]# rm -fr *
[root@shell_example mnt]# ls
[root@shell_example mnt]# touch westos
[root@shell_example mnt]# ls -li westos
8388748 -rw-r--r--. 1 root root 0 Mar 27 17:53 westos
[root@shell_example mnt]# touch westos1
[root@shell_example mnt]# ls -li westos1
8388750 -rw-r--r--. 1 root root 0 Mar 27 17:53 westos1
[root@shell_example mnt]# vim westos
[root@shell_example mnt]# ls -li
total 4
8388752 -rw-r--r--. 1 root root 13 Mar 27 17:54 westos
8388750 -rw-r--r--. 1 root root  0 Mar 27 17:53 westos1
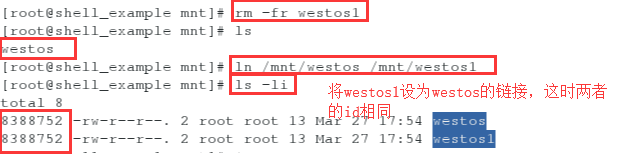
[root@shell_example mnt]# rm -fr westos1
[root@shell_example mnt]# ls
westos
[root@shell_example mnt]# ln /mnt/westos /mnt/westos1   ##ln是创建文件的硬链接,ln -s创建的是软连接
[root@shell_example mnt]# ls -li
total 8
8388752 -rw-r--r--. 2 root root 13 Mar 27 17:54 westos
8388752 -rw-r--r--. 2 root root 13 Mar 27 17:54 westos1
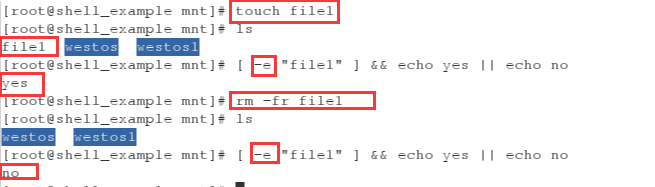
(2)-e,文件是否存在
[root@shell_example mnt]# touch file1
[root@shell_example mnt]# ls
file1  westos  westos1
[root@shell_example mnt]# [ -e "file1" ] && echo yes || echo no
yes
[root@shell_example mnt]# rm -fr file1
[root@shell_example mnt]# ls
westos  westos1
[root@shell_example mnt]# [ -e "file1" ] && echo yes || echo no
no
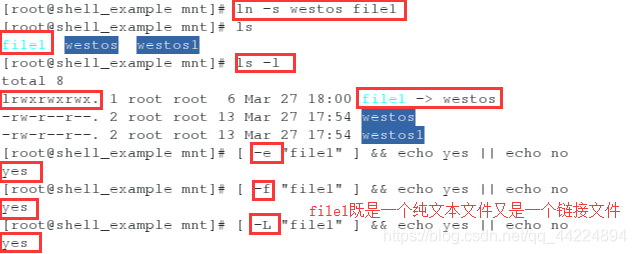
(3)-L 链接
[root@shell_example mnt]# ln -s westos file1  ##ln -s 创建软连接
[root@shell_example mnt]# ls
file1  westos  westos1
[root@shell_example mnt]# ls -l
total 8
lrwxrwxrwx. 1 root root  6 Mar 27 18:00 file1 -> westos
-rw-r--r--. 2 root root 13 Mar 27 17:54 westos
-rw-r--r--. 2 root root 13 Mar 27 17:54 westos1
[root@shell_example mnt]# [ -e "file1" ] && echo yes || echo no
yes
[root@shell_example mnt]# [ -f "file1" ] && echo yes || echo no
yes
[root@shell_example mnt]# [ -L "file1" ] && echo yes || echo no
yes
(4)-b 块设备
[root@shell_example mnt]# [ -b "/dev/vda" ] && echo yes || echo no
yes

(5)-c 字符设备
[root@shell_example mnt]# [ -c "/dev/pts/0" ] && echo yes || echo no
yes

(6)-d 目录
[root@shell_example mnt]# [ -d "/mnt" ] && echo yes || echo no
yes

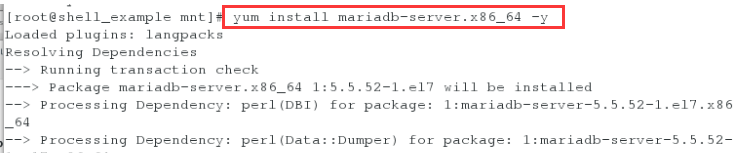
(7)-S 套接字 (重装数据库软件时不仅要卸载软件,不删除数据目录(/var/lib/mysql),卸载数据库之后数据文件仍会存在,一般不删除数据目录)
[root@shell_example mnt]# yum install mariadb-server.x86_64 -y ##安装mariadb数据库软件
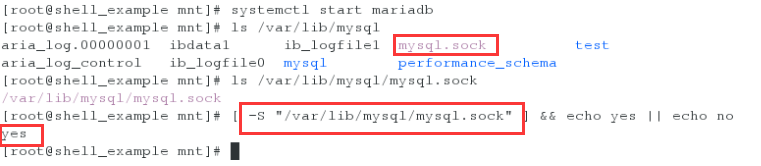
[root@shell_example mnt]# systemctl start mariadb ##开启服务
[root@shell_example mnt]# ls /var/lib/mysql ##/var/lib/mysql数据库的数据目录
aria_log.00000001 ibdata1 ib_logfile1 mysql.sock test
aria_log_control ib_logfile0 mysql performance_schema
[root@shell_example mnt]# ls /var/lib/mysql/mysql.sock ##查看文件
/var/lib/mysql/mysql.sock
[root@shell_example mnt]# [ -S "/var/lib/mysql/mysql.sock" ] && echo yes || echo no
yes
补充:
1.tr命令:大小写转换
(1)编辑一个文件,文件中的内容大小写都有
[root@shell_example mnt]# vim westos
[root@shell_example mnt]# cat westos
happy new year
hello WORLD

(2)将文件中的内容都变成小写
[root@shell_example mnt]# tr 'A-Z' 'a-z' < westos
happy new year
hello world

(3)将文件中的内容都变成大写
[root@shell_example mnt]# tr 'a-z' 'A-Z' < westos
HAPPY NEW YEAR
HELLO WORLD

2.更改字体或背景的颜色
echo -e “\033[字背景颜色;字体颜色;ANSI控制码m字符串\033[0m”
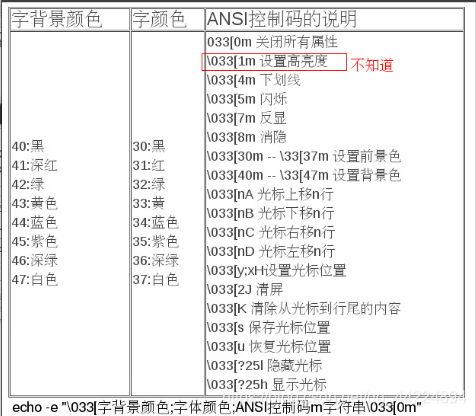
字背景颜色:
| 40 | 黑 |
|---|---|
| 41 | 深红 |
| 42 | 绿 |
| 43 | 黄色 |
| 44 | 蓝色 |
| 45 | 紫色 |
| 46 | 深绿 |
| 47 | 白色 |
字体颜色:
| 30 | 黑 |
|---|---|
| 31 | 红 |
| 32 | 绿 |
| 33 | 黄 |
| 34 | 蓝 |
| 35 | 紫 |
| 36 | 深绿 |
| 37 | 白色 |
(1)设置字背景颜色为蓝色
[root@shell_example mnt]# echo -e "\033[44mhello world\033[0m"
hello world

(2)设置字体颜色为黄色,字背景颜色为蓝色
[root@shell_example mnt]# echo -e "\033[44;33mhello world\033[0m"
hello world

(3)设置字体颜色为红色,字背景颜色为蓝色
[root@shell_example mnt]# echo -e "\033[44;31mhello world\033[0m"
hello world


 650
650

 被折叠的 条评论
为什么被折叠?
被折叠的 条评论
为什么被折叠?
 到【灌水乐园】发言


