


 本文详细介绍了使用EasyUI框架进行数据展示及增删改查操作的全过程,包括JSP页面搭建、JS脚本控制、DAO层方法实现及Action层处理。
在 easyui(二) 已经实现了如何进行权限管理
接下来使用easyui实现数据的增删查改
首先,在上一篇的博客代码基础上,建立一个jsp页面
<%@ page language="java" contentType="text/html; charset=UTF-8"
    pageEncoding="UTF-8"%>
<!DOCTYPE html PUBLIC "-//W3C//DTD HTML 4.01 Transitional//EN" "http://www.w3.org/TR/html4/loose.dtd">
<html>
<head>
<meta http-equiv="Content-Type" content="text/html; charset=UTF-8">
<title>Insert title here</title>
<link rel="stylesheet" type="text/css" href="${pageContext.request.contextPath }/static/js/easyui5/themes/default/easyui.css">
	<link rel="stylesheet" type="text/css" href="${pageContext.request.contextPath }/static/js/easyui5/themes/icon.css">
	<script type="text/javascript" src="${pageContext.request.contextPath }/static/js/easyui5/jquery.min.js"></script>
	<script type="text/javascript" src="${pageContext.request.contextPath }/static/js/easyui5/jquery.easyui.min.js"></script>
	<script type="text/javascript" src="${pageContext.request.contextPath }/static/js/userManage.js"></script>
</head>
<body>
<!-- 展示数据所用 -->
<table id="dg"></table>
<input type="hidden" id="ctx" value="${pageContext.request.contextPath }" >

<!-- 弹出提交表单所用 -->
<div id="dd" class="easyui-dialog" title="编辑窗体" style="width:400px;height:200px;"
        data-options="iconCls:'icon-save',resizable:true,modal:true,closed:true,buttons:'#bb'">
<form id="ff" method="post">
	<input type="hidden" name="SerialNo">
	<input type="hidden" id="xf" >
    <div align="center">
        <label for="name">uid:</label>
        <input class="easyui-validatebox" type="text" name="uid" data-options="required:true" />
    </div>
    <div align="center">
        <label for="name">uname:</label>
        <input class="easyui-validatebox" type="text" name="uname" data-options="required:true" />
    </div>
    <div align="center">
        <label for="name">upwd:</label>
        <input class="easyui-validatebox" type="text" name="upwd" data-options="required:true" />
    </div>
</form>
</div>


<div id="bb">
<a href="#" class="easyui-linkbutton" onclick="ok();">保存</a>
<a href="#" class="easyui-linkbutton">关闭</a>
</div>
<!-- <div id="tb">
<a href="#" class="easyui-linkbutton" data-options="iconCls:'icon-edit',plain:true"/a>
<a href="#" class="easyui-linkbutton" data-options="iconCls:'icon-help',plain:true"/a>
</div> -->


</body>
</html>
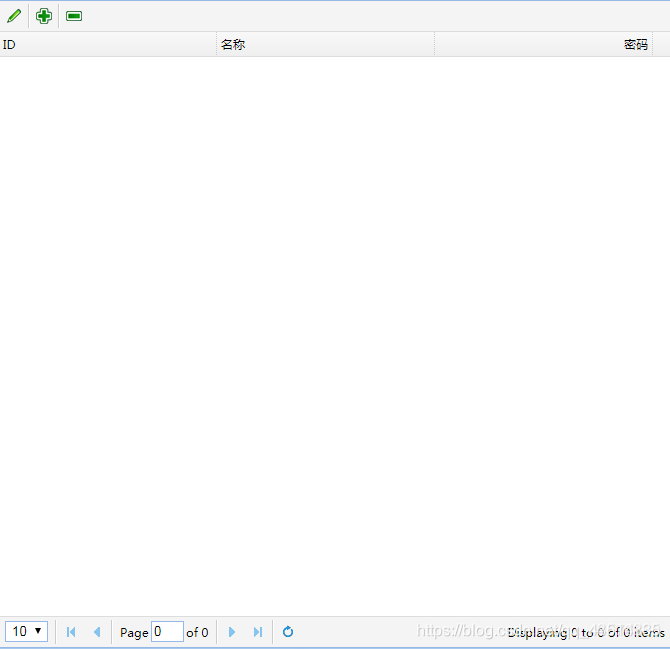
显示数据
1, 先把表单展示出来:
在easyui自带API里,都有详细的form解释和操作。

根据API把from表单代码copy到了jsp页面中,形成一个简易表单,
通过一个js文件用来控制运用easyui。然后在里面通过在API的控制表单属性和绑定小图标的具体属性进行优化:
fitColumns:true,填充列,
fit:true, 填充行
pagination:true,自动分页
columns:控制列
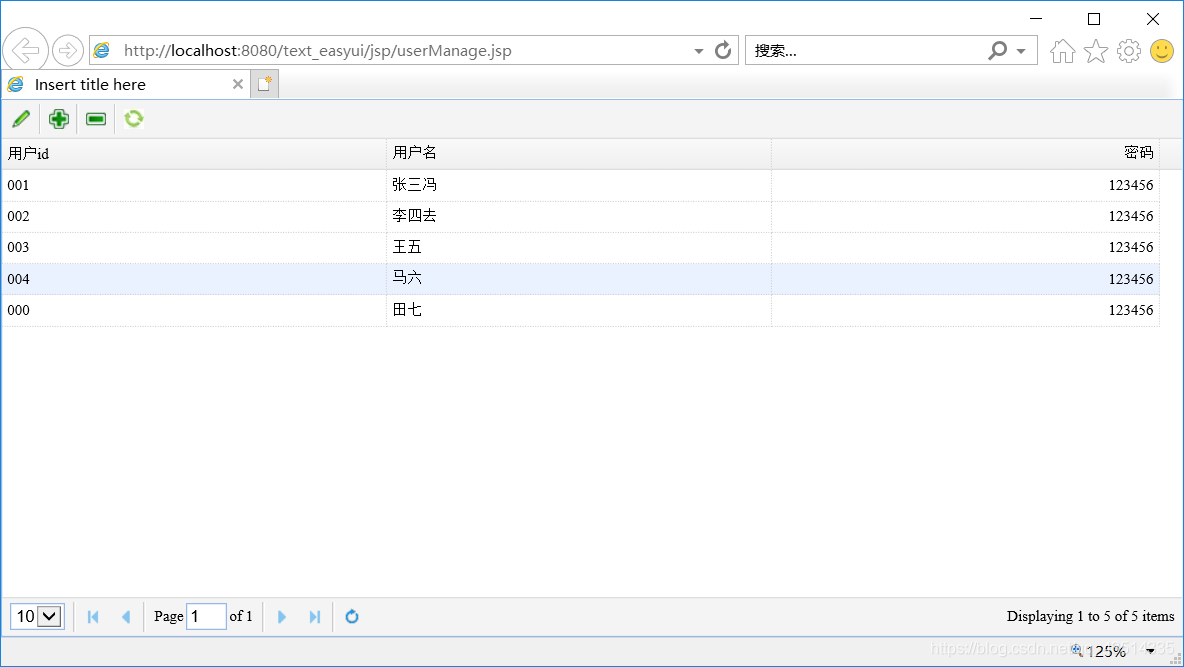
这里列名一定要和jsp所写的name一致,否则不会显示出数据。
js代码:
$(function(){
$('#dg').datagrid({
url:$("#ctx").val()+'/userAction.action?methodName=list',
fitColumns:true,
fit:true,
pagination:true,
columns:[[
{field:'uid',title:'用户id',width:100},
{field:'uname',title:'用户名',width:100},
{field:'upwd',title:'密码',width:100,align:'right'}
]],
toolbar: [{
iconCls: 'icon-edit',
handler: function(){
var row = $('#dg').datagrid('getSelected');
if(row){
$('#xf').val("edit");
$('#ff').form('load',row);
$('#dd').dialog('open');
}else{
alert('请先选中再修改');
}
}
},'-',{
iconCls: 'icon-add',
handler: function(){
$('#ff').form('clear');//清空表单内容
$('#xf').val("adduser");//给隐藏域赋值,由于隐藏域是设置在form表单内,所以赋值必须在清空表单内容后
$('#dd').dialog('open');//打开表单窗体
$('#dg').datagrid("reload");//刷新数据
}
},'-',{
iconCls: 'icon-remove',
handler: function(){
var row=$('#dg').datagrid("getSelected");
//通过ajax调用删除方法
if (confirm('你确定要删除吗?')) {
$.ajax({
url:$("#ctx").val()+'/userAction.action?methodName=del&&SerialNo='+row.SerialNo,
success: function(param){
if (param>0) {
alert('删除成功');
$('#dg').datagrid("reload");
}
}
})
}
}
},'-',{
iconCls: 'icon-shuaxin',
handler: function(){
$('#dg').datagrid('reload');
}
}]
// dialog布局
});
})
function ok(){
var ss = $('#xf').val();
$('#ff').form('submit', {
url:$("#ctx").val()+'/userAction.action?methodName='+$('#xf').val(), //$('#xf').val(),通过获取隐藏域的值调用不同的方法
success: function(param){
$('#dd').dialog('close');
$('#dg').datagrid('reload');
$('#ff').form('clear');
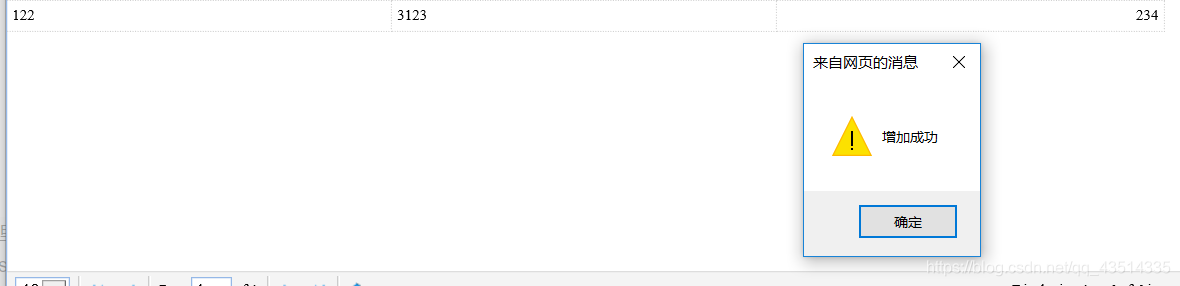
if (param>0) {
if(ss=='adduser'){
alert('增加成功');
}else {
alert('修改成功');
}
}
}
});
};
页面效果:
在dao方法里编写好自己的方法,然后通过url来调用即可展示数据:
操作数据
数据绑定完之后就可以进行操作了
先给上面的jsp写一个弹框,当点击表格上方绑定的图标进行相应的操作,这里就运用到easyui里的dialog组件。通过API找到window,里面有详细介绍和运用。
默认显示关闭,closed:true,
绑定按钮,buttons:’#bb’
选中单项然后点击编辑图标就会弹出一个表单窗口
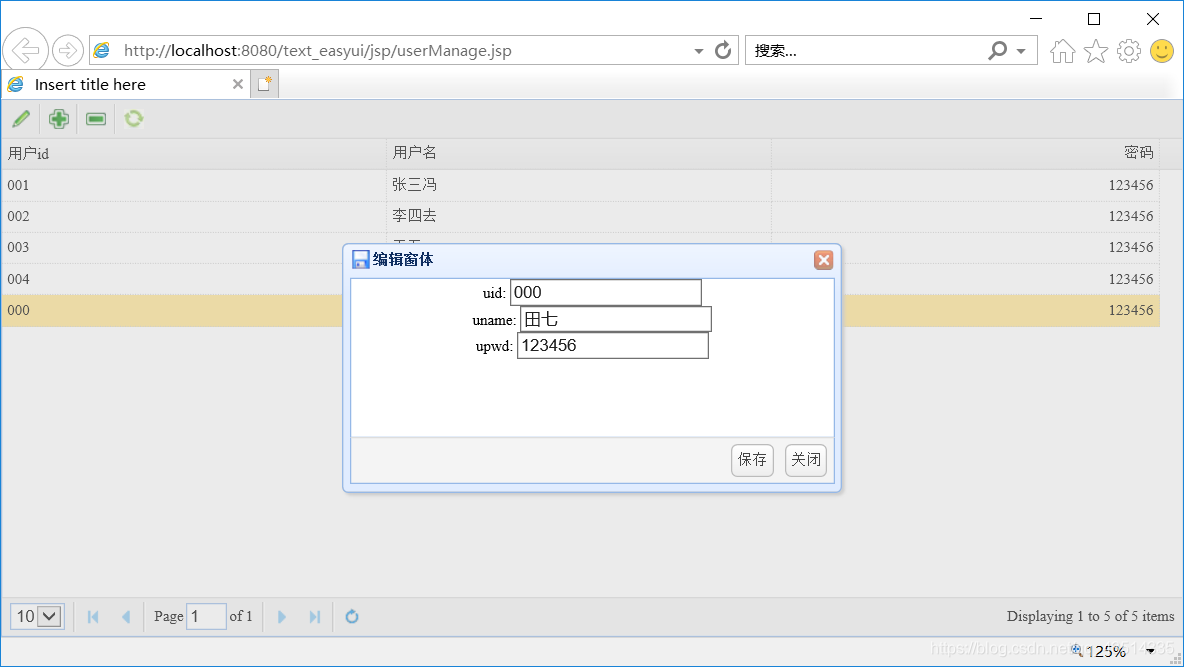
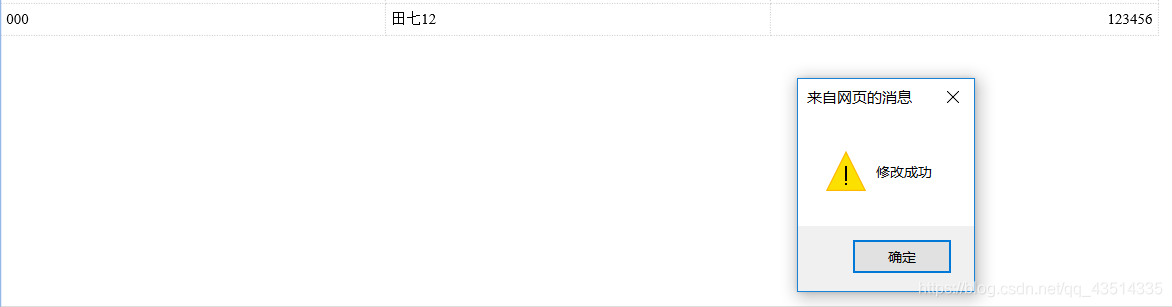
修改信息之后保存就可以了
这时就会弹出提示修改成功数据也已经修改了
UserDao.java
上面修改已经完成了。现在再增加其他的Dao方法:
然后通过js页面调用UserAction的方法就可以实现数据操作了
/**
	 * 修改方法
	 * @param paMap
	 * @return
	 * @throws NoSuchFieldException
	 * @throws SecurityException
	 * @throws IllegalArgumentException
	 * @throws IllegalAccessException
	 * @throws SQLException
	 */
	public int edit(Map<String, String[]> paMap) throws NoSuchFieldException, SecurityException, IllegalArgumentException, IllegalAccessException, SQLException {
		String sql = "update t_easyui_user_version2 set uid=?,uname=?,upwd=? where serialno=?";
		return super.executeUpdate(sql, new String[] {"uid","uname","upwd","SerialNo"}, paMap);
	}

	/**
	 * 增加方法
	 * @param paMap
	 * @return
	 * @throws NoSuchFieldException
	 * @throws SecurityException
	 * @throws IllegalArgumentException
	 * @throws IllegalAccessException
	 * @throws SQLException
	 */
	public int adduser(Map<String, String[]> paMap) throws Exception {
		String sql = "insert into t_easyui_user_version2(uid,uname,upwd) values(?,?,?)";
		return super.executeUpdate(sql, new String[] {"uid","uname","upwd"}, paMap);
	}
	//删除
	public int del(Map<String, String[]> paMap) throws Exception {
		String sql = "delete from t_easyui_user_version2 where serialno=?";
		return super.executeUpdate(sql, new String[] {"SerialNo"}, paMap);
	}
UserAction.java
package com.li.web;

import java.util.HashMap;
import java.util.List;
import java.util.Map;

import javax.servlet.http.HttpServletRequest;
import javax.servlet.http.HttpServletResponse;

import com.fasterxml.jackson.databind.ObjectMapper;
import com.li.dao.UserDao;
import com.li.util.PageBean;
import com.li.util.ResponseUtil;
import com.zking.framework.ActionSupport;

public class UserAction extends ActionSupport{
	private UserDao userDao = new UserDao();
	public String login(HttpServletRequest req,HttpServletResponse resp) {
		try {
			List<Map<String, Object>> list = this.userDao.list(req.getParameterMap(), null);
			if (list != null && list.size() > 0) {//判断是否登陆成功
				List<Map<String, Object>> listMenu = this.userDao.listMenu(req.getParameter("uid"), null);
				StringBuilder sb = new StringBuilder();
				for (Map<String, Object> map : listMenu) {//遍历获取权限字符串
					sb.append(","+map.get("menuId"));
				}
				req.setAttribute("menuHid", sb.substring(1));//去除逗号
			}else {//失败返回登陆
				return "login";
			}
		} catch (Exception e) {
			e.printStackTrace();
		}

		return "index";
	}
	/**
	 * datagrid所需的数据后端程序员开发完毕!
	 * @param req
	 * @param resp
	 * @return
	 */
	public String list(HttpServletRequest req,HttpServletResponse resp) {
		try {
			PageBean pageBean = new PageBean();
			pageBean.setRequest(req);
			List<Map<String, Object>> list = this.userDao.list(req.getParameterMap(), pageBean);
			ObjectMapper om = new ObjectMapper();
			Map<String, Object> map = new HashMap<>();
			map.put("total", pageBean.getTotal());
			map.put("rows", list);
			ResponseUtil.write(resp, om.writeValueAsString(map));
		} catch (Exception e) {
			e.printStackTrace();
		}

		return null;
	}

	/**
	 *  form组件提交所需的数据
	 * @param req
	 * @param resp
	 * @return
	 */
	public String edit(HttpServletRequest req,HttpServletResponse resp) {
		try {
			int edit = this.userDao.edit(req.getParameterMap());
			ObjectMapper om = new ObjectMapper();
			ResponseUtil.write(resp, om.writeValueAsString(edit));
		} catch (Exception e) {
			e.printStackTrace();
		}

		return null;
	}


	public String adduser(HttpServletRequest req,HttpServletResponse resp) {
		try {
			int add = this.userDao.adduser(req.getParameterMap());
			ObjectMapper om = new ObjectMapper();
			ResponseUtil.write(resp, om.writeValueAsString(add));
		} catch (Exception e) {
			e.printStackTrace();
		}
		return null;
	}
	public String del(HttpServletRequest req,HttpServletResponse resp) {
		try {
			int del = this.userDao.del(req.getParameterMap());
			ObjectMapper om = new ObjectMapper();
			ResponseUtil.write(resp, om.writeValueAsString(del));
		} catch (Exception e) {
			e.printStackTrace();
		}

		return null;
	}

}
这样我们的增删查改就完成了
其他操作效果:
增加

删除

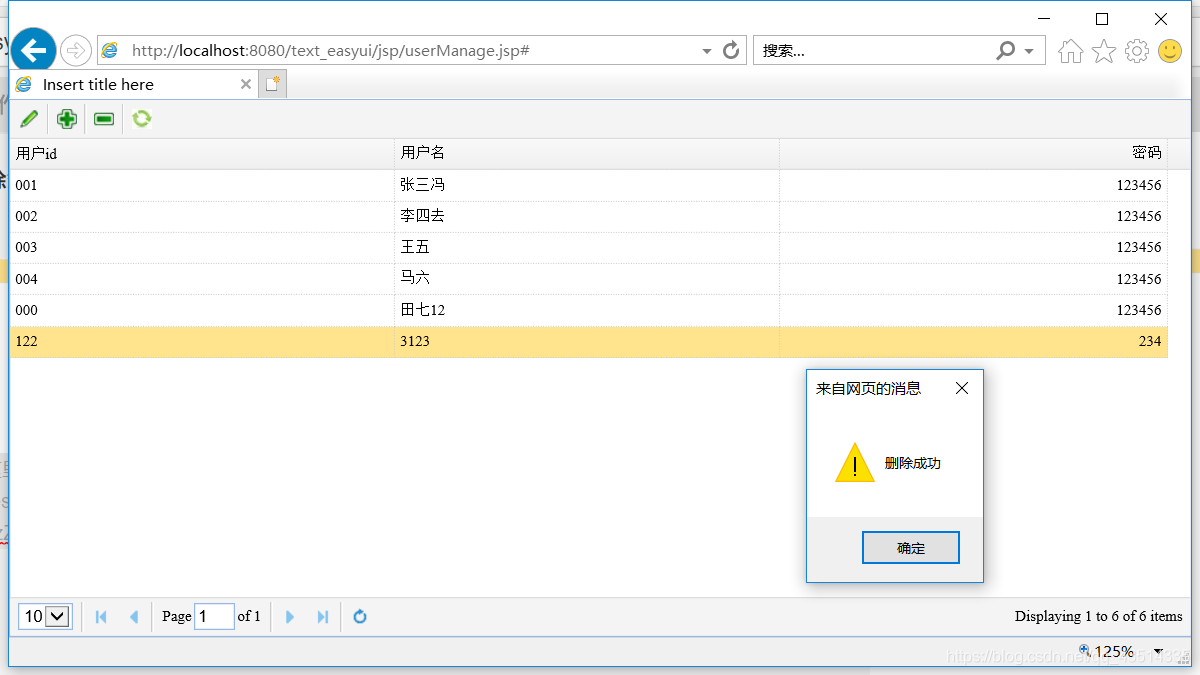
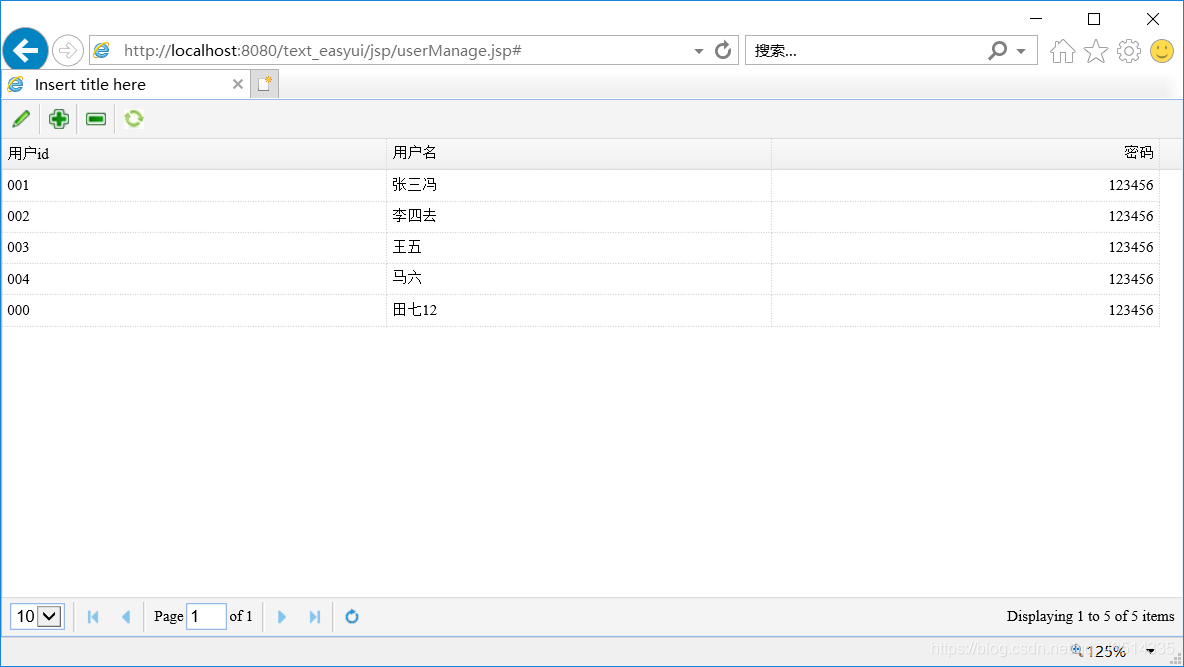
删除成功之后会提示之后页面数据就刷新了:


 580
580

 被折叠的 条评论
为什么被折叠?
被折叠的 条评论
为什么被折叠?
 到【灌水乐园】发言


