


 本文详细介绍如何在SpringBoot项目中使用JSP页面,包括创建Maven Web项目、添加依赖、配置视图解析器、创建控制器及JSP页面等步骤。
1.创建一个maven web项目
2.添加springboot和jsp相关依赖
<parent>
	<groupId>org.springframework.boot</groupId>
	<artifactId>spring-boot-starter-parent</artifactId>
	<version>2.0.3.RELEASE</version>
</parent>
<dependencies>
	<dependency>
		<groupId>junit</groupId>
		<artifactId>junit</artifactId>
		<version>3.8.1</version>
		<scope>test</scope>
	</dependency>
	<dependency>
		<groupId>org.springframework.boot</groupId>
		<artifactId>spring-boot-starter-web</artifactId>
	</dependency>

	<!-- jsp依赖 -->
	<dependency>
		<groupId>org.springframework.boot</groupId>
		<artifactId>spring-boot-starter-tomcat</artifactId>
	</dependency>
	<dependency>
		<groupId>org.apache.tomcat.embed</groupId>
		<artifactId>tomcat-embed-jasper</artifactId>
	</dependency>

</dependencies>
3.在application.properties配置文件中添加配置
spring.mvc.view.prefix=/WEB-INF/jsp/
spring.mvc.view.suffix=.jsp
4.创建一个controller
@EnableAutoConfiguration
@ComponentScan(basePackages="com.vhukze.controller")
@RestController
public class JspDemoController {

	@RequestMapping("/toJsp")
	public ModelAndView toJsp() {
		return new ModelAndView("index");
	}

	public static void main(String[] args) {
		SpringApplication.run(JspDemoController.class, args);
	}
}
5.在src/main下新建webapp目录,在webapp下面创建配置的路径

<html>
<body>
<h2>Hello World!</h2>
</body>
</html>
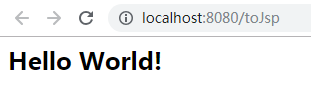
6.启动项目访问controller映射路径


 1670
1670

 被折叠的 条评论
为什么被折叠?
被折叠的 条评论
为什么被折叠?
 到【灌水乐园】发言


