


本文参考自:(https://blog.youkuaiyun.com/sinat_25923849/article/details/78889674)
1. 原材料
 1.1 VTK 最新 Release 文件包 https://www.vtk.org/download/

 1.2 CMake 最新 Release 安装包 https://cmake.org/download/

 1.3 Visual Studio 2015 https://msdn.itellyou.cn/ (社区版足矣,还不用序列号)
- 1
- 2
- 3
- 4
- 5
2. 配置流程
2.1 打开 CMake !

2.2 选择文件路径 !
首先把下载好的源码解压放在你喜欢的目录下,这个 source code 就是你喜欢的目录,
注意一定要对应你有 CMakeLists.txt 文件的目录下,外面包了多少层没关系,你要让 CMake
看到这个文件他才知道要干什么。第二个 build 目录就是配置好的工程文件存放的地址,
自己找个喜欢的地方放都没问题。这里我就是自己建了新的文件夹。
2.3 Configure ,第一次点击该按钮 !
出现下面这个界面,选择你的编译器版本,我这里肯定是VS2015了。

完事后,你的 CMake 界面应该出现了一片红,不要害怕,继续 Configure。

下面我要选择一些针对性的组件。这一步骤你可以根据自己项目的实际情况来进行勾选,我主要基于MFC开发程序,所以必须要包含MFC的库,我还想看看例子,所以直接把例子一起配置,最后,我想输出的库文件在我指定的文件夹下。
BUILD - EXAMPLES

Module - XXXMFC

CMake - INSTALL_PREFIX

2.4 Configure ,第二次点击该按钮,然后 Generate 吧!
配置完成后,就可以生成工程文件了。

2.5 Open Project !

打开工程,进入VS2015的界面。

在 ALL_BUILD 上右键点击重新生成,等一会让程序飞一会……
很幸运,一个错没有,全部顺利生成了,我是 WIN10 系统。
2.6 Install !
下面就是生成实际需要使用的库了

在 INSTALL 右键设为启动项目然后重新生成就好了,静静等待 lib 和 dll 的到来……
3. 测试一下例子
激动人心的时刻来了,看看例子能不能跑起来呢?
由于之前我们已经 BUILD 了例子,所以在 BIN 目录下已经有生成好的例子工程文件在等着我们了,我在这里选择了
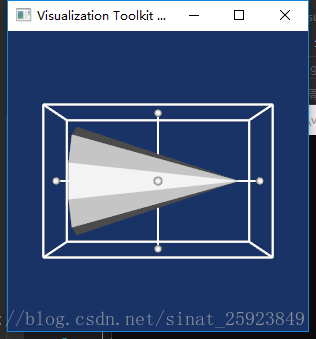
Examples\Tutorial\Step6\ 的例子作为测试。
首先直接打开例子的工程运行一下,看看跑不跑的起来,结果蹦出这个。

不要紧,这个问题我们先放一放,看起来好像直接运行需要远程调试器,那么我们先试试新建一个工程能不能运行示例代码。
新建一个普通的 WIN32 控制台工程,把上面这个例子的代码拷贝进去。
/*=========================================================================

  Program:   Visualization Toolkit
  Module:    Cone6.cxx

  Copyright (c) Ken Martin, Will Schroeder, Bill Lorensen
  All rights reserved.
  See Copyright.txt or http://www.kitware.com/Copyright.htm for details.

     This software is distributed WITHOUT ANY WARRANTY; without even
     the implied warranty of MERCHANTABILITY or FITNESS FOR A PARTICULAR
     PURPOSE.  See the above copyright notice for more information.

=========================================================================*/
//
// This example introduces 3D widgets. 3D widgets take advantage of the
// event/observer design pattern introduced previously. They typically
// have a particular representation in the scene which can be interactively
// selected and manipulated using the mouse and keyboard. As the widgets
// are manipulated, they in turn invoke events such as StartInteractionEvent,
// InteractionEvent, and EndInteractionEvent which can be used to manipulate
// the scene that the widget is embedded in. 3D widgets work in the context
// of the event loop which was set up in the previous example.
//
// Note: there are more 3D widget examples in VTK/Examples/GUI/.
//

// First include the required header files for the VTK classes we are using.
#include "vtkConeSource.h"
#include "vtkPolyDataMapper.h"
#include "vtkRenderWindow.h"
#include "vtkRenderWindowInteractor.h"
#include "vtkCamera.h"
#include "vtkActor.h"
#include "vtkRenderer.h"
#include "vtkCommand.h"
#include "vtkBoxWidget.h"
#include "vtkTransform.h"
#include "vtkInteractorStyleTrackballCamera.h"

//
// Similar to Cone2.cxx, we define a callback for interaction.
//
class vtkMyCallback : public vtkCommand
{
public:
  static vtkMyCallback *New()
    { return new vtkMyCallback; }
  void Execute(vtkObject *caller, unsigned long, void*) VTK_OVERRIDE
  {
      vtkTransform *t = vtkTransform::New();
      vtkBoxWidget *widget = reinterpret_cast<vtkBoxWidget*>(caller);
      widget->GetTransform(t);
      widget->GetProp3D()->SetUserTransform(t);
      t->Delete();
  }
};

int main()
{
  //
  // Next we create an instance of vtkConeSource and set some of its
  // properties. The instance of vtkConeSource "cone" is part of a
  // visualization pipeline (it is a source process object); it produces data
  // (output type is vtkPolyData) which other filters may process.
  //
  vtkConeSource *cone = vtkConeSource::New();
  cone->SetHeight( 3.0 );
  cone->SetRadius( 1.0 );
  cone->SetResolution( 10 );

  //
  // In this example we terminate the pipeline with a mapper process object.
  // (Intermediate filters such as vtkShrinkPolyData could be inserted in
  // between the source and the mapper.)  We create an instance of
  // vtkPolyDataMapper to map the polygonal data into graphics primitives. We
  // connect the output of the cone souece to the input of this mapper.
  //
  vtkPolyDataMapper *coneMapper = vtkPolyDataMapper::New();
  coneMapper->SetInputConnection( cone->GetOutputPort() );

  //
  // Create an actor to represent the cone. The actor orchestrates rendering
  // of the mapper's graphics primitives. An actor also refers to properties
  // via a vtkProperty instance, and includes an internal transformation
  // matrix. We set this actor's mapper to be coneMapper which we created
  // above.
  //
  vtkActor *coneActor = vtkActor::New();
  coneActor->SetMapper( coneMapper );

  //
  // Create the Renderer and assign actors to it. A renderer is like a
  // viewport. It is part or all of a window on the screen and it is
  // responsible for drawing the actors it has.  We also set the background
  // color here.
  //
  vtkRenderer *ren1= vtkRenderer::New();
  ren1->AddActor( coneActor );


不用说,这时候程序肯定是一堆红线了,因为没有配置环境。

网上大多文章都是说 CMake 配置,这是有道理的,我也在这摔了一跤,好在我很快爬起来了,我相信很多人跟我一样是对 CMake 不那么熟练的,那么下面看看我们如何不用 CMake 也能跑起来这个例子吧。

建好工程随便起个名字建个CPP文件把上面的例子代码黏贴进去。

这时候我们还需要配置 .h .lib .dll 这三个东西,这三项已经在我们之前的 OUT 文件夹中了,只要在项目属性中配置路径。

项目属性-VC++目录-包含目录–找到你输出的 include 文件夹路径,添加进去,红线都没了,这时候还运行不了,链接器-常规-附加库目录–找到你之前的 lib 文件夹路径,添加进去,这一步你只是告诉系统,还有这些地方存放了一些额外的lib,但是系统并不知道你要用哪些,所以还得告诉系统,你要用哪些 lib。链接器-输入-附加依赖项–把你这个lib文件夹下的所有lib名字全输进去吧,一个一个输?当然没这么麻烦

在lib文件夹下新建一个文本文档,把下面的语句放进去,保存,改后缀名为 bat,双击,看看是不是多了一个 LIBLIST.txt 文件,把里面的内容全复制,拷贝到附加依赖项中。


DIR *.lib /B >LIBLIST.TXT
这时候还需要把告诉程序 DLL 在哪里就可以,这里有三种解决方案:
1、配置 path 系统环境变量
2、配置 VS “调试” 变量
3、直接拷贝 DLL 到工程目录下
4、直接拷贝 DLL 到 SYSTEM32(64) 文件夹中
那么3,4方法是最简单的,也是不太推荐的,因为在以后的过程中需要频繁的进行拷贝,但是没关系,我们就是想让VTK先跑起来,哪个简单用哪个,直接把BIN下的DLL全部拷贝到你新建的这个工程目录下,运行一下程序吧。
这里有个注意,之前我们跳过的那个问题,64位远程调试的问题,这里再次出现,因为VTK我们用VS2015生成的64位库,所以必须用64位调试,找了一些网上的方法,发现关闭了防火墙就好了。
现在运行程序,如果之前的配置没问题应该会报这个错。

这主要是因为我们没用CMake 配置工程,而是自己新建的,这就导致生成工程的时候少了几行代码,没关系我们把他加在最前面。
关键的三行代码
#include <vtkAutoInit.h>
VTK_MODULE_INIT(vtkRenderingOpenGL2);
VTK_MODULE_INIT(vtkInteractionStyle);

好了,代码加上去了,再次运行,是不是可以了呢。


那么这里还遗留了几个小问题:

1、每次要用VTK的时候都要复制一大堆LIB进去,很麻烦,怎么简化?

2、DLL 配置的1、2方法怎么操作

请看我的另外一篇关于VS项目配置的博客,谢谢。


 630
630

 被折叠的 条评论
为什么被折叠?
被折叠的 条评论
为什么被折叠?
 到【灌水乐园】发言


