


 本文详细介绍了Linux系统下的磁盘管理流程,包括设备识别、挂载与卸载、磁盘分区、文件系统安装、swap分区管理、配额设置及磁盘加锁等关键操作。通过实际案例演示了如何使用fdisk、mount、mkfs等命令进行磁盘管理。
linux系统中的磁盘管理
1.本地存储设备的识别
- fdisk -l ##真实存在的设备(不一定是系统识别的)

- cat /proc/partitions ##系统识别的设备

- blkid ##系统可以使用的设备
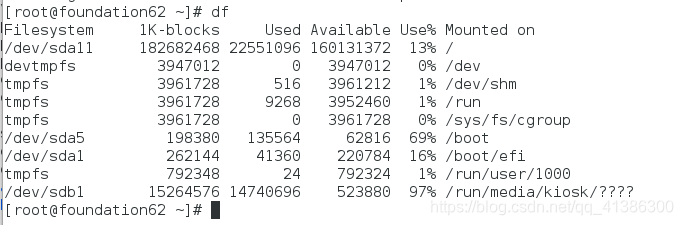
- df ##系统正在挂载的设备
2.设备的挂载和卸载
- 设备名称
- /dev/xdx ##/dev/hd0 /dev/hd1 /dev/sda /dev/sdb /dev/sda1 /dev/sdb1
- /dev/sr0 ##光驱
- /dev/mapper/* ##虚拟设备(用软件模拟出来的)
- 设备的挂载
mount 设备 挂载点
- mount /dev/sdb1 /mnt ##挂载sdb1到mnt
- umount /mnt或sdb1 ##卸载
- mount -o ro /dev/sdb1 /mnt ##只读挂载
- mount ##查看挂载信息
- mount -o remount,rw /dev/sdb1或 /mnt ##重新读写挂载
- 解决设备正忙问题
[root@foundation62 ~]# umount /mnt
umount: /mnt: target is busy.
(In some cases useful info about processes that use
the device is found by lsof(8) or fuser(1))
解决方法1:lsof /mnt
[root@foundation62 ~]# lsof /mnt
lsof: WARNING: can’t stat() fuse.gvfsd-fuse file system /run/user/1000/gvfs
Output information may be incomplete.
COMMAND PID USER FD TYPE DEVICE SIZE/OFF NODE NAME
bash 12849 root cwd DIR 8,17 8192 1 /mnt
- kill -9 12849
- umount /mnt
解决方法2:
- fuser -vm /mnt ##查看
- fuser -kvm /mnt ##查看并结束
3.磁盘分区
1.fdisk -l
2.fdisk /dev/vdb
Command (m for help): m
Command action
a toggle a bootable flag
b edit bsd disklabel
c toggle the dos compatibility flag
d delete a partition
g create a new empty GPT partition table
G create an IRIX (SGI) partition table
l list known partition types
m print this menu
n add a new partition
o create a new empty DOS partition table
p print the partition table
q quit without saving changes
s create a new empty Sun disklabel
t change a partition’s system id
u change display/entry units
v verify the partition table
w write table to disk and exit
x extra functionality (experts only)
Command (m for help): n
Partition type:
p primary (0 primary, 0 extended, 4 free)
e extended
Select (default p): ##主分区
Using default response p
Partition number (1-4, default 1): ##id用默认
First sector (2048-20971519, default 2048): ##分区起始
Using default value 2048
Last sector, +sectors or +size{K,M,G} (2048-20971519, default 20971519): +500M ##分区大小
Partition 1 of type Linux and of size 500 MiB is set
Command (m for help): p ##显示信息
Disk /dev/vdb: 10.7 GB, 10737418240 bytes, 20971520 sectors
Units = sectors of 1 * 512 = 512 bytes
Sector size (logical/physical): 512 bytes / 512 bytes
I/O size (minimum/optimal): 512 bytes / 512 bytes
Disk label type: dos
Disk identifier: 0xc3a0e4b3
Device Boot Start End Blocks Id System
/dev/vdb1 2048 1026047 512000 83 Linux
/dev/vdb2 1026048 2050047 512000 83 Linux
/dev/vdb3 2050048 3074047 512000 83 Linux
/dev/vdb4 3074048 20971519 8948736 5 Extended ##把所有剩余空间都给扩展分区
4.给设备安装文件系统
-
cat /proc/partitions
-
mkfs.xfs /dev/vdb1
-
vim /etc/fstab
设备 挂载点 文件系统 挂载参数 是否备份 是否检测
/dev/vdb1 /mnt xfs defaults 0 0 -
mount -a
5.swap分区管理
(1)swap分区建立
划分分区并设定分区标签为82
mkswap /dev/vdb6
swapon -a /dev/vdb6
swapon -s
Filename Type Size Userd Priority
/dev/vdb6 partition 511996 0 -1
vim /etc/fstab
/dev/vdb6 swap swap defaults 0 0
(2)swap分区删除
vim /etc/fstab
swapoff /dev/vdb6
swapon -s
6.配额
- 分区,格式化
mkdir /public
mount -o usrquota /dev/vdb7 /public
edquota -u student
tu
vim /etc/fstab
/dev/vdb7 /public xfs defaults,usrquota 0 0
测试:
切换到student用户:
dd if=/dev/zero of=/public/studentfile bs=1M count=500
7.磁盘加锁
cryptsetup luksFormat /dev/vdb8
YES
cryptsetup open /dev/vdb8 westos
mkfs.xfs /dev/mapper/westos
mount /dev/mapper/westos /mnt/
touch /mnt/file{1…5}
umount /mnt/
cryptsetup close westos ##关闭之后,/dev/mapper/westos文件消失,挂载原始设备也不能查看其中的内容
cryptsetup open /dev/vdb8 linux
mount /dev/mapper/linux /mnt


 236
236

 被折叠的 条评论
为什么被折叠?
被折叠的 条评论
为什么被折叠?
 到【灌水乐园】发言


