


一、介绍
在实际开发中,我们都是先拿到需求,也就是说先知道我们想要的是什么样的,然后按照我们想要的样子开发,需求是活的,经常会变动,如果一下子全部将功能实现,要改需求的时候,倒是增加了时间成本,所以我们需要测试Web项目通常不需要启动项目,使用一些Servlet相关的模拟对象。
测试驱动开发:我们按照需求先写一个自己预期结果的测试用例,这个测试用例刚开始肯定是失败的测试,随着不断的编码和重构,最终让测试用例通过测试,这样才能保证软件的质量和可控性。
二、需求
控制器的测试。
使用JUnit和Spring TestContext framework,演示对普通页面转向形控制器和RestController进行测试。
三、演示
(1)添加pom文件
其中test说明这些包的存活是在test周期,也就意味着发布时我们将不包含这些jar包。
<dependency>
			<groupId>org.springframework</groupId>
			<artifactId>spring-test</artifactId>
			<version>${spring-framework.version}</version>
			<scope>test</scope>
		</dependency>


		<dependency>
			<groupId>junit</groupId>
			<artifactId>junit</artifactId>
			<version>4.11</version>
			<scope>test</scope>
		</dependency>
(2)演示服务
在src/main/java下新建DemoService
package com.eleven.service;

import org.springframework.stereotype.Service;

@Service // 声明当前DemoService是Spring管理的一个Bean
public class DemoService {

	public String saySomething() {
		return "hello";
	}

}
(3)测试用例
在src/test/java下新建TestControllerIntegrationTests
package com.eleven.controller;

import static org.springframework.test.web.servlet.request.MockMvcRequestBuilders.get;
import static org.springframework.test.web.servlet.result.MockMvcResultMatchers.content;
import static org.springframework.test.web.servlet.result.MockMvcResultMatchers.forwardedUrl;
import static org.springframework.test.web.servlet.result.MockMvcResultMatchers.model;
import static org.springframework.test.web.servlet.result.MockMvcResultMatchers.status;
import static org.springframework.test.web.servlet.result.MockMvcResultMatchers.view;

import org.junit.Before;
import org.junit.Test;
import org.junit.runner.RunWith;
import org.springframework.beans.factory.annotation.Autowired;
import org.springframework.mock.web.MockHttpServletRequest;
import org.springframework.mock.web.MockHttpSession;
import org.springframework.test.context.ContextConfiguration;
import org.springframework.test.context.junit4.SpringJUnit4ClassRunner;
import org.springframework.test.context.web.WebAppConfiguration;
import org.springframework.test.web.servlet.MockMvc;
import org.springframework.test.web.servlet.setup.MockMvcBuilders;
import org.springframework.web.context.WebApplicationContext;

import com.eleven.MyMvcConfig;
import com.eleven.service.DemoService;

@RunWith(SpringJUnit4ClassRunner.class)
@ContextConfiguration(classes = { MyMvcConfig.class })
@WebAppConfiguration("src/main/resources") // 默认为src/main/webapp,现在修改为src/main/resources
public class TestControllerIntegrationTests {

	private MockMvc mockMvc; // 用来模拟MVC对象

	@Autowired
	private DemoService demoService; // 可以在测试用例中注入Spring的Bean

	@Autowired
	WebApplicationContext wac; // 注入WebApplicationContext

	@Autowired
	MockHttpSession session; // 注入模拟http session

	@Autowired
	MockHttpServletRequest request; // 注入模拟的Http request

	@Before // 测试之前进行初始化工作
	public void setup() {
		this.mockMvc = MockMvcBuilders.webAppContextSetup(this.wac).build(); // 初始化
	}

	@Test
	public void testNormalController() throws Exception {
		mockMvc.perform(get("/normal")) // 模拟向/normal进行get请求
				.andExpect(status().isOk()) // 预期状态返回200
				.andExpect(view().name("page")) // 预期view的名称为page
				.andExpect(forwardedUrl("/WEB-INF/classes/views/page.jsp")) // 预期页面转向的路径为/WEB-INF/classes/views/page.jsp
				.andExpect(model().attribute("msg", demoService.saySomething())); // 预期返回值是hello
	}

	@Test
	public void testRestController() throws Exception {
		mockMvc.perform(get("/testRest")) // 模拟向/testRest进行get请求
				.andExpect(status().isOk()).andExpect(content().contentType("text/plain;charset=UTF-8")) // 预期返回的媒体类型为text/plain;charset=UTF-8
				.andExpect(content().string(demoService.saySomething())); // 预期返回值的内容为hello
	}
}
(4)编写控制层
在src/test/java下新建NormalController
package com.eleven.controller;

import org.springframework.beans.factory.annotation.Autowired;
import org.springframework.stereotype.Controller;
import org.springframework.ui.Model;
import org.springframework.web.bind.annotation.RequestMapping;

import com.eleven.service.DemoService;

@Controller
public class NormalController {

	@Autowired
	private DemoService demoService;

	@RequestMapping("/normal")
	public String testPage(Model model) {
		model.addAttribute("msg", demoService.saySomething());
		return "page";
	}

}
(5)编写jsp页面
在src/main/resources/views下新建page.jsp
<%@ page language="java" contentType="text/html; charset=UTF-8"
    pageEncoding="UTF-8"%>
<!DOCTYPE html>
<html>
<head>
<meta charset="UTF-8">
<title>Insert title here</title>
</head>
<body>
	<pre>欢迎欢迎</pre>
</body>
</html>
(6)编写RestController控制层
在src/test/java下新建MyRestController
package com.eleven.controller;

import org.springframework.beans.factory.annotation.Autowired;
import org.springframework.web.bind.annotation.RequestMapping;
import org.springframework.web.bind.annotation.ResponseBody;
import org.springframework.web.bind.annotation.RestController;

import com.eleven.service.DemoService;

@RestController
public class MyRestController {

	@Autowired
	private DemoService demoService;

	@RequestMapping(value = "/testRest", produces = "text/palin;charset=UTF-8")
	public @ResponseBody String testRest() {
		return demoService.saySomething();
	}
}
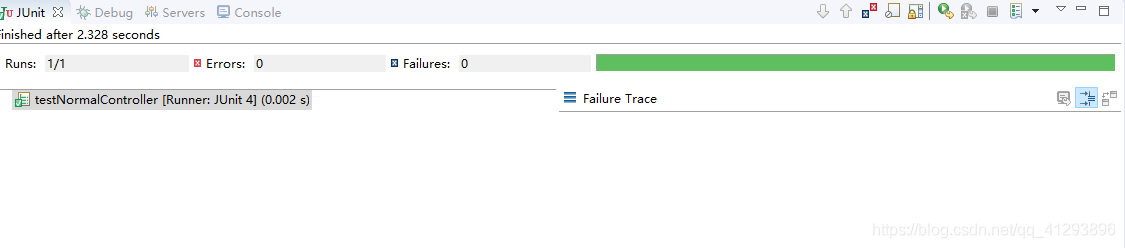
(7)运行测试
运行src/test/java下的TestControllerIntegrationTests


 2116
2116

 被折叠的 条评论
为什么被折叠?
被折叠的 条评论
为什么被折叠?
 到【灌水乐园】发言


