


下载apache-flume-1.6.0-bin.tar.gz :点击打开链接:http://archive.apache.org/dist/flume/1.6.0/
Flume的应用指南:点击打开链接 :http://flume.apache.org/FlumeUserGuide.html
一:解压
[hadoop@master local]$ tar -zxvf ./app/apache-flume-1.6.0-bin.tar.gz -C ./soft/
二:配置环境变量
vi ~/.bashrc
export FLUMN_HOME=/usr/local/soft/flume-1.6.0
export PATH=$PATH:$FLUMN_HOME/bin
source ~/.bashrc
在/flume-1.6.0/conf
[hadoop@master conf]$ vi flume-env.sh.template
export JAVA_HOME=/usr/local/soft/jdk1.8.0
三:验证安装
[hadoop@master conf]$ flume-ng version
下面进行简单操作一个小实例
flumn/conf
-------------------------------------
1.名字agent(代理)组件
2.描述配置source(源)
3.描述配置channel(通道)
4.描述配置sink
5.绑定source,sink,到channel
在/flume-1.6.0/conf
[hadoop@master conf]$ vi netcat-r.conf
a1.sources = r1
a1.sinks = k1
a1.channels = c1

# Describe/configure the source
a1.sources.r1.type = netcat
a1.sources.r1.bind = 0.0.0.0
a1.sources.r1.port = 44444
# Describe the sink
a1.sinks.k1.type = logger

# Use a channel which buffers events in memory
a1.channels.c1.type = memory
a1.channels.c1.capacity = 1000
a1.channels.c1.transactionCapacity = 100

# Bind the source and sink to the channel
a1.sources.r1.channels = c1
参数简单的介绍:
#--conf :配置目录
#--conf-file :配置文件
#--name :代理名称
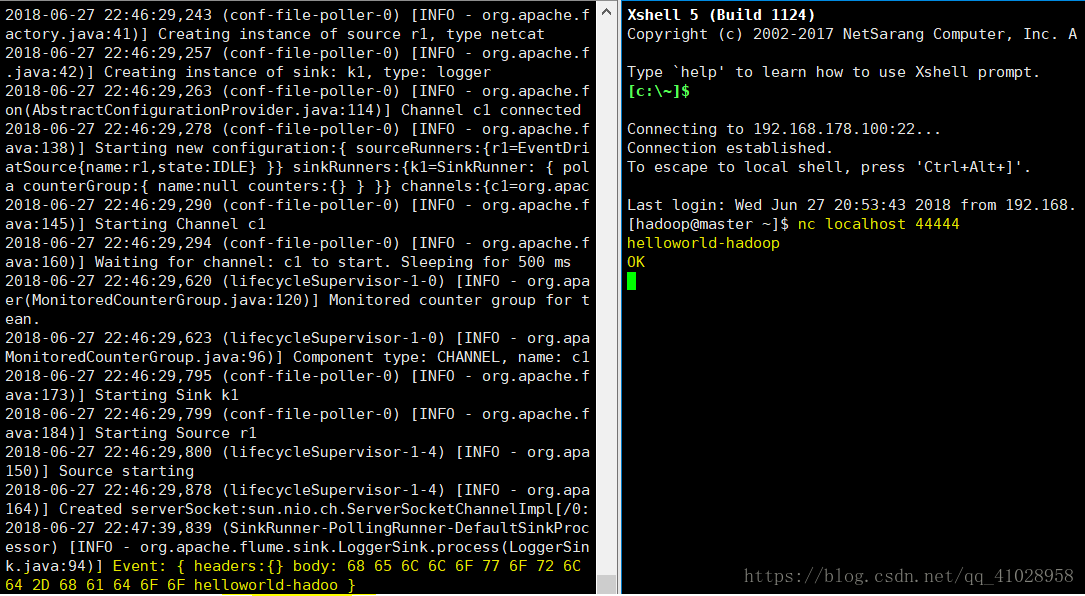
#-D :指定额外的参数[hadoop@master conf]$ flume-ng agent --conf-file netcat-r.conf --name a1 -Dflume.root.logger=INFO,console


 478
478

 被折叠的 条评论
为什么被折叠?
被折叠的 条评论
为什么被折叠?
 到【灌水乐园】发言


