


 本文详细介绍了如何在微信小程序中创建并提交表单,包括前端WXML代码示例,JS逻辑控制及数据验证,以及后端PHP处理流程,实现了从前端到数据库的数据完整提交过程。
第一当然是要配置自己的虚拟域名,请跳转https://blog.youkuaiyun.com/qq_40936013/article/details/83993552
查看,
然后,慢慢的重点来了。
先看前端wxml代码吧
<form bindsubmit="formSubmit" bindreset="formReset">
<view class="section">
<view class="section__title">姓名</view>
<input name="xingming" placeholder="请输入姓名" />
</view>
<view class="section section_gap">
<view class="section__title">性别</view>
<radio-group name="xingbie">
<label><radio value="男"/>男</label>
<label><radio value="女"/>女</label>
</radio-group>
</view>
<view class="section section_gap">
<view class="section__title">爱好</view>
<checkbox-group name="aihao">
<label><checkbox value="旅游"/>旅游</label>
<label><checkbox value="看书"/>看书</label>
<label><checkbox value="电动"/>电动</label>
<label><checkbox value="篮球"/>篮球</label>
</checkbox-group>
</view>
<view class="btn-area">
<button formType="submit">提交</button>
<button formType="reset">重置</button>
</view>
</form>
- js文件是逻辑控制,主要是它发送请求和接收数据,
- json 用于此页面局部 配置并且覆盖全局app.json配置,
- wxss用于页面的样式设置,
- wxml就是页面,相当于html
其中几个关键点需要理解
A.Form表单,需要绑定一个submit事件,在小程序中,属性为bindsubmit,
bindsubmit=”formSubmit” 这里的属性值formSubmit,命名可以为符合规范的任意值,相当于以前html中的 onsubmit=”formSubmit()”,是一个函数名,当提交的时候触发formSubmit这个函数事件,这个函数写在js中。
B.其他的属性和之前的HTML差不多,注意的是,表单一定要有name=“value”,后端处理和以前一样,比如name=”username” PHP可以用 $_POST[‘username']来接收。
C.由于小程序没有input submit这个按钮,所以在每个form表单中都要有一个提交按钮,
<button formType="submit">提交</button>,这个按钮就是用来开启提交事件的。
下面请看js代码
const app = getApp()
Page({
data: {
},
formSubmit: function (e) {
console.log(e.detail.value);
if (e.detail.value.xingming.length == 0 || e.detail.value.xingming.length >= 8) {
wx.showToast({
title: '姓名不能为空或过长!',
icon: 'loading',
duration: 1500
})
setTimeout(function () {
wx.hideToast()
}, 2000)
} else if (e.detail.value.xingbie.length == 0) {
wx.showToast({
title: '性别不能为空!',
icon: 'loading',
duration: 1500
})
setTimeout(function () {
wx.hideToast()
}, 2000)
} else if (e.detail.value.aihao.length == 0) {
wx.showToast({
title: '爱好不能为空!',
icon: 'loading',
duration: 1500
})
setTimeout(function () {
wx.hideToast()
}, 2000)
} else {
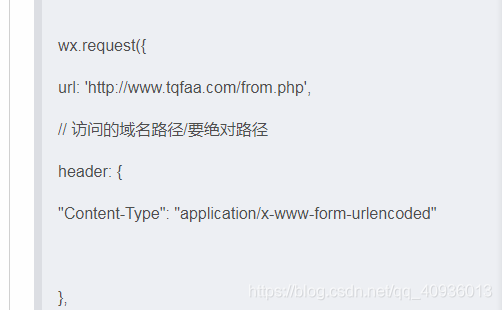
wx.request({
url: 'http://www.tqfaa.com/from.php',
// 访问的域名路径/要绝对路径
header: {
"Content-Type": "application/x-www-form-urlencoded"
},
method: "POST",
data: { xingming: e.detail.value.xingming, xingbie: e.detail.value.xingbie, aihao: e.detail.value.aihao },
success: function (res) {
console.log(res.data);
if (res.data.status == 0) {
wx.showToast({
title: '提交失败!!!',
icon: 'loading',
duration: 1500
})
} else {
wx.showToast({
title: '提交成功!!!',//这里打印出登录成功
icon: 'success',
duration: 1000
})
}
}
})
}
},
})
其中重点讲一下这个路径:
from.php是我重新写的一个文件夹(网站根目录就是这个文件夹)下放的php文件(因为前面有用框架,但是因为是php小白,一直访问不到自己写的from.php文件,所以只能放弃。。。。。)
url是你请求的网址,比如以前在前端,POST表单中action=‘index.php',这里的index.php是相对路径,而小程序
请求的网址必须是网络绝对路径。
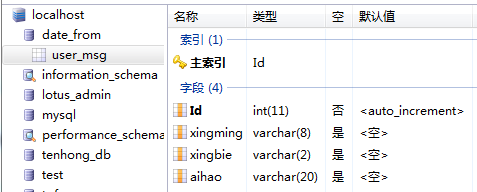
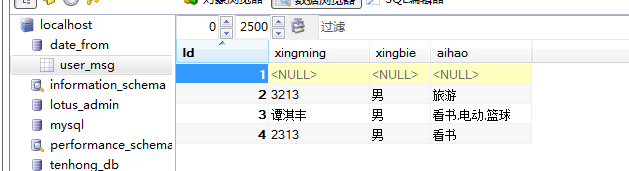
数据库表就这样吧
 、
、
最后重要的from.php文件!
<?php
$con=mysqli_connect("localhost","root","root","date_from"); //链接数据库,分别是服务器,数据库用户,密码和数据库名
if (!$con)
{
die('Could not connect: ' . mysqli_connect_error());
}
mysqli_query($con,"set names utf8");
if (!empty($_POST['xingming'])&&!empty($_POST['xingbie'])&&!empty($_POST['aihao'])){
$sql="INSERT INTO user_msg(xingming, xingbie, aihao) VALUES ('$_POST[xingming]','$_POST[xingbie]','$_POST[aihao]')";//user_msg 数据库表名
$result = mysqli_query($con,$sql);
if (!$result)
{
die('Error: ' . mysqli_connect_error());
}
}
$sql1 = "SELECT * FROM user_msg";
$result1 = mysqli_query($con,$sql1);
?>
<!doctype html>
<html lang="zh-cn">
<head>
<meta charset="utf-8">
<title>表单</title>
</head>
<body style="margin:50px;">
<script language="JavaScript">
function myrefresh()
{
window.location.reload();
}
setTimeout('myrefresh()',10000); //指定1秒刷新一次
</script>
<table style='text-align:left;' border='1'>
<tr><th>id</th><th>名字</th><th>性别</th><th>爱好</th></tr>
<?php
while ($bookInfo = mysqli_fetch_array($result1,MYSQLI_ASSOC)){ //返回查询结果到数组
$xingming = $bookInfo["xingming"]; //将数据从数组取出
$xingbie = $bookInfo["xingbie"];
$aihao = $bookInfo["aihao"];
$id = $bookInfo["id"];
echo "<tr><td>{$id}</td><td>{$xingming}</td><td>{$xingbie}</td><td>{$aihao}</td></tr>";
}
//释放结果集
mysqli_free_result($result1);
mysqli_close($con);
?>
</table>
</body>
</html>
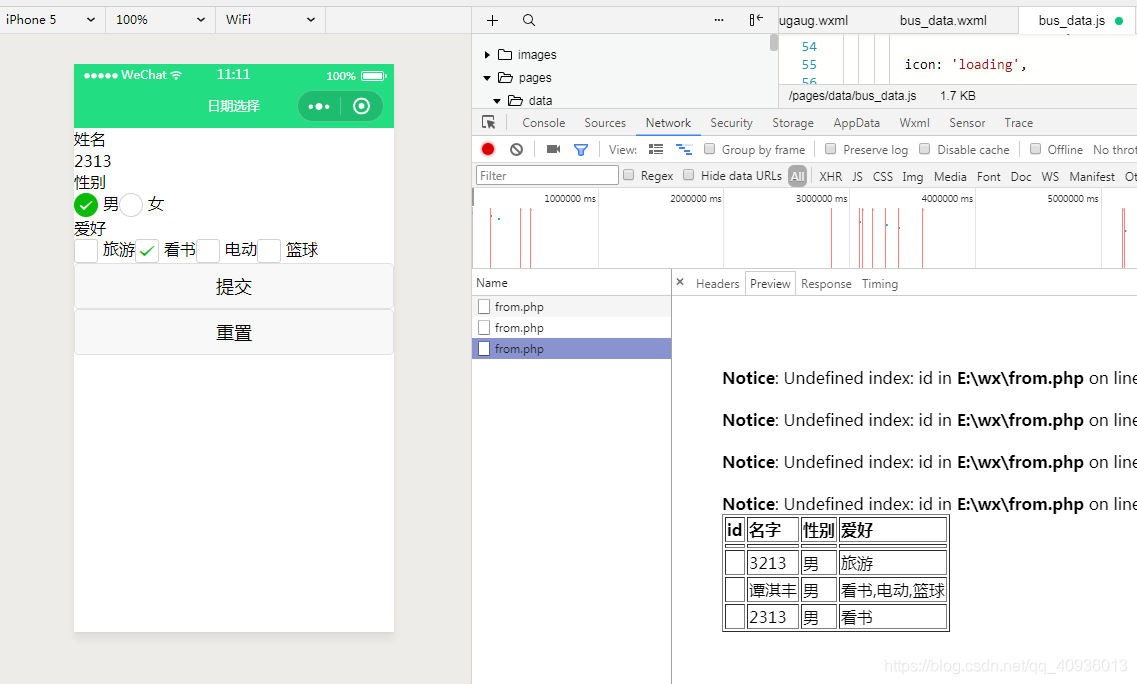
最后,实现效果当然要配几张图片
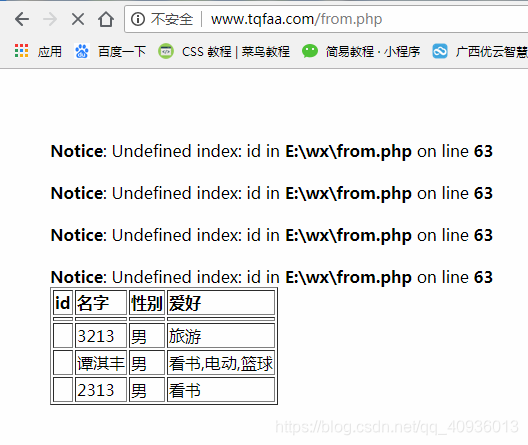
当然你还可以浏览器打开虚拟网址查看
最后数据库这边看看数据有没有更新
完成!文章实践内容来源欢迎跳转https://blog.youkuaiyun.com/wydd7522/article/details/80724526


 1116
1116

 被折叠的 条评论
为什么被折叠?
被折叠的 条评论
为什么被折叠?
 到【灌水乐园】发言


