


 本文介绍了如何使用Python代码将灰度图像转换为伪彩色,包括检验灰度图的脚本和详细转换代码,以及一个实际的使用示例。这对于语义分割中的图像可视化很有帮助。

💪 专业从事且热爱图像处理,图像处理专栏更新如下👇:
📝《图像去噪》
📝《超分辨率重建》
📝《语义分割》
📝《风格迁移》
📝《目标检测》
📝《图像增强》
📝《模型优化》
📝《模型实战部署》
📝《图像配准融合》
📝《数据集》
📝《高效助手》

一、检验灰度图
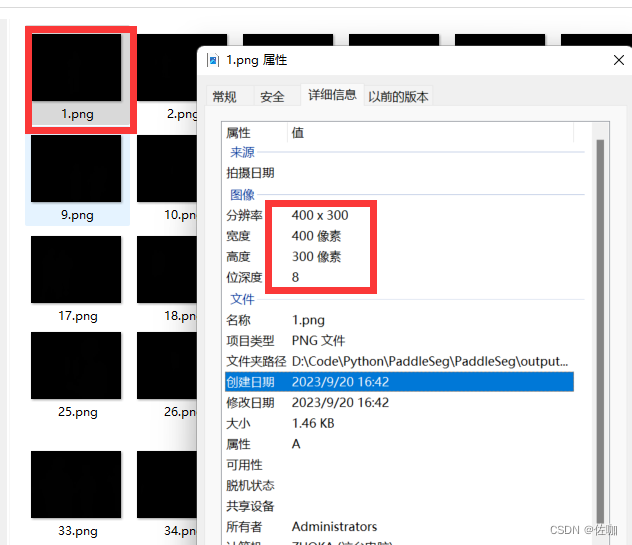
制作语义分割数据集或用训练好模型测试图像时,得到的结果是灰度图像,如下:
1.1 检验代码
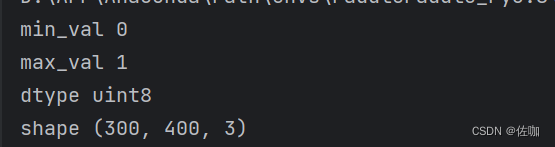
上面图像灰度值不是全是全为0,灰度范围在[0,1]之间,使用下面脚本测试灰度图像的灰度值是否全为0:
import cv2

img = cv2.imread("output/result/Result_2023.9.18_Int8/Val_Predict/BlockImage/1.png")

min_val = img.min()
max_val= img.max()

print("min_val",min_val)
print("max_val",max_val)
print("dtype",img.dtype)
print("shape",img.shape)
print("img = ",img)

cv2.imshow("1",img)
cv2.waitKey()
cv2.destroyWindow()
通过上面脚本检测结果如下:
二、灰度图转伪彩色图代码
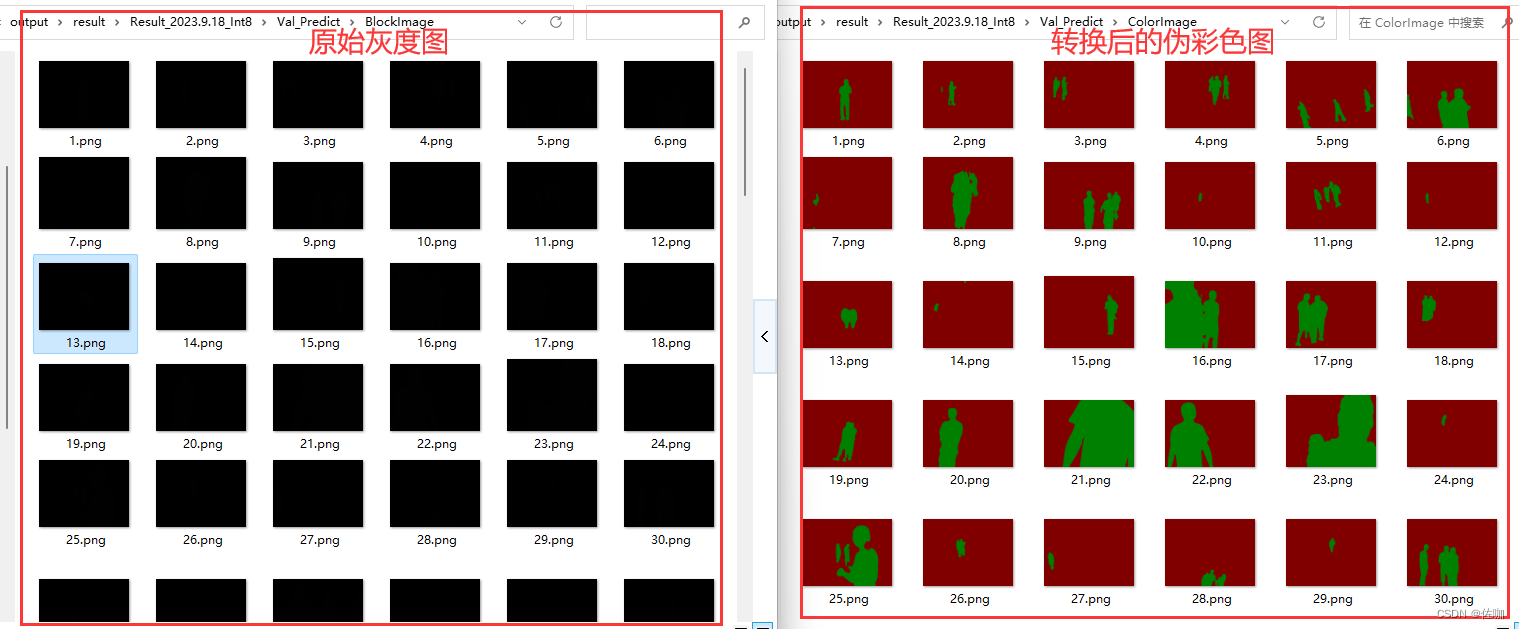
上面的灰度图直观的看不了测试结果怎样,得将[0,1]区间的灰度值映射到[0,255],详解代码见下:
from __future__ import print_function

import argparse
import os
import os.path as osp
import sys
import numpy as np
from PIL import Image


def parse_args():
    parser = argparse.ArgumentParser(
        formatter_class=argparse.ArgumentDefaultsHelpFormatter)
    parser.add_argument(
        'dir_or_file', help='input gray label directory or file list path')
    parser.add_argument('output_dir', help='output colorful label directory')
    parser.add_argument('--dataset_dir', help='dataset directory')
    parser.add_argument('--file_separator', help='file list separator')
    return parser.parse_args()


def get_color_map_list(num_classes):
    """
    Returns the color map for visualizing the segmentation mask,
    which can support arbitrary number of classes.
    Args:
        num_classes (int): Number of classes.
    Returns:
        (list). The color map.
    """

    num_classes += 1
    color_map = num_classes * [0, 0, 0]
    for i in range(0, num_classes):
        j = 0
        lab = i
        while lab:
            color_map[i * 3] |= (((lab >> 0) & 1) << (7 - j))
            color_map[i * 3 + 1] |= (((lab >> 1) & 1) << (7 - j))
            color_map[i * 3 + 2] |= (((lab >> 2) & 1) << (7 - j))
            j += 1
            lab >>= 3
    color_map = color_map[3:]
    return color_map


def gray2pseudo_color(args):
    """将灰度标注图片转换为伪彩色图片"""
    input = args.dir_or_file
    output_dir = args.output_dir
    if not osp.exists(output_dir):
        os.makedirs(output_dir)
        print('Creating colorful label directory:', output_dir)

    color_map = get_color_map_list(256)
    if os.path.isdir(input):
        for fpath, dirs, fs in os.walk(input):
            for f in fs:
                try:
                    grt_path = osp.join(fpath, f)
                    _output_dir = fpath.replace(input, '')
                    _output_dir = _output_dir.lstrip(os.path.sep)

                    im = Image.open(grt_path)
                    lbl = np.asarray(im)

                    lbl_pil = Image.fromarray(lbl.astype(np.uint8), mode='P')
                    lbl_pil.putpalette(color_map)

                    real_dir = osp.join(output_dir, _output_dir)
                    if not osp.exists(real_dir):
                        os.makedirs(real_dir)
                    new_grt_path = osp.join(real_dir, f)

                    lbl_pil.save(new_grt_path)
                    print('New label path:', new_grt_path)
                except:
                    continue
    elif os.path.isfile(input):
        if args.dataset_dir is None or args.file_separator is None:
            print('No dataset_dir or file_separator input!')
            sys.exit()
        with open(input) as f:
            for line in f:
                parts = line.strip().split(args.file_separator)
                grt_name = parts[1]
                grt_path = os.path.join(args.dataset_dir, grt_name)

                im = Image.open(grt_path)
                lbl = np.asarray(im)

                lbl_pil = Image.fromarray(lbl.astype(np.uint8), mode='P')
                lbl_pil.putpalette(color_map)

                grt_dir, _ = osp.split(grt_name)
                new_dir = osp.join(output_dir, grt_dir)
                if not osp.exists(new_dir):
                    os.makedirs(new_dir)
                new_grt_path = osp.join(output_dir, grt_name)

                lbl_pil.save(new_grt_path)
                print('New label path:', new_grt_path)
    else:
        print('It\'s neither a dir nor a file')


if __name__ == '__main__':
    args = parse_args()
    gray2pseudo_color(args)
2.1 转换代码使用细则
使用该代码,只需要在终端去到该文件所在路径下,添加灰度图像文件夹路径和转换后的保存路径即可。
终端中输入的命令为:
python gray2pseudo_color.py <dir_or_file> <output_dir>
上面命令中:
dir_or_file为灰度图所在的路径
output_dir为转换后伪彩色图像的保存路径
具体的使用方法见下图:

三、示例转换结果
转换后的对比结果如下图:
四、总结
以上就是语义分割中灰度图像转伪彩色图像的方法,希望能帮到你!
感谢您阅读到最后!😊总结不易,多多支持呀🌹 点赞👍收藏⭐评论✍️,您的三连是我持续更新的动力💖
关注公众号「视觉研坊」,获取干货教程、实战案例、技术解答、行业资讯!


 3237
3237

 被折叠的 条评论
为什么被折叠?
被折叠的 条评论
为什么被折叠?
 到【灌水乐园】发言


