


 本文详细介绍了如何使用Spring、SpringMVC和MyBatis(SSM)框架搭建一个完整的项目,包括Maven项目的创建,相关依赖的添加,关键配置文件的设置,以及使用MyBatis逆向工程自动生成代码的过程。
一,创建Maven项目
二,在pom.xml文件中添加必要的相关依赖spring,springmvc,mybatis,数据库连接池,驱动包,其他(jstl,jsp,servletr- api,junit)等
注:依赖导入时spring的尽量版本号一致
  <!--Mybatis Generator-->
    <!-- https://mvnrepository.com/artifact/org.mybatis.generator/mybatis-generator-cor-->
    <dependency>
      <groupId>org.mybatis.generator</groupId>
      <artifactId>mybatis-generator-core</artifactId>
      <version>1.3.7</version>
    </dependency>


    <!--spring mvc-->
    <!-- https://mvnrepository.com/artifact/org.springframework/spring-webmvc -->
    <dependency>
      <groupId>org.springframework</groupId>
      <artifactId>spring-webmvc</artifactId>
      <version>5.0.9.RELEASE</version>
    </dependency>

    <!--spring context-->
    <!-- https://mvnrepository.com/artifact/org.springframework/spring-context -->
    <dependency>
      <groupId>org.springframework</groupId>
      <artifactId>spring-context</artifactId>
      <version>5.0.9.RELEASE</version>
    </dependency>


    <!--Spring jdbc-->
    <!-- https://mvnrepository.com/artifact/org.springframework/spring-jdbc -->
    <dependency>
      <groupId>org.springframework</groupId>
      <artifactId>spring-jdbc</artifactId>
      <version>5.0.9.RELEASE</version>
    </dependency>

    <!--spring test-->
    <!-- https://mvnrepository.com/artifact/org.springframework/spring-test -->
    <dependency>
      <groupId>org.springframework</groupId>
      <artifactId>spring-test</artifactId>
      <version>5.0.9.RELEASE</version>
      <scope>test</scope>
    </dependency>


    <!--spring 面向切面-->
    <!-- https://mvnrepository.com/artifact/org.springframework/spring-aspects -->
    <dependency>
      <groupId>org.springframework</groupId>
      <artifactId>spring-aspects</artifactId>
      <version>5.0.9.RELEASE</version>
    </dependency>


    <!--Mybatis-->
    <!-- https://mvnrepository.com/artifact/org.mybatis/mybatis -->
    <dependency>
      <groupId>org.mybatis</groupId>
      <artifactId>mybatis</artifactId>
      <version>3.4.6</version>
    </dependency>

    <!--mybatis 整合spring-->
    <!-- https://mvnrepository.com/artifact/org.mybatis/mybatis-spring -->
    <dependency>
      <groupId>org.mybatis</groupId>
      <artifactId>mybatis-spring</artifactId>
      <version>1.3.2</version>
    </dependency>

    <!--数据库连接池 驱动-->
    <!-- https://mvnrepository.com/artifact/com.mchange/c3p0 -->
    <dependency>
      <groupId>com.mchange</groupId>
      <artifactId>c3p0</artifactId>
      <version>0.9.5.2</version>
    </dependency>
    <!-- https://mvnrepository.com/artifact/mysql/mysql-connector-java -->
    <dependency>
      <groupId>mysql</groupId>
      <artifactId>mysql-connector-java</artifactId>
      <version>5.1.47</version>
    </dependency>
    <!-- Servlet+JSP+JSTL -->
    <dependency>
      <groupId>javax.servlet</groupId>
      <artifactId>javax.servlet-api</artifactId>
      <version>3.1.0</version>
      <scope>provided</scope>
    </dependency>
    <dependency>
      <groupId>javax.servlet.jsp</groupId>
      <artifactId>javax.servlet.jsp-api</artifactId>
      <version>2.3.1</version>
    </dependency>
    <dependency>
      <groupId>javax.servlet</groupId>
      <artifactId>jstl</artifactId>
      <version>1.2</version>
    </dependency>
    <dependency>
      <groupId>org.springframework</groupId>
      <artifactId>spring-test</artifactId>
      <version>5.0.9.RELEASE</version>
    </dependency>
    <!--junit测试-->
    <dependency>
      <groupId>junit</groupId>
      <artifactId>junit</artifactId>
      <version>4.12</version>
      <scope>compile</scope>
    </dependency>
三,引用bootstrap前端框架
1,在官网下载:https://v3.bootcss.com/
2,在项目webapp文件下创建静态文件夹static将下载好的bootstrap文件夹放入下面
3,在再static文件夹下创建js文件夹放入jquery文件
(推荐一个网站有多个版本的jquery文件提供下载)
js文件下载地址:http://www.jq22.com/jquery-info122
结构如下:
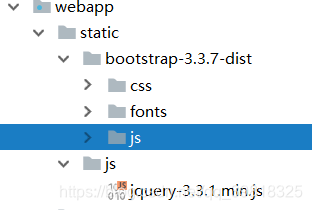
4,在jsp文件中引入必须的文件
    <!--引入jquery-->
    <script type="text/javascript" src="static/js/jquery-3.3.1.min.js"/>
    <!--引入样式-->
    <link href="static/bootstrap-3.3.7-dist/css/bootstrap.min.css"/>
    <script type="text/javascript" src="static/bootstrap-3.3.7-dist/js/bootstrap.min.js"/>
四,SSM整合关键配置文件
1,spring配置(放在资源文件夹resource下)
先创建数据库连接相关文件db.properties(放在资源文件夹resource下)

<beans xmlns="http://www.springframework.org/schema/beans"
       xmlns:context="http://www.springframework.org/schema/context"
       xmlns:xsi="http://www.w3.org/2001/XMLSchema-instance" xmlns:mvc="http://www.springframework.org/schema/mvc"
       xmlns:tx="http://www.springframework.org/schema/tx"
       xmlns:aop="http://www.springframework.org/schema/aop"
       xsi:schemaLocation="http://www.springframework.org/schema/beans
   http://www.springframework.org/schema/beans/spring-beans-3.0.xsd
   http://www.springframework.org/schema/context
   http://www.springframework.org/schema/context/spring-context-3.0.xsd
   http://www.springframework.org/schema/mvc
   http://www.springframework.org/schema/mvc/spring-mvc.xsd
   http://www.springframework.org/schema/tx
   http://www.springframework.org/schema/tx/spring-tx-3.0.xsd
   http://www.springframework.org/schema/aop
   http://www.springframework.org/schema/aop/spring-aop.xsd
">

    <context:component-scan base-package="cn.xf">
        <context:exclude-filter type="annotation" expression="org.springframework.stereotype.Controller"/>
    </context:component-scan>

    <!--spring的配置文件,这里主要配置和业务逻辑有关的-->
    <!--=====================数据源,事务控制,XXX=====================-->
    <context:property-placeholder location="classpath:dbconfig.properties"/>
    <bean id="pooledDataSource" class="com.mchange.v2.c3p0.ComboPooledDataSource">
        <property name="jdbcUrl" value="${jdbc.jdbcUrl}"/>
        <property name="driverClass" value="${jdbc.driverClass}"/>
        <property name="user" value="${jdbc.user}"/>
        <property name="password" value="${jdbc.password}"/>
    </bean>
    <!--==================================================================-->

    <!--===============================配置Mybatis的整合=======================-->
    <bean id="sqlSessionFactory" class="org.mybatis.spring.SqlSessionFactoryBean">
        <!--指定MyBatis全局配置文件的位置-->
        <property name="configLocation" value="classpath:mybatis-cinfig.xml"/>
        <property name="dataSource" ref="pooledDataSource"/>
        <!--指定mybatis,mapper文件的位置-->
        <property name="mapperLocations" value="classpath*:/mapper/*Mapper.xml"/>
    </bean>


    <!--配置扫描器,将mybatis接口的实现加入到ioc容器中-->
    <bean  class="org.mybatis.spring.mapper.MapperScannerConfigurer">
        <!--扫描所有的dao接口的实现,加入到ioc容器中-->
        <property name="basePackage" value="cn.xf.dao"/>
    </bean>
    <!--=========================================================================-->

    <!--配置一个可以执行批量操作的sqlSession-->
    <bean id="sqlSession" class="org.mybatis.spring.SqlSessionTemplate">
        <constructor-arg name="sqlSessionFactory" ref="sqlSessionFactory"/>
        <constructor-arg name="executorType" value="BATCH"></constructor-arg>
    </bean>
    <!--====================================事务控制的配置===============================-->
    <bean id="transactionManager" class="org.springframework.jdbc.datasource.DataSourceTransactionManager">
        <!--控制住数据源-->
        <property name="dataSource" ref="pooledDataSource"></property>
    </bean>
    <!--开启基于注解的事务,使用xml配置形式的事务-->
    <aop:config>
        <!--切入点表达式-->
        <aop:pointcut expression="execution(* cn.xf.service..*(..))" id="txPomnit"/>
        <!--配置事务增强-->
        <aop:advisor advice-ref="txAdvice" pointcut-ref="txPomnit"/>
    </aop:config>

    <!--配置事务增强,事务如何切入-->
    <tx:advice id="txAdvice" transaction-manager="transactionManager">

        <tx:attributes>
            <!--所有方法都是事务方法-->
            <tx:method name="*"></tx:method>
            <!--以get开头的所有方法-->
            <tx:method name="get*" read-only="true"/>
        </tx:attributes>
    </tx:advice>
    <!--==========================================================================-->

</beans>
2,springmvc配置(配置文件放在wenapp/WEB-INF下)
<beans xmlns="http://www.springframework.org/schema/beans"
       xmlns:context="http://www.springframework.org/schema/context"
       xmlns:xsi="http://www.w3.org/2001/XMLSchema-instance" xmlns:mvc="http://www.springframework.org/schema/mvc"
       xsi:schemaLocation="http://www.springframework.org/schema/beans
   http://www.springframework.org/schema/beans/spring-beans-3.0.xsd
   http://www.springframework.org/schema/context
   http://www.springframework.org/schema/context/spring-context-3.0.xsd
   http://www.springframework.org/schema/mvc
   http://www.springframework.org/schema/mvc/spring-mvc.xsd">

    <!--
    以下是有关HelloWeb-servlet.xml文件的重点说明:
    [servlet-name]-servlet.xml文件将用于创建定义的bean,
    它会覆盖在全局范围中使用相同名称定义的任何bean的定义。
    <context:component-scan ...>标签将用于激活Spring MVC注释扫描功能,
    允许使用@Controller和@RequestMapping等注释。InternalResourceViewResolver将定义用于解析视图名称的规则。
    根据上面定义的规则,hello的逻辑视图将委托给位于/WEB-INF/jsp/hello.jsp这个视图来实现。
    -->
    <!--springmvc的配置文件,包含网站跳转逻辑的控制,配置-->
    <context:component-scan base-package="cn.xf" use-default-filters="false">
        <!--只扫描控制器-->
        <context:include-filter type="annotation" expression="org.springframework.stereotype.Controller"/>
    </context:component-scan>

    <!--配置视图解析器,方便页面返回-->
    <bean class="org.springframework.web.servlet.view.InternalResourceViewResolver">
        <property name="prefix" value="/WEB-INF/views/"/>
        <property name="suffix" value=".jsp"/>
    </bean>
    <!--两个标准配置-->
    <!--将springmvc不能处理的请求交给tomcat-->
    <mvc:default-servlet-handler/>
    <!--能支持springmvc的高级的一些功能,jsr303校验,快捷的ajax..映射动态请求-->
    <mvc:annotation-driven />

</beans>
3,配置mybatis(在sources资源文件夹下创建)
<?xml version="1.0" encoding="UTF-8"?>
        <!DOCTYPE configuration
                PUBLIC "-//mybatis.org//DTD Config 3.0//EN"
                "http://mybatis.org/dtd/mybatis-3-config.dtd">
<configuration>
    <settings>
        <setting name="mapUnderscoreToCamelCase" value="true"/>
    </settings>
    <typeAliases>
        <package name="cn.xf.bean"/>
    </typeAliases>
</configuration>
4,配置web.xml文件
<!--1 启动spring容器-->
  <context-param>
    <param-name>contextConfigLocation</param-name>
    <param-value>classpath:applicationContext.xml</param-value>
  </context-param>

  <listener>
    <listener-class>org.springframework.web.context.ContextLoaderListener</listener-class>
  </listener>

  <!--2, Springmvc的前端控制器,拦截所有请求-->
  <servlet>
    <servlet-name>dispatcherServlet</servlet-name>
    <servlet-class>org.springframework.web.servlet.DispatcherServlet</servlet-class>
    <load-on-startup>1</load-on-startup>
  </servlet>

  <servlet-mapping>
    <servlet-name>dispatcherServlet</servlet-name>
    <url-pattern>/</url-pattern>
  </servlet-mapping>

  <!--3 字符过滤器-->
  <filter>
    <filter-name>CharacterEncodingFilter</filter-name>
    <filter-class>org.springframework.web.filter.CharacterEncodingFilter</filter-class>
    <init-param>
      <param-name>encoding</param-name>
      <param-value>utf-8</param-value>
    </init-param>
    <init-param>
      <param-name>forceRequestEncoding</param-name>
      <param-value>true</param-value>
    </init-param>
    <init-param>
      <param-name>forceResponseEncoding</param-name>
      <param-value>true</param-value>
    </init-param>
  </filter>
  <filter-mapping>
    <filter-name>CharacterEncodingFilter</filter-name>
    <url-pattern>/*</url-pattern>
  </filter-mapping>

  <!--4 使用Rest风格的url,将页面普通的post请求转为指定的delete或者put-->
  <filter>
    <filter-name>HiddenHttpMethodFilter</filter-name>
    <filter-class>org.springframework.web.filter.HiddenHttpMethodFilter</filter-class>
  </filter>
  <filter-mapping>
    <filter-name>HiddenHttpMethodFilter</filter-name>
    <url-pattern>/*</url-pattern>
  </filter-mapping>
五,使用mybatis逆向工程
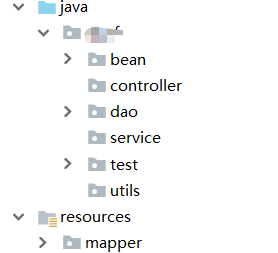
1,在项目更目录下创建配置文件配置数据库中的表和项目映射
注:现在项目下创建相应的文件夹包
如下:
<?xml version="1.0" encoding="UTF-8"?>
<!DOCTYPE generatorConfiguration
        PUBLIC "-//mybatis.org//DTD MyBatis Generator Configuration 1.0//EN"
        "http://mybatis.org/dtd/mybatis-generator-config_1_0.dtd">

<generatorConfiguration>


    <context id="DB2Tables" targetRuntime="MyBatis3">

        <!--设置不自动生成注释-->
        <commentGenerator>
            <property name ="suppressAllComments" value ="true"/>
        </commentGenerator>
        <!--配置数据库连接-->
        <jdbcConnection driverClass="com.mysql.jdbc.Driver"
                        connectionURL="数据库连接地址"
                        userId="数据库用户名"
                        password="密码">
        </jdbcConnection>

        <javaTypeResolver >
            <property name="forceBigDecimals" value="false" />
        </javaTypeResolver>
        <!--指定javaBean生成位置-->
        <javaModelGenerator
                targetPackage="cn.xf.bean"
                targetProject=".\src\main\java">
            <property name="enableSubPackages" value="true" />
            <property name="trimStrings" value="true" />
        </javaModelGenerator>
        <!--指定sql映射文件生产的位置-->
        <sqlMapGenerator
                targetPackage="mapper"
                targetProject=".\src\main\resources">
            <property name="enableSubPackages" value="true" />
        </sqlMapGenerator>
        <!--指定dao接口生成的位置,mapper接口-->
        <javaClientGenerator type="XMLMAPPER"
                             targetPackage="cn.xf.dao"
                             targetProject=".\src\main\java">
            <property name="enableSubPackages" value="true" />
        </javaClientGenerator>
        <!--table指定每个表的生成策略-->
        <table tableName="数据库中的表名" domainObjectName="映射到项目中的实体名"></table>
        <table tableName="数据库中的表名" domainObjectName="映射到项目中的实体名"></table>

    </context>
</generatorConfiguration>
2,运行mybatis逆向工程
在包中创建一个java文件
package cn.xf.test;

import org.mybatis.generator.api.MyBatisGenerator;
import org.mybatis.generator.config.Configuration;
import org.mybatis.generator.config.xml.ConfigurationParser;
import org.mybatis.generator.exception.InvalidConfigurationException;
import org.mybatis.generator.exception.XMLParserException;
import org.mybatis.generator.internal.DefaultShellCallback;

import java.io.File;
import java.io.IOException;
import java.sql.SQLException;
import java.util.ArrayList;
import java.util.List;

public class MBGTest {
    public static void main(String[] args) throws IOException, XMLParserException, InvalidConfigurationException, SQLException, InterruptedException {
        List<String> warnings = new ArrayList<String>();
        boolean overwrite = true;
        File configFile = new File("创建mybatis逆向工程的配置文件");
        ConfigurationParser cp = new ConfigurationParser(warnings);
        Configuration config = cp.parseConfiguration(configFile);
        DefaultShellCallback callback = new DefaultShellCallback(overwrite);
        MyBatisGenerator myBatisGenerator = new MyBatisGenerator(config, callback, warnings);
        myBatisGenerator.generate(null);
    }
}
3,点击运行该类,则会在相应的文件夹下生成文件
注:想了解更多mybatis配置和逆向工程的,请移步到mybatis官网,有更详细的文档说明
网址:http://www.mybatis.org/mybatis-3/
就这样ssm的基本配置就完成啦......
如有什么不太清楚的和建议,请多多留言,大家互相交流学习啊。。。


 1284
1284

 被折叠的 条评论
为什么被折叠?
被折叠的 条评论
为什么被折叠?
 到【灌水乐园】发言


