


测试环境Nginx安装及其配置
一:Nginx安装
需要先装pcre, zlib,前者为了重写rewrite,后者为了gzip压缩。
安装前的准备:
1) 准备 pcre-8.12.tar.gz。该文件为正则表达式库。让nginx支持rewrite需要安装这个库。
2)准备 nginx-1.5.0.tar.gz。该文件为nginx的linux版本安装文件
3)确保进行了安装了linux常用必备支持库
Linux中必备常用支持库的安装(centos6.5)
在CentOS安装软件的时候,可能缺少一部分支持库,而报错。这里首先安装系统常用的支持库。那么在安装的时候就会减少很多的错误的出现。
# yum install -y gcc gdb strace gcc-c++ autoconf libjpeglibjpeg-devel libpng libpng-devel freetype freetype-devel libxml2 libxml2-develzlib zlib-devel glibc glibc-devel glib2 glib2-devel bzip2 bzip2-devel ncursesncurses-devel curl curl-devel e2fsprogs patch e2fsprogs-devel krb5-devel libidnlibidn-devel openldap-devel nss_ldap openldap-clients openldap-serverslibevent-devel libevent uuid-devel uuid mysql-devel
正则表达式库安装
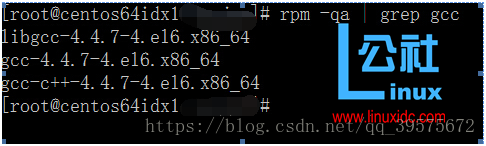
1. 确保进行了安装了linux常用必备支持库。检查是否安装了g++、gcc。rpm -qa | grep gcc 之后需要出现3个包如下图所示。如果没有出现。需要安装g++、gcc。
# yum install gcc-c++
2. 
3. 上传pcre-8.02.tar.gz, nginx-1.5.0.tar.gz 到 /usr/local/目录下
(如果没有pcre-8.02.tar.gz,就进入到/usr/local目录下
cd /usr/local/
wget http://exim.mirror.fr/pcre/pcre-8.02.tar.gz)
tar -zxvfpcre-8.02.tar.gz
进入到解压的目录
cd pcre-8.02
配置
./configure
编译
Make
安装
make install
或者(./configure && make&& make install)
4:安装zlib库
cd /usr/local
wget http://zlib.net/zlib-1.2.8.tar.gz(可能不能用)
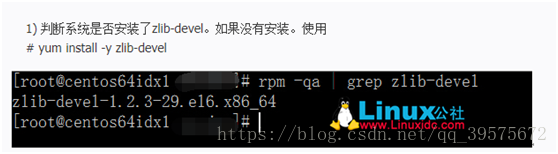
(就是用yum install –y zlibzlib-devel,
rpm –qa | grep zlib;查看zlib版本,如果存在就不用下载了)
出现过一个问题:写在最后了
tar -zxvfzlib-1.2.8.tar.gz cd zlib-1.2.8
./configure
Make
Make install
5:安装ssl
cd /usr/local/
wget http://www.openssl.org/source/openssl-1.0.1c.tar.gz
tar -zxvf openssl-1.0.1c.tar.gz
./config
make
make install
6、安装nginx
Nginx 一般有两个版本,分别是稳定版和开发版,您可以根据您的目的来选择这两个版本的其中一个,下面是把 Nginx 安装到/usr/local/nginx 目录下的详细步骤:
cd /usr/local/
wget http://nginx.org/download/nginx-1.2.8.tar.gz
tar -zxvf nginx-1.2.8.tar.gz
cd nginx-1.2.8
./configure --prefix=/usr/local/nginx
make
make install
--with-pcre=/usr/src/pcre-8.21 指的是pcre-8.21 的源码路径。
--with-zlib=/usr/src/zlib-1.2.7 指的是zlib-1.2.7 的源码路径。
安装结束后:cd /usr/local/nginx/sbin
./nginx
检查是否启动成功:
netstat -ano|grep 80 有结果输入说明启动成功
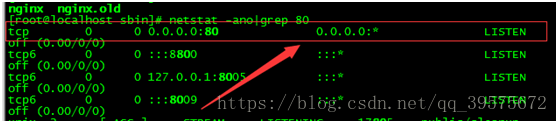
说明已经启动成功。
修改配置文件:
Nginx运行用户和组:
Groupaddwww 添加www组
Useradd–g www www –s /bin/false 创建nginx运行账户www并加入到www组,不允许www用户直接登录
生成密码可以使用htpasswd, 或者使用openssl。下面以htpasswd为例
1、安装htpasswd工具
这里直接yum进行安装,你也可以根据需要选择编译安装:
yum -y install httpd-tools
2、设置用户名和密码,并把用户名、密码保存到指定文件中:
[root@uuu ~]# htpasswd -c /usr/local/nginx/passwd www New password: Re-type new password: Adding password for user www
我们可以看下最后生成的密码文件的内容: [root@uuu ~]# cat /usr/local/nginx/passwd www:$apr1$DhlW8hIu$BXyCQ7hiEos1DiqgwEYcZ1
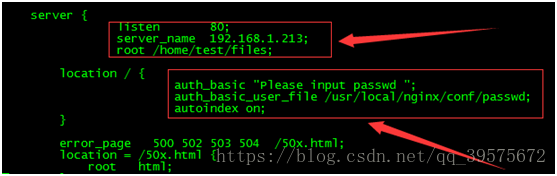
3、修改nginx配置文件 找到nginx配置文件,我们要对整个站点开启验证,所以在配置文件中修改如下(/usr/local/nginx/conf/nginx.conf)
然后重启nginx [root@uuu sbin]# ./nginx -t nginx: the configuration file /usr/local/src/nginx/conf/nginx.conf syntax is ok nginx: configuration file /usr/local/src/nginx/conf/nginx.conf test is successful [root@uuu sbin]# ./nginx -s reload
以上都配置无误后,你重新访问你的站点,如果出现需要身份验证的弹窗就说明修改成功了 |

报这个错误,说明权限不够,要查看该文件权限,然后给文件施加777权限。

如果报这个错误,就改成下面的东西。

gzip: stdin: not in gzip format tar: Child returned status 1tar: Error is not recoverable: exiting now
gzip 报错
参考:https://www.cnblogs.com/llxx07/p/6409384.html
参考:https://www.linuxidc.com/Linux/2016-08/134110.htm


 279
279

 被折叠的 条评论
为什么被折叠?
被折叠的 条评论
为什么被折叠?
 到【灌水乐园】发言


