


 本文详细解析了Spring框架在Web开发中,未使用注解和使用注解两种情况下,如何进行web-service-dao的配置流程。从bean.xml配置文件的调整,到各层(DAO、Service、Action)的编码实践,再到测试类的编写,全面覆盖了传统配置和注解配置的方法,对比了两者之间的差异。
2019年6月10号,又是无聊的一天!
Spring 未使用注解时的web-service-dao配置流程讲解
(1)未使用注解,即需要把bean.xml里的注解关闭,如下:
    <!-- 开启注解-->
   <!-- <context:annotation-config/>-->
    <!-- 注解的位置-->
    <!--<context:component-scan base-package="com.gyf"/>-->
bean.xml具体代码如下:
<?xml version="1.0" encoding="UTF-8"?>
<!--xmlns xml namespace:xml命名空间-->
<beans xmlns="http://www.springframework.org/schema/beans"
       xmlns:xsi="http://www.w3.org/2001/XMLSchema-instance"
       xmlns:p ="http://www.springframework.org/schema/p"
       xmlns:context ="http://www.springframework.org/schema/context"
       xsi:schemaLocation="http://www.springframework.org/schema/beans
                           http://www.springframework.org/schema/beans/spring-beans.xsd
                           http://www.springframework.org/schema/context
                           http://www.springframework.org/schema/context/spring-context.xsd">

    <!-- 开启注解-->
   <!-- <context:annotation-config/>-->
    <!-- 注解的位置-->
    <!--<context:component-scan base-package="com.gyf"/>-->

    <!-- 1.配置dao-->
    <bean id="userDao" class="com.njtech.dao.UserDaoImpl"></bean>

    <!-- 2.配置service -->
    <!--(1)因为我定义的User里面是需要Dao的,所以理论上需要new一个dao,但是我在UserServiceImpl中已经设置了set/get方法
        所以,我需要在bean里面设置property
        (2)如果这里没有property那么,将会报空指针异常
    -->
    <bean id="userService" class="com.njtech.service.Impl.UserServiceImpl">
        <property name="userDao" ref="userDao"></property>
    </bean>

    <!--3.配置action-->
    <!--同上-->

    <bean id="userAction" class="com.njtech.web.action.UserAction">
        <property name="userService" ref="userService"></property>
    </bean>
</beans>
(2)未使用注解时的UserServiceImpl,userDao是由set/get方法注入。
package com.njtech.service.Impl;

import com.njtech.dao.UserDao;
import com.njtech.dao.UserDaoImpl;
import com.njtech.model.User;
import com.njtech.service.UserService;
import org.springframework.beans.factory.annotation.Autowired;

/**
 * 〈一句话功能简述〉:UserService 的实现类
 * @author njtech
 * @create 2019/6/8
 * @since 1.0.0
 */
public class UserServiceImpl implements UserService {

    //@Autowired //spring会自动注入userDao赋值
    private UserDao userDao;

    @Override
    public void add(User user) {
        System.out.println("service 添加用户:" + user);
        //调用dao
        userDao.add(user);
    }

    private String name;

    public String getName() {
        return name;
    }

    public void setName(String name) {
        this.name = name;
    }

    @Override
    public void add() {
        System.out.println("创建用户...." + name);
    }


    public UserServiceImpl() {
        System.out.println("UserServiceImpl()调用了");
    }

    public UserDao getUserDao() {
        return userDao;
    }

    public void setUserDao(UserDao userDao) {
        this.userDao = userDao;
    }
}
(3)编码UserAction,也是不采用注解方式。userService是由set/get方法注入。
package com.njtech.web.action;

import com.njtech.model.User;
import com.njtech.service.Impl.UserServiceImpl;
import com.njtech.service.UserService;
import com.njtech.model.User;
import org.springframework.beans.factory.annotation.Autowired;
import org.springframework.beans.factory.annotation.Qualifier;
import org.springframework.stereotype.Controller;

@Controller
public class UserAction{

    //@Autowired//spring自动注入userService赋值
    @Qualifier("myUserService")//根据指定的id注入属性
    private UserService userService;

    public UserService getUserService() {
        return userService;
    }

    public void setUserService(UserService userService) {
        this.userService = userService;
    }

    public void save(User user){
        System.out.println("action save方法 ");
        userService.add(user);
    }

}
(4)测试类,test1()是没有action的情况下,test2()是有action的情况下
package com.njtech.test;

import com.njtech.model.User;
import com.njtech.service.UserService;
import com.njtech.web.action.UserAction;
import org.junit.Test;
import org.springframework.context.ApplicationContext;
import org.springframework.context.support.ClassPathXmlApplicationContext;

public class Day02Test5 {


    @Test
    public void test1() throws Exception {

        //注解的使用
        //web开发流程 action -> service -> dao

        ApplicationContext context = new ClassPathXmlApplicationContext("beans11.xml");
        //拿到service
        UserService userService = (UserService) context.getBean("userService");

        //添加用户
        User user = new User();
        user.setUsername("njtech");
        user.setPassword("1234");
        userService.add(user);
    }

    @Test
    public void test2() throws Exception {

        //注解的使用
        //web开发流程 action -> service -> dao

        ApplicationContext context = new ClassPathXmlApplicationContext("beans11.xml");

        //拿到action
        UserAction userAction = (UserAction) context.getBean("userAction");

        //添加用户
        User user = new User();
        user.setUsername("njtech");
        user.setPassword("1234");
        userAction.save(user);
    }
}
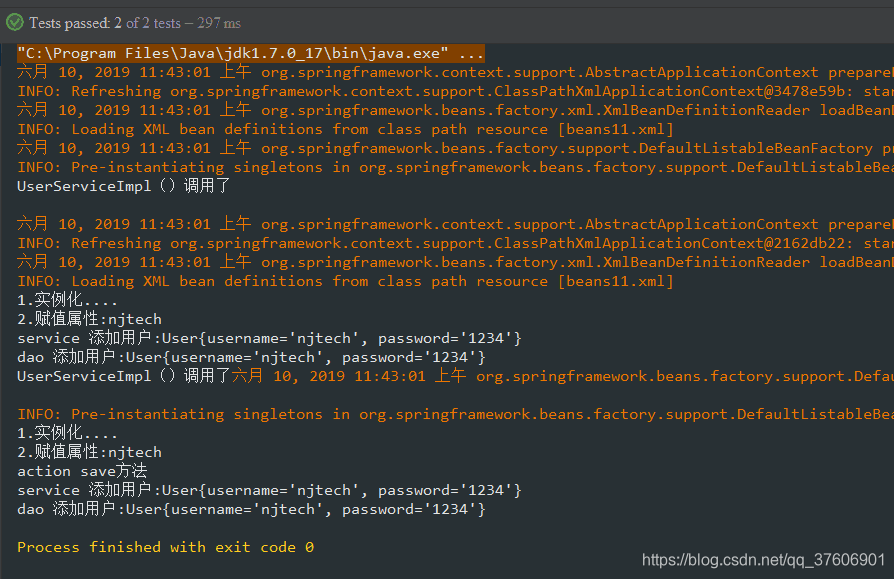
结果截图:
总结:
(1)action、service、dao三层的关系是:dao注入到service层,service注入到action层。
(2)如果采用@Autowired注解的话那么就不需要set/get方法进行注入,而且需要在bean.xml中开启注解的功能
(3)一般开发流程是先写dao层,再写service层,最后写servlet层
采用注解的方式:
(1)bean.xml
<?xml version="1.0" encoding="UTF-8"?>
<!--xmlns xml namespace:xml命名空间-->
<beans xmlns="http://www.springframework.org/schema/beans"
       xmlns:xsi="http://www.w3.org/2001/XMLSchema-instance"
       xmlns:p ="http://www.springframework.org/schema/p"
       xmlns:context ="http://www.springframework.org/schema/context"
       xsi:schemaLocation="http://www.springframework.org/schema/beans
                           http://www.springframework.org/schema/beans/spring-beans.xsd
                           http://www.springframework.org/schema/context
                           http://www.springframework.org/schema/context/spring-context.xsd">

    <!-- 开启注解-->
    <context:annotation-config/>
    <!-- 注解的位置-->
    <context:component-scan base-package="com.njtech"/>

</beans>
(2)在UserDaoImpl上面添加注解@Repository,本质上就是为UserDaoImpl配置一个bean
package com.njtech.dao;
import com.njtech.model.User;
import org.springframework.stereotype.Repository;
@Repository
public class UserDaoImpl implements UserDao{
    @Override
    public void add(User user) {
        System.out.println("dao 添加用户:" + user);
    }
}
(3)在UserServiceImpl里面里面去掉set/get方法,然后添加@Autowired注解在属性上。UserAction同理。
    @Autowired //spring会自动注入userDao赋值
    private UserDao userDao;
整个代码为:
package com.njtech.service.Impl;

import com.njtech.dao.UserDao;
import com.njtech.dao.UserDaoImpl;
import com.njtech.model.User;
import com.njtech.service.UserService;
import org.springframework.beans.factory.annotation.Autowired;

/**
 * 〈一句话功能简述〉:UserService 的实现类
 * @author njtech
 * @create 2019/6/8
 * @since 1.0.0
 */

 @Service
public class UserServiceImpl implements UserService {

    @Autowired //spring会自动注入userDao赋值
    private UserDao userDao;

    @Override
    public void add(User user) {
        System.out.println("service 添加用户:" + user);
        //调用dao
        userDao.add(user);
    }

    private String name;

    public String getName() {
        return name;
    }

    public void setName(String name) {
        this.name = name;
    }

    @Override
    public void add() {
        System.out.println("创建用户...." + name);
    }


    public UserServiceImpl() {
        System.out.println("UserServiceImpl()调用了");
    }

//    public UserDao getUserDao() {
//        return userDao;
//    }
//
//    public void setUserDao(UserDao userDao) {
//        this.userDao = userDao;
//    }
}
(4)UserAction
package com.njtech.web.action;

import com.njtech.model.User;
import com.njtech.service.Impl.UserServiceImpl;
import com.njtech.service.UserService;
import com.njtech.model.User;
import org.springframework.beans.factory.annotation.Autowired;
import org.springframework.beans.factory.annotation.Qualifier;
import org.springframework.stereotype.Controller;

@Controller
public class UserAction{

    @Autowired//spring自动注入userService赋值
    private UserService userService;

//    public UserService getUserService() {
//        return userService;
//    }
//
//    public void setUserService(UserService userService) {
//        this.userService = userService;
//    }

    public void save(User user){
        System.out.println("action save方法 ");
        userService.add(user);
    }

}
为UserService属性添加@Autoware注解、以及UserAction添加@Controller注解
(5.)测试类
package com.njtech.test;

import com.njtech.model.User;
import com.njtech.service.UserService;
import com.njtech.web.action.UserAction;
import org.junit.Test;
import org.springframework.context.ApplicationContext;
import org.springframework.context.support.ClassPathXmlApplicationContext;

public class Day02Test6 {

    @Test
    public void test1() throws Exception {

        //注解的使用
        //web开发流程 action -> service -> dao
        ApplicationContext context = new ClassPathXmlApplicationContext("beans12.xml");
        //获取action
        UserAction userAction =  context.getBean(UserAction.class);

        //添加用户
        User user = new User();
        user.setUsername("njtech");
        user.setPassword("1234");
        userAction.save(user);
    }
}
其中
       ApplicationContext context = new ClassPathXmlApplicationContext("beans12.xml");
        //获取action
        UserAction userAction =  context.getBean(UserAction.class);
可以写成:
        ApplicationContext context = new ClassPathXmlApplicationContext("beans11.xml");
        //拿到action
        UserAction userAction = (UserAction) context.getBean("userAction");
不过需要进行强制类型转换。


 480
480

 被折叠的 条评论
为什么被折叠?
被折叠的 条评论
为什么被折叠?
 到【灌水乐园】发言


