


CheckBox Navigation 13
Contributing to Snappy Testing with Checkbox
1. Introduction
为了支持运行snappyUbuntuCore的设备的发布,Canonical生产了专门针对这些系统的复选框版本。
本文档旨在为读者提供足够的信息,以提供新的测试,或修改现有的测试,目的是尽可能扩大覆盖范围
-
Brief anatomy of a Checkbox test tool
- 复选框测试工具由以下三类组件组成:
- 核心测试框架(称为Plainbox)
- UI和启动器
- “提供程序”中包含的测试定义和相关数据
要添加测试,只需了解构成其测试工具的提供者的详细信息。本文档的其余部分将侧重于复选框提供程序以及如何处理它们。
- 复选框测试工具由以下三类组件组成:
2. Snappy Provider
包含snappy Ubuntu核心系统的大多数测试的提供者称为平面盒-提供者-snappy,可以在这个启动板项目中找到:https://launchpad.net/plainbox-provider-snappy
所有用于复选框核心和测试的代码也都托管在Launchpad上。要检索提供程序的源文件,请参阅“代码”子页上的说明:
https://code.launchpad.net/plainbox-provider-snappy
-
1. Directory structure of the Provider
使用GIT克隆提供者,如上文所述,将产生一个类似于以下目录的目录(在编写本报告时):
checkbox@xenial:~$ ls -1 plainbox-provider-snappy/
plainbox-provider-snappy
plainbox-provider-snappy-resource
列出的第一个目录是保存测试的提供者,第二个目录是支持提供者,它在测试运行开始时收集有关系统的信息。让我们更详细地查看测试提供程序
checkbox@xenial:~$ ls -1 plainbox-provider-snappy/plainbox-provider-snappy
bin
data
manage.py
po
src
units
| bin | Executable scripts that can be called as part of the test (refer to command field below) |
| data | Data to support the running of tests e.g. configuration files |
| manage.py | Provider management script. Must be present in each provider to specify unique identifiers. |
| po | Translation support, files here are used to provide translations for tests fields into other languages. |
| src | Source files and accompanying build scripts e.g. C source code and a Makefile, that are compiled into binaries and packaged with the provider for use as part of the test (refer to command field below) |
| units | “Job” definition files |
-
2, Jobs
作业是对单个测试的复选框说法。它们定义在语法松散地基于RFC 822的文本文件中。下面是一个来自plain - box provider-snappy的例子:
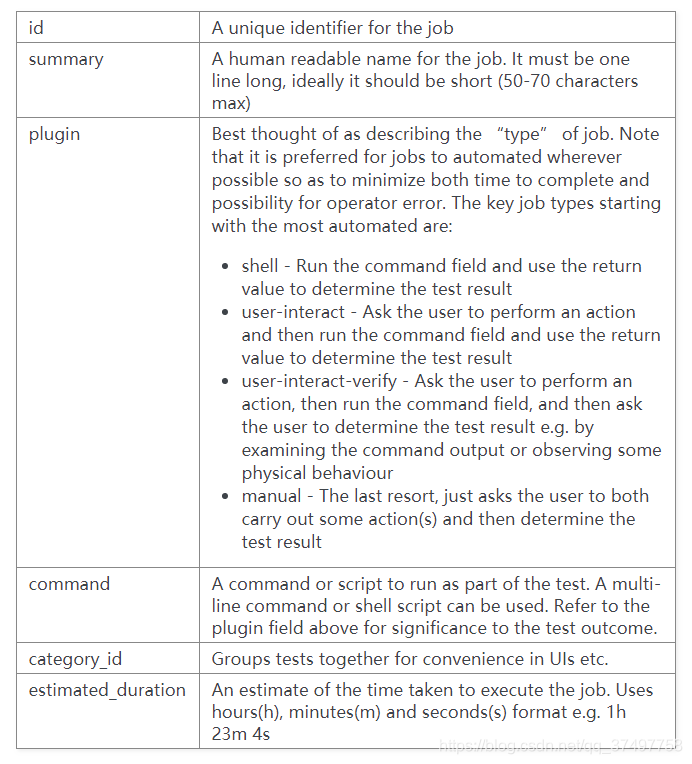
id: cpu/offlining_test
_summary:
 Test offlining of each CPU core
_description:
 Attempts to offline each core in a multicore system.
plugin: shell
command: cpu_offlining
category_id: cpu
estimated_duration: 1s
user: root
这个测试示例中的字段概述:
Further reading: http://checkbox.readthedocs.io/en/latest/units/job.html -
3. Test plans
测试计划是描述应该一起执行的作业定义序列的工具。
通过列出作业定义的标识符(参见上面的id:字段)或包含与其标识符匹配的正则表达式来选择作业定义以包含在测试计划中。下面是一个来自plain - box-provider-snappy的测试计划示例,它被缩写为:
id: snappy-generic
unit: test plan
_name: QA tests for Snappy Ubuntu Core devices
estimated_duration: 1h
include:
 wifi/.*
 audio/.*
| id | A unique identifier for the test plan |
| data | Data to support the running of tests e.g. configuration files |
| manage.py | Provider management script. Must be present in each provider to specify unique identifiers. |
| po | Translation support, files here are used to provide translations for tests fields into other languages. |
| src | Source files and accompanying build scripts e.g. C source code and a Makefile, that are compiled into binaries and packaged with the provider for use as part of the test (refer to command field below) |
| units | “Job” definition files |
Further reading: http://checkbox.readthedocs.io/en/latest/units/test-plan.html
3. Creating a test in five easy steps
-
1. Configure your development environment
开发复选框测试最好在Ubuntu桌面系统上进行。
你需要一台专用的PC或者运行Ubuntu Desktop 16.04 (Xenial Xerus)的虚拟机来访问支持为snappy Ubuntu Core构建软件包的工具。当你的系统启动并运行时,请确保安装了以下软件包:
$ sudo apt install snapcraft git:为了简化开发,删除这些预装供应商:
$ sudo apt remove plainbox-provider-checkbox plainbox-provider-resource-generic You should now have all the tools required to modify and build a provider. -
2. Get the source
Clone the providers:
$ git clone https://git.launchpad.net/plainbox-provider-snappy克隆的snapcraft包装分支:
$ git clone https://git.launchpad.net/~checkbox-dev/plainbox-provider-snappy/+git/packaging进一步的说明将假定这些文件被复制到用户的主目录中。
-
3. Make your changes
units文件夹包含许多以类别命名的文件。这不是必需的,但是在这里使用它可以使查找测试更容易一些。创建一个新文件或编辑一个现有的类别。
$ git checkout -b <NEW-BRANCH>
$ touch ~/plainbox-provider-snappy/plainbox-provider-snappy/units/<category>.pxu
$ editor ~/plainbox-provider-snappy/plainbox-provider-snappy/units/<category>.pxu
如果添加一个新的测试,请确保将测试id添加到您希望该测试成为其中一部分的任何测试计划的“includes”部分。
-
4. Check your test is valid
使用provider管理脚本检查修改后的provider是否仍然有效:
$ cd ~/plainbox-provider-snappy/plainbox-provider-snappy-resource
$ ./manage.py develop
$ cd ~/plainbox-provider-snappy/plainbox-provider-snappy
$ ./manage.py validate
验证工具将提供建议以指出您的提供者没有遵循最佳实践的地方,警告以指出可能出现运行时问题的地方,以及错误以指出必须修复的事情,以便通过复选框正确地解析和运行提供者。
验证结果在最后一行给出:The provider seems to be valid -
5. Build the Checkbox snap package
用于构建新版本的复选框工具单元包的工具可以在打包分支的克隆中找到。
这使用的snapcraft工具是由snapcraft控制的。
yaml文件。
要用本地更改构建一个快照,请查看该文件中提供程序部分的源部分:$ editor ~/packaging/snapcraft.yaml ... plainbox-provider-snappy: after: [checkbox] ...修改这些,使它们指向你的本地提供商:[a][b]:
...
    plainbox-provider-snappy:
        source: <path-to-local-provider>
        source-type: local
        after: [checkbox]
...
然后你可以构建snap包:
$ snapcraft clean ... $ snapcraft ... Snapped checkbox-snappy_0.10~s16_amd64.snap -
6. Run the tests
在Ubuntu核心上运行复选框,它描述了安装和运行snap的过程。
-
7. Submit your modifications to the project
要推送代码,报告错误等,你需要一个启动平台帐户:https://login.launchpad.net/
一旦你有了账户,你就可以将代码推送到发射台。
然后,您可以请求合并到主存储库中。
要获得代码到Launchpad遵循以下步骤:$ git add <file> $ git commit -m “Adds a test for...” $ git remote add my-repo git+ssh://git.launchpad.net/~<USERNAME>/plainbox-provider-snappy $ git push my-repo <NEW-BRANCH>如果您导航到launchpad上的plainbox-provider-snappy项目,您现在应该会看到“Other repositories”一节下列出了您的存储库。
在这里你可以看到我的(jocave)个人存储库列在顶部: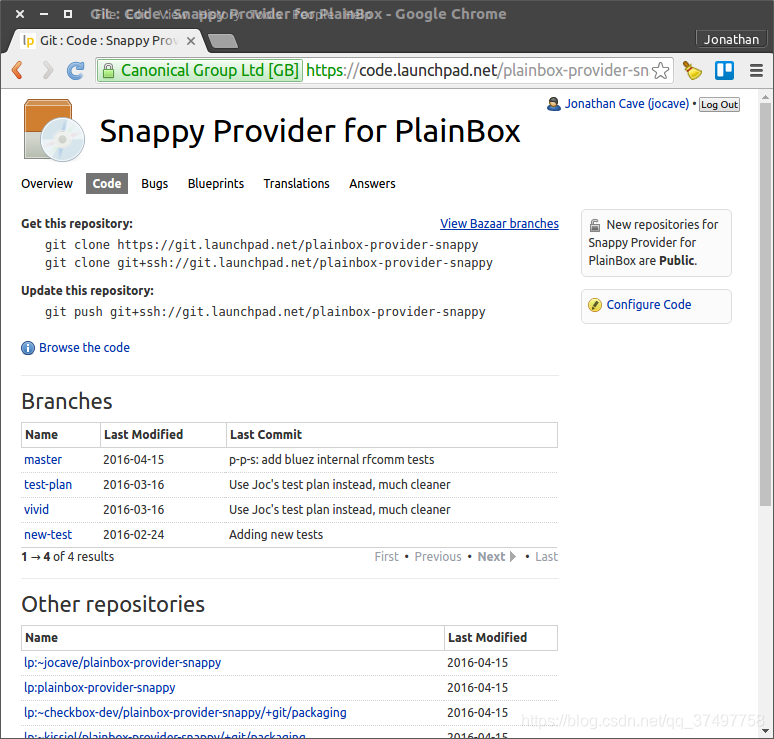
点击你的存储库,你会看到一个列出所有分支的概览页面: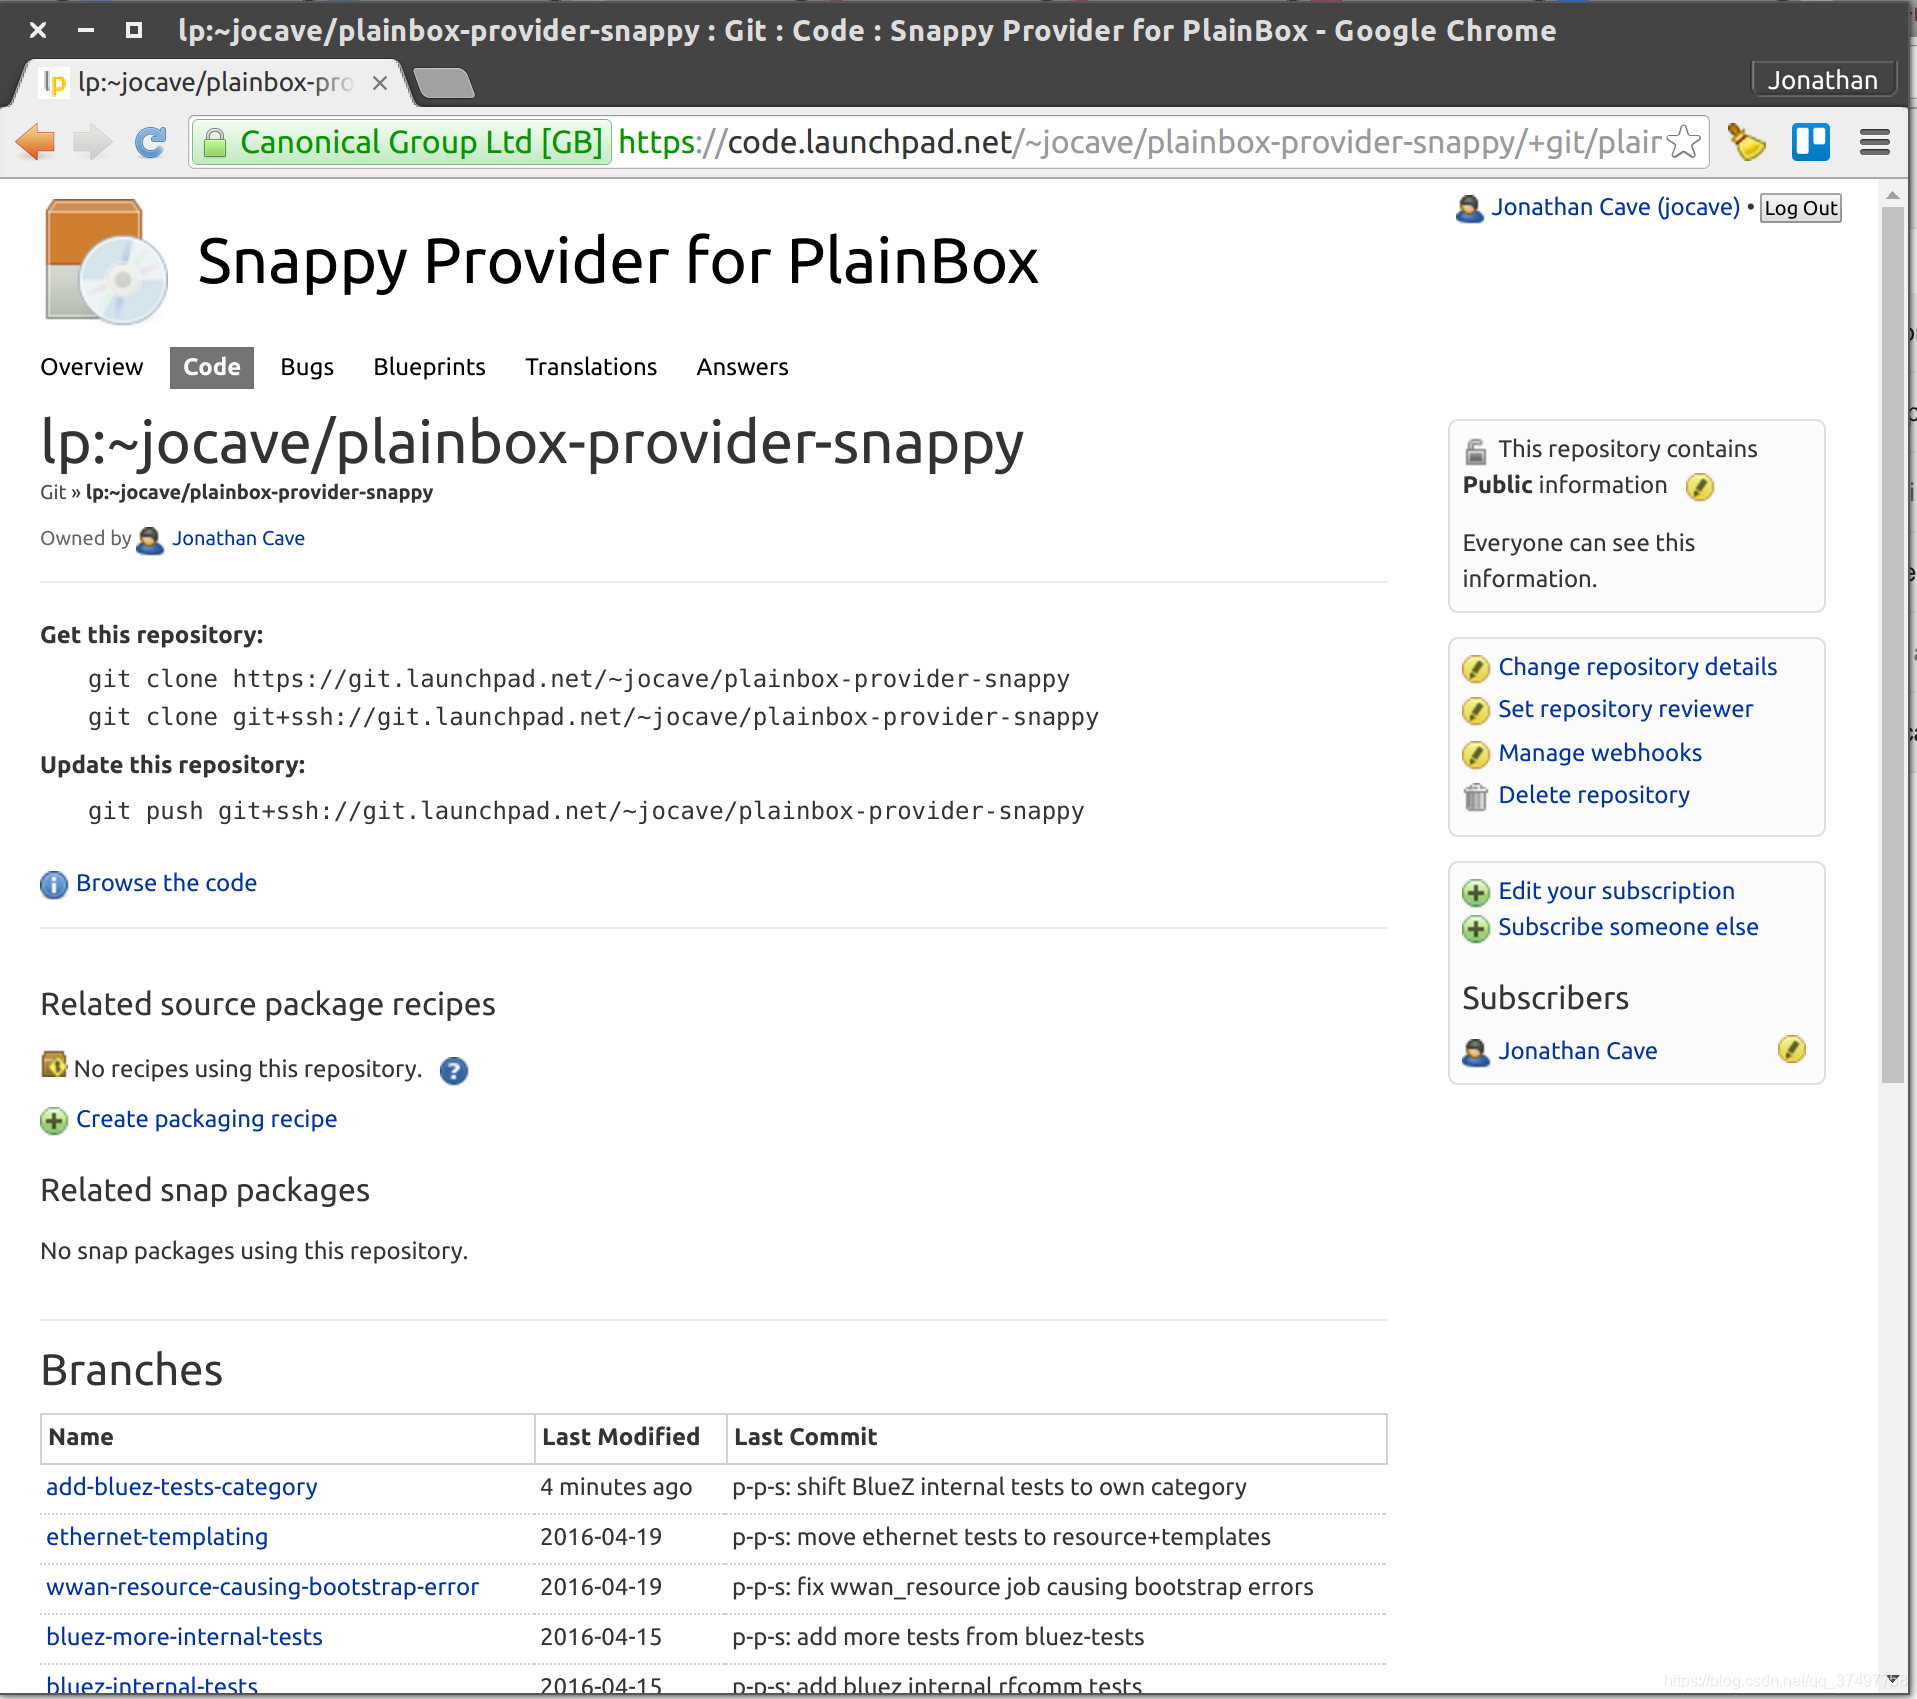
点击你上传的分支,会有一个“提议合并”的选项。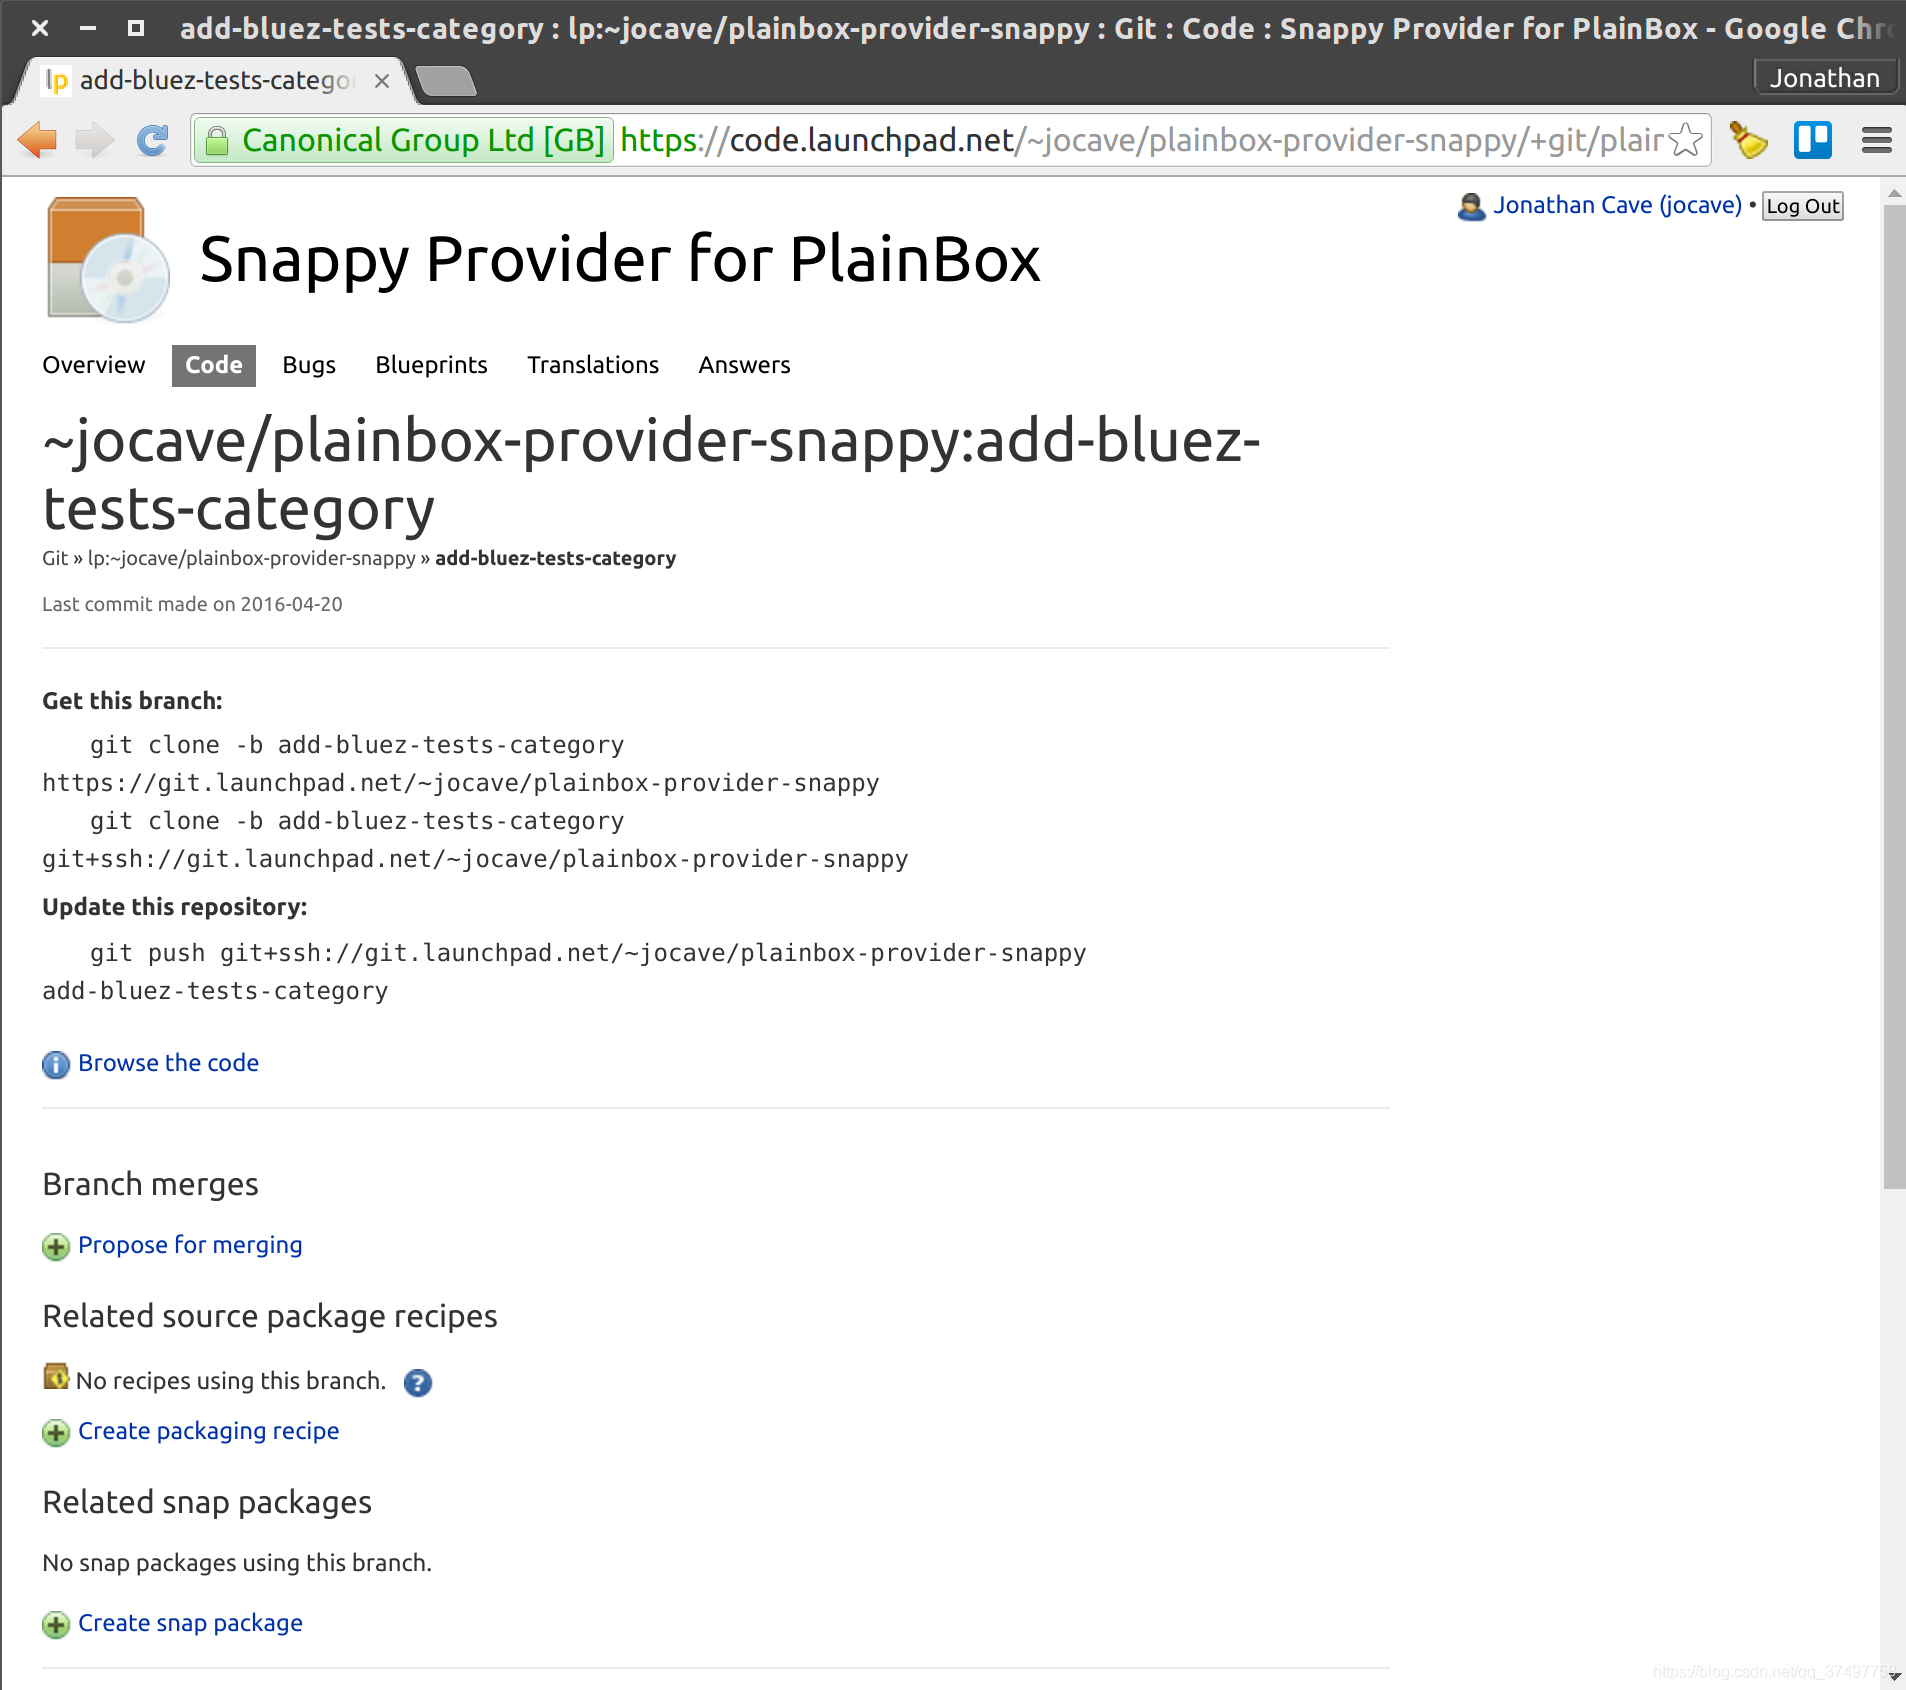
选择此选项,填写如下表格: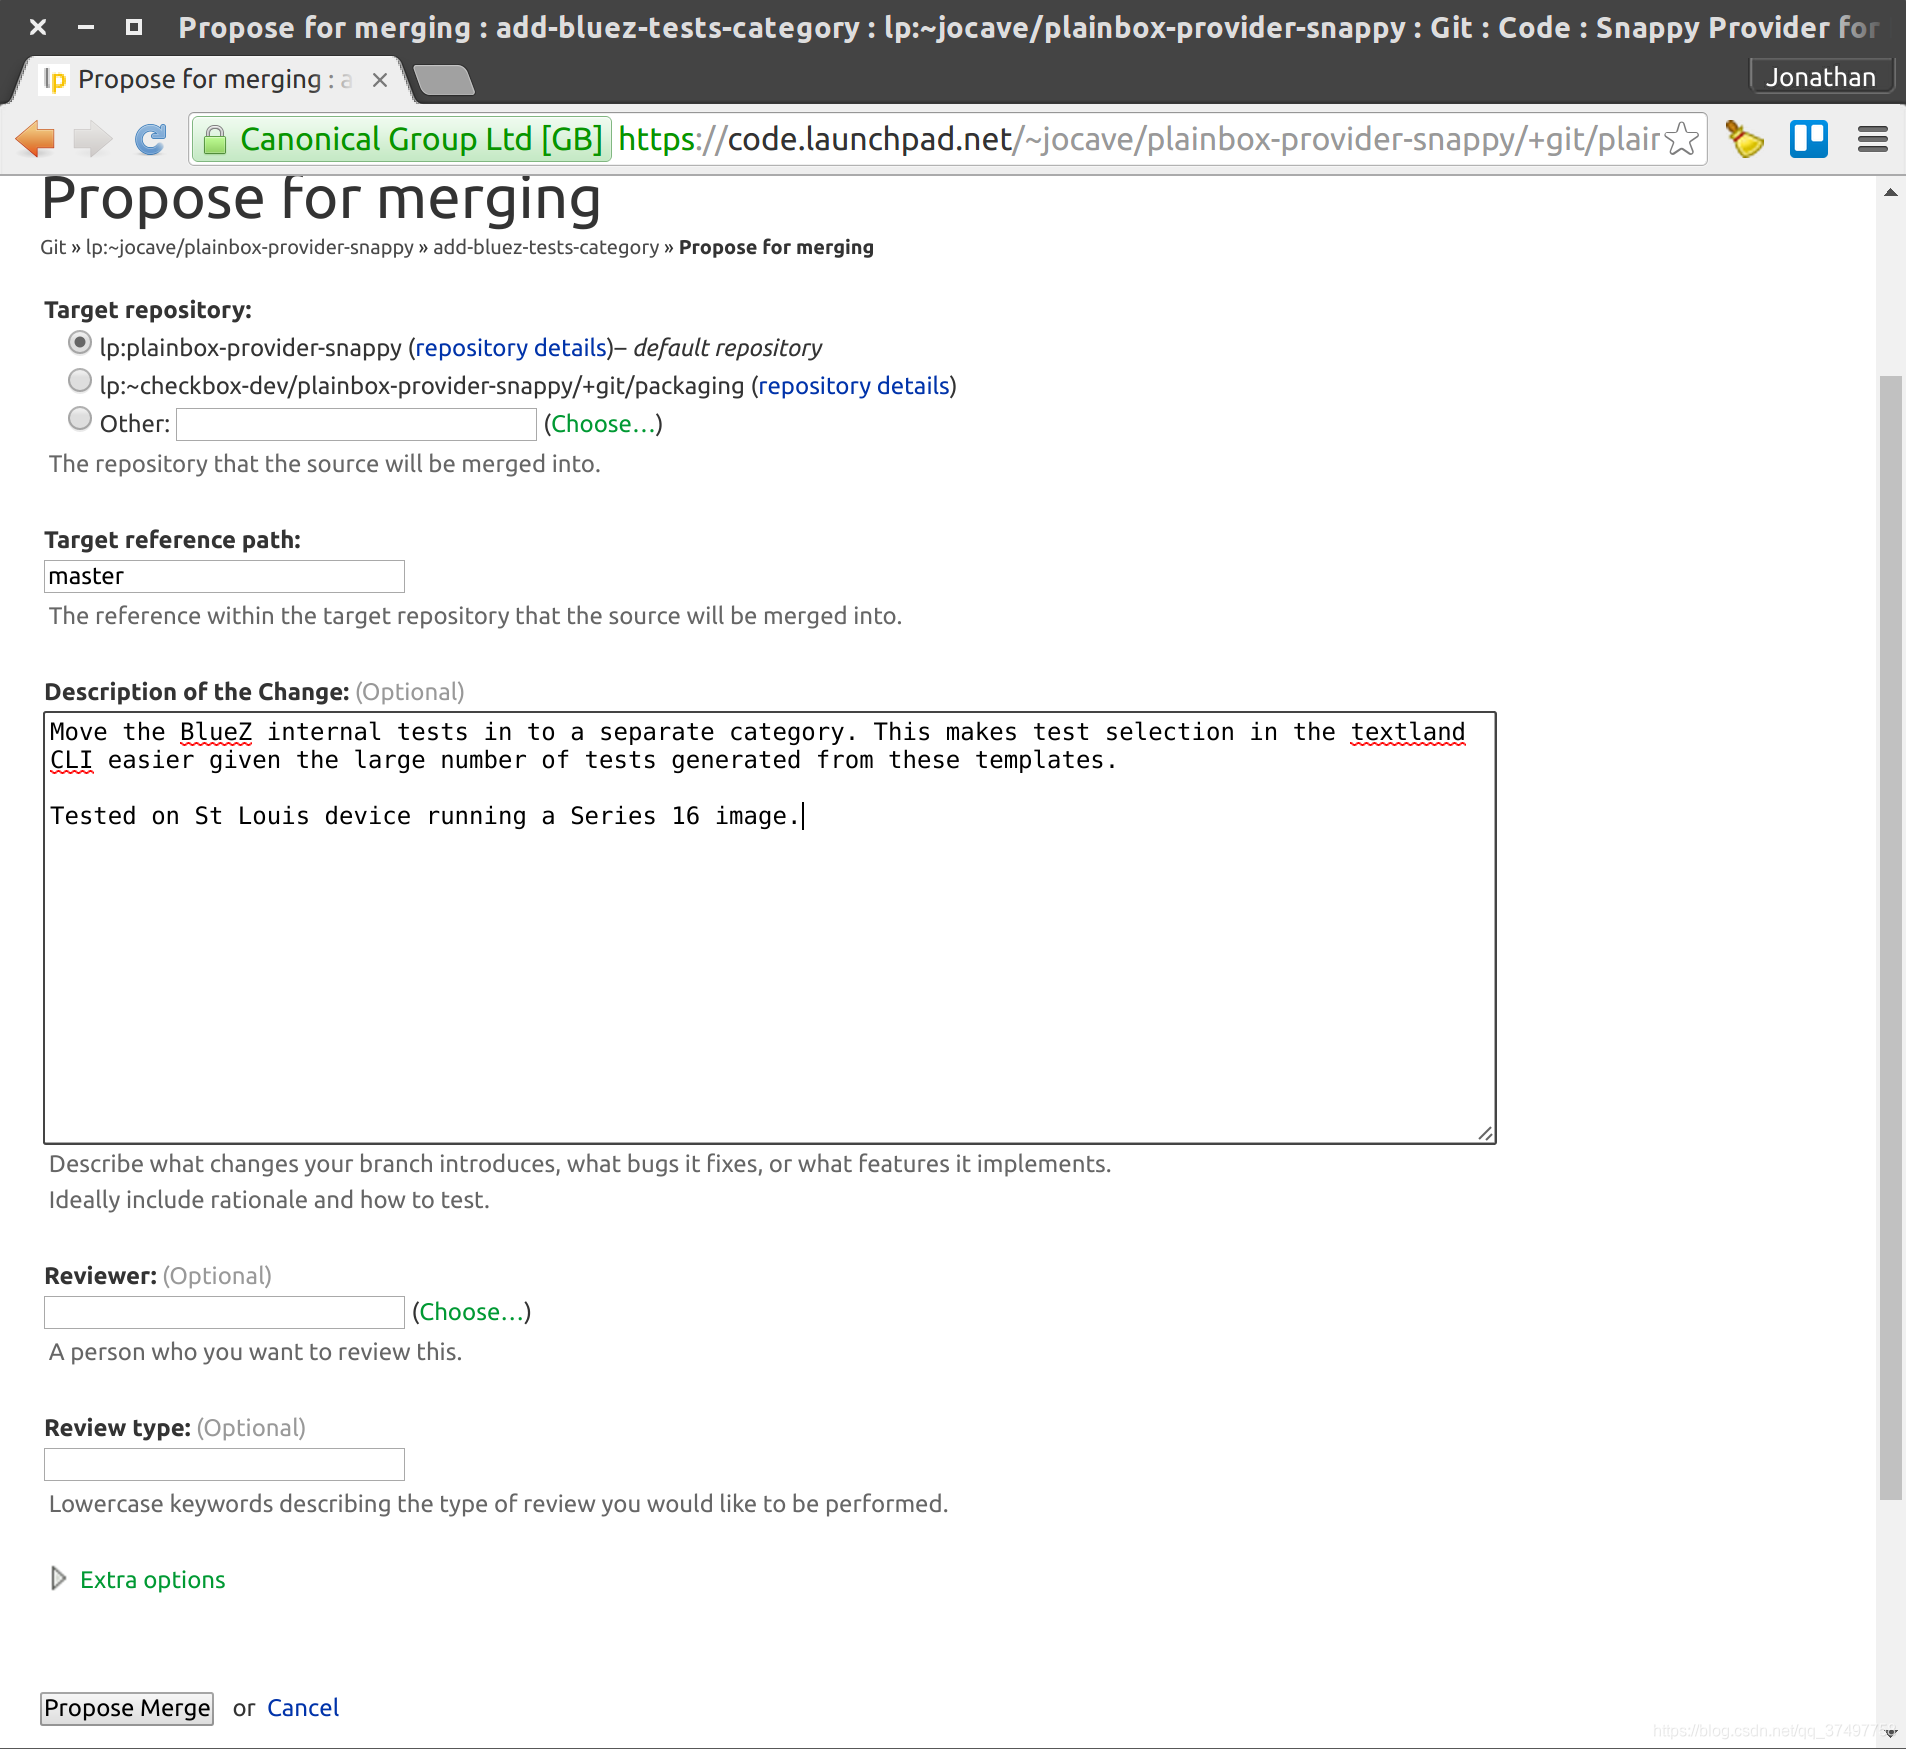
维护项目的团队成员将收到合并请求的通知,并对其进行审查。


 被折叠的 条评论
为什么被折叠?
被折叠的 条评论
为什么被折叠?
 到【灌水乐园】发言


