


 本文详细介绍了如何在VSCode中配置CodeRunner,以便支持C++11特性,包括基础配置、调整CodeRunner设置和修改tasks.json,解决因缺少C++11支持导致的编译警告和错误。
配置vscode,使其可以运行C++11特性的代码

封面引用自配置教程的B站视频,非常详细的视频,感谢视频作者的贡献。
Step 1: 基础配置
首先参照这个视频进行基础的配置,安装必要的插件:
【Mac用Visual Studio Code编写C/C++ 苹果电脑VS Code快速编写C/C++教程】
配置完成后,可以运行基本的输出hello world的代码,并进行调试。
但是在使用vector时,会报错。
#include <iostream>
#include <vector>
#include <string>

using namespace std;

int main()
{
    vector<string> msg{"Hello", "C++", "World", "from", "VS Code", "and the C++ extension!"};

    for (const string &word : msg)
    {
        cout << word << " ";
    }
    cout << endl;
}
报错:
(base) lindsey@LindseydeMacBook-Air CppCode % cd "/Users/lindsey/Library/CloudSto
rage/OneDrive-个人/CppCode/" && g++ helloworld.cpp -o helloworld && "/Users/linds
ey/Library/CloudStorage/OneDrive-个人/CppCode/"helloworld
helloworld.cpp:9:23: error: expected ';' at end of declaration
    vector<string> msg{"Hello", "C++", "World", "from", "VS Code", "and the C++ extension!"};
                      ^
                      ;
helloworld.cpp:11:29: warning: range-based for loop is a C++11 extension [-Wc++11-extensions]
    for (const string &word : msg)
                            ^
1 warning and 1 error generated.
原因:因为编译器默认没有开启对C++11(或更高版本)的支持,而代码中使用了C++11的特性(如初始化列表和基于范围的for循环)。为了解决这个问题,需要在编译命令中指定使用C++11或更高版本的标准。
Step 2: 调整Code Runner的配置
调整Code Runner的配置来确保编译命令包含 -std=c++11(或更高版本)的编译选项,需要修改VSCode的设置以包含C++11编译选项。
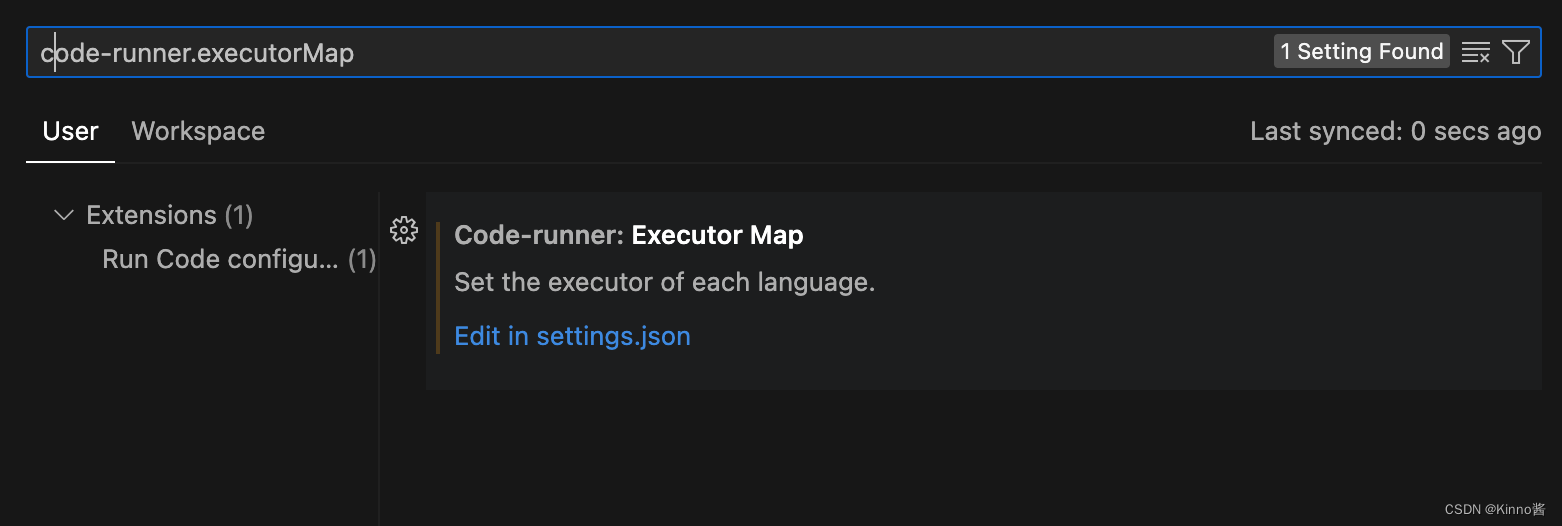
- 点击左下角齿轮图标,打开VSCode设置
- 在搜索框中输入
code-runner.executorMap,点击Edit in settings.json
- 进入settings.json,修改
code-runner.executorMap的设置,为C++添加编译选项-std=c++11
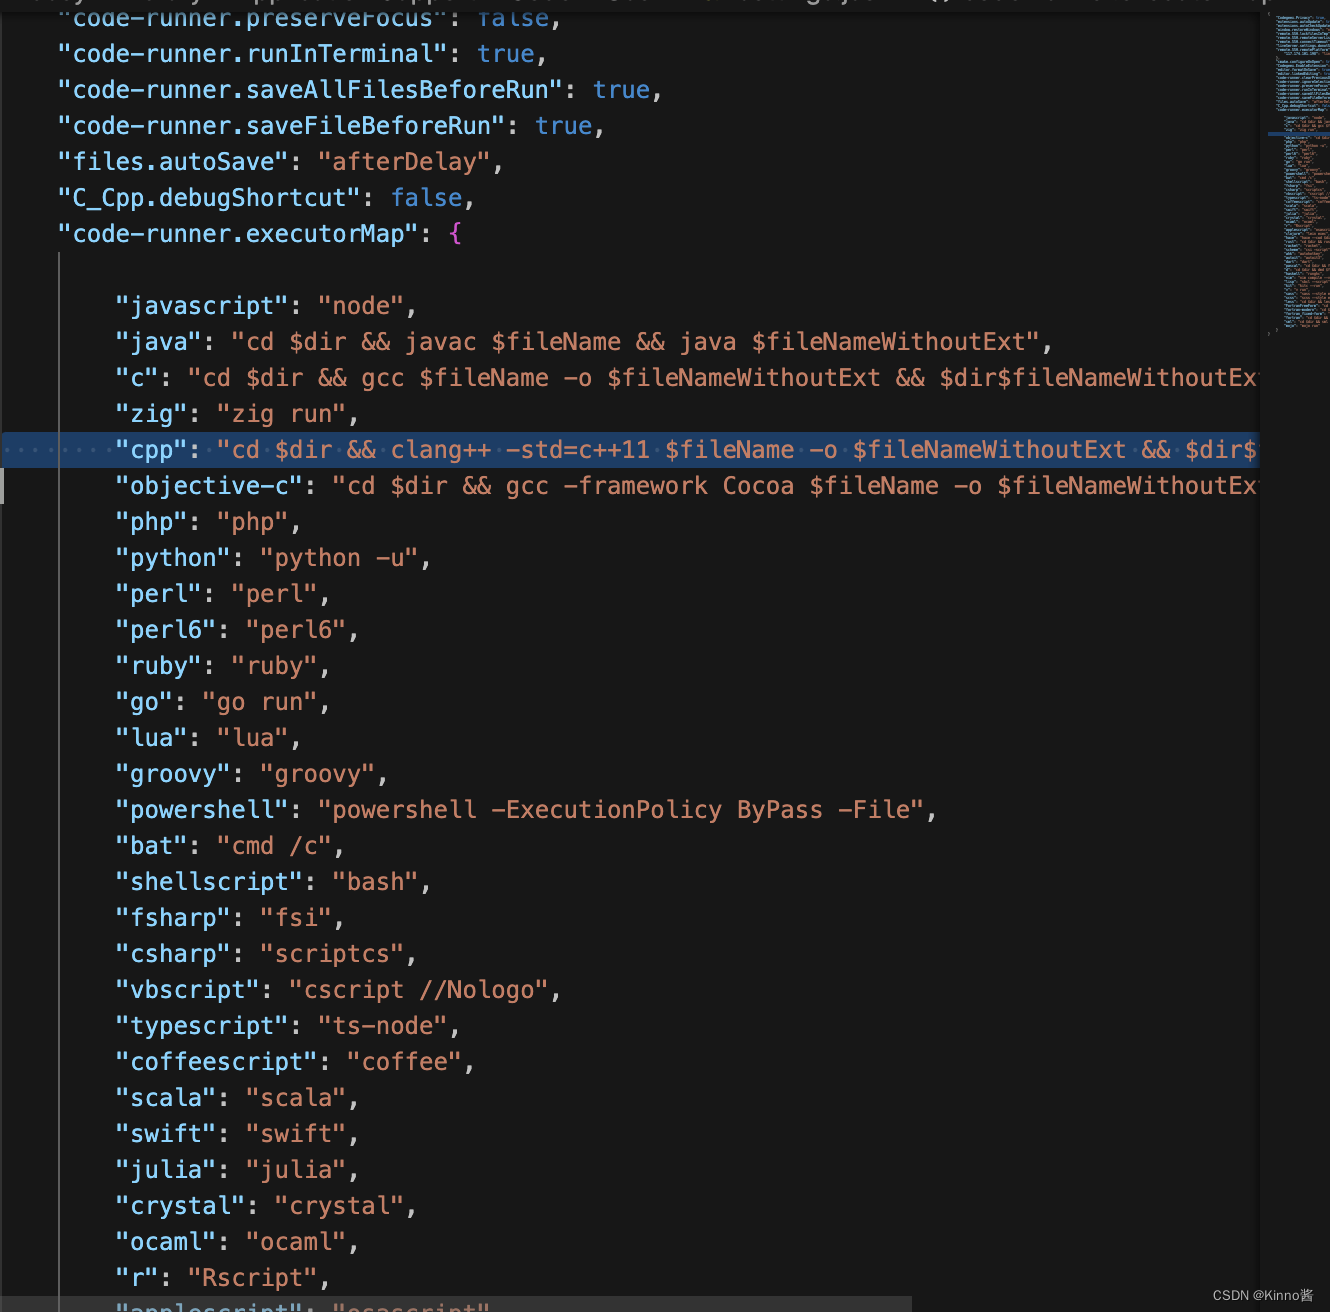
"code-runner.executorMap": {
    "cpp": "cd $dir && clang++ -std=c++11 $fileName -o $fileNameWithoutExt && $dir$fileNameWithoutExt",
}
这段配置告诉Code Runner插件使用clang++编译器编译C++文件时添加-std=c++11选项,然后执行编译出的程序。
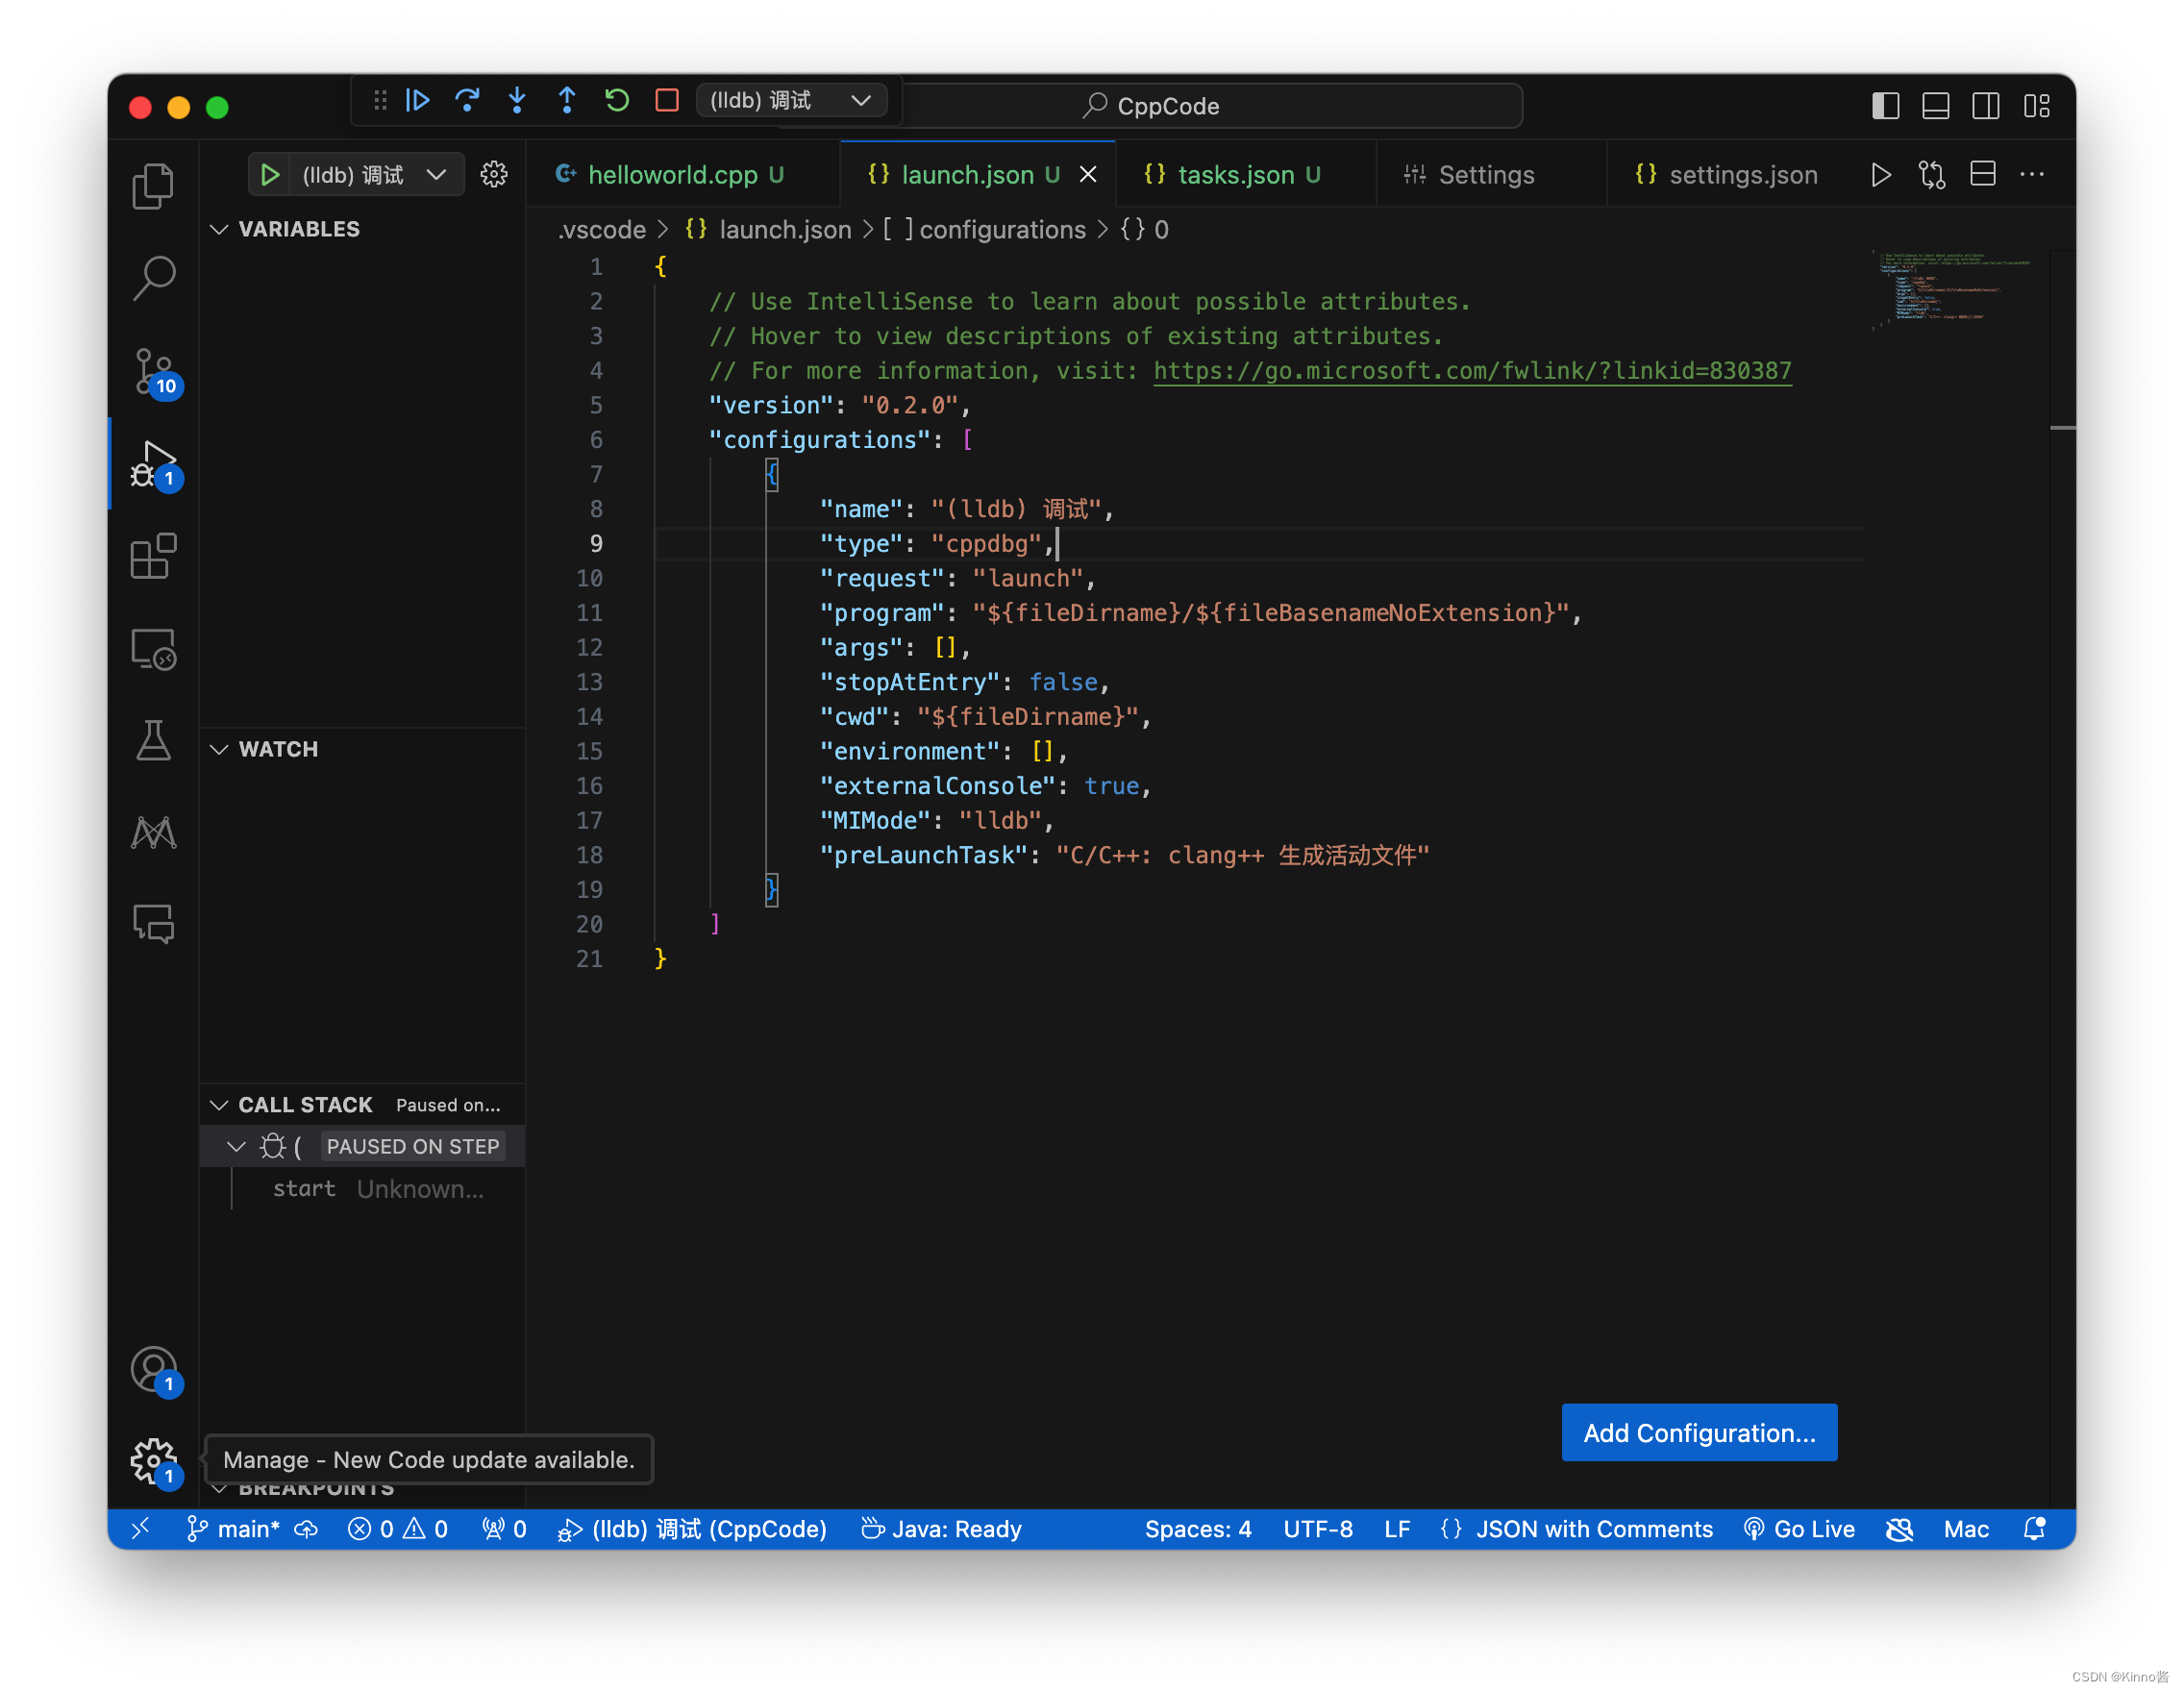
Step 3: 更改tasks.json
如果希望在VSCode的构建任务或调试中使用C++11特性,需要确保tasks.json中的编译命令包含-std=c++11编译选项。例如,修改tasks.json中的args数组,为clang++命令添加-std=c++11选项:
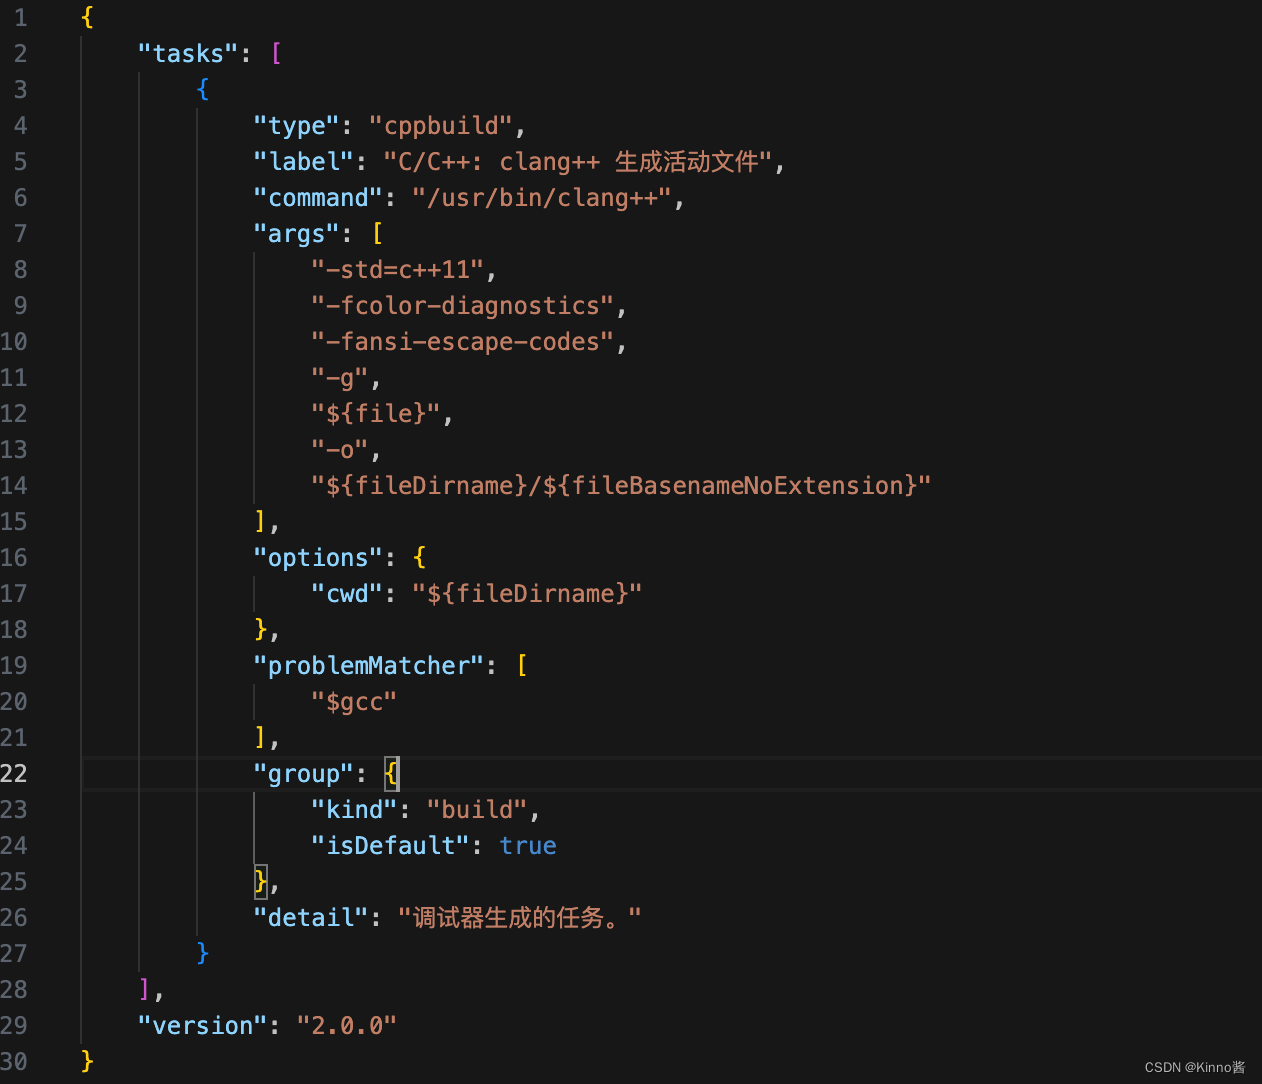
"args": [
    "-std=c++11",
    "-fcolor-diagnostics",
    "-fansi-escape-codes",
    "-g",
    "${file}",
    "-o",
    "${fileDirname}/${fileBasenameNoExtension}"
],
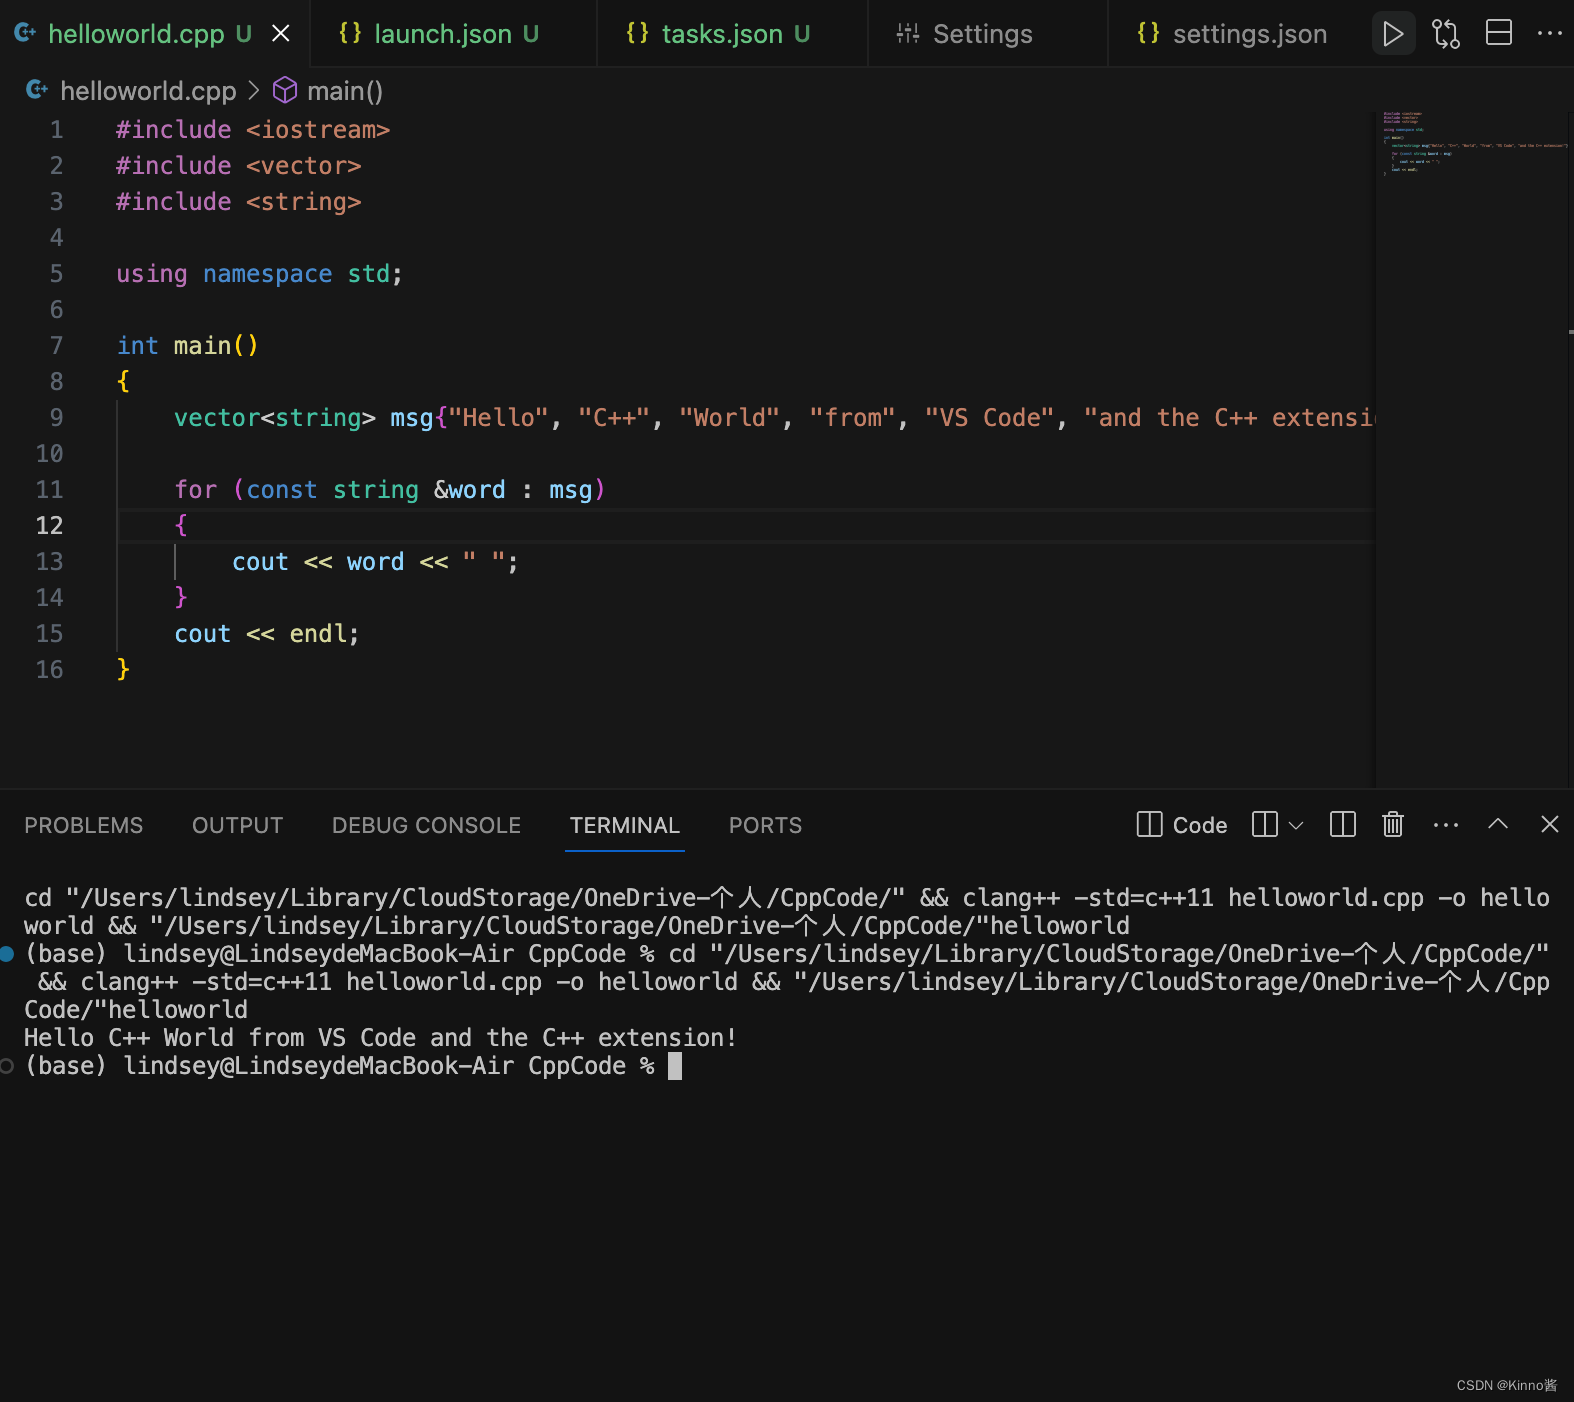
成功运行


 5万+
5万+

 被折叠的 条评论
为什么被折叠?
被折叠的 条评论
为什么被折叠?
 到【灌水乐园】发言


