


 本文详细介绍如何使用Eclipse和Maven快速搭建SpringBoot项目,包括创建Maven项目、添加SpringBoot依赖、创建控制器并运行项目,最后通过浏览器验证项目是否成功搭建。
Eclipse使用Maven搭建SpringBoot项目
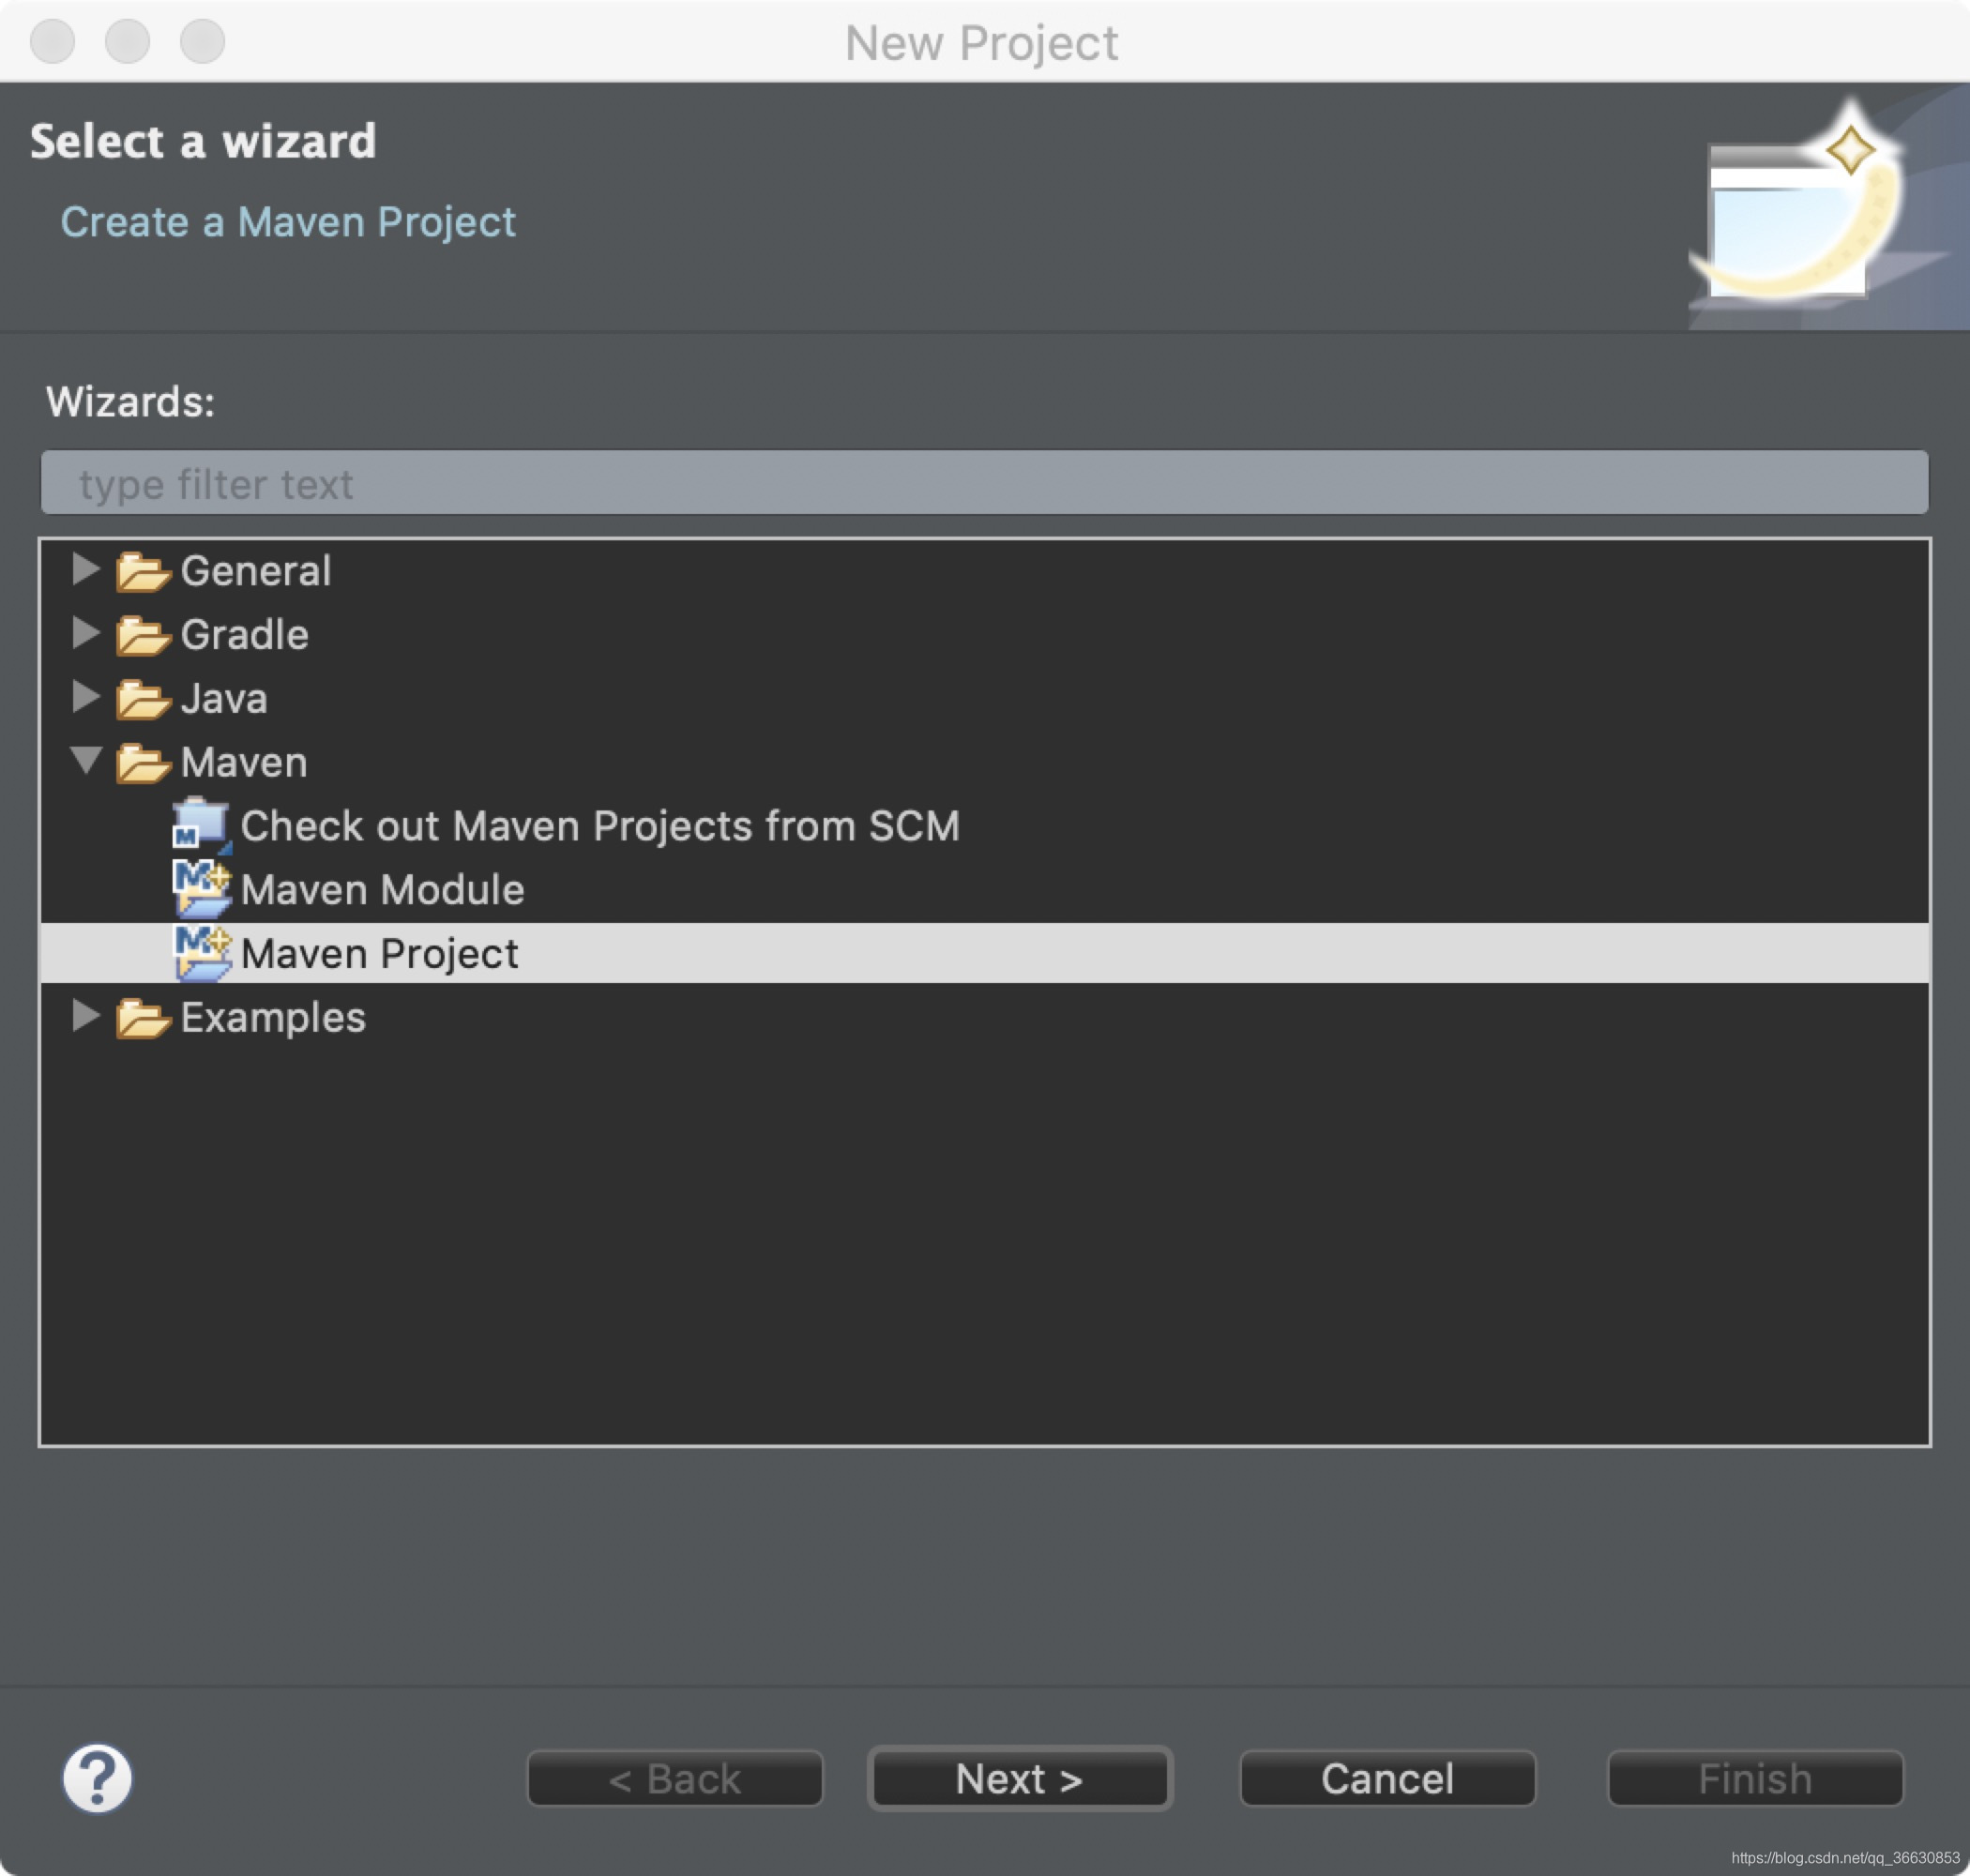
1.使用Eclipse创建Maven项目,点击next
2.勾选Create a Simple project,点击next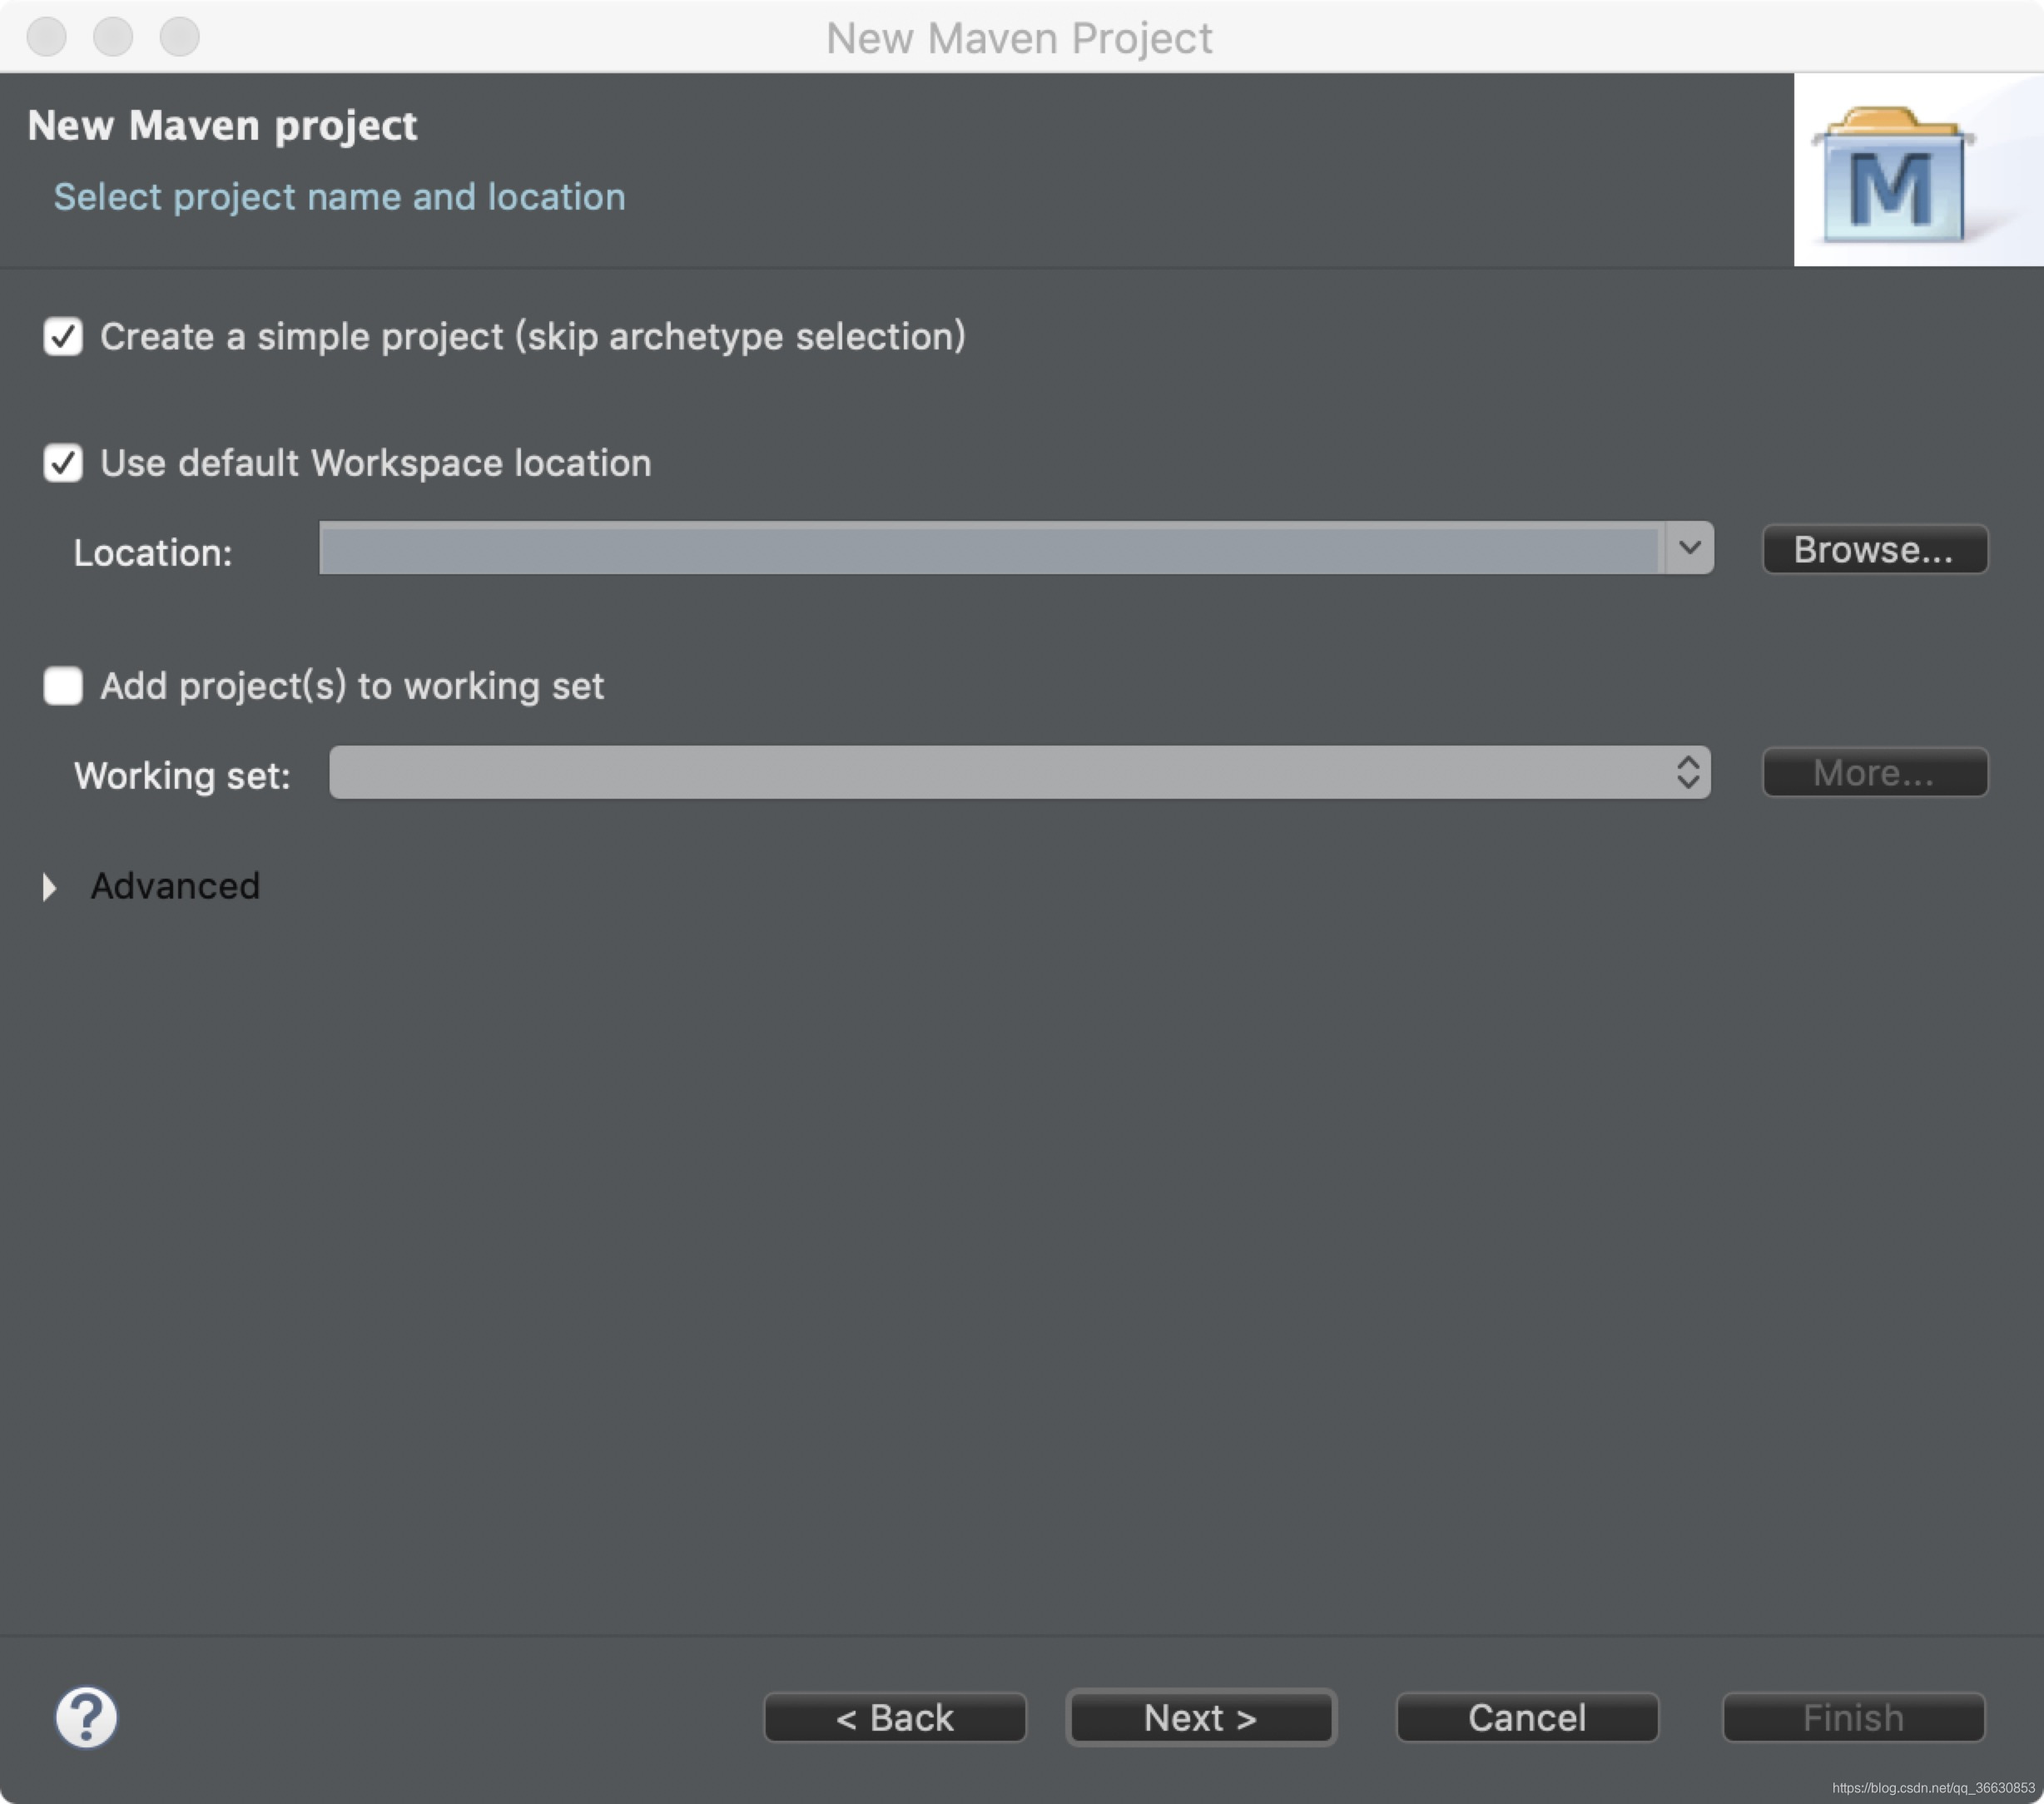
3.填写Group Id和Artifact Id,点击Finish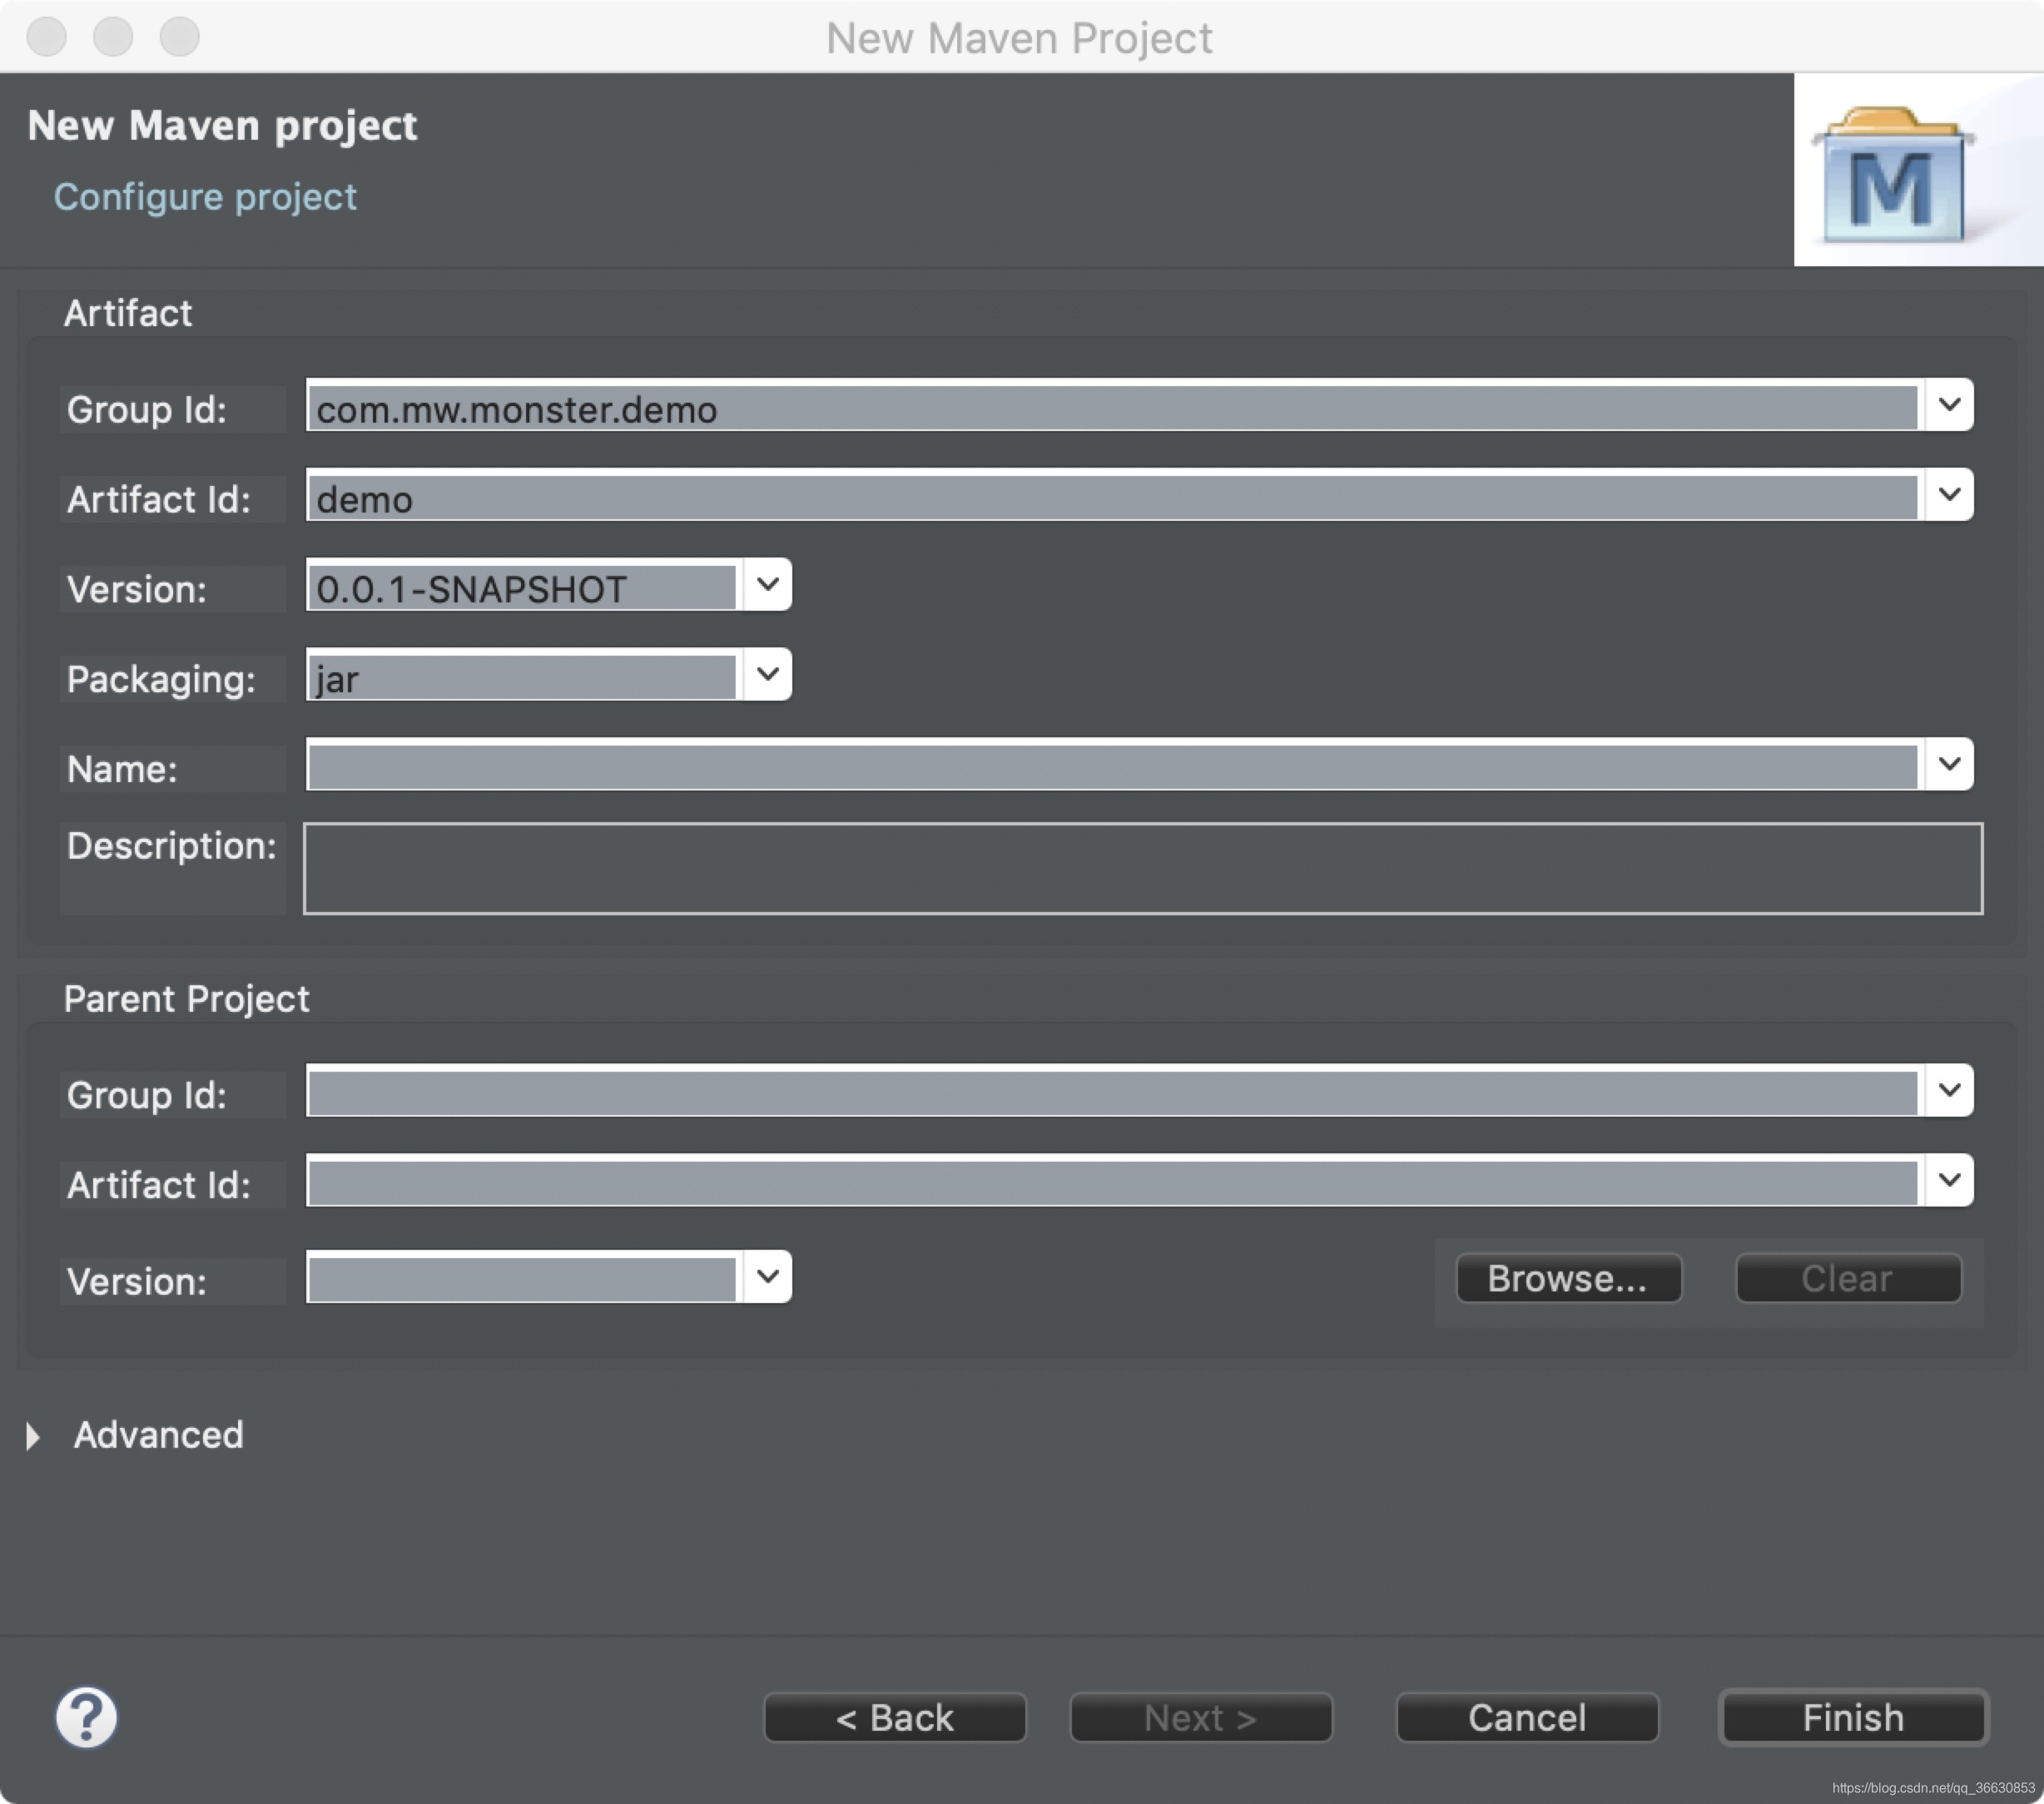
4.现在Maven项目创建完成,修改pom文件,在pom文件中添加SpringBoot相关依赖
	<parent>
		<groupId>org.springframework.boot</groupId>
		<artifactId>spring-boot-starter-parent</artifactId>
		<version>2.0.1.RELEASE</version>
	</parent>

	<dependencies>
		<dependency>
			<groupId>org.springframework.boot</groupId>
			<artifactId>spring-boot-starter-web</artifactId>
		</dependency>
	</dependencies>
完成效果如图: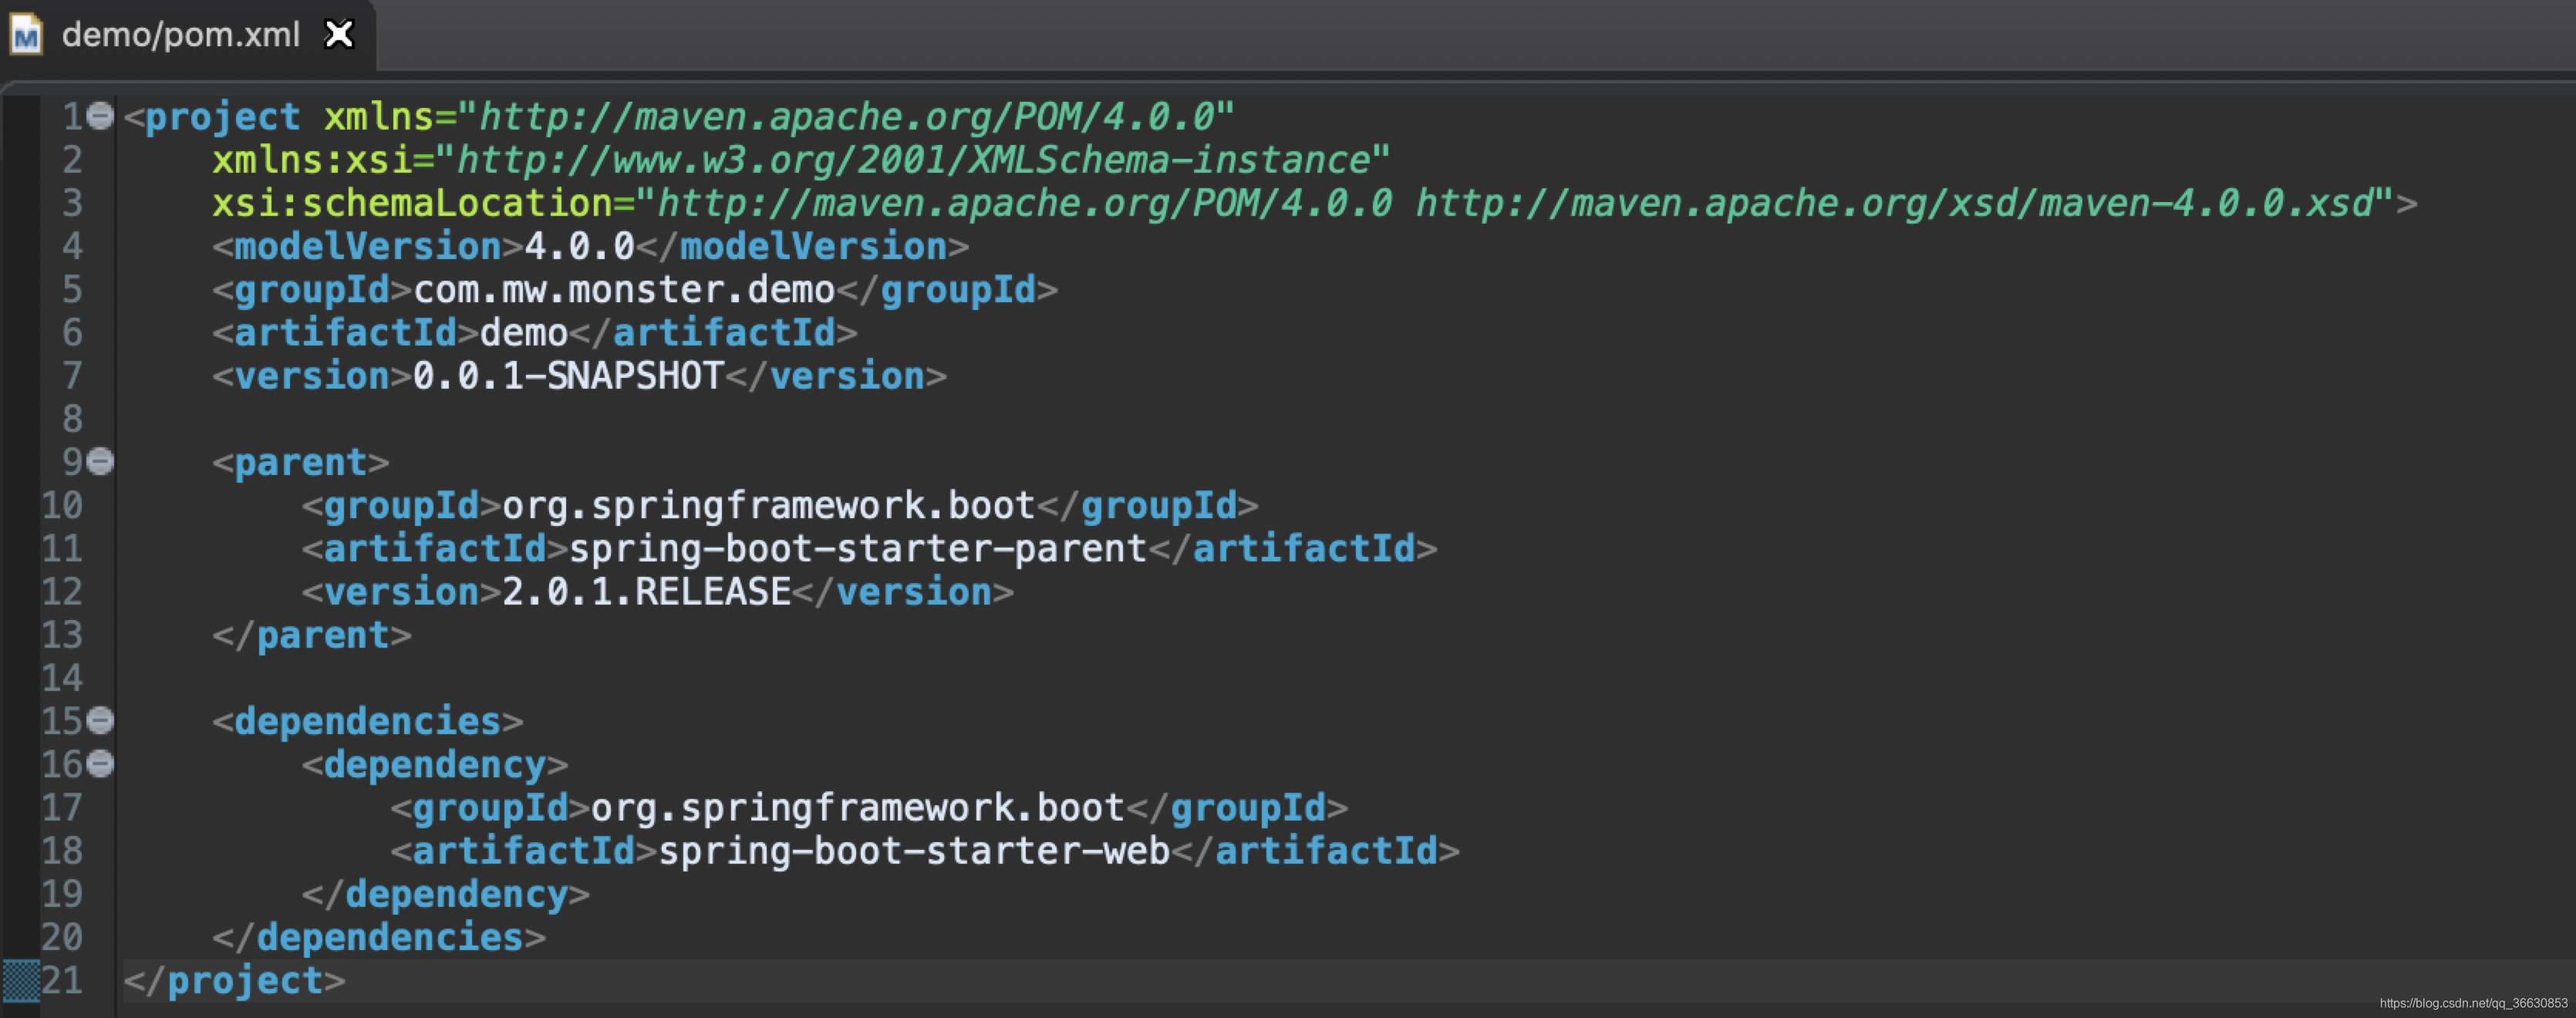
5.如果项目报错,请在项目名称上右键,Maven–>Update Project,会下载SpringBoot相应的Jar包,第一次可能会比较慢,可以在Maven中配置阿里云的仓库,下载速度会比较快点。
6.在src/main/java下创建HelloController
package com.mw.monster.demo.controller;

import org.springframework.boot.SpringApplication;
import org.springframework.boot.autoconfigure.EnableAutoConfiguration;
import org.springframework.web.bind.annotation.RequestMapping;
import org.springframework.web.bind.annotation.RestController;

@RestController
@EnableAutoConfiguration
public class HelloController {

	@RequestMapping("/")
	String home(){
		return "Hello World!";
	}

	public  static  void main(String[] args) throws Exception {
		SpringApplication.run(HelloController.class,args);
	}
}
7.在HelloController中运行main方法,启动整个项目
8.访问Http://localhost:8080,页面显示"Hello World!",SpringBoot项目创建完成!
使用Gradle手工创建SpringBoot项目
后续更新~~


 550
550

 被折叠的 条评论
为什么被折叠?
被折叠的 条评论
为什么被折叠?
 到【灌水乐园】发言


