


需求:
上传的图片要进行裁切或压缩到C端显示的格式与大小
主要应用于PC端的后管 涉及到新增过程 与图片回显(修改)
思路:
- 点击上传,从本地选择图片文件
- 选择文件夹后进入模态框(将选择的图片塞入模态框) 模态框作为裁剪图片的容器
- 进行裁剪
- 获取裁剪后的结果 并将裁剪后的图片对象返回给父组件
- 父组件获取到裁剪后的图片文件 进行上传 成功后将图片回显
修改过程:
- 将后端数据回显到图片框内
- 点击图片 重复上述1-5步 成功后覆盖掉当前页面图片
开发:
图片上传框组件:
<template>
<div>
<a-upload
name="avatar"
listType="picture-card"
class="avatar-uploader"
:showUploadList="false"
:beforeUpload="beforeUpload"
:customRequest="function(){}"
@change="handleChange"
>
<img class="default-img" v-if="imageUrl" :src="imageUrl" alt="avatar" />
<div v-else>
<a-icon :type="loading ? 'loading' : 'plus'" />
<div class="ant-upload-text">点击上传</div>
</div>
</a-upload>
<!-- modal -->
<cropper-modal ref="cropperModal" @ok="handleCropperSuccess"></cropper-modal>
</div>
</template>
<script>
import cropperModal from "./cropperModal"
import Utils from "@/utils/util"
export default {
name:'imgCropper',
components:{
cropperModal
},
props:{
//图片格式
imgFormat:{
type:Array,
default:function(){
return ['image/jpeg']
}
},
//图片大小
imgSize:{
type:Number,
default:2
},
//图片裁切配置
options:{
type:Object,
default:function(){
return {
autoCropWidth:750,
autoCropHeight:340,
};
}
},
//回显图片路径
value:{
type:String,
default:''
}
},
data () {
return {
loading: false,
imageUrl: ''
}
},
watch:{
value:{
handler(val){
this.imageUrl = val || '';
},
immediate:true
},
},
methods: {
//从本地选择文件
handleChange (info) {
let { options } = this;
Utils.file2Base64(info.file.originFileObj, (imageUrl) => {
let target = Object.assign({},options,{
img:imageUrl
})
this.$refs['cropperModal'].edit(target);
})
},
// 上传之前 格式与大小校验
beforeUpload (file) {
let { imgFormat,imgSize } = this;
let isFormat = imgFormat.includes(file.type)
if(!isFormat){
this.$message.error('图片格式不支持!')
}
const isLt2M = file.size / 1024 / 1024 <= imgSize
if (!isLt2M) {
this.$message.error('图片大小限制在'+imgSize+'MB内!')
}
return isFormat && isLt2M
},
//裁剪成功后的File对象
handleCropperSuccess(data){
console.log('File:',data);
//进行图片上传动作
// 模拟后端请求 2000 毫秒延迟
let that=this;
that.loading = true
new Promise((resolve) => {
setTimeout(() => resolve(), 2000)
}).then((res) => {
that.$message.success('上传成功')
//将返回的数据回显
that.imageUrl = res.img;
that.$emit('ok')
}).catch(() => {
// Do something
}).finally(() => {
that.loading = false
})
}
},
}
</script>
<style>
.avatar-uploader > .ant-upload {
width: 200px;
height: 200px;
}
.avatar-uploader .default-img{
width: 100%;
}
.ant-upload-select-picture-card i {
font-size: 32px;
color: #999;
}
.ant-upload-select-picture-card .ant-upload-text {
margin-top: 8px;
color: #666;
}
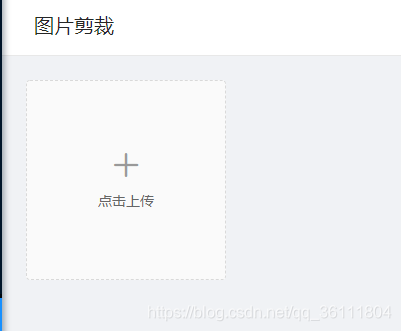
</style>效果:
裁剪模态框
<template>
  <a-modal :visible="visible" title="修改头像" :maskClosable="false" :confirmLoading="confirmLoading" :width="1000" @cancel="cancelHandel">
    <div class="cropper-wrapper">
      <vue-cropper
        ref="cropper"
        :img="options.img"
        :info="true"
        :original="true"
        :autoCrop="options.autoCrop"
        :autoCropWidth="options.autoCropWidth"
        :autoCropHeight="options.autoCropHeight"
        :fixedBox="options.fixedBox"
        @realTime="realTime"
      >
      </vue-cropper>
    </div>
    <div class="result-wrapper">
      <div class="tar-img" :style="previews.div">
        <img :src="previews.url" :style="previews.img"/>
      </div>
    </div>
    <template slot="footer">
      <a-button key="back" @click="cancelHandel">取消</a-button>
      <a-button key="submit" type="primary" :loading="confirmLoading" @click="okHandel">保存</a-button>
    </template>
  </a-modal>
</template>
<script>
  import { VueCropper } from 'vue-cropper'
  import Utils from "@/utils/util"

  export default {
    name:'cropperModal',
    components: {
      VueCropper
    },
    data() {
      return {
        visible: false,
        img: null,
        confirmLoading: false,

        options: {
          img: '/avatar2.jpg',//裁剪图片的地址
          autoCrop: true, //是否默认生成截图框
          autoCropWidth: 200, //默认生成截图框宽度
          autoCropHeight: 200, //默认生成截图框高度
          fixedBox: true //固定截图框大小 不允许改变
        },
        previews: {},
      };
    },
    methods: {
      edit(record) {
        let { options } = this;
        this.visible = true;
        this.options = Object.assign({},options,record);
      },
      cancelHandel() {
        this.options = {
          img: '/avatar2.jpg',
          autoCrop: true,
          autoCropWidth: 200,
          autoCropHeight: 200,
          fixedBox: true
        };
        this.visible = false;
      },
      okHandel() {
        const that = this
        that.confirmLoading = true
        // 获取截图的base64 数据
        this.$refs.cropper.getCropData((data) => {
          // 转换为File对象
          let file = Utils.dataURLtoFile(data,'测试哟');
          //将裁剪侯的图片对象返回给父组件
          that.$emit('ok',file);
          that.cancelHandel()
        })
      },
      //下载输入框里的图片
      downloadNewImg(){
        //获取截图的blob数据
        this.$refs.cropper.getCropBlob((data) => {
          Utils.blob2Base64(data).then(res=>{
            Utils.downLoadImage(res,'测试的哟');
          })
        })
      },
      //移动框的事件
      realTime(data) {
        this.previews = data
      }
    }
  };
</script>

<style lang="scss" scoped>
  .cropper-wrapper{
    width: 100%;
    height: 400px;
  }
  .result-wrapper{
    margin-top: 20px;
    width: 100%;
    display: flex;
    padding: 20px;
    justify-content: center;
    .tar-img{
      overflow: hidden;
    }
  }

</style>
效果:

需要用到一些图片转base64格式,base64转File对象等utils方法,可自行百度 主要取决于后端接收哪样的数据格式。
感谢大大们的优秀UI和强大组件,提供一下参考文档:


 4168
4168

 被折叠的 条评论
为什么被折叠?
被折叠的 条评论
为什么被折叠?
 到【灌水乐园】发言


