


| 指令 | 描述 |
|---|---|
| {{}} | 插值表达式 |
| v-text | 更新元素中的text内容 |
| v-html | 更新元素中的 innerHTML |
| v-if | 根据表达式的真假值来有条件地渲染元素。 |
| v-else-if | 表示 v-if 的“else if 块”。可以链式调用。 |
| v-else | 为 v-if 或者 v-else-if 添加“else 块”。 |
| v-for | 基于源数据多次渲染元素或模板块。 |
| v-on | 绑定事件监听器。 |
| v-bind | 动态地绑定一个或多个 attribute,或一个组件 prop 到表达式。 |
| v-once | 只渲染元素和组件一次。 |
| v-model | 在表单控件或者组件上创建双向绑定。 |
| v-slot | 提供具名插槽或需要接收 prop 的插槽。 |
1. 插值表达式 {{}}
- 在HTML页面中我们需要获取Vue中的数据,这时我们可以通过插值表达式来获取。
<!DOCTYPE html>
<html lang="en">

<head>
  <meta charset="UTF-8" />
  <title>常用指令</title>
</head>

<body>
  <div id="root">
    <div>{{message}}</div>
  </div>
  <script src="https://unpkg.com/vue@next"></script>
  <script>
    const app = Vue.createApp({
      data() {
        return {
          message: "hello world"
        };
      }
    });
    const vm = app.mount('#root');
  </script>
</body>

</html>
2. v-text
- 更新元素的 textContent。
<!DOCTYPE html>
<html lang="en">

<head>
  <meta charset="UTF-8" />
  <title>常用指令</title>
</head>

<body>
  <div id="root">
  </div>
  <script src="https://unpkg.com/vue@next"></script>
  <script>
    const app = Vue.createApp({
      data() {
        return {
          message: "hello world"
        };
      },
      template: `
        <div v-text="message"></div>
      `
    });
    const vm = app.mount('#root');
  </script>
</body>

</html>
3. v-html
- 更新元素的 innerHTML。
<!DOCTYPE html>
<html lang="en">

<head>
  <meta charset="UTF-8" />
  <title>常用指令</title>
</head>

<body>
  <div id="root">
  </div>
  <script src="https://unpkg.com/vue@next"></script>
  <script>
    const app = Vue.createApp({
      data() {
        return {
          html: "<i style='color:red;'>hello world</i>"
        };
      },
      template: `
        <div v-html="html"></div>
      `
    });
    const vm = app.mount('#root');
  </script>
</body>

</html>
4. v-if
- 根据表达式的真假值来有条件地渲染元素。在切换时元素及它的数据绑定 / 组件被销毁并重建。
<!DOCTYPE html>
<html lang="en">

<head>
  <meta charset="UTF-8" />
  <title>常用指令</title>
</head>

<body>
  <div id="root">
  </div>
  <script src="https://unpkg.com/vue@next"></script>
  <script>
    const app = Vue.createApp({
      data() {
        return {
          b1: true,
          b2: false,
          message1: "hello world true",
          message2: "hello world false"
        };
      },
      template: `
        <div v-if="b1">{{message1}}</div>
        <div v-if="b2">{{message2}}</div>
      `
    });
    const vm = app.mount('#root');
  </script>
</body>

</html>
5. v-else-if
- 前一兄弟元素必须有
v-if或v-else-if。- 表示
v-if的“else if 块”。可以链式调用。<!DOCTYPE html> <html lang="en"> <head> <meta charset="UTF-8" /> <title>常用指令</title> </head> <body> <div id="root"> </div> <script src="https://unpkg.com/vue@next"></script> <script> const app = Vue.createApp({ data() { return { b1: true, b2: false, }; }, template: ` <div v-if="b2">v-if</div> <div v-else-if="b1">v-else-if</div> <div v-else>v-else</div> ` }); const vm = app.mount('#root'); </script> </body> </html>
6. v-else
- 前一兄弟元素必须有
v-if或v-else-if。- 为
v-if或者v-else-if添加“else 块”。<!DOCTYPE html> <html lang="en"> <head> <meta charset="UTF-8" /> <title>常用指令</title> </head> <body> <div id="root"> </div> <script src="https://unpkg.com/vue@next"></script> <script> const app = Vue.createApp({ data() { return { // b1: true, b2: false, // message1: "hello world true", // message2: "hello world false" }; }, template: ` <div v-if="b2">v-if</div> <div v-else>v-else</div> ` }); const vm = app.mount('#root'); </script> </body> </html>
7. v-for
7.1用 v-for 把一个数组对应为一组元素
- 我们可以用
v-for指令基于一个数组来渲染一个列表。v-for指令需要使用item in items形式的特殊语法,其中 items 是源数据数组,而item则是被迭代的数组元素的别名。- 在
v-for块中,我们可以访问所有父作用域的 property。v-for还支持一个可选的第二个参数,即当前项的索引。v-for的默认行为会尝试原地修改元素而不是移动它们。要强制其重新排序元素,你需要用特殊 attributekey来提供一个排序提示:<!DOCTYPE html> <html lang="en"> <head> <meta charset="UTF-8" /> <title>常用指令</title> </head> <body> <ul id="root"> </ul> <script src="https://unpkg.com/vue@next"></script> <script> // 用 v-for 把一个数组对应为一组元素 const app = Vue.createApp({ data() { return { parentMessage: 'Parent', items: [{ message: 'Hello' }, { message: 'world' }] }; }, template: ` <li v-for="(item, index) in items" :key="index"> {{ parentMessage }}--{{ index }}--{{ item.message }} </li> ` }); const vm = app.mount('#root'); </script> </body> </html>
7.2 数组更新检测
- 1. 使用数组的变更函数 push, pop, shift, unshift, splice, sort, reverse
vm.items.pop();
- 2. 直接替换数组
vm.items = [{message: "666666"}];
- 3. 直接更新数组的内容
vm.items[0] = {message: "111111"};
7.3 在 v-for 里使用对象
- 你也可以用
v-for来遍历一个对象的 property。- 你也可以提供第二个的参数为 property 名称 (也就是键名 key)。
- 还可以用第三个参数作为索引。
<!DOCTYPE html>
<html lang="en">

<head>
  <meta charset="UTF-8" />
  <title>常用指令</title>
</head>

<body>
  <ul id="root">
  </ul>
  <script src="https://unpkg.com/vue@next"></script>
  <script>
    // 在 v-for 里使用对象
    const app = Vue.createApp({
      data() {
        return {
          myObject: {
            name: 'ZS',
            age: 18,
            sex: 'male'
          }
        };
      },
      template: `
        <li v-for="(value, key, index) in myObject">
          {{ index }}--{{ key }}--{{ value }}
        </li>
      `
    });
    const vm = app.mount('#root');
  </script>
</body>

</html>
7.4 在 v-for 里使用值的范围
<!DOCTYPE html> <html lang="en"> <head> <meta charset="UTF-8" /> <title>常用指令</title> </head> <body> <ul id="root"> </ul> <script src="https://unpkg.com/vue@next"></script> <script> // 在 v-for 里使用值的范围 const app = Vue.createApp({ template: ` <span v-for="item in 10" :key="item"> {{ item }}   </span> ` }); const vm = app.mount('#root'); </script> </body> </html>

8. v-on
- 绑定事件监听器。事件类型由参数指定。表达式可以是一个方法的名字或一个内联语句,如果没有修饰符也可以省略。
- 使用 .prevent 修饰符等于调用
event.preventDefault()。- 我们可以使用
v-on指令 (通常缩写为 @ 符号) 来监听 DOM 事件,并在触发事件时执行一些 JavaScript。用法为v-on:click="methodName"或使用快捷方式@click="methodName"<!DOCTYPE html> <html lang="en"> <head> <meta charset="UTF-8" /> <title>常用指令</title> </head> <body> <div id="root"> </div> <script src="https://unpkg.com/vue@next"></script> <script> const app = Vue.createApp({ data(){ return { message: 'hello' }; }, methods: { handleSubmit(){ const inputValue = document.getElementById('inputValue'); this.message = inputValue.value; console.log(this.message); } }, template: ` <div>{{message}}</div> <form action='https://www.baidu.com'> <input type='text' id='inputValue'/> <input type='submit' value='submit' v-on:click.prevent='handleSubmit'/> </form> ` }); const vm = app.mount('#root'); </script> </body> </html>
9. v-bind
- 动态地绑定一个或多个 attribute,或一个组件 prop 到表达式。
- 在绑定
class或styleattribute 时,支持其它类型的值,如数组或对象。
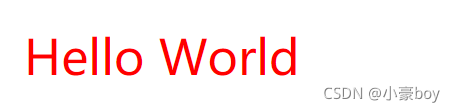
9.1 字符串语法
- 我们可以传给
:class(v-bind:class的简写) 一个字符串:<!DOCTYPE html> <html lang="en"> <head> <meta charset="UTF-8" /> <title>常用指令</title> <style> .red { color: red; } </style> </head> <body> <div id="root"> </div> <script src="https://unpkg.com/vue@next"></script> <script> const app = Vue.createApp({ data() { return { classString: 'red' }; }, template: ` <div :class="classString"> Hello World </div> ` }); const vm = app.mount('#root'); </script> </body> </html>
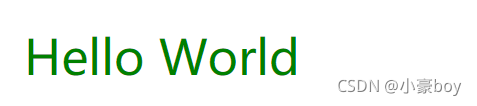
9.2 对象语法
- 我们可以传给
:class(v-bind:class的简写) 一个对象,以动态地切换 class:<!DOCTYPE html> <html lang="en"> <head> <meta charset="UTF-8" /> <title>常用指令</title> <style> .red { color: red; } .green { color: green; } </style> </head> <body> <div id="root"> </div> <script src="https://unpkg.com/vue@next"></script> <script> const app = Vue.createApp({ data() { return { classObject: { red: false, green: true }, }; }, template: ` <div :class="classObject"> Hello World </div> ` }); const vm = app.mount('#root'); </script> </body> </html>
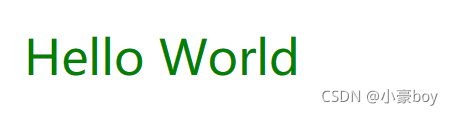
9.3 数组语法
- 我们可以把一个数组传给
:class,以应用一个 class 列表:<!DOCTYPE html> <html lang="en"> <head> <meta charset="UTF-8" /> <title>常用指令</title> <style> .red { color: red; } .green { color: green; } </style> </head> <body> <div id="root"> </div> <script src="https://unpkg.com/vue@next"></script> <script> const app = Vue.createApp({ data() { return { classArray: ['red', 'green'], }; }, template: ` <div :class="classArray"> Hello World </div> ` }); const vm = app.mount('#root'); </script> </body> </html>
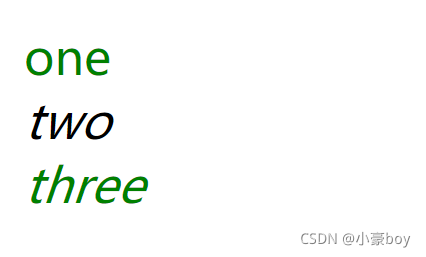
9.4 在组件上使用
- 当你在带有单个根元素的自定义组件上使用
classattribute 时,这些 class 将被添加到该元素中。此元素上的现有 class 将不会被覆盖。- 如果你的组件有多个根元素,你需要定义哪些部分将接收这个类。可以使用
$attrs组件属性执行此操作。<!DOCTYPE html> <html lang="en"> <head> <meta charset="UTF-8" /> <title>常用指令</title> <style> .red { color: red; } .green { color: green; } .italic { font-style: italic; } </style> </head> <body> <div id="root"> </div> <script src="https://unpkg.com/vue@next"></script> <script> const app = Vue.createApp({ data() { return { italic: 'italic', classObject: { red: false, green: true }, }; }, template: ` <div> <demo1 :class="classObject" v-bind:italic='italic'></demo1> <demo2 :class="classObject" v-bind:italic='italic'></demo2> </div> ` }); app.component('demo1', { props: ['italic'], template: ` <div :class="$attrs.class">one</div> <div :class="italic">two</div> ` }) app.component('demo2', { props: ['italic'], template: ` <div :class="italic">three</div> ` }) const vm = app.mount('#root'); </script> </body> </html>
10. v-once
- 只渲染元素和组件一次。随后的重新渲染,元素/组件及其所有的子节点将被视为静态内容并跳过。这可以用于优化更新性能。
<!DOCTYPE html>
<html lang="en">

<head>
  <meta charset="UTF-8" />
  <title>常用指令</title>
</head>

<body>
  <div id="root">
  </div>
  <script src="https://unpkg.com/vue@next"></script>
  <script>
    const app = Vue.createApp({
      data() {
        return {
          message: 1
        };
      },
      methods: {
        handleClick() {
          this.message++;
        }
      },
      template: `
        <div v-once>{{message}}</div>
        <div>{{message}}</div>
        <button @click=handleClick>+1</button>
      `
    });
    const vm = app.mount('#root');
  </script>
</body>

</html>

11. v-model
- 在表单控件或者组件上创建双向绑定。
11.1 表单控件绑定
- 与表单元素中 text 类型的 <input> 元素中的 value 进行绑定。
<!DOCTYPE html>
<html lang="en">

<head>
  <meta charset="UTF-8" />
  <title>props</title>
</head>

<body>
  <div id="root">
  </div>
  <script src="https://unpkg.com/vue@next"></script>
  <script>
    const app = Vue.createApp({
      data() {
        return {
          inputValue: '',
          list: []
        };
      },
      methods: {
        handleAddItem() {
          this.list.push(this.inputValue);
          this.inputValue = '';
        }
      },
      template: `
        <div>
          <input v-model="inputValue" />
          <button v-on:click="handleAddItem">增加</button>
          <ul>
            <li v-for="(item, index) of list">{{item}}</li>
          </ul>
        </div>
      `
    });
    app.mount('#root');
  </script>
</body>

</html>
11.2 父子组件间如何通过事件进行通信
- 不使用 v-model
<!DOCTYPE html>
<html lang="en">

<head>
  <meta charset="UTF-8" />
  <title>props</title>
</head>

<body>
  <div id="root">
  </div>
  <script src="https://unpkg.com/vue@next"></script>
  <script>
    const app = Vue.createApp({
      data() {
        return { count: 1 }
      },
      methods:{
        handleAdd(count){
          this.count = count;
        }
      },
      template: `
        <counter :count='count' @add="handleAdd" />
      `
    });
    app.component('counter', {
      props: ['count'],
      methods: {
        handleClick() {
          this.$emit('add', this.count + 3);
        }
      },
      template: `
        <div @click="handleClick">{{count}}</div>
      `
    });
    app.mount('#root');
  </script>
</body>

</html>
- 使用 v-model
<!DOCTYPE html>
<html lang="en">

<head>
  <meta charset="UTF-8" />
  <title>props</title>
</head>

<body>
  <div id="root">
  </div>
  <script src="https://unpkg.com/vue@next"></script>
  <script>
    const app = Vue.createApp({
      data() {
        return { count: 1 }
      },
      template: `
        <counter v-model='count' />
      `
    });
    app.component('counter', {
      props: ['modelValue'],
      methods: {
        handleClick() {
          this.$emit('update:modelValue', this.modelValue + 3);
        }
      },
      template: `
        <div @click="handleClick">{{modelValue}}</div>
      `
    });
    app.mount('#root');
  </script>
</body>

</html>
- 多个 v-model 绑定
<!DOCTYPE html>
<html lang="en">

<head>
  <meta charset="UTF-8" />
  <title>props</title>
</head>

<body>
  <div id="root">
  </div>
  <script src="https://unpkg.com/vue@next"></script>
  <script>
    const app = Vue.createApp({
      data() {
        return { count: 1, count1: 1 }
      },
      template: `
        <counter v-model:count='count' v-model:count1='count1'/>
      `
    });
    app.component('counter', {
      props: ['count', 'count1'],
      methods: {
        handleClick() {
          this.$emit('update:count', this.count + 1);
          this.$emit('update:count1', this.count1 + 3);
        }
      },
      template: `
        <div @click="handleClick">{{count}}--{{count1}}</div>
      `
    });
    app.mount('#root');
  </script>
</body>

</html>
- 处理 v-model 修饰符
<!DOCTYPE html>
<html lang="en">

<head>
  <meta charset="UTF-8" />
  <title>props</title>
</head>

<body>
  <div id="root">
  </div>
  <script src="https://unpkg.com/vue@next"></script>
  <script>
    const app = Vue.createApp({
      data() {
        return {
          count: 'a',
        }
      },
      template: `
        <counter v-model.uppercase="count" />
      `
    });
    app.component('counter', {
      props: {
        'modelValue': String,
        // 检查是否带有修饰符,默认没有返回空对象
        'modelModifiers': {
          default: () => ({})
        }
      },
      methods: {
        handleClick() {
          let newValue = this.modelValue + 'b';
          // this.modelModifiers    {uppercase: true}
          if (this.modelModifiers.uppercase) {
            newValue = newValue.toUpperCase();
          }
          this.$emit('update:modelValue', newValue);
        }
      },
      template: `
        <div @click="handleClick">{{modelValue}}</div>
      `
    });
    const vm = app.mount('#root');
  </script>
</body>

</html>

12. v-slot
- 提供具名插槽或需要接收 prop 的插槽。
- 跟
v-on和v-bind一样,v-slot也有缩写,即把参数之前的所有内容 (v-slot:) 替换为字符#。例如v-slot:header可以被重写为#header。
12.1 插槽的基本使用
<!DOCTYPE html>
<html lang="en">

<head>
  <meta charset="UTF-8" />
  <title>v-slot</title>
</head>

<body>
  <div id="root">
  </div>
  <script src="https://unpkg.com/vue@next"></script>
  <script>
    const app = Vue.createApp({
      data(){
        return {
          message: '值传递'
        }
      },
      template: `
        <comp1>字符串</comp1>
        <comp1><ul><li>HtML代码</li></ul></comp1>
        <comp1>{{message}}</comp1>
      `
    });
    app.component('comp1', {
      template: `
        <div><slot></slot></div>
      `
    });
    const vm = app.mount('#root');
  </script>
</body>

</html>

12.2 具名插槽的使用
- 在向具名插槽提供内容的时候,我们可以在一个
<template>元素上使用v-slot指令,并以v-slot的参数的形式提供其名称。一个不带
name的<slot>出口会带有隐含的名字“default”。<!DOCTYPE html> <html lang="en"> <head> <meta charset="UTF-8" /> <title>v-slot</title> </head> <body> <div id="root"> </div> <script src="https://unpkg.com/vue@next"></script> <script> const app = Vue.createApp({ template: ` <comp1> <template v-slot:header> <div>header</div> </template> <template v-slot:default> <div>content</div> </template> <template v-slot:footer> <div>footer</div> </template> </comp1> ` }); app.component('comp1', { template: ` <slot name='header'></slot> <slot></slot> <slot name='footer'></slot> ` }); const vm = app.mount('#root'); </script> </body> </html>

12.3 作用域插槽
<!DOCTYPE html>
<html lang="en">

<head>
  <meta charset="UTF-8" />
  <title>v-slot</title>
</head>

<body>
  <div id="root">
  </div>
  <script src="https://unpkg.com/vue@next"></script>
  <script>
    const app = Vue.createApp({
      template: `
        <ul>
          <!-- 接收 prop 的默认插槽,使用了解构 -->
          <comp1>
            <template v-slot:default="{defItem}">
              <li>{{defItem}}</li>
            </template>
          </comp1>
          <!-- 接收 prop 的具名插槽 -->
          <comp1>
            <template v-slot:namItem="slotProps">
              <li>{{slotProps.namItem}}</li>
            </template>
          </comp1>
        </ul>
      `
    });
    app.component('comp1', {
      data() {
        return {
          defItems: [1, 2, 3],
          namItems: [4, 5, 6]
        }
      },
      template: `
        <slot v-for="defItem in defItems" :defItem="defItem"></slot>
        <slot name='namItem' v-for="namItem in namItems" :namItem="namItem"></slot>
      `
    });
    const vm = app.mount('#root');
  </script>
</body>

</html>


 1281
1281

 被折叠的 条评论
为什么被折叠?
被折叠的 条评论
为什么被折叠?
 到【灌水乐园】发言


