


 本文介绍了使用EasyUI框架中的Layout组件实现网页布局的方法,并通过一个实战案例展示了如何结合tree树组件和tabs选项卡组件来构建动态交互界面。
今天回顾了之前学习的使用EasyUI的Layout组件实现简单的页面布局,尝试着做了一个简单的Demo。
目录如下: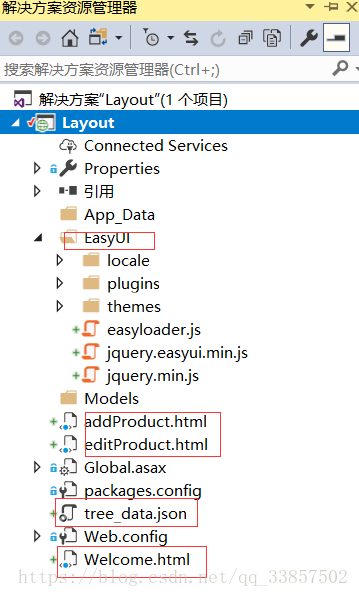
步骤一:引入easyui的样式和脚本
<link href="EasyUI/themes/black/easyui.css" rel="stylesheet" />
    <link href="EasyUI/themes/icon.css" rel="stylesheet" />
    <script src="EasyUI/jquery.min.js"></script>
    <script src="EasyUI/jquery.easyui.min.js"></script>
    <script src="EasyUI/locale/easyui-lang-jp.js"></script>
步骤二:在页面中引入easyui-layout组件,并且加入tree树组件和tabs选项卡组件
<body class="easyui-layout">
<div data-options="region:'north'" style="height:100px;">
<p style="text-align:center;color:yellow;font-size:28px">满天星的Layout效果演示</p>
</div>
<div data-options="region:'south'" style="height:50px;">
<p style="text-align:center">版权所有:©2018满天星</p>
</div>
<div data-options="region:'west',title:'菜单区域'" style="width:200px;">
<div id="aa" class="easyui-accordion">
<div title="业务模块" data-options="iconCls:'icon-save',fit:true" >
<!--树组件-->
<ul id="menuTree"></ul>
</div>
<div title="视频管理模块" data-options="iconCls:'icon-reload'" >
content2
</div>
<div title="系统管理模块" data-options="iconCls:'icon-add'">
content3
</div>
</div>
</div>
<div data-options="region:'center'" style="padding:5px;background:#eee;">
<!--选项卡组件-->
<div id="tabs"></div>
</div>
</body>步骤三:添加部分脚本代码,tabs首页的呈现
 $(function () {
            //实例化tabs组件
            $("#tabs").tabs({
                border: false,//无边框
                fit: true//铺满父容器
            });
              //添加一个选项卡
            $("#tabs").tabs('add',{
                title: "首页",
                content: "欢迎来到满天星的系统",
                closable: false//是否显示关闭按钮
            });
 })
步骤四:添加一个json文件(tree_data.json),用于存储树控件的数据
[
  {
    "id": 1,
    "text": "产品管理",
    "iconCls": "icon-tip",
    "children": [
      {
        "text": "添加产品",
        "attributes": {
        "url": "addProduct.html",
        "title": "添加产品",
        "closable": true
        }
      },
      {
        "text": "修改产品",
        "attributes": {
        "url": "editProduct.html",
        "title": "修改产品",
        "closable": true
        }
      }
    ]
  }
]
你也可以把这段json代码放入jsonview去检查下格式是否正确
步骤五:添加部分脚本代码,tree的呈现以及和tabs的联动
//实例化一个树组件
            $("#menuTree").tree({
                url: "tree_data.json",//数据存放在json文件中
                method:'get',//若不设置为get提交,会有405错误
                onClick: function (node)//node是触发的节点
                {
                    //console.log(node.attributes);//打印显示node.attributes
                    if (node.attributes)//如果有attributes对象,就进入
                    {
                        var title = node.text;//树节点的文本
                        var t = $("#tabs");//t为tabs标签

                        if (t.tabs('exists',title))//如果节点存在
                        {
                            t.tabs('select', title)

                        }
                        else//如果不存在,则添加节点
                        {
                            var url = node.attributes.url;//节点url
                            t.tabs('add', {
                                title: title,//标题
                                href: url,//地址来源
                                closable: true
                            })
                        }
                    }
                }
中间我们有很多逻辑,例如你创建tabs判断是否存在,避免重复创建tabs。
最后,我们看看最终演示效果。
1.首页

2.打开摸一个树节点,触发对应的选项卡
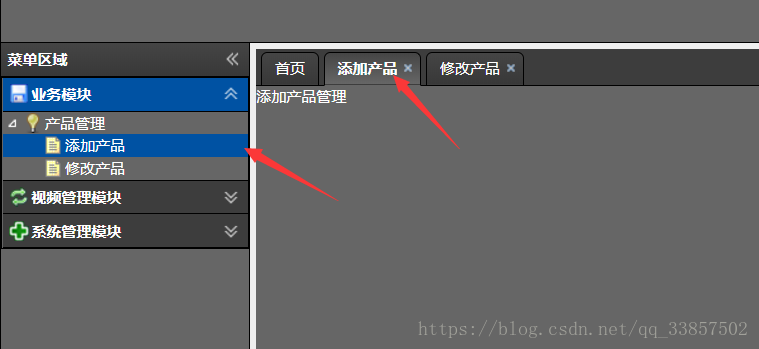
大功告成!!!


 5195
5195

 被折叠的 条评论
为什么被折叠?
被折叠的 条评论
为什么被折叠?
 到【灌水乐园】发言


