注意!!!
此文章需要配置了SpringDispatcherServlet和InternalResourceViewResolver才能够使用,如果不会配置,请翻看我【SpringMVC】系列的第一篇文章《【SpringMVC】1. SpringMVC的第一个程序——HelloWorld》
一、什么是REST
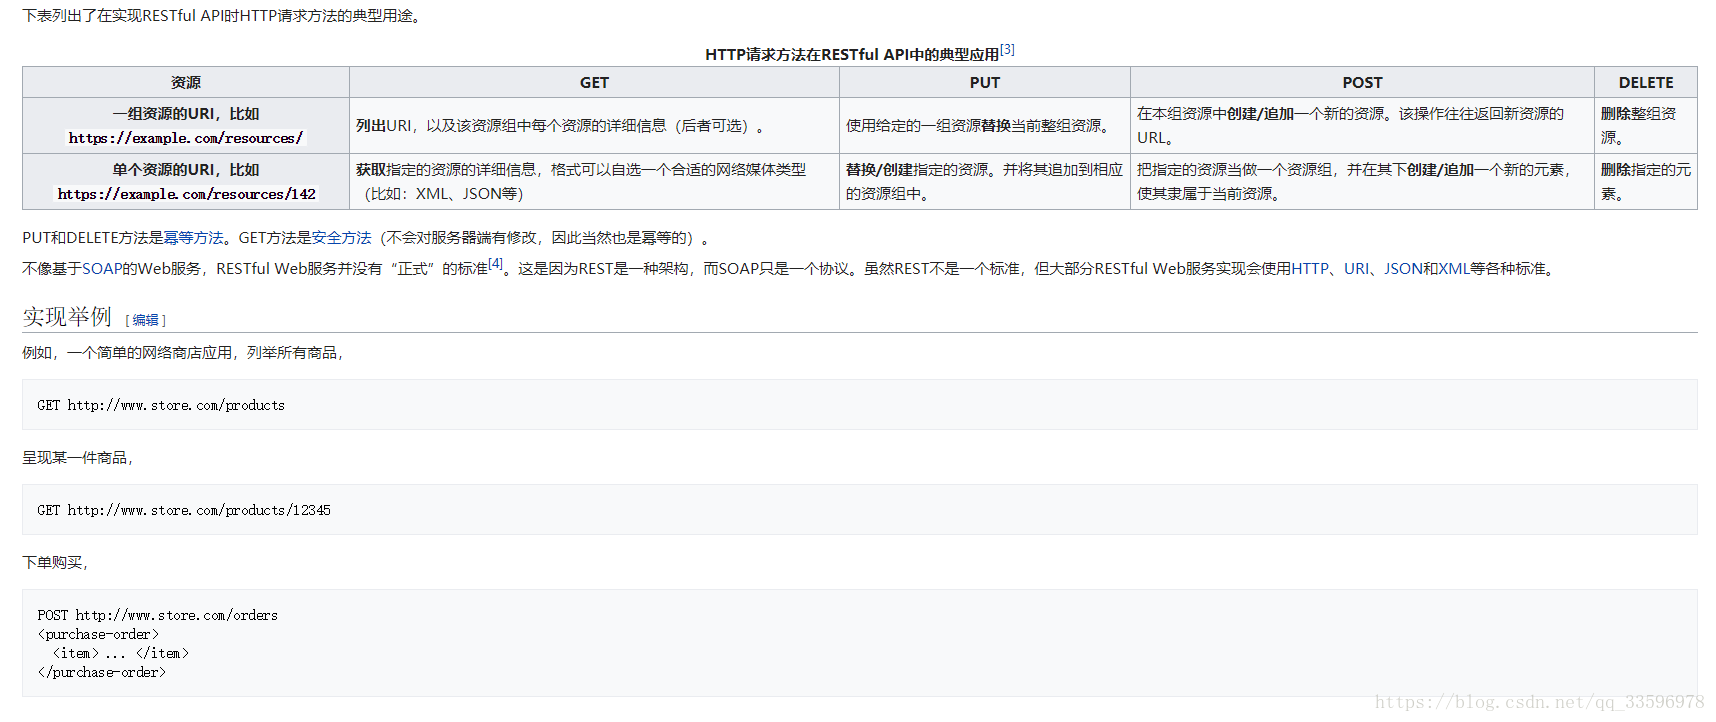
表现层状态转换(REST,英文:Representational State Transfer)是Roy Thomas Fielding博士于2000年在他的博士论文[1] 中提出来的一种万维网软件架构风格,目的是便于不同软件/程序在网络(例如互联网)中互相传递信息。表现层状态转换(REST,英文:Representational State Transfer)是根基于超文本传输协议(HTTP)之上而确定的一组约束和属性,是一种设计提供万维网络服务的软件构建风格。匹配或兼容于这种架构风格(简称为 REST 或 RESTful)的网络服务,允许客户端发出以统一资源标识符访问和操作网络资源的请求,而与预先定义好的无状态操作集一致化。因此表现层状态转换提供了在互联网络的计算系统之间,彼此资源可交互使用的协作性质(interoperability)。相对于其它种类的网络服务,例如 SOAP服务则是以本身所定义的操作集,来访问网络上的资源。
—维基百科《表现层状态转换》
要点及标准
要注意的是,REST是设计风格而不是标准。REST通常基于使用HTTP,URI,和XML以及HTML这些现有的广泛流行的协议和标准。
- 资源是由URI来指定。
- 对资源的操作包括获取、创建、修改和删除资源,这些操作正好对应HTTP协议提供的GET、POST、PUT和DELETE方法。
- 通过操作资源的表现形式来操作资源。
- 资源的表现形式则是XML或者HTML,取决于读者是机器还是人,是消费web服务的客户软件还是web浏览器。当然也可以是任何其他的格式。

更多内容请点击: 维基百科《表现层状态转换》进行了解
二、@PathVariable
在了解了什么是REST风格的地址后,我们可以了解下@PathVariable注解,这个注解是专门用来获取REST风格地址参数。
- 带占位符的URL是Spring3.0 新增的功能,该功能在SpringMVC向REST 目标挺进发展过程中具有里程碑的意义
- 通过
@PathVariable可以将URL中占位符参数绑定到控制器处理方法的入参中:URL 中的 {xxx}
占位符可以通过@PathVariable("xxx")绑定到操作方法的入参中。
###(1)在com.springmvc.handlers中创建一个Handle类SpringMVCTest
package com.springmvc.handlers;

import java.io.IOException;
import java.io.Writer;
import java.util.Arrays;
import java.util.Date;
import java.util.Map;

import javax.servlet.http.HttpServletRequest;
import javax.servlet.http.HttpServletResponse;

import org.springframework.stereotype.Controller;
import org.springframework.web.bind.annotation.CookieValue;
import org.springframework.web.bind.annotation.ModelAttribute;
import org.springframework.web.bind.annotation.PathVariable;
import org.springframework.web.bind.annotation.RequestHeader;
import org.springframework.web.bind.annotation.RequestMapping;
import org.springframework.web.bind.annotation.RequestMethod;
import org.springframework.web.bind.annotation.RequestParam;
import org.springframework.web.bind.annotation.ResponseBody;
import org.springframework.web.bind.annotation.SessionAttributes;
import org.springframework.web.servlet.ModelAndView;

import com.springmvc.entities.User;

@SessionAttributes(value = { "user" }, types = { String.class })
@RequestMapping("/springmvc")
@Controller
public class SpringMVCTest {

	private static final String SUCCESS = "success";

	/**
	 * @PathVariable 可以用来映射URL中的占位符到目标方法的参数
	 * @param id
	 * @return
	 */
	@RequestMapping(value = "/testPathVariable/{id}")
	public String testPathVariable(@PathVariable("id") Integer id) {
		System.out.println("testPathVariable id:" + id);
		return SUCCESS;
	}
}
(2)在WebRoot文件夹根目录创建index.jsp
<%@ page language="java" import="java.util.*" pageEncoding="UTF-8"%>
<!DOCTYPE HTML PUBLIC "-//W3C//DTD HTML 4.01 Transitional//EN">
<html>
<head>

<title>My JSP 'index.jsp' starting page</title>
</head>

<body>
<a href="springmvc/testPathVariable/1">testPathVariable</a>
</body>

</html>
(3)在WEB-INF文件夹下创建views,并在views下创建success.jsp文件
<%@ page language="java" import="java.util.*" pageEncoding="UTF-8"%>
<%@ taglib prefix="fmt" uri="http://java.sun.com/jsp/jstl/fmt" %>
<!DOCTYPE HTML PUBLIC "-//W3C//DTD HTML 4.01 Transitional//EN">
<html>
<head>
<title>success</title>
</head>

<body>
	<h1>Success page</h1>
</body>
</html>
(4)运行Tomcat,访问index.jsp

直接点击超链接testPathVariable即可,上面那些是我上一篇教程留下来的东西,不用去管。
点击超链接后跳转到Success页面,然后查看MyEclipse的控制台

发现id已经从链接http://localhost:8080/springmvc-1/springmvc/testPathVariable/1获取出来。
三、使用GET、POST、PUT 与DELETE 请求
HTTP 协议里面,四个表示操作方式的动词:GET、POST、PUT、DELETE。它们分别对应四种基本操作:
- GET 用来获取资源
- POST 用来新建资源
- PUT 用来更新资源
- DELETE 用来删除资源。
如何发送PUT请求和DELETE请求?
1.需要配置HiddenHttpMethodFilter
2.请求页面需要发送POST请求
3.需要在发送POST请求时携带一个name="_method"的隐藏域,值为DELETE,或PUT
(1)在web.xml中配置HiddenHttpMethodFilter
使用HiddenHttpMethodFilter指定HTTP的请求类型:浏览器 form 表单只支持GET与POST请求,而DELETE、PUT 等 method 并不支持,Spring3.0 添加了一个过滤器,可以将这些请求转换为标准的 http 方法,使得支持 GET、POST、PUT 与DELETE 请求。
<!-- 配置org.springframework.web.filter.HiddenHttpMethodFilter 可以把POST请求转换为DELETE或者POST请求 -->
	<filter>
		<filter-name>HiddenHttpMethodFilter</filter-name>
		<filter-class>org.springframework.web.filter.HiddenHttpMethodFilter</filter-class>
	</filter>
	<filter-mapping>
		<filter-name>HiddenHttpMethodFilter</filter-name>
		<url-pattern>/*</url-pattern>
	</filter-mapping>
### (2)在`com.springmvc.handlers`中创建Handler类`SpringMVC` 并且写入相关的请求方法
package com.springmvc.handlers;

import java.io.IOException;
import java.io.Writer;
import java.util.Arrays;
import java.util.Date;
import java.util.Map;

import javax.servlet.http.HttpServletRequest;
import javax.servlet.http.HttpServletResponse;

import org.springframework.stereotype.Controller;
import org.springframework.web.bind.annotation.CookieValue;
import org.springframework.web.bind.annotation.ModelAttribute;
import org.springframework.web.bind.annotation.PathVariable;
import org.springframework.web.bind.annotation.RequestHeader;
import org.springframework.web.bind.annotation.RequestMapping;
import org.springframework.web.bind.annotation.RequestMethod;
import org.springframework.web.bind.annotation.RequestParam;
import org.springframework.web.bind.annotation.ResponseBody;
import org.springframework.web.bind.annotation.SessionAttributes;
import org.springframework.web.servlet.ModelAndView;

import com.springmvc.entities.User;

@SessionAttributes(value = { "user" }, types = { String.class })
@RequestMapping("/springmvc")
@Controller
public class SpringMVCTest {
	/*
	 * REST风格的URL 以CRUD为例:
	 * 新增:/order POST
	 * 修改:/order/1 PUT
	 * update?id=1
	 * 获取:/order/1 GET get?id=1
	 * 删除:/order/1 DELETE delete?id=1
	 *
	 * 如何发送PUT请求和DELETE请求?
	 * 1.需要配置HiddenHttpMethodFilter
	 * 2.需要发送POST请求
	 * 3.需要在发送POST请求时携带一个name="_method"的隐藏域,值为DELETE,或PUT
	 *
	 * 在SpringMVC的目标方法中如何获得id? 使用@PathVariable注解
	 */
	@RequestMapping(value = "/testRest/{id}", method = RequestMethod.GET)
	public String testRest(@PathVariable("id") Integer id) {
		System.out.println("testRest id:" + id);
		return SUCCESS;
	}

	@RequestMapping(value = "/testRest", method = RequestMethod.POST)
	public String testRest() {
		System.out.println("testRest POST");
		return SUCCESS;
	}

	@RequestMapping(value = "/testRest/{id}", method = RequestMethod.DELETE)
	@ResponseBody
	public String testRestDelete(@PathVariable("id") Integer id) {
		System.out.println("testRest Delete:" + id);
		return SUCCESS;
	}

	@RequestMapping(value = "/testRest/{id}", method = RequestMethod.PUT)
	@ResponseBody
	public String testRestPut(@PathVariable("id") Integer id) {
		System.out.println("testRest put:" + id);
		return SUCCESS;
	}
}
(3)在WebRoot的根目录下创建index.jsp
<%@ page language="java" import="java.util.*" pageEncoding="UTF-8"%>
<!DOCTYPE HTML PUBLIC "-//W3C//DTD HTML 4.01 Transitional//EN">
<html>
<head>

<title>My JSP 'index.jsp' starting page</title>
</head>

<body>
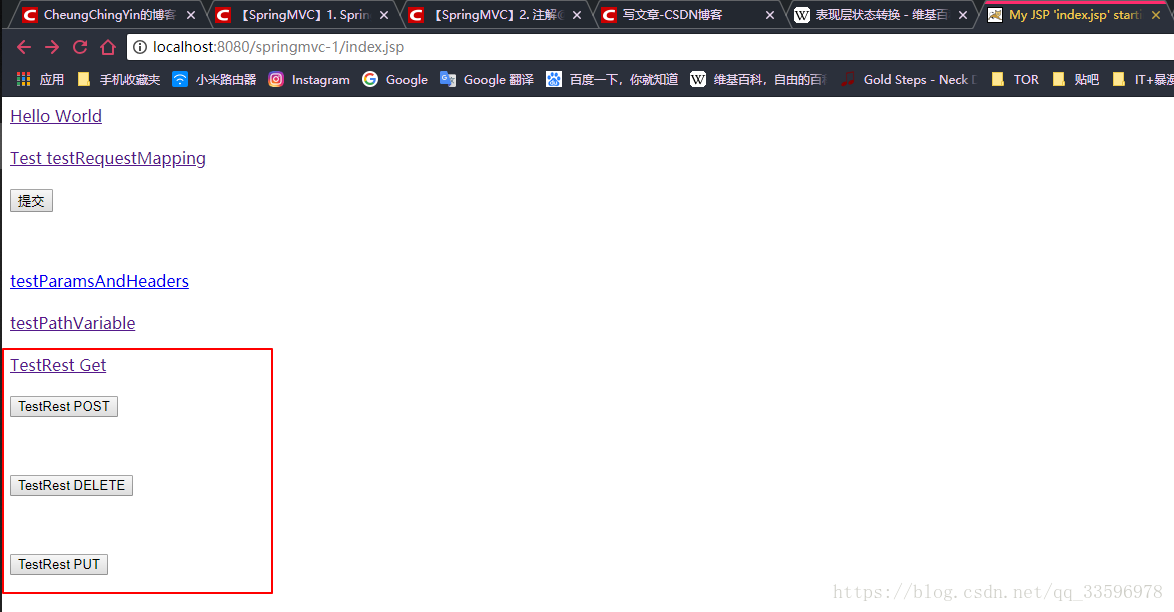
<a href="springmvc/testRest/1">TestRest Get</a>
	<br>
	<br>
	<form action="springmvc/testRest" method="post">
		<input type="submit" value="TestRest POST"/>
	</form>
	<br>
	<br>
	<form action="springmvc/testRest/1" method="post">
		<input type="hidden" name="_method" value="DELETE"/>
		<input type="submit" value="TestRest DELETE"/>
	</form>
	<br>
	<br>
	<form action="springmvc/testRest/1" method="post">
		<input type="hidden" name="_method" value="PUT"/>
		<input type="submit" value="TestRest PUT"/>
	</form>
	</body>

</html>
(4)效果展示
启动TomCat服务器后,访问index主页:http://localhost:8080/springmvc-1/index.jsp

1.测试超链接TestRestGet

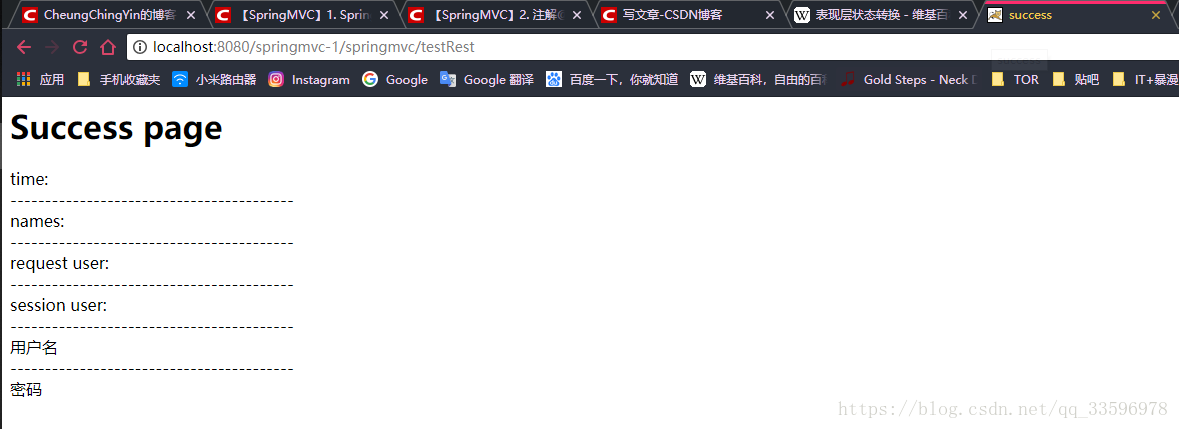
TestRestGet能够正常访问
2.测试表单提交按钮
TestRestPOST

TestRestPOST能够正常访问

3.测试表单提交按钮
TestRestDELETE


TestRestDELETE能够正常访问
4.测试表单提交按钮
TestRestPUT


TestRestPUT能够正常访问


 本文深入解析REST架构风格及其在SpringMVC框架中的应用,涵盖@PathVariable注解详解,GET、POST、PUT、DELETE请求处理,以及HiddenHttpMethodFilter配置,适合初学者快速掌握RESTful API设计。


 被折叠的 条评论
为什么被折叠?


